Creating a new driver’s profile and setting him as available #
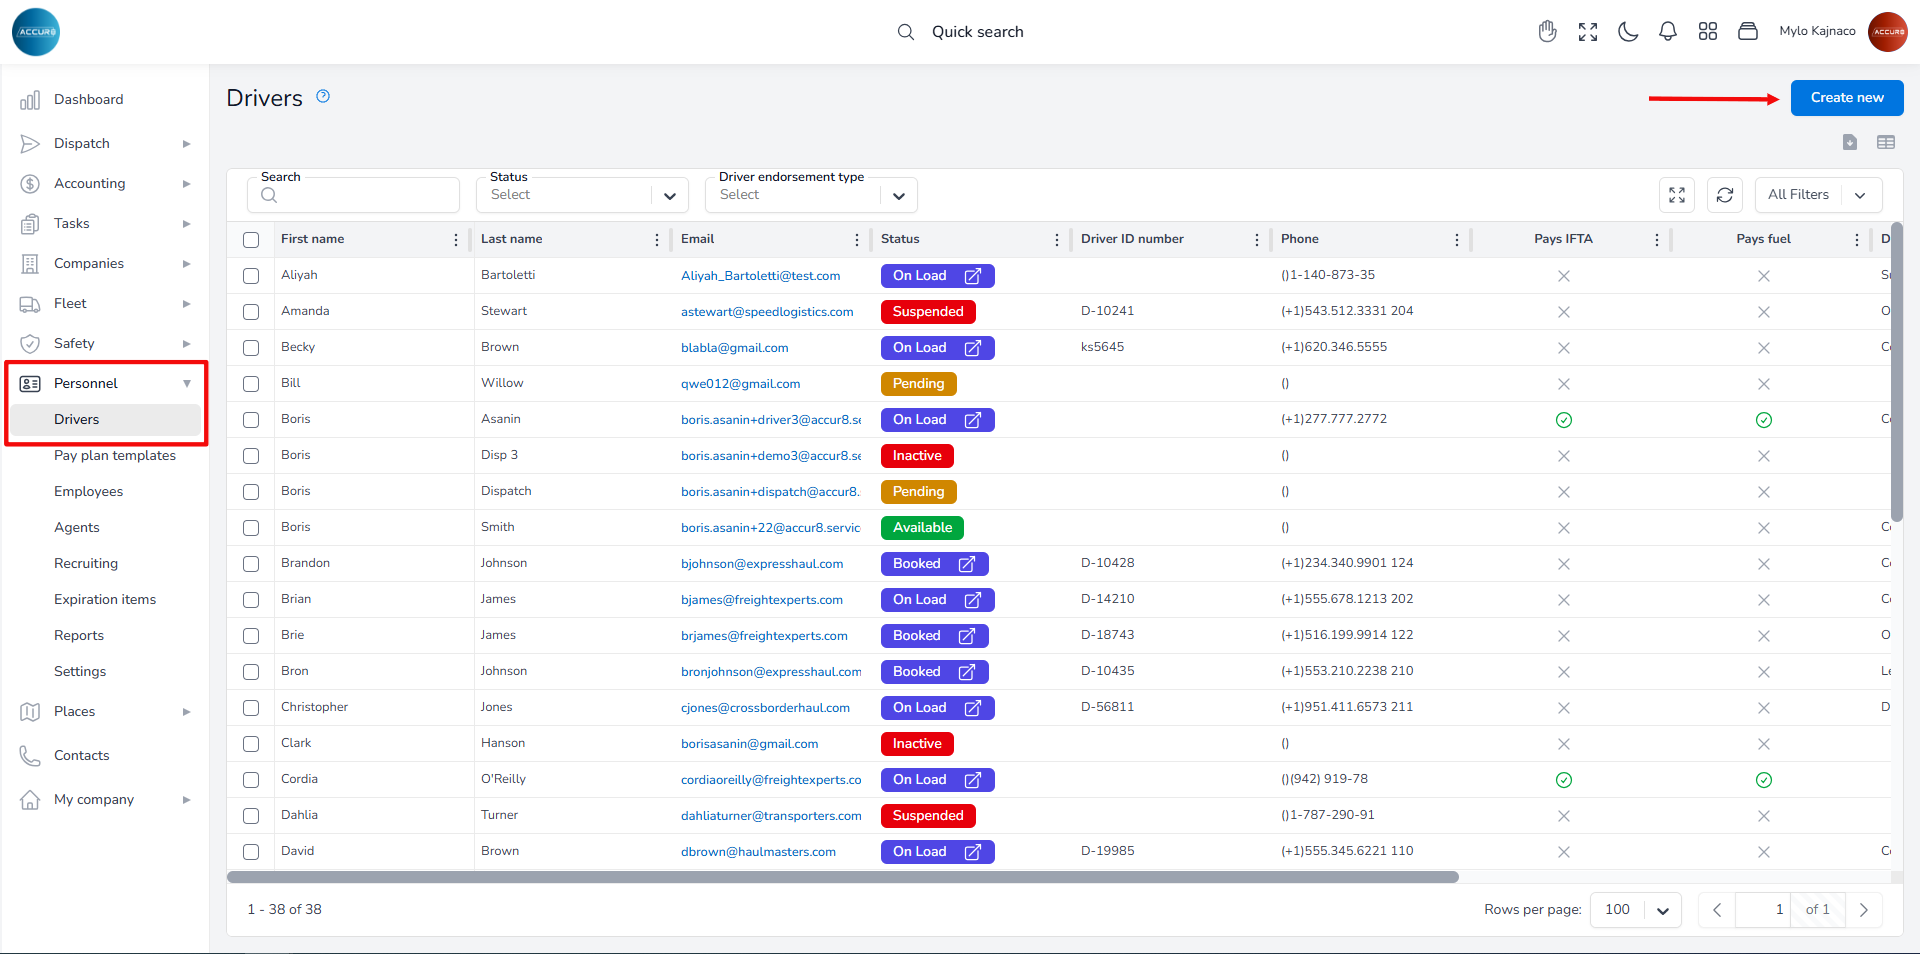
To create a driver’s profile, navigate to the left sidebar and click the Personnel section, then select Drivers. Next, click the Create New button in the top-right corner. This will open a new page with various sections.
To add a new driver, you must fill in the required information. In the Contact Info section, provide the email address, first name, and last name. In the CDL Info section, enter the driver’s CDL details. These fields are mandatory and sufficient for creating a profile. If you wish, you can add additional information later. Please remember that the driver’s email address must be unique.
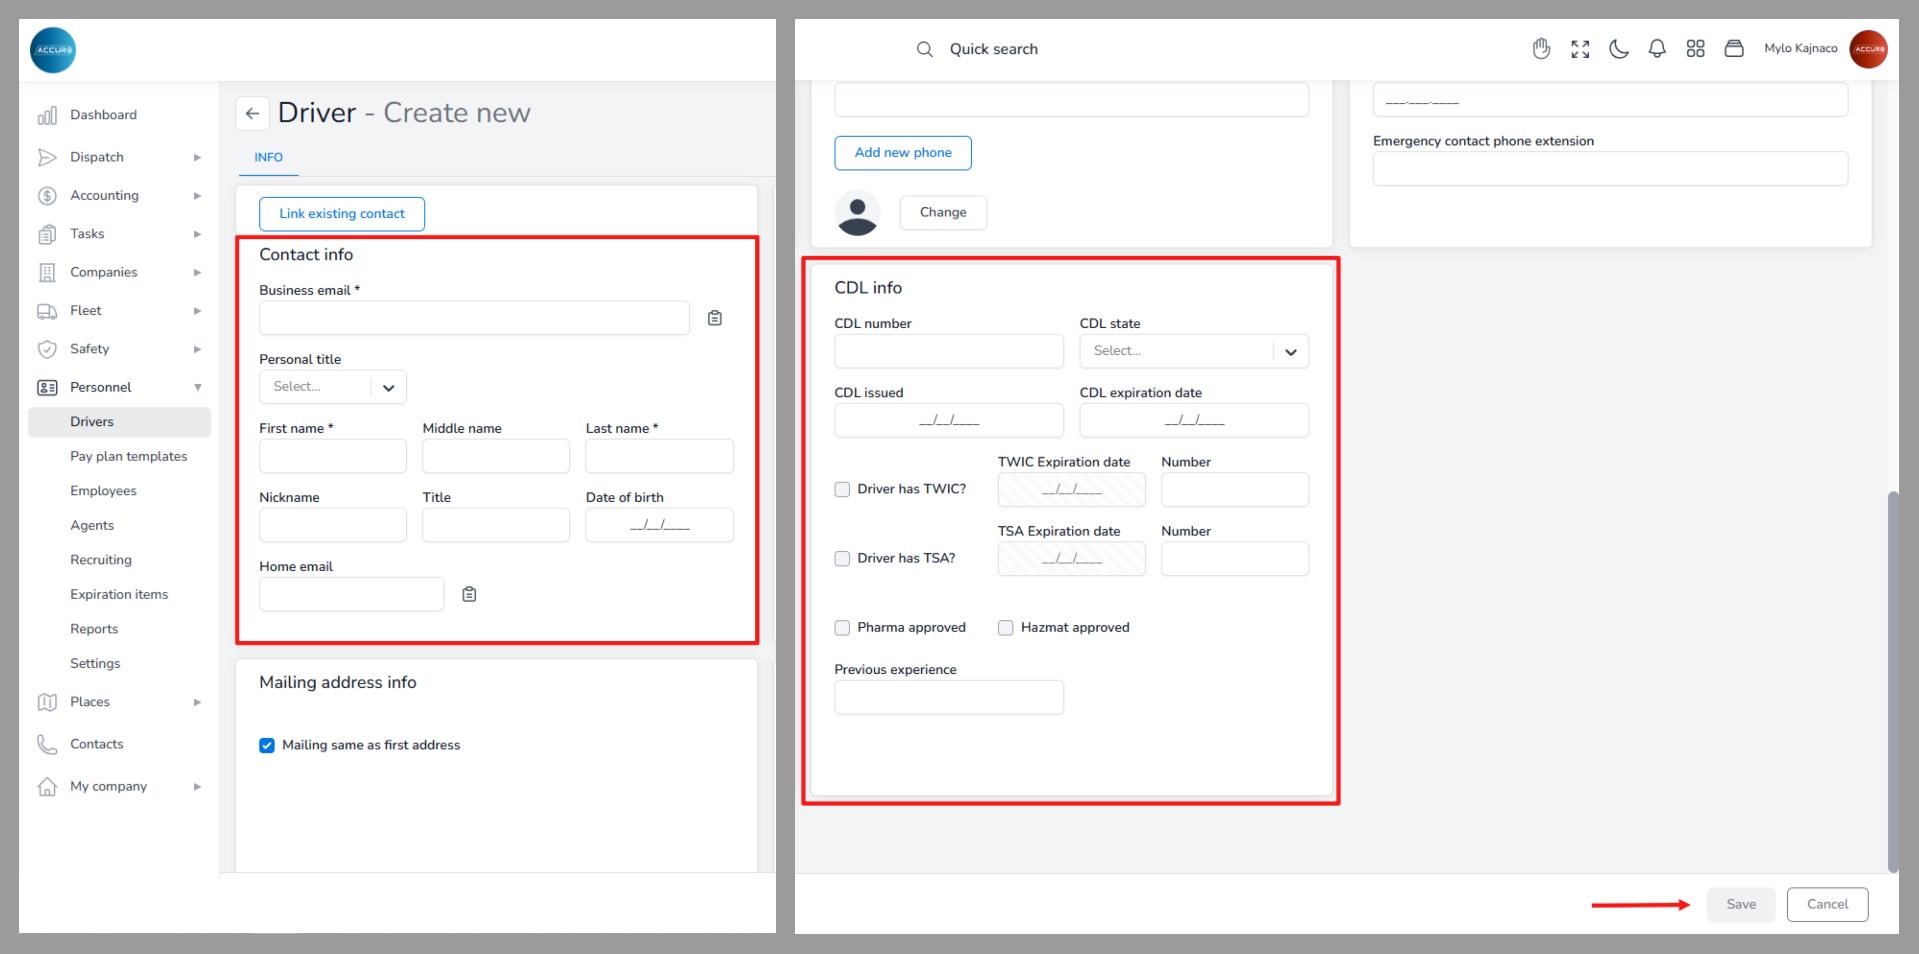
Once you have completed all the required fields, click the Save button. A pop-up window will appear, prompting you to choose your next step. To proceed to the driver’s page, select that option.
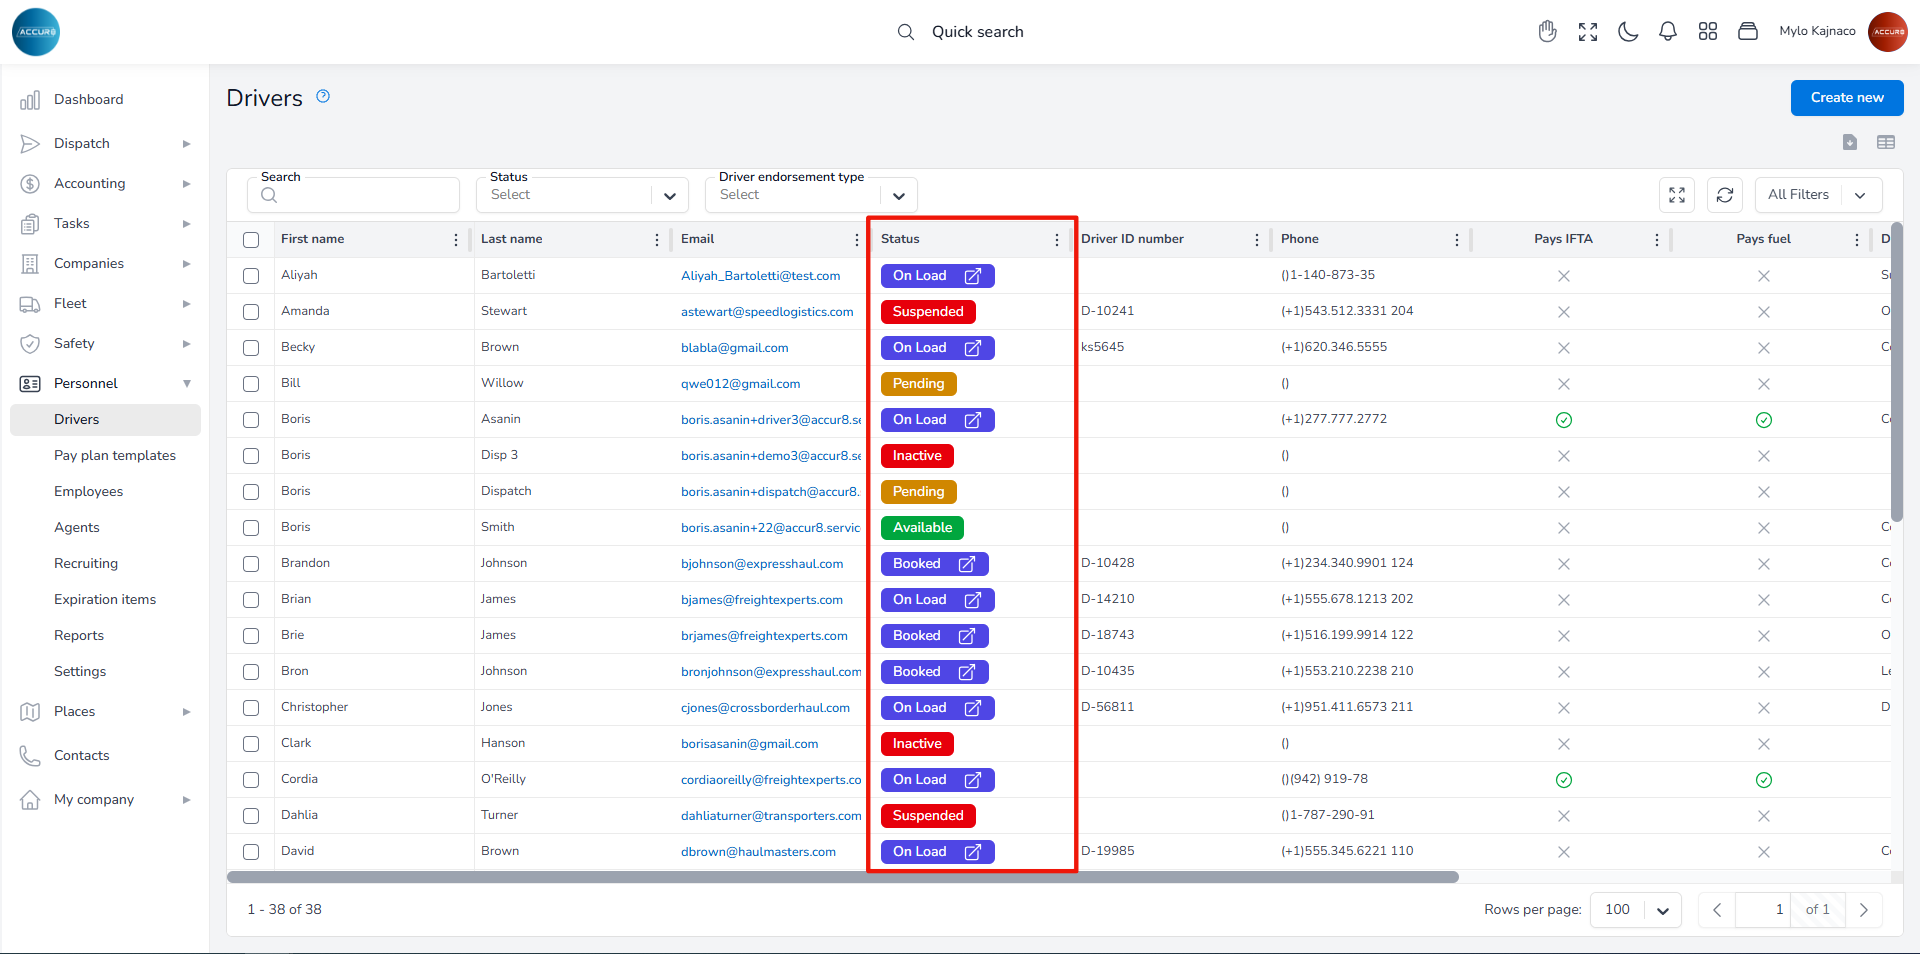
Initially, the driver’s status in the system will be set to Pending. This status indicates that the driver’s profile has been created but not yet activated, as it is awaiting completion of required documents, background checks, orientation, or other pre-employment steps.
Note: You can always check the status under the Status column in the Driver’s list.
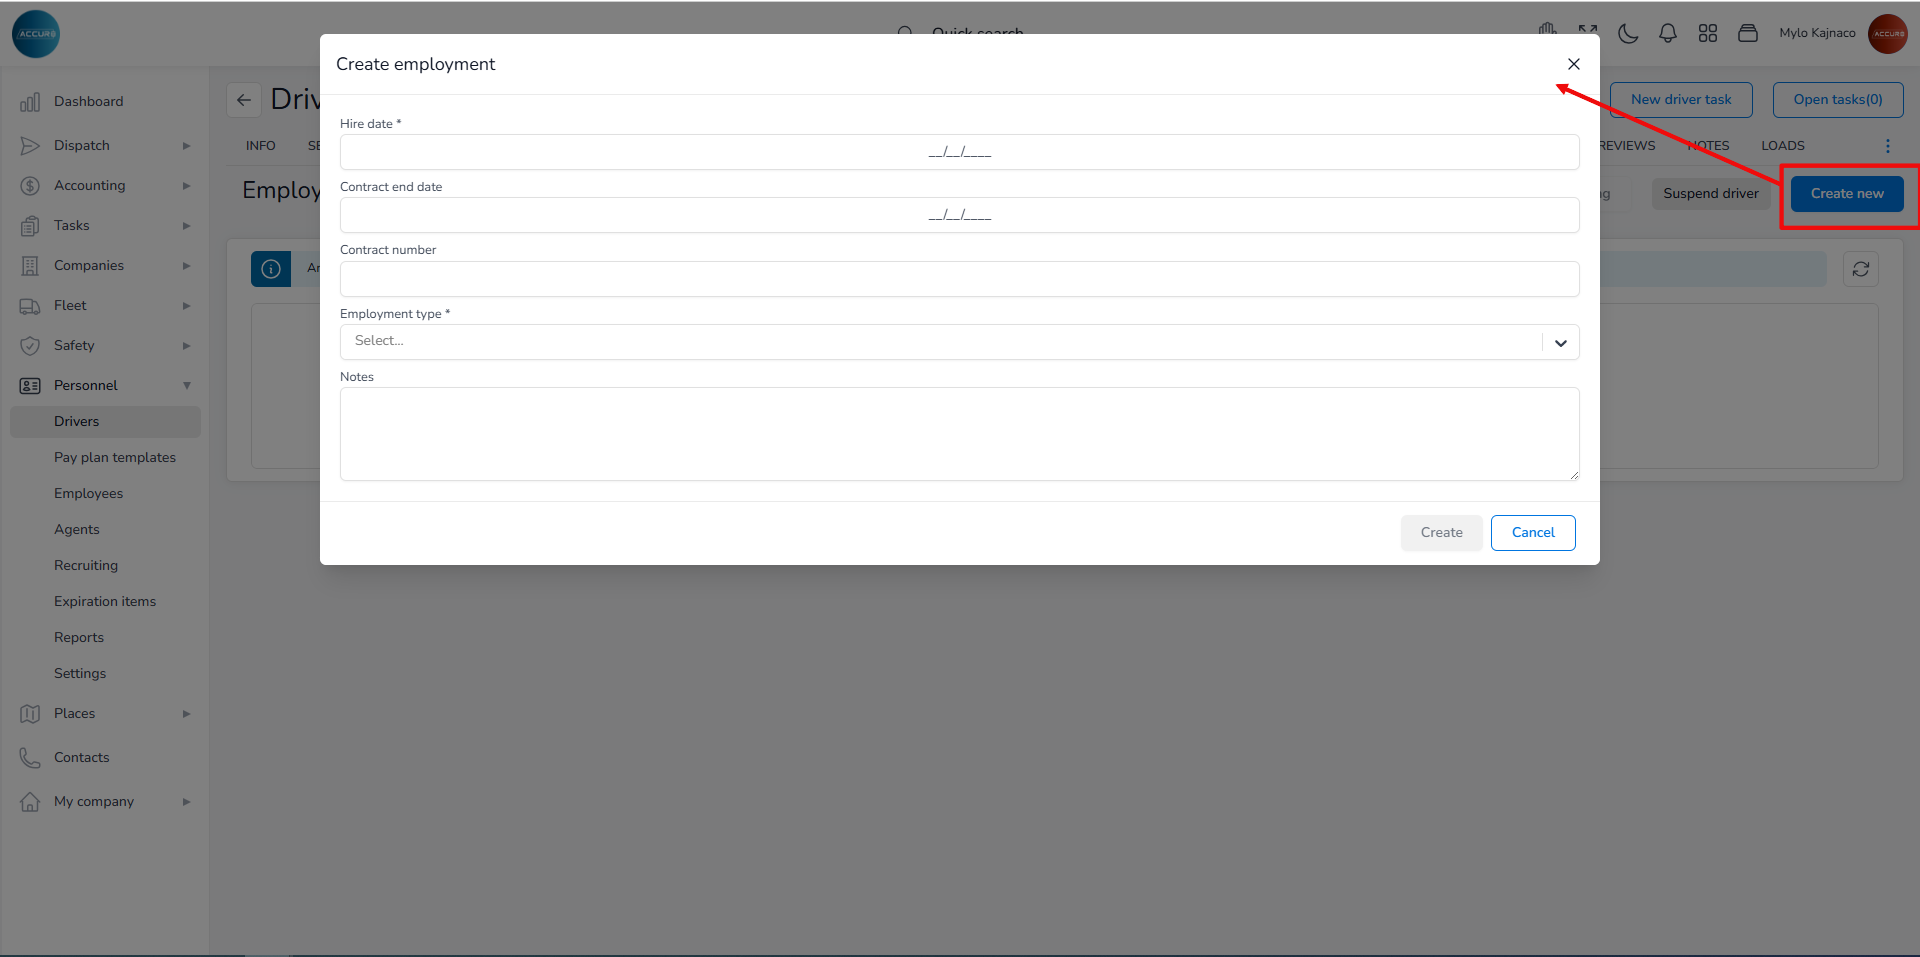
To set his status to Available, you need to add a contract by creating an employment profile for the driver. This can be done under the Employment tab on the Driver’s page. Clicking the Create new button opens a pop-up window. Here, you will need to enter the hire date and select the employment type that best fits the driver’s arrangement. These two fields are mandatory to create a new entry, but you may also fill in any additional fields if desired. After clicking the Create button, the driver’s status will change to Available.
*Note: When the contract ends, the driver will be marked as inactive. The system allows you to extend the driver’s contract by creating a new one.
** To find more about driver’s statuses in the ACCUR8 TMS, please follow this link: https://accur8.help/docs/how-drivers-status-management-works/
Managing Documents (adding, finding missing ones, expiration dates) #
On the Driver’s page, under the Documents tab, you can find all the necessary documents that drivers must possess. The missing documents will be marked in red, and a blue notification will show the number of documents that need to be uploaded.

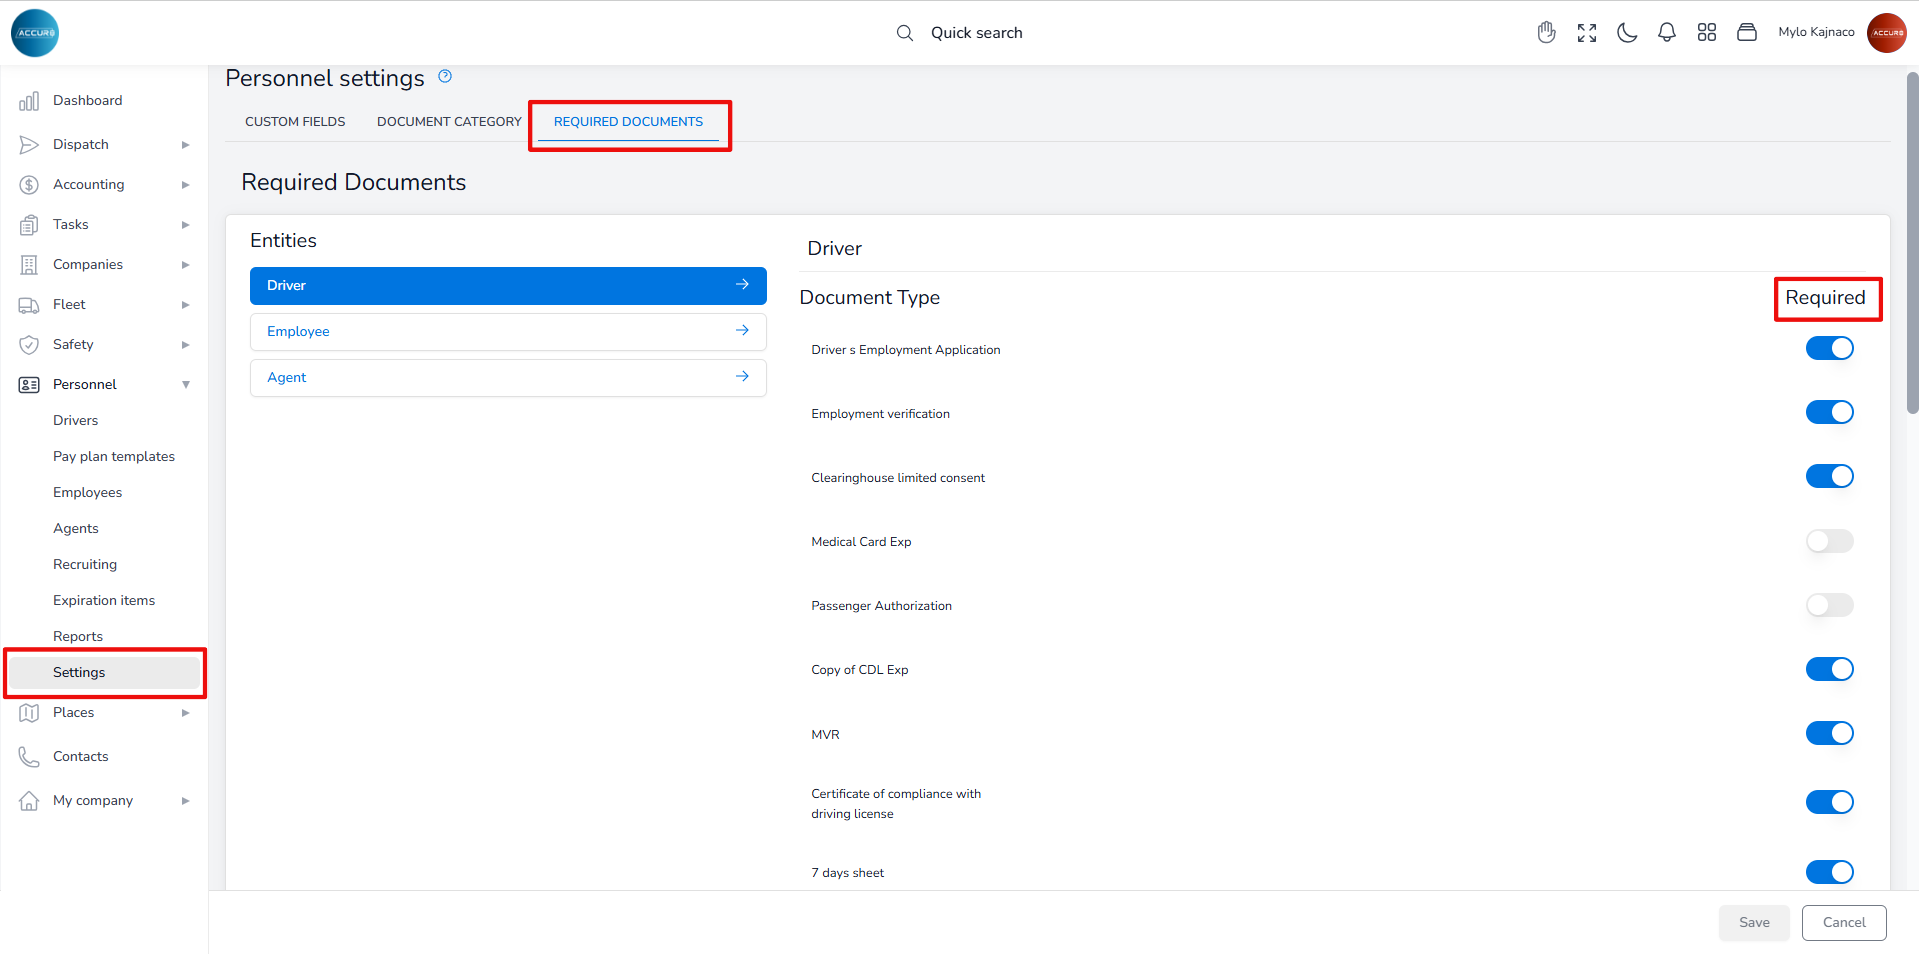
To determine which documents are required, navigate to the Personnel section. Select the Settings section and then, under the Required documents tab, choose the Driver entity. On the right side, you will see various document types. You can toggle the button next to each document type to indicate whether it is required for drivers.
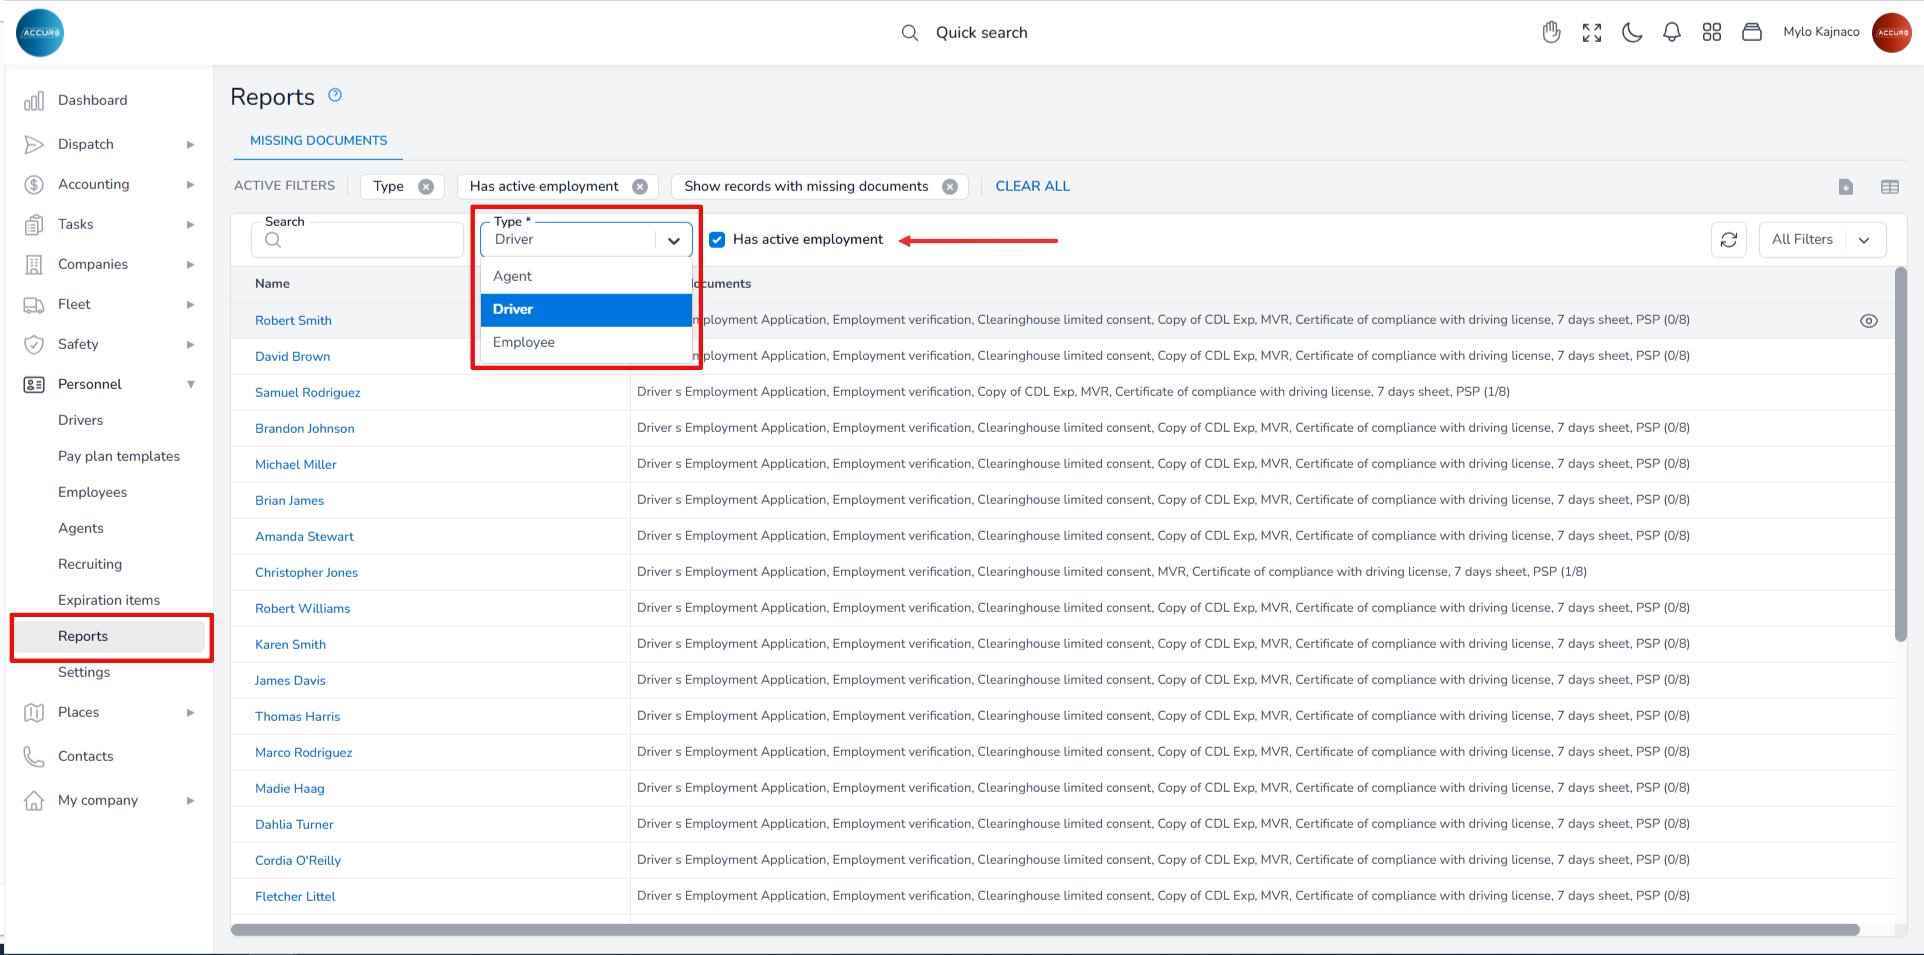
To check which documents are missing, go to the Reports section. Under the Missing documents tab, select the entity from the Type field and mark the Has active employment checkbox. This will display a list of all active drivers, along with the missing documents for each one.
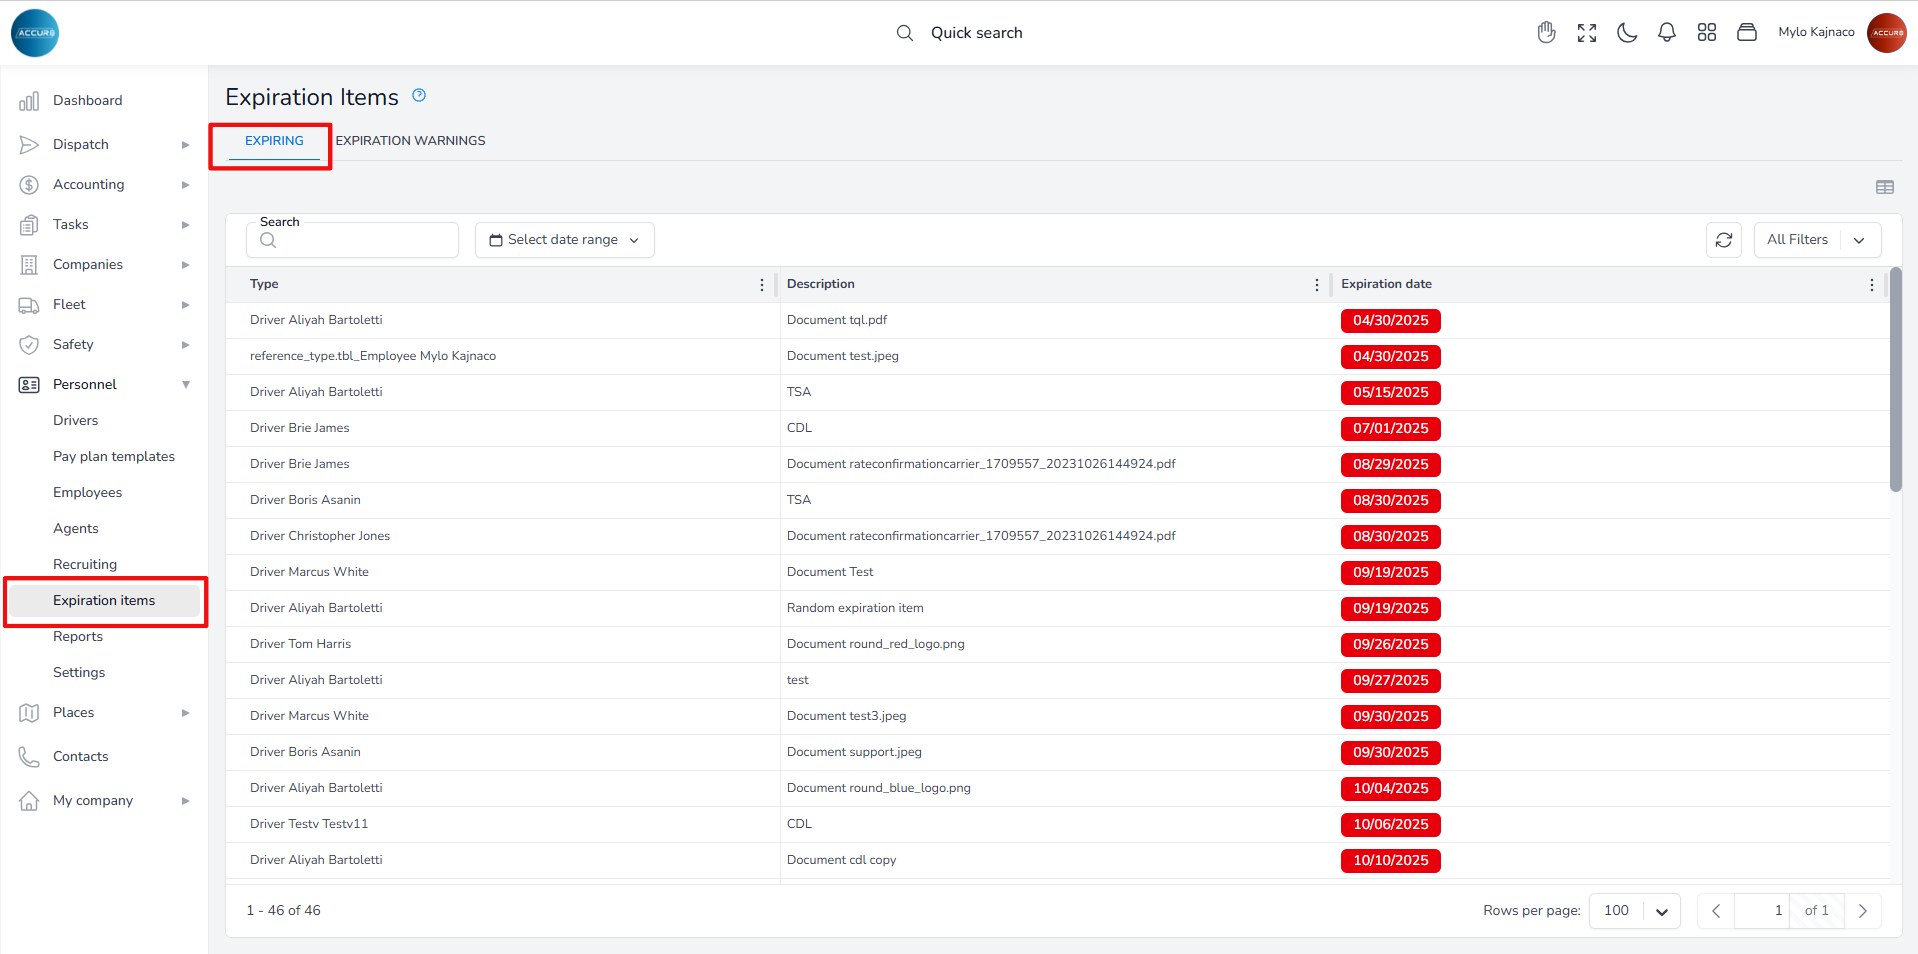
To check the expiration dates of documents, go to the Expiration items section. Under the Expiring tab, you will find a list of all documents, along with their types and expiration dates.
Additionally, you can access this information for an individual driver by visiting the Expiration Items tab located on each Driver’s Info page.
Note: To find out how to replace a document or renew an expired document, please follow the link below: https://accur8.help/docs/document-management-guide/#3-toc-title
Creating a new truck’s profile #
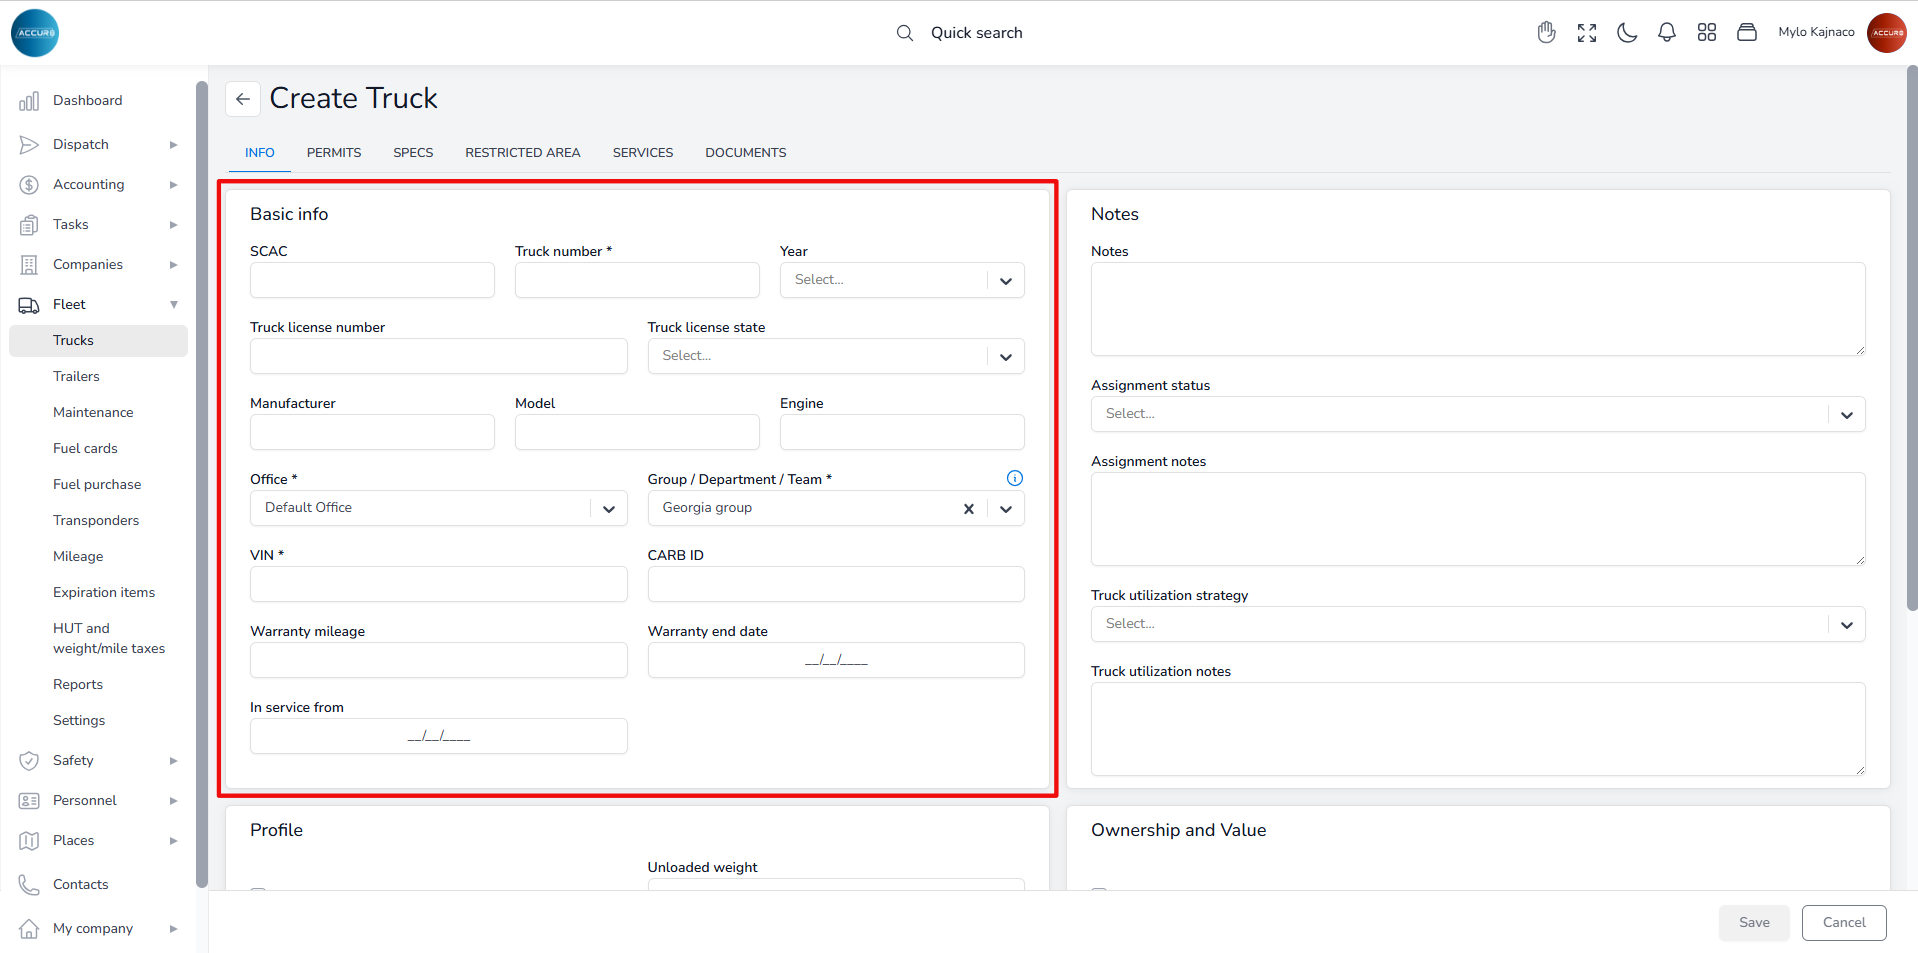
To create a truck’s profile, navigate to the left sidebar and click the Fleet section, then select Trucks. Next, click the Create New button in the top-right corner. This will open a new page with various sections.

To add a new truck, you must fill in the required information. In the Basic Info section, provide the truck number and VIN number, and select the Office and the Group/Department/Team from the corresponding drop-down menus. These fields are mandatory and sufficient for creating a profile. If you wish, you can add additional information later.
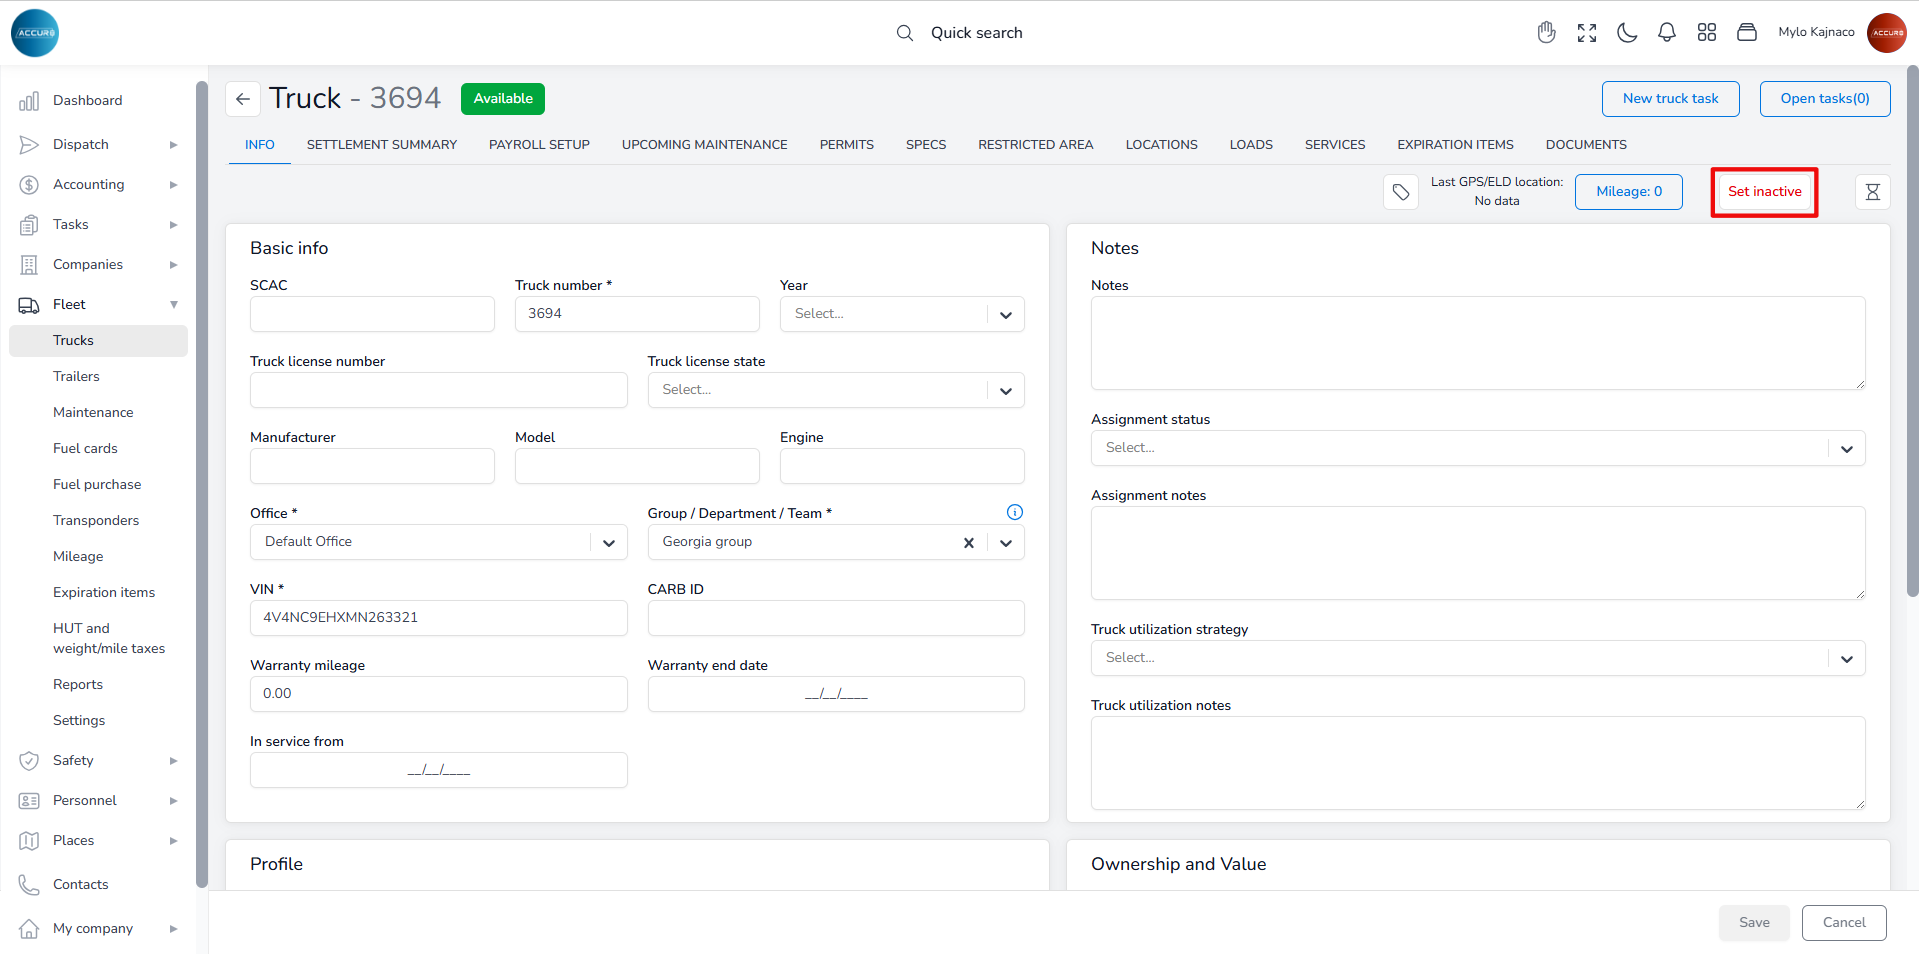
Once you have created the profile, the truck’s status in the system is set to Available.
If a truck is no longer available and needs to be removed from the system, you must first set it to inactive status. To do this, go to the selected Truck’s page and click the Set Inactive button in the top-right corner.
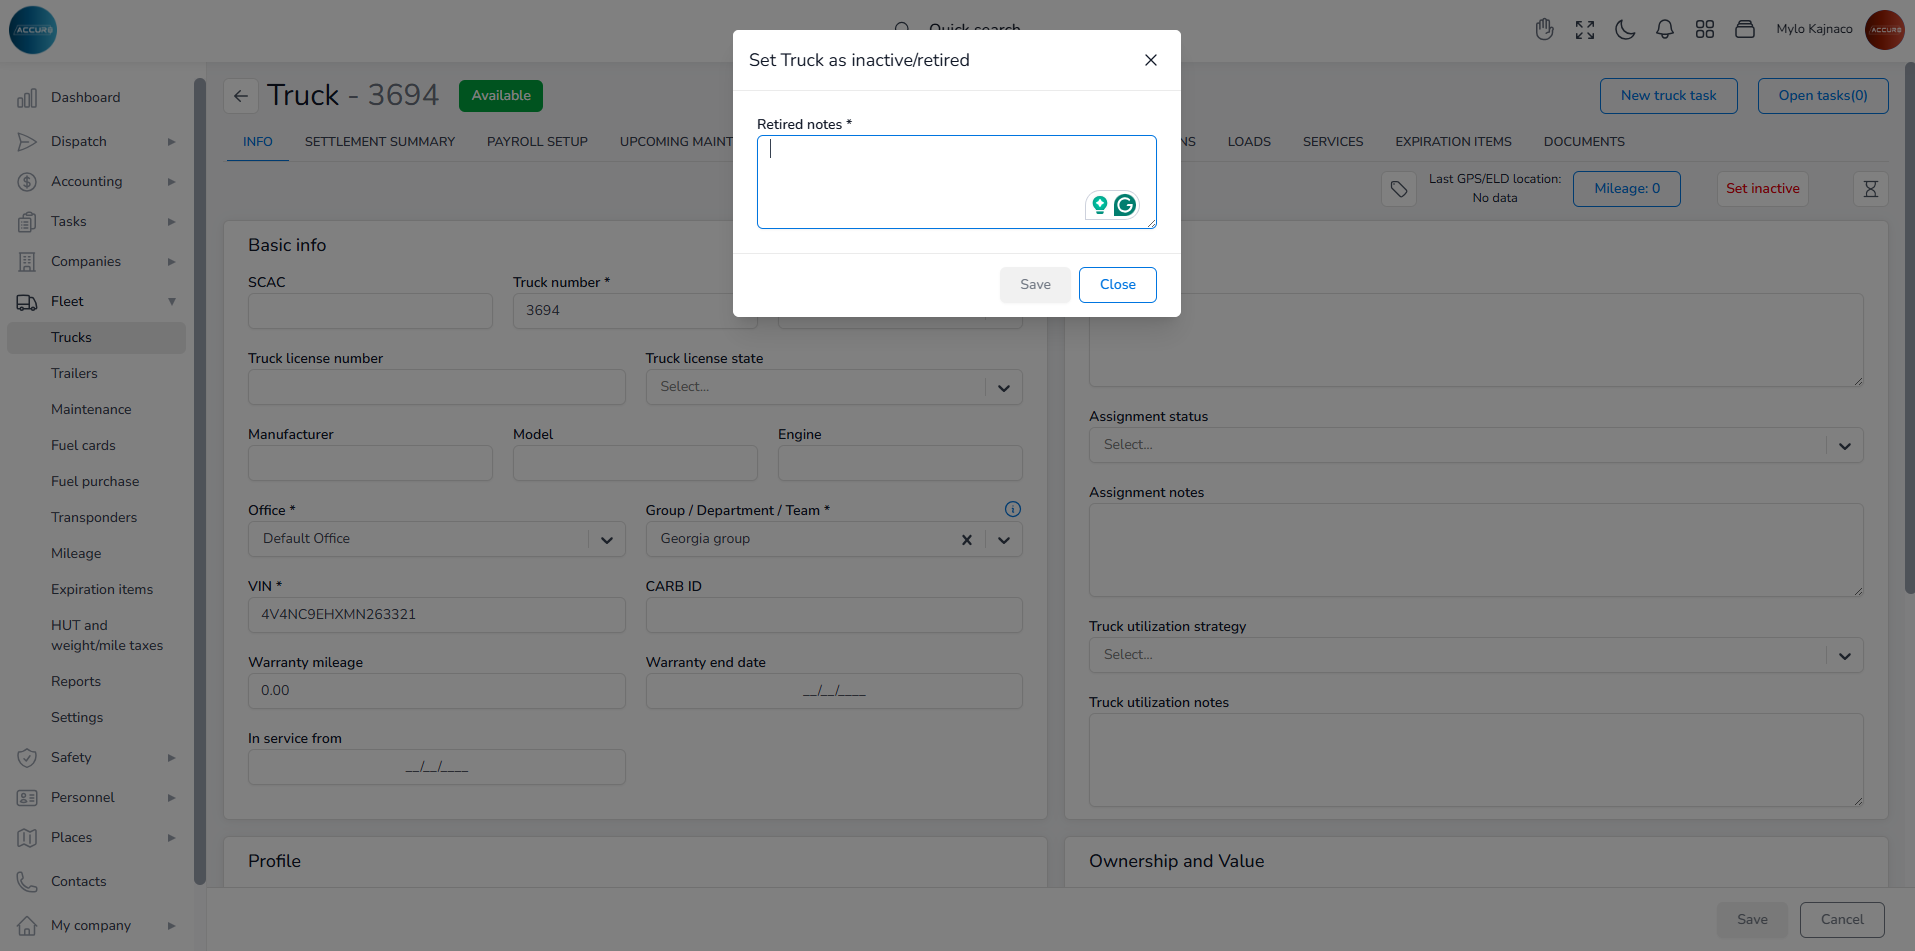
A pop-up window will appear where you will add a retired note and save it.
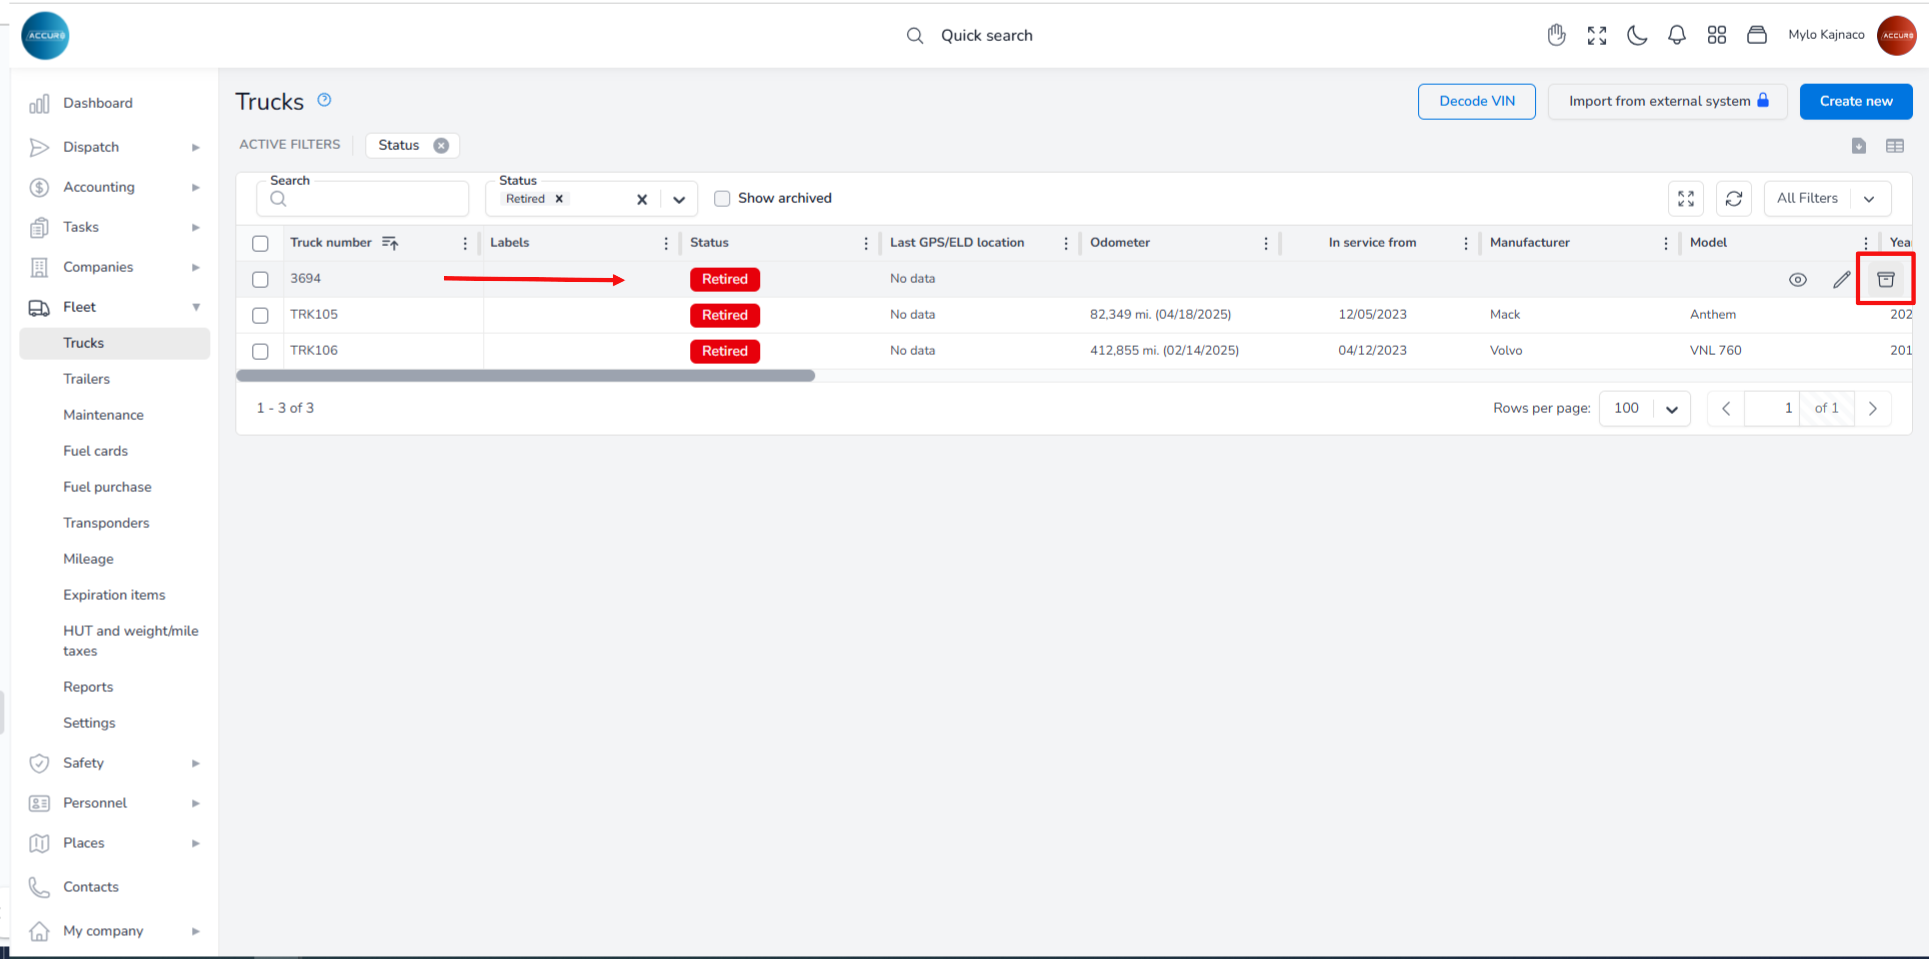
The truck will then be marked as Retired. To delete the truck from the system, navigate to the Trucks list, hover over the truck you want to delete, and then click the Archive button.
Managing Documents (adding, finding missing ones, expiration dates) #
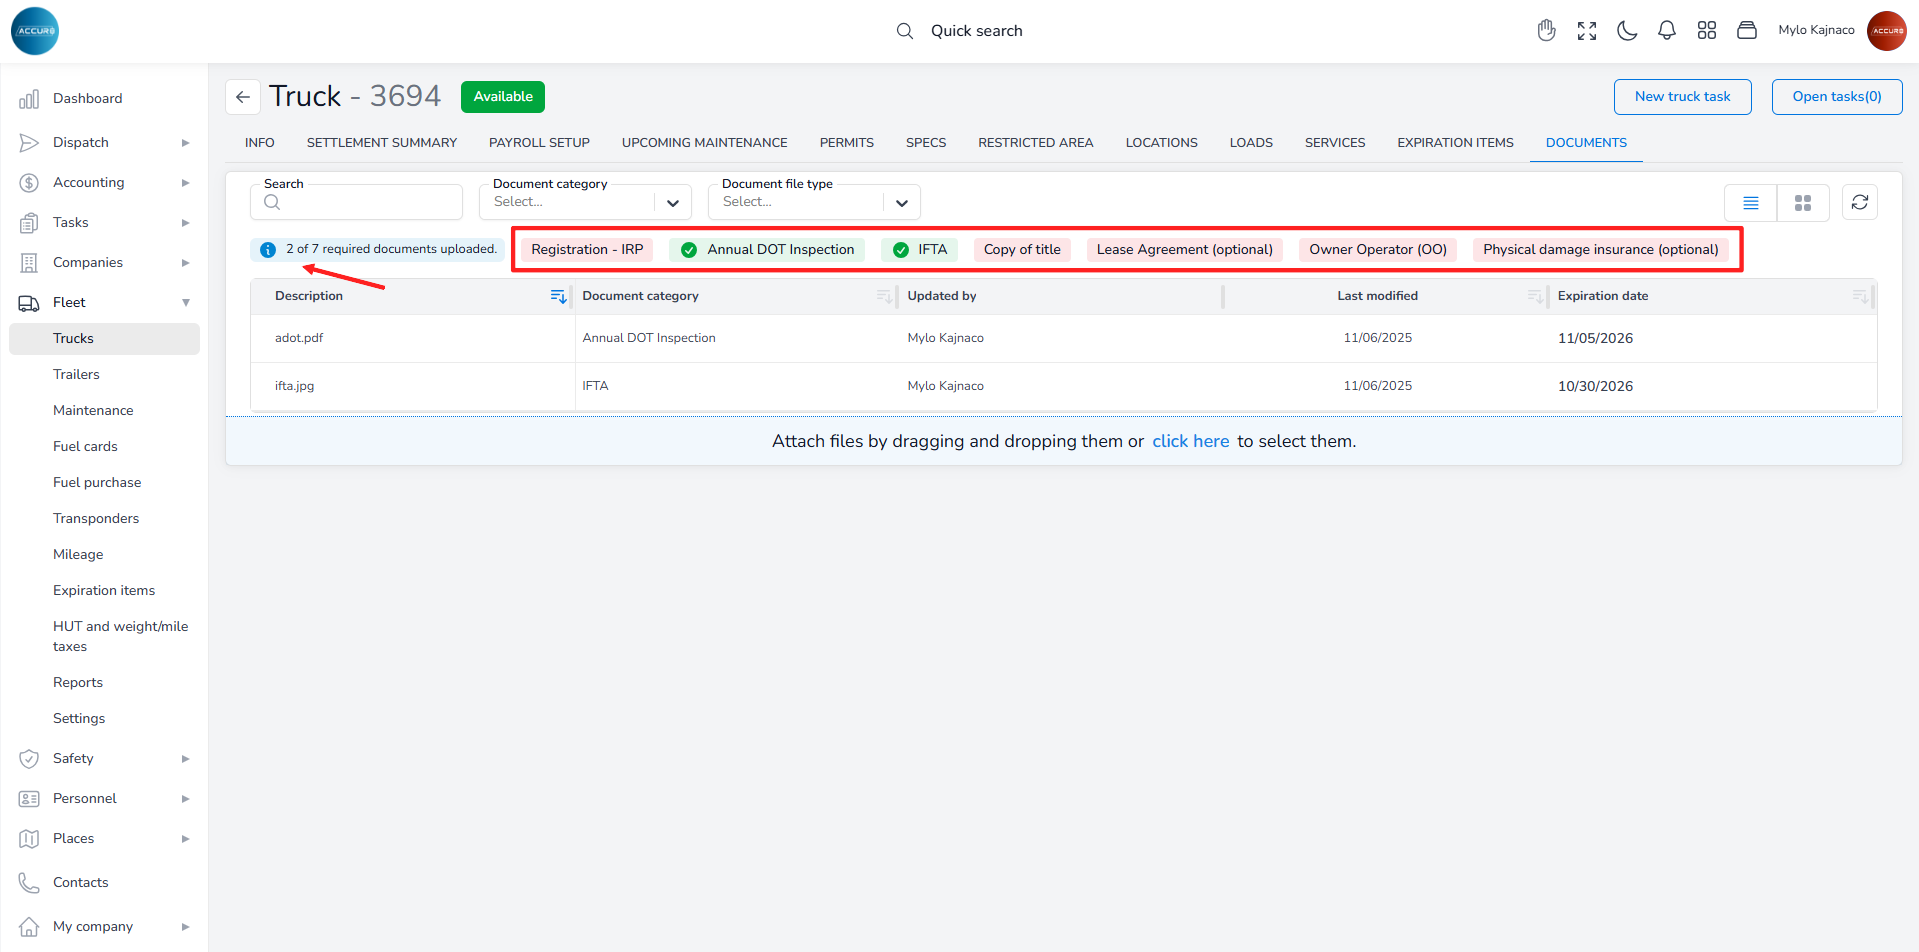
To find all the necessary documents for a selected truck, go to that Truck’s page and then click the Documents tab. The missing documents will be marked in red, and a blue notification will show the number of documents that need to be uploaded.
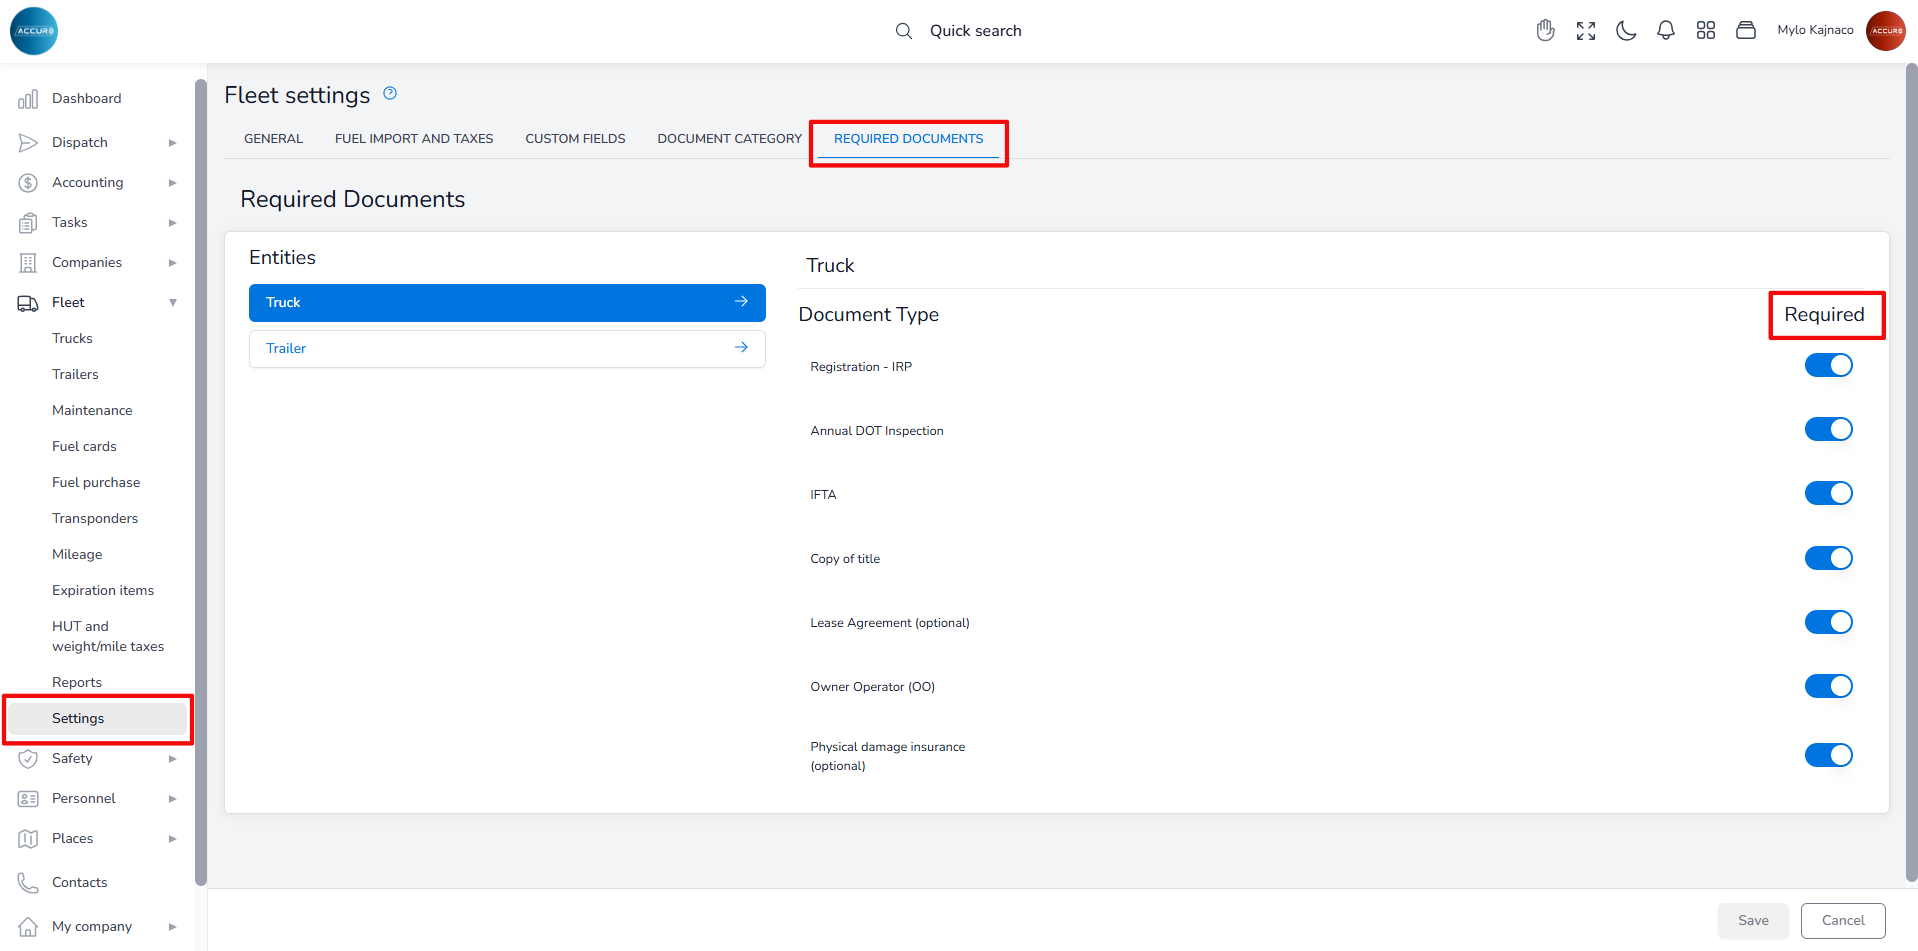
To determine which documents are required, navigate to the Fleet section and then click Settings. Under the Required documents tab, select the Truck entity. On the right side, you will see various document types, and you can toggle the button next to each one to indicate whether it is needed.
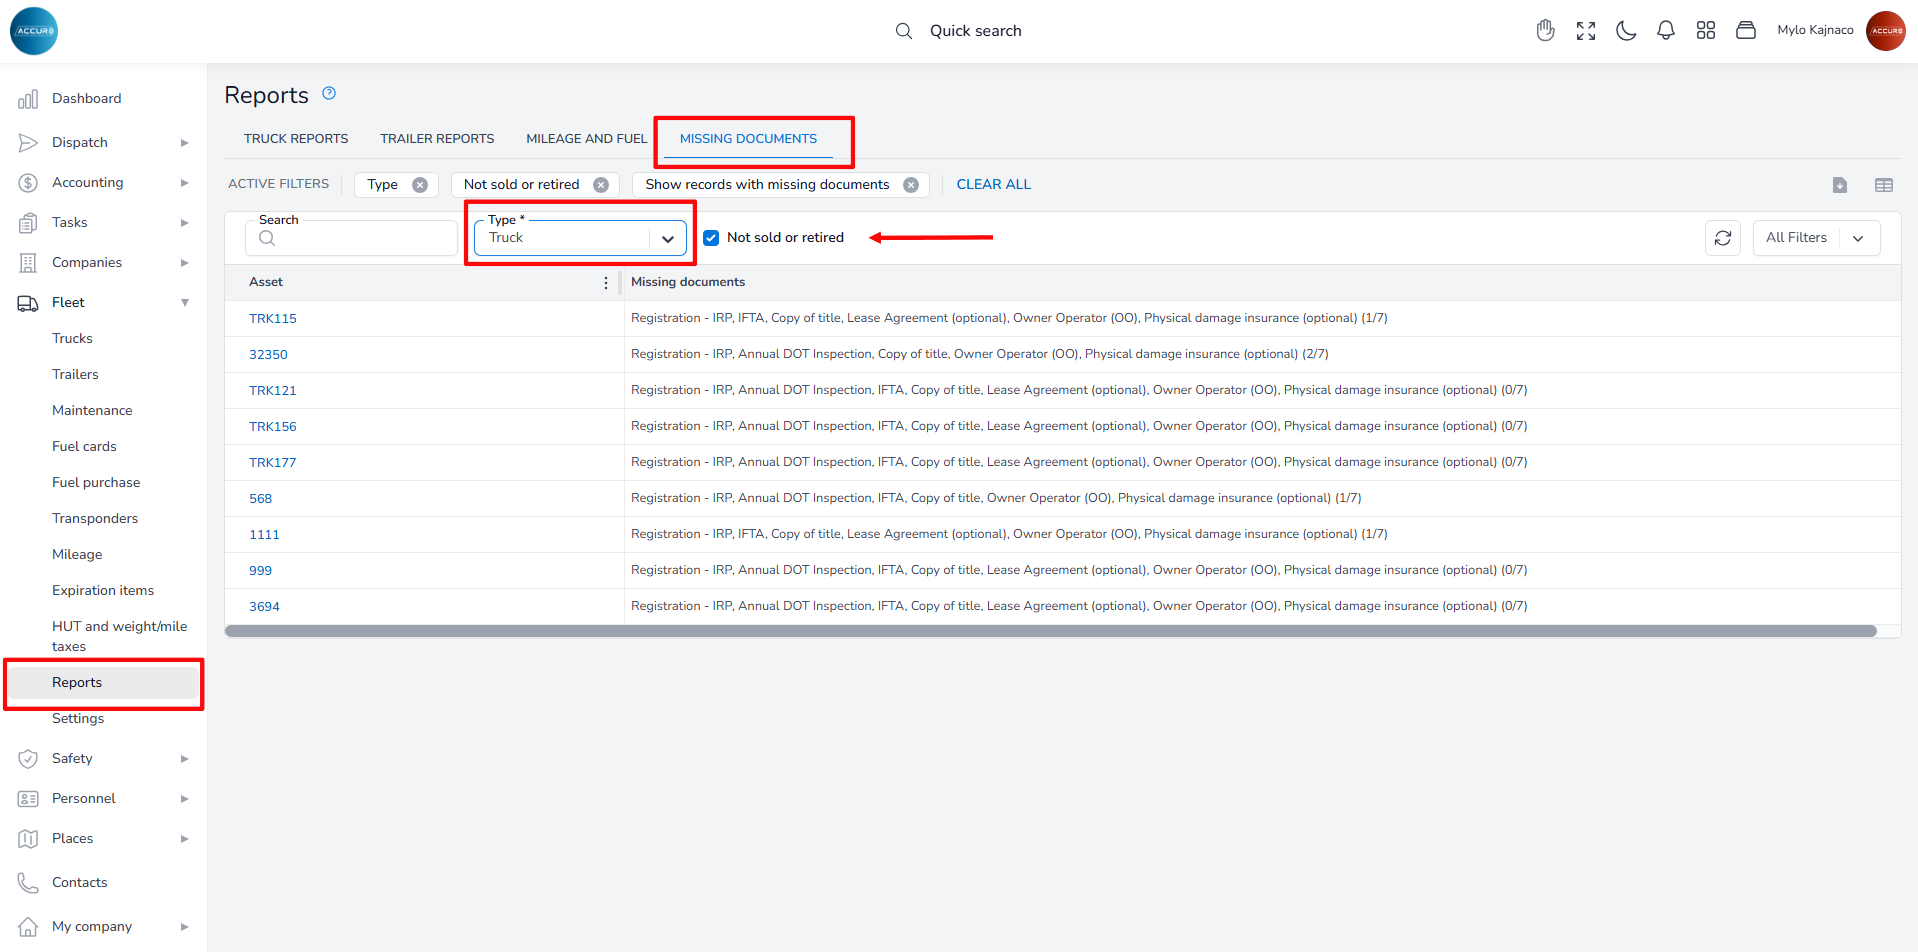
To check which documents are missing, go to the Reports section. Under the Missing documents tab, select the entity from the Type field and mark the Not sold or retired checkbox. This will display a list of all active trucks, along with the missing documents for each one.
To check the expiration dates of documents, go to the Expiration items section, and under the Expiring tab, you will find a list of all documents, along with their types and expiration dates.

Additionally, you can access this information for an individual truck by visiting the Expiration Items tab located on each Truck’s info page.
Note: To find out how to replace a document or renew an expired document, please follow the link below: https://accur8.help/docs/document-management-guide/#3-toc-title
Creating a new trailer’s profile #
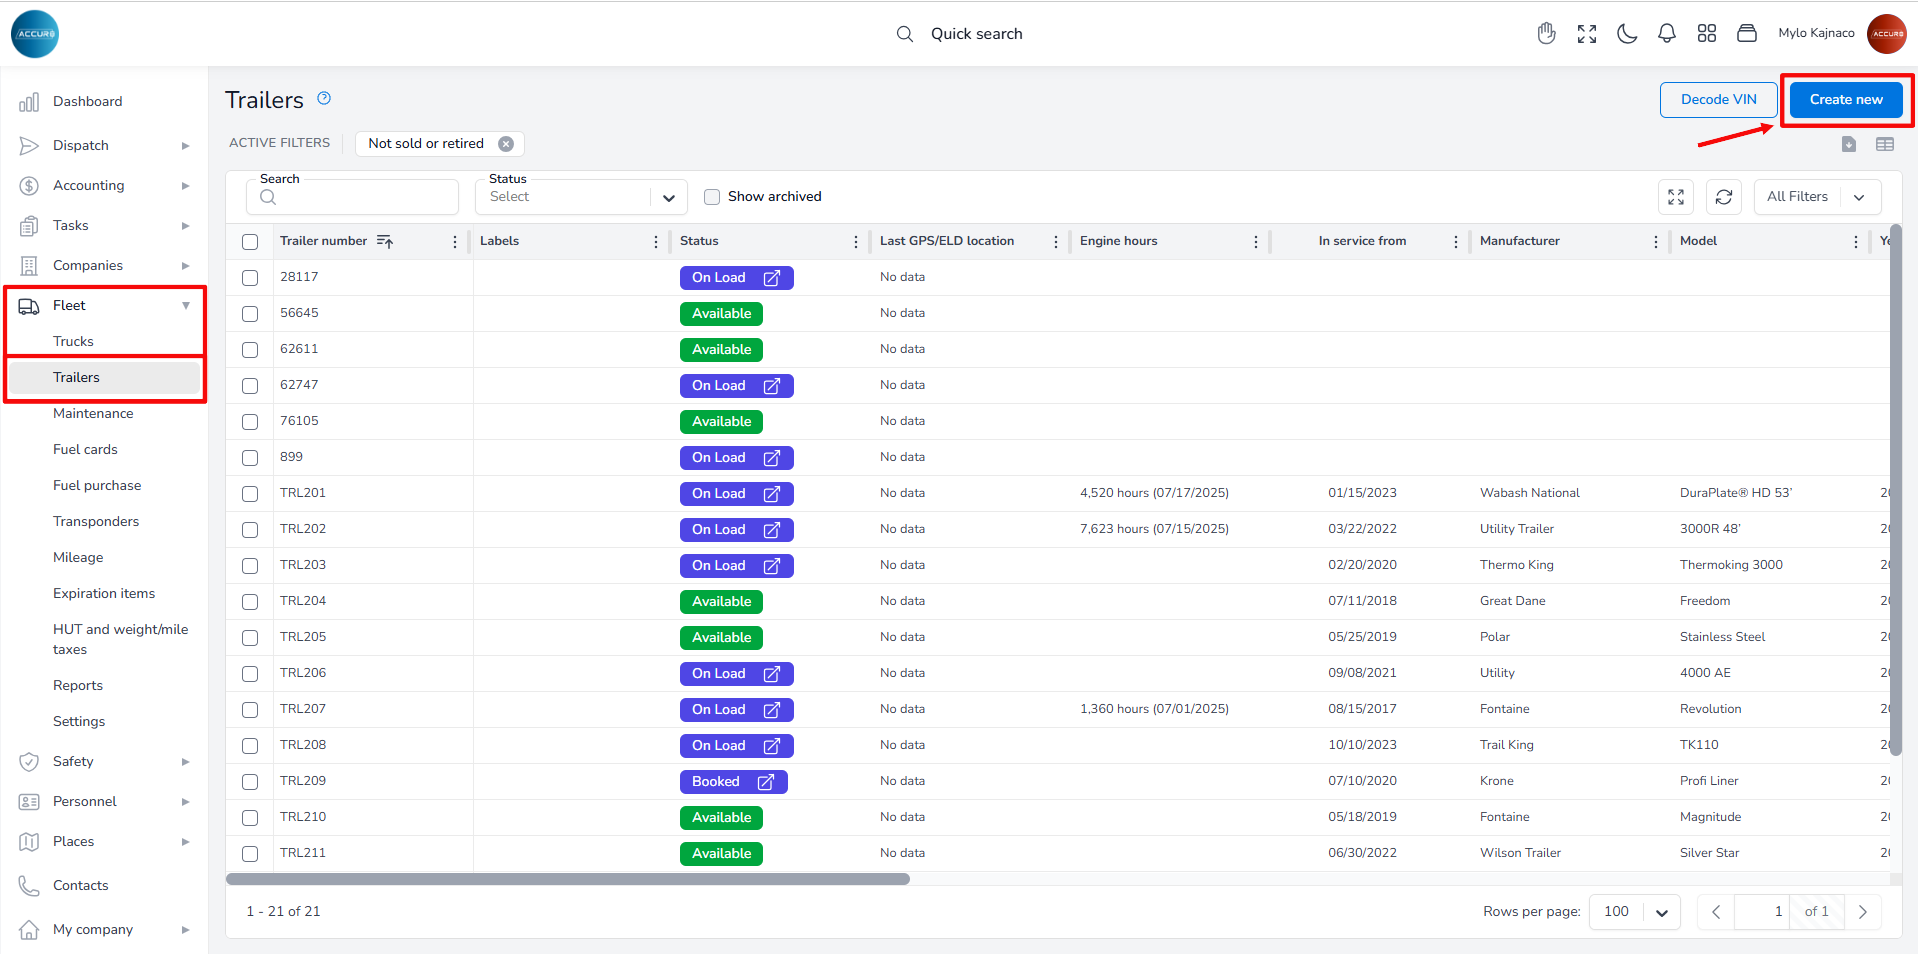
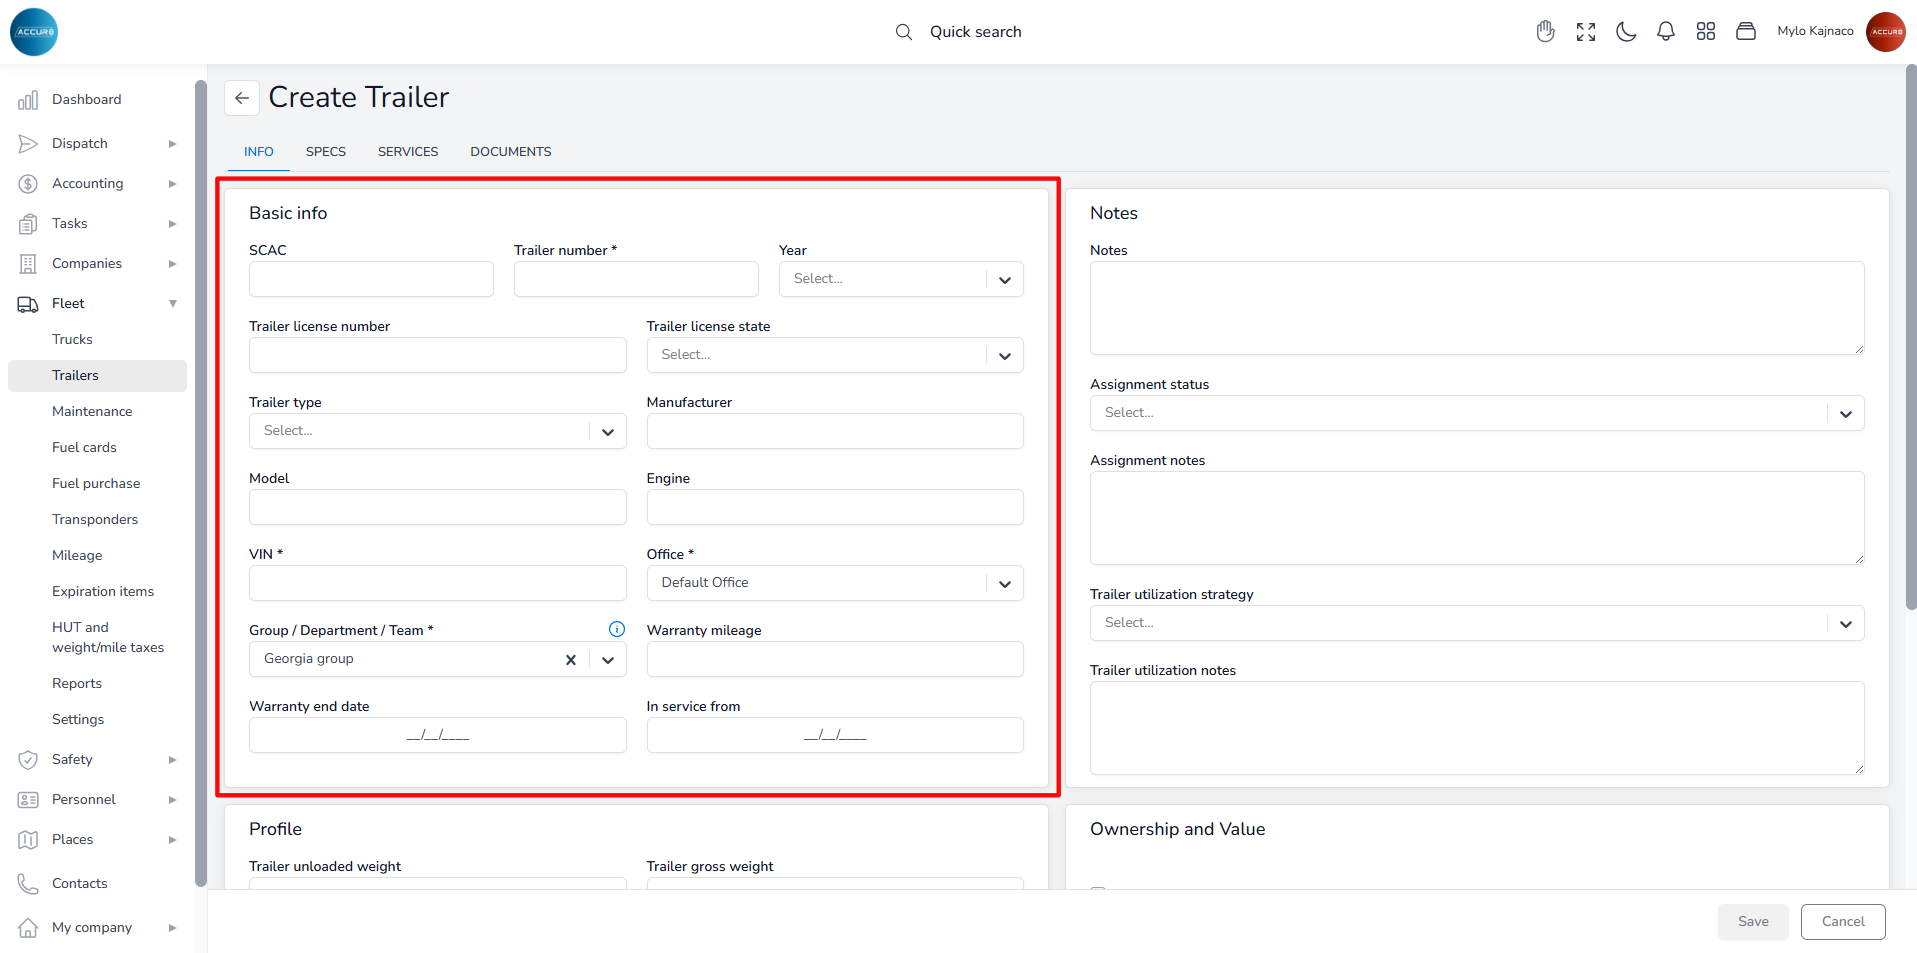
To add a trailer to the system, navigate to the left sidebar and click the Fleet section, then select Trailers. Next, click the Create New button in the top-right corner. This will open a new page with various sections.
To add a new trailer, you must fill in the required information. In the Basic Info section, provide the trailer number and VIN number, and select the Office and the Group/Department/Team from the corresponding drop-down menus. These fields are mandatory and sufficient for creating a profile. If you wish, you can add additional information later.
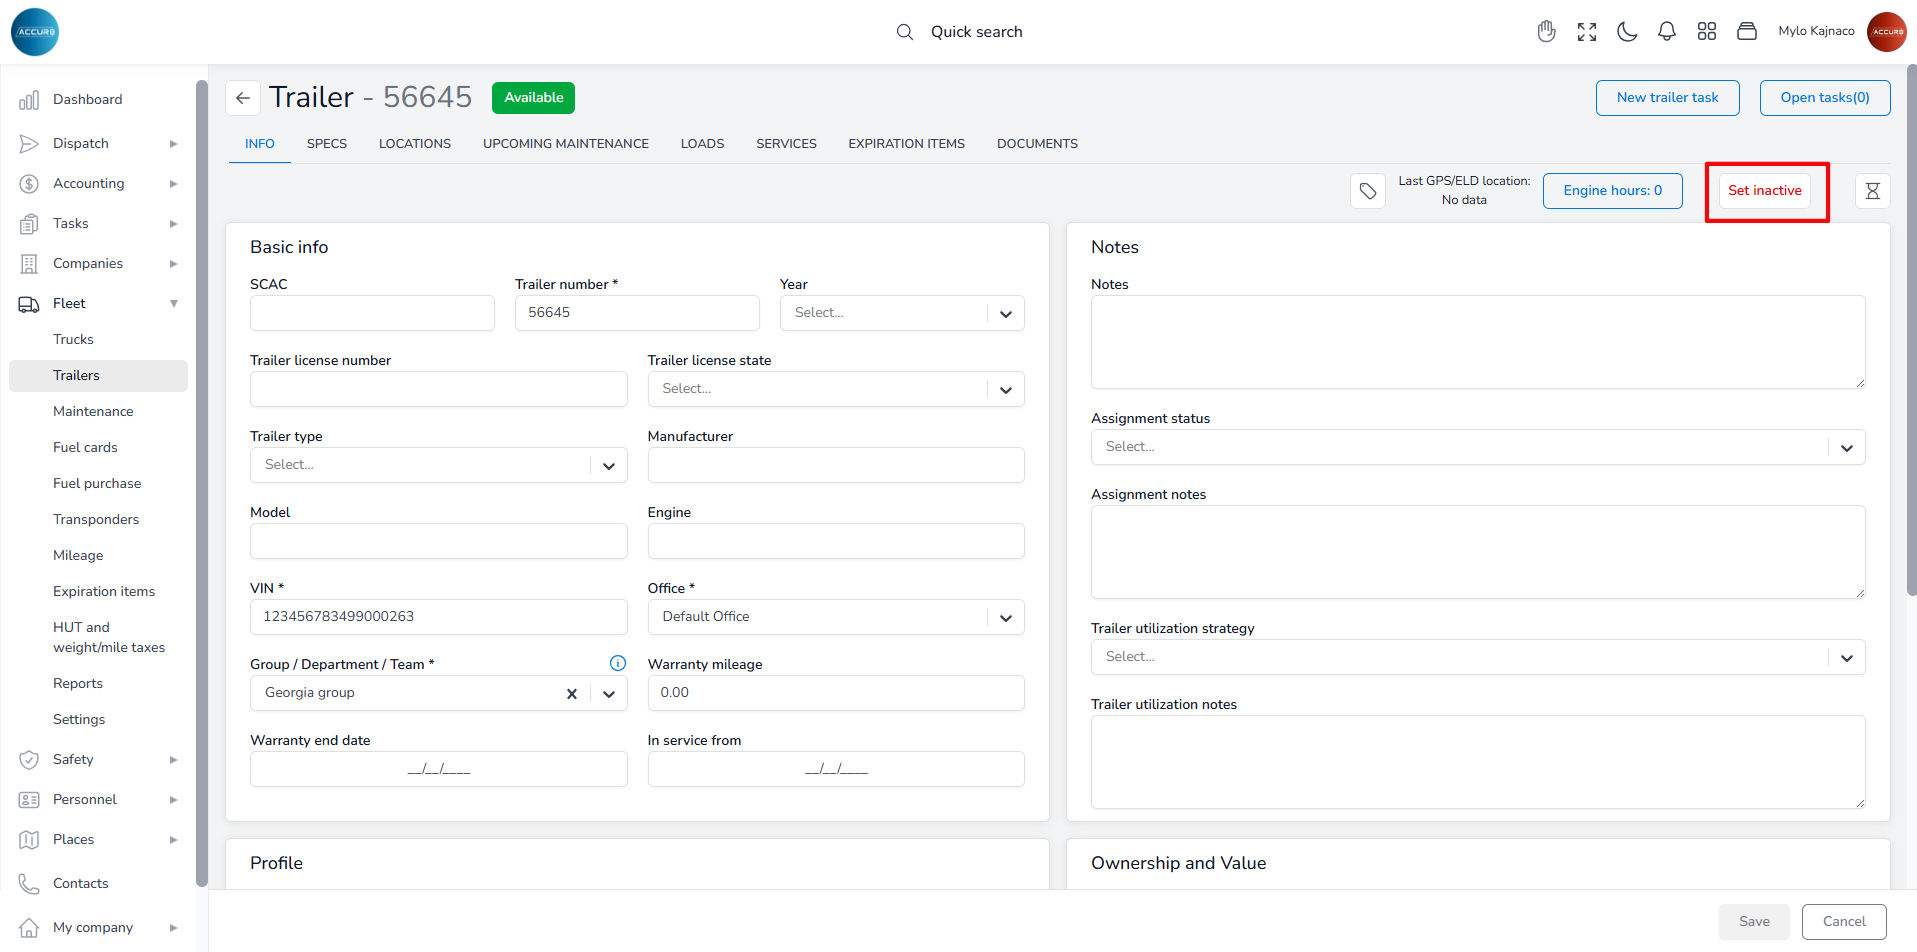
Once you have created the profile, the trailer’s status in the system is set to Available.
If a trailer is no longer available and needs to be removed from the system, you must first set it to inactive status. To do this, go to the selected Trailer’s page and click the Set Inactive button in the top-right corner.
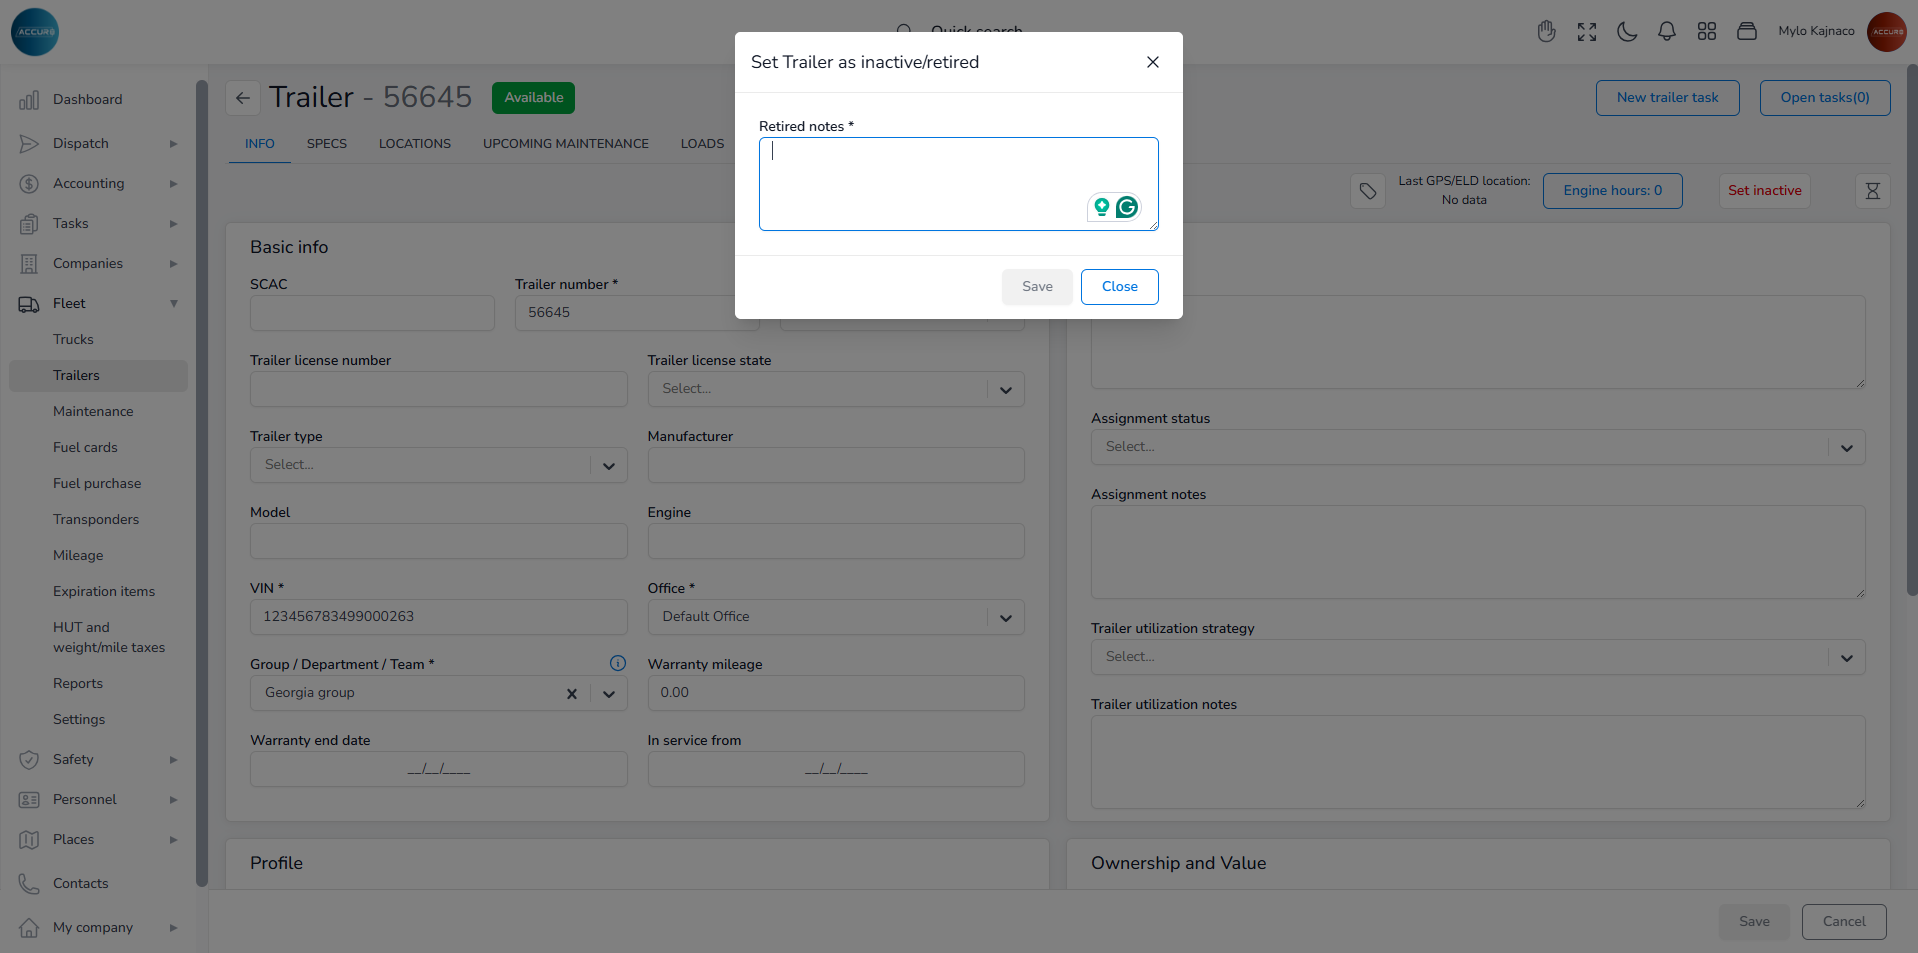
A pop-up window will appear where you will add a retired note and save it.
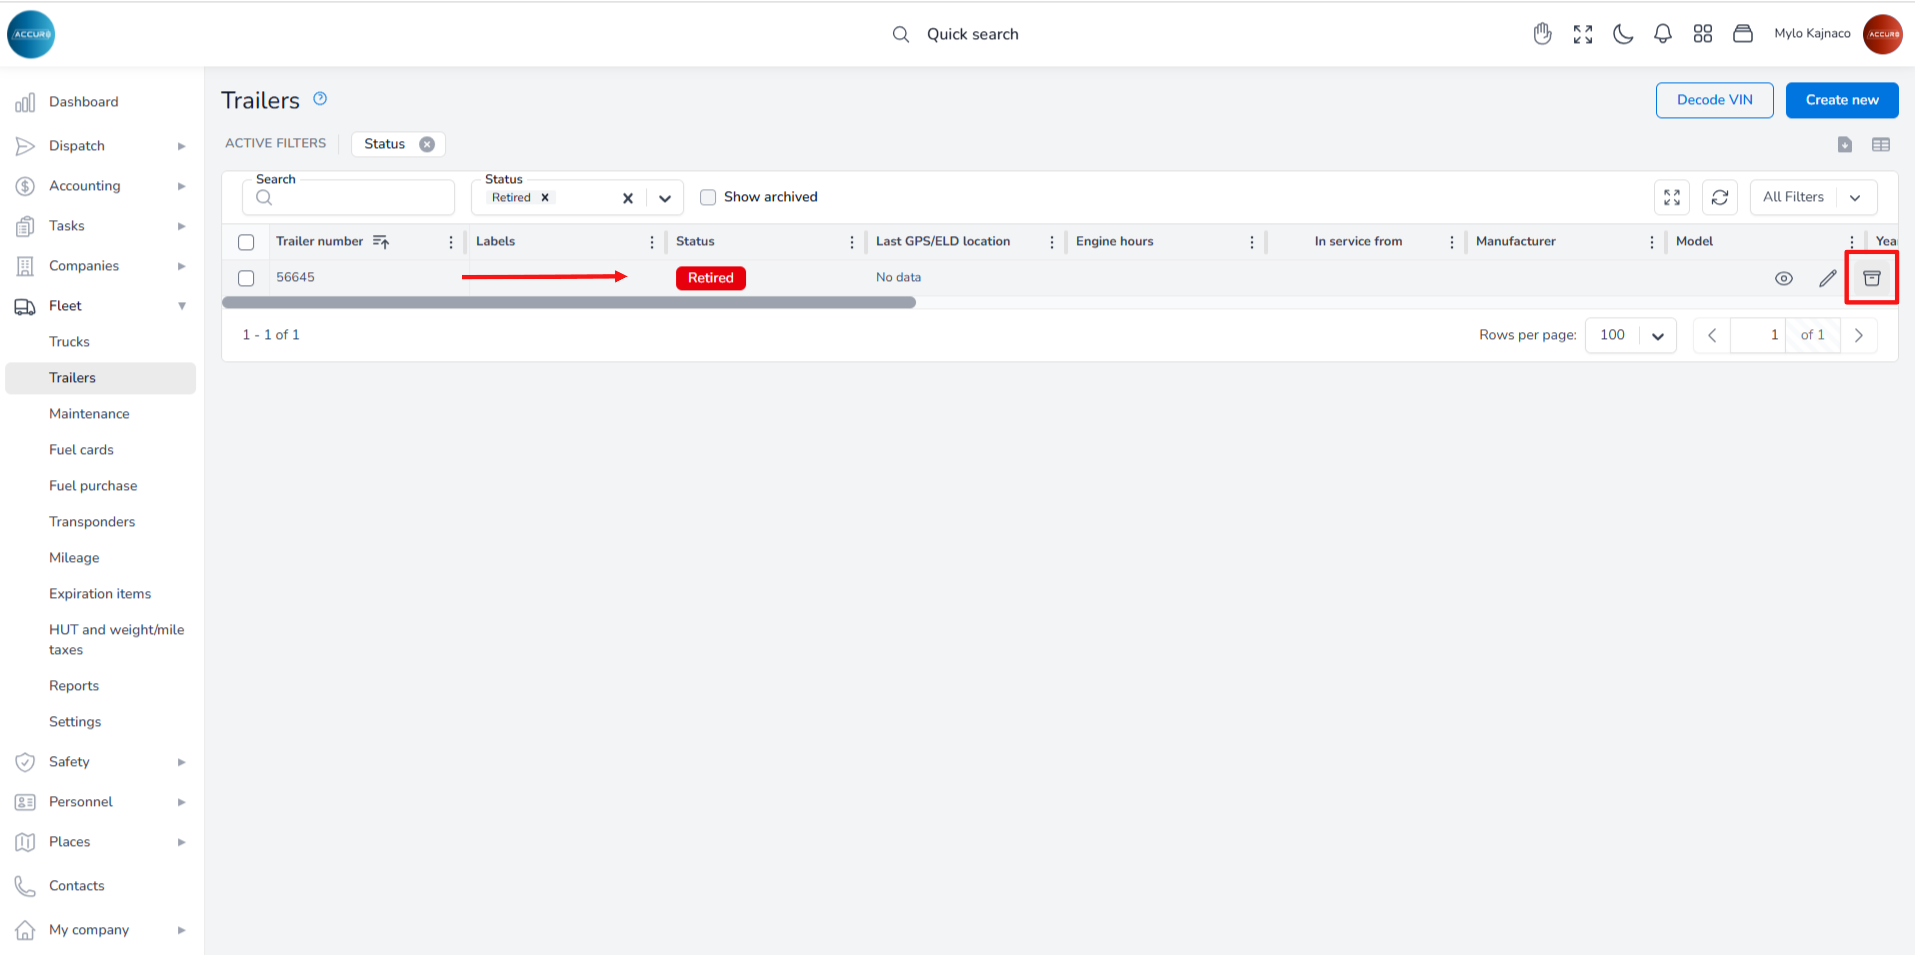
The trailer will then be marked as Retired. To delete the trailer from the system, navigate to the Trailers list, hover over the trailer you want to delete, and then click the Archive button.
Managing Documents (adding, finding missing ones, expiration dates) #
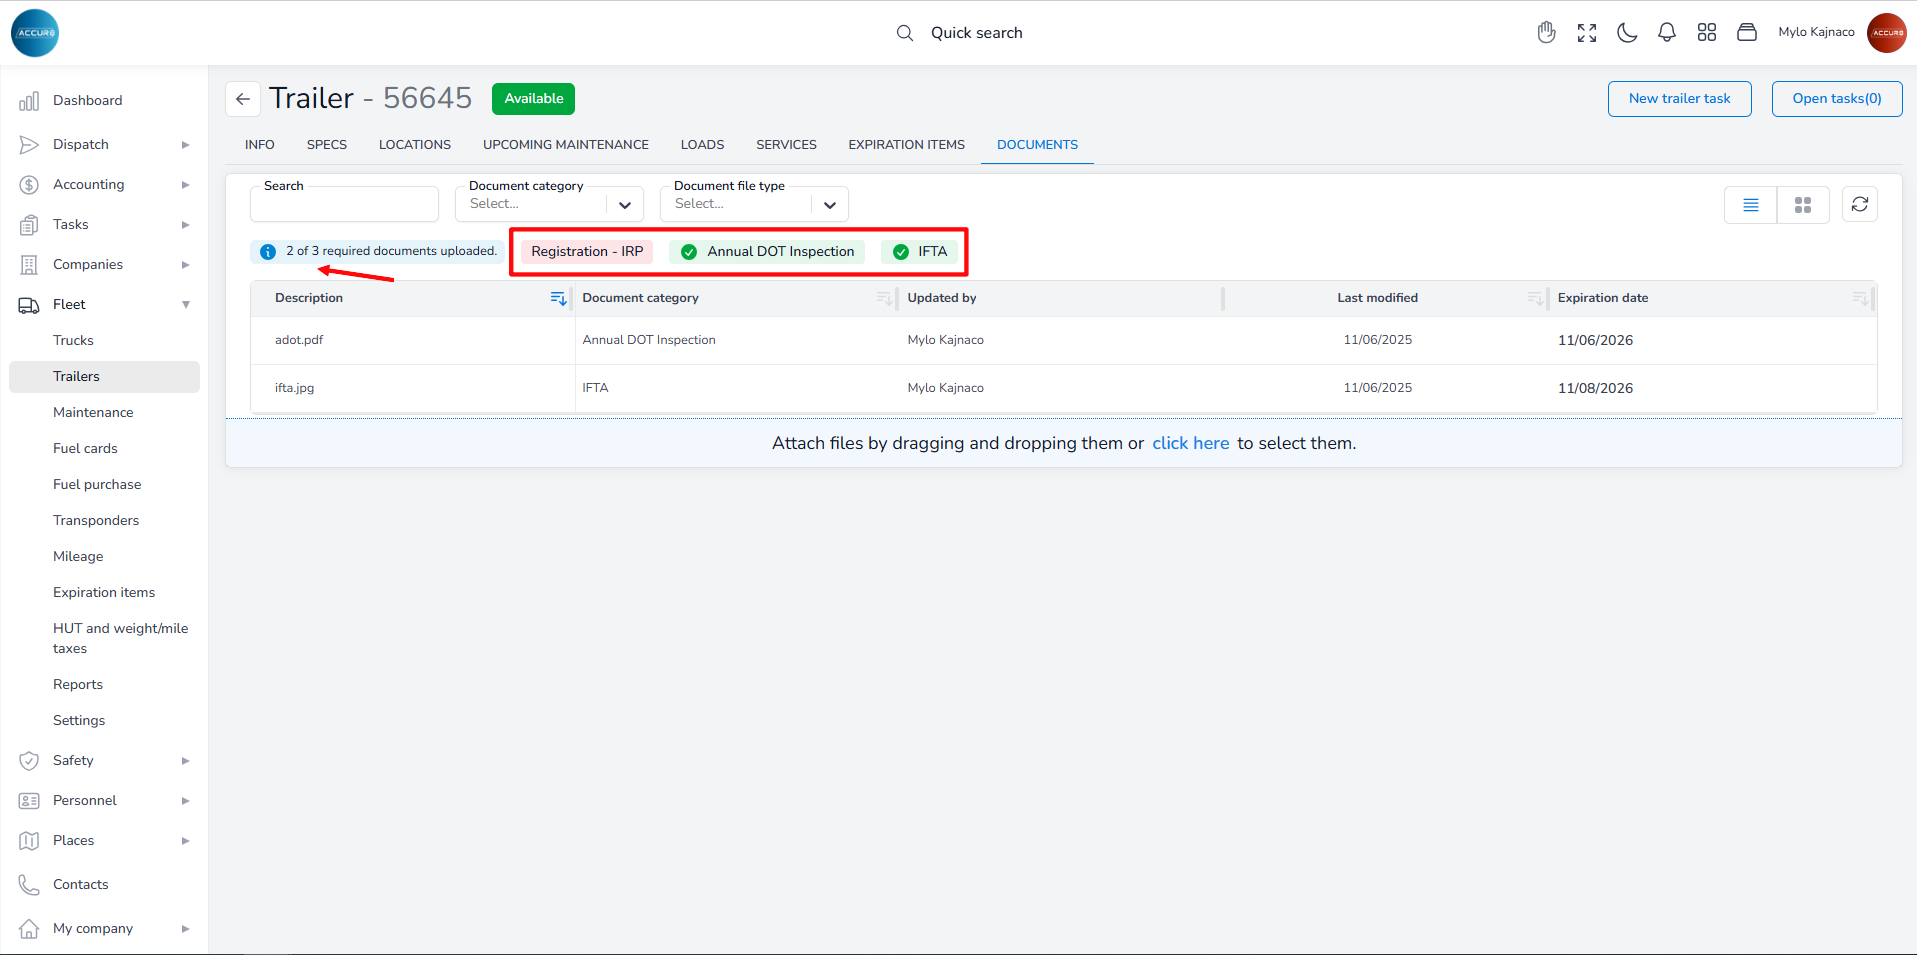
To find all the necessary documents for the selected trailer, go to that Trailer’s page and then click the Documents tab. The missing documents will be marked in red, and a blue notification will show the number of documents that need to be uploaded.
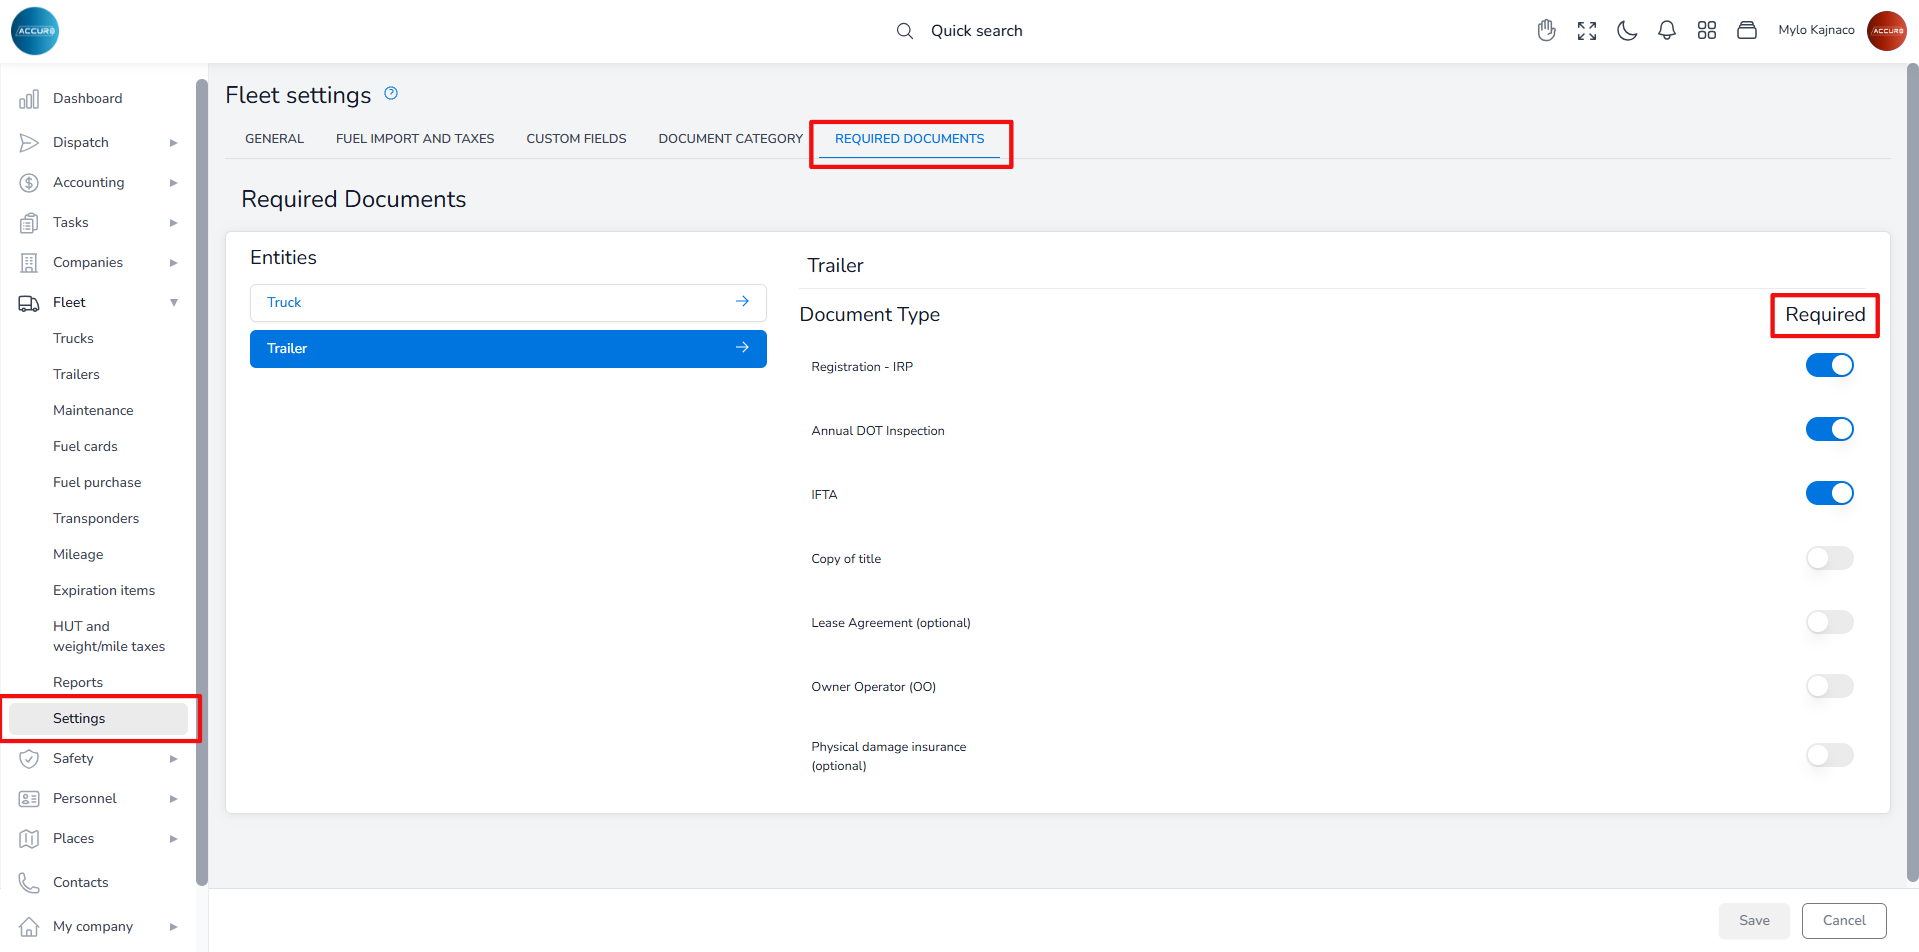
To determine which documents are required, navigate to the Fleet section, then click the Settings. Under the Required documents tab, select the Trailer entity. On the right side, you will see various document types, and you can toggle the button next to each one to indicate whether it is needed.
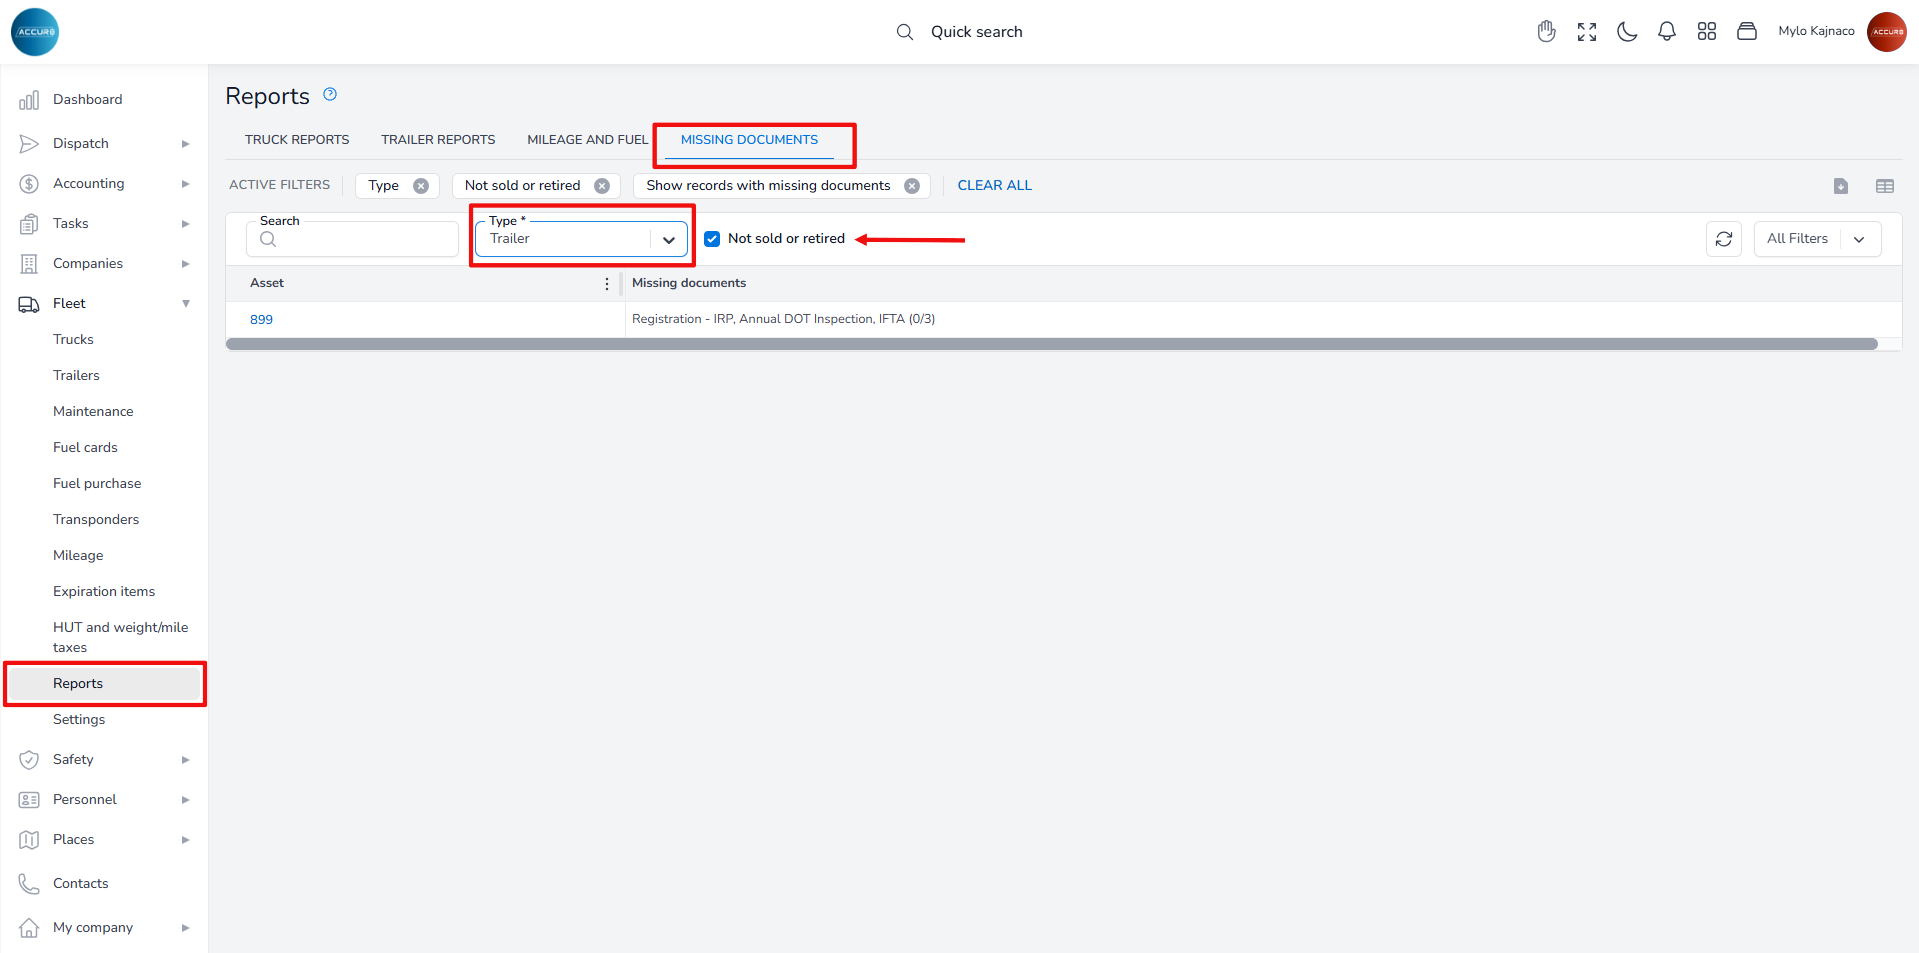
To check which documents are missing, go to the Reports section. Under the Missing documents tab, select the entity from the Type field and mark the Not sold or retired checkbox. This will display a list of all active trailers, along with the missing documents for each one.
To check the expiration dates of documents, go to the Expiration items section. Under the Expiring tab, you will find a list of all documents, along with their types and expiration dates.

Additionally, you can access this information for an individual trailer by visiting the Expiration Items tab located on each Trailer’s info page.
Note: To find out how to replace a document or renew an expired document, please follow the link below: https://accur8.help/docs/document-management-guide/#3-toc-title
Creating a Unit in the Dispatch Manager #
After entering the drivers and assets into the system, you can create a Unit within the Dispatch Manager. This will enable the system to automatically record relevant details for those entities when a load is dispatched.
To create a new Unit, navigate to the Dispatch section and select the Dispatch Manager. Then, click the Create New button in the top-right corner.
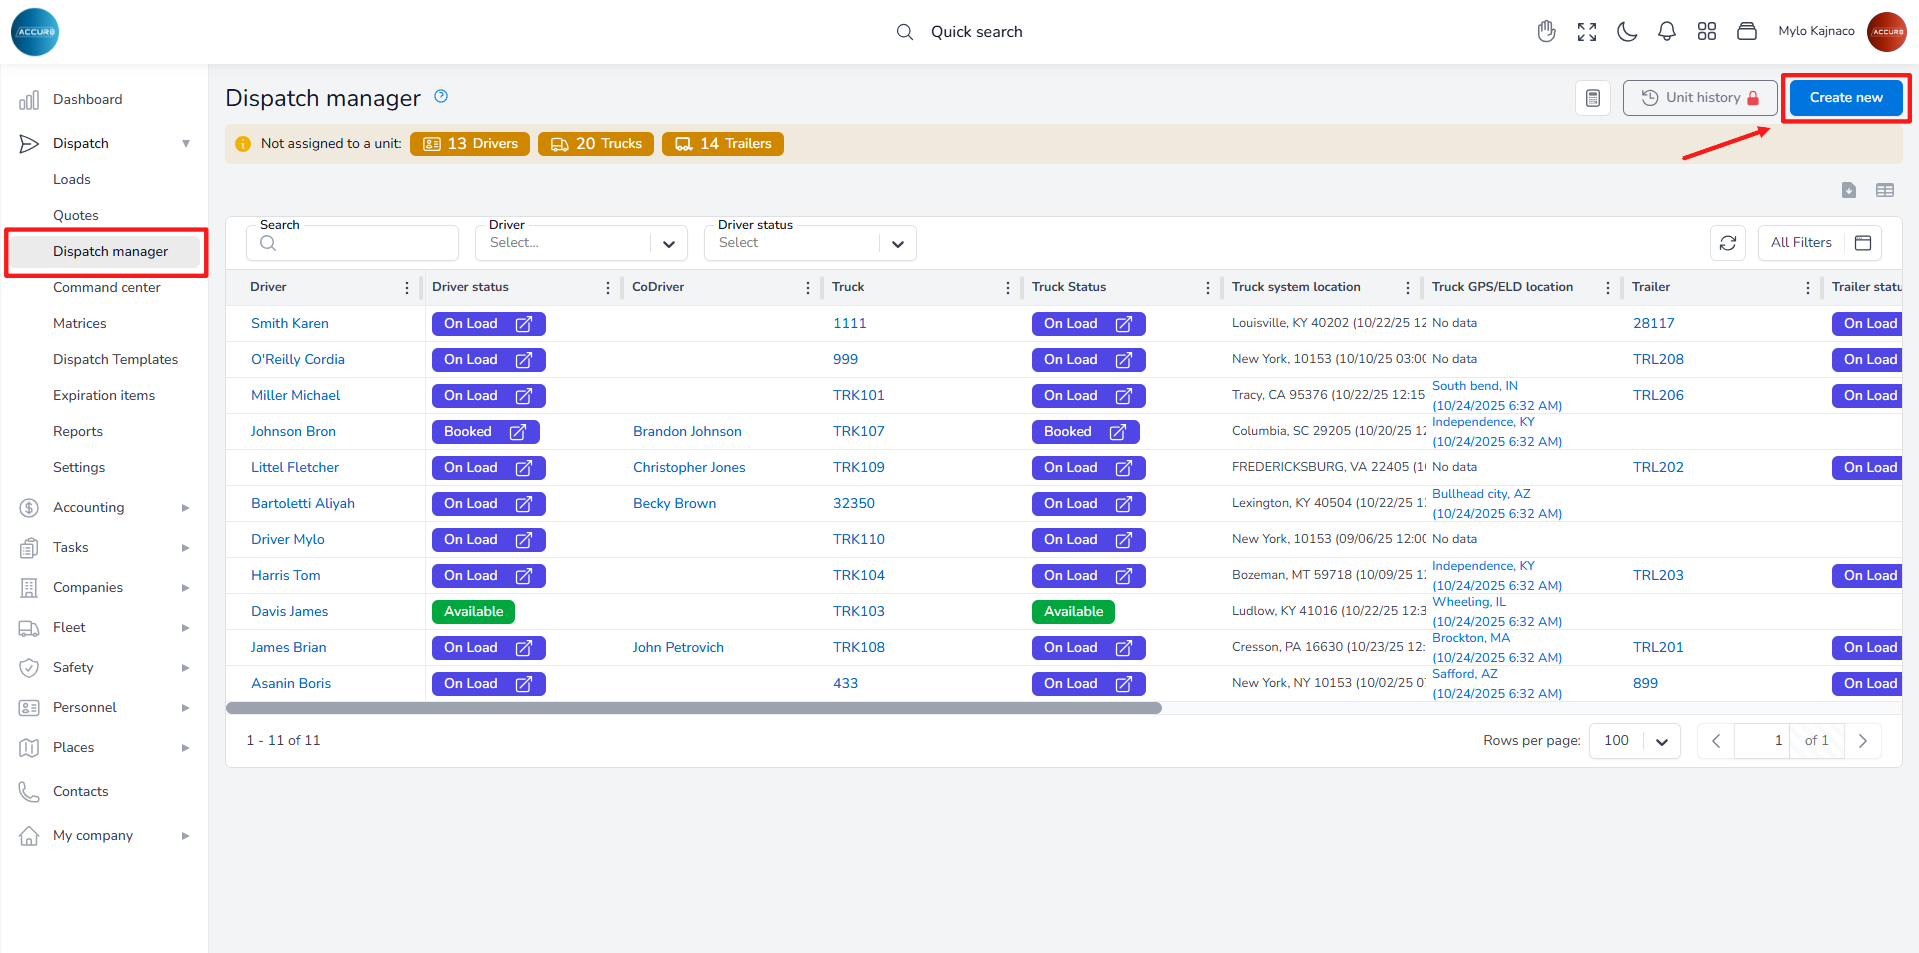
In the form that appears, choose a specific driver, codriver, truck, and trailer from the dropdown lists that will be associated with this unit.
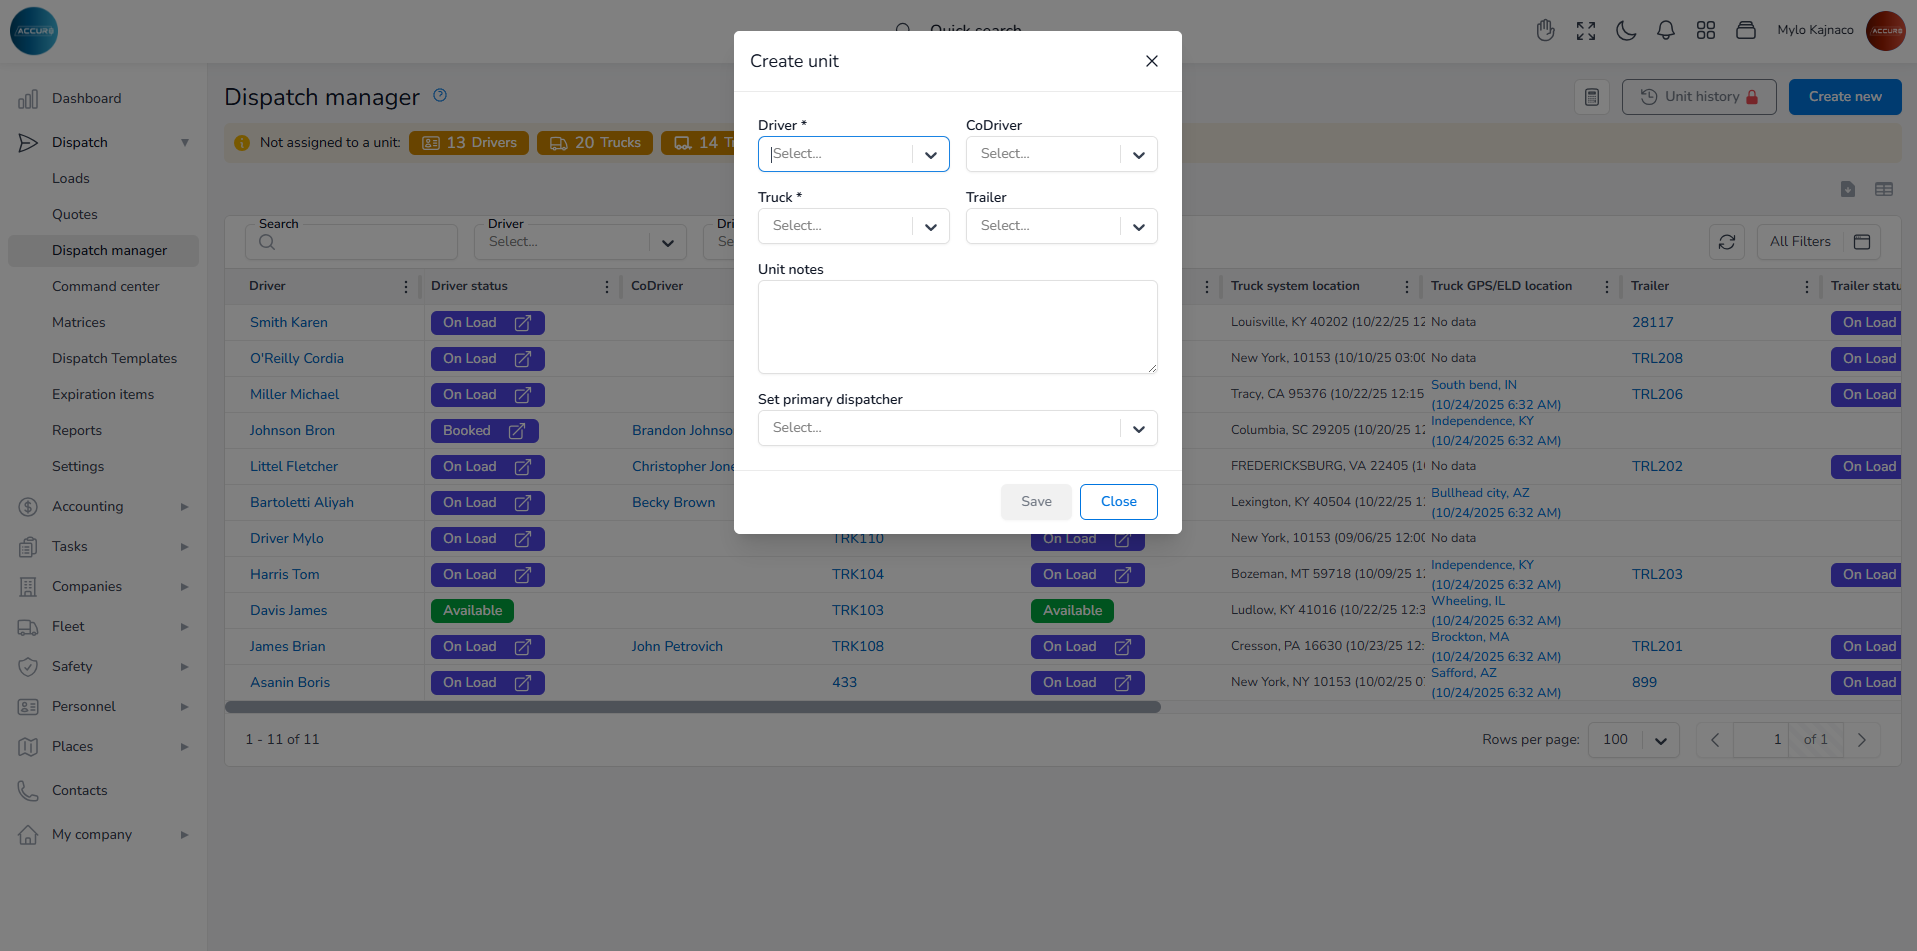
Please note that a Unit must include both a Driver and a Truck, as these are the required fields. You may also include additional entities and select the primary dispatcher from the corresponding field.
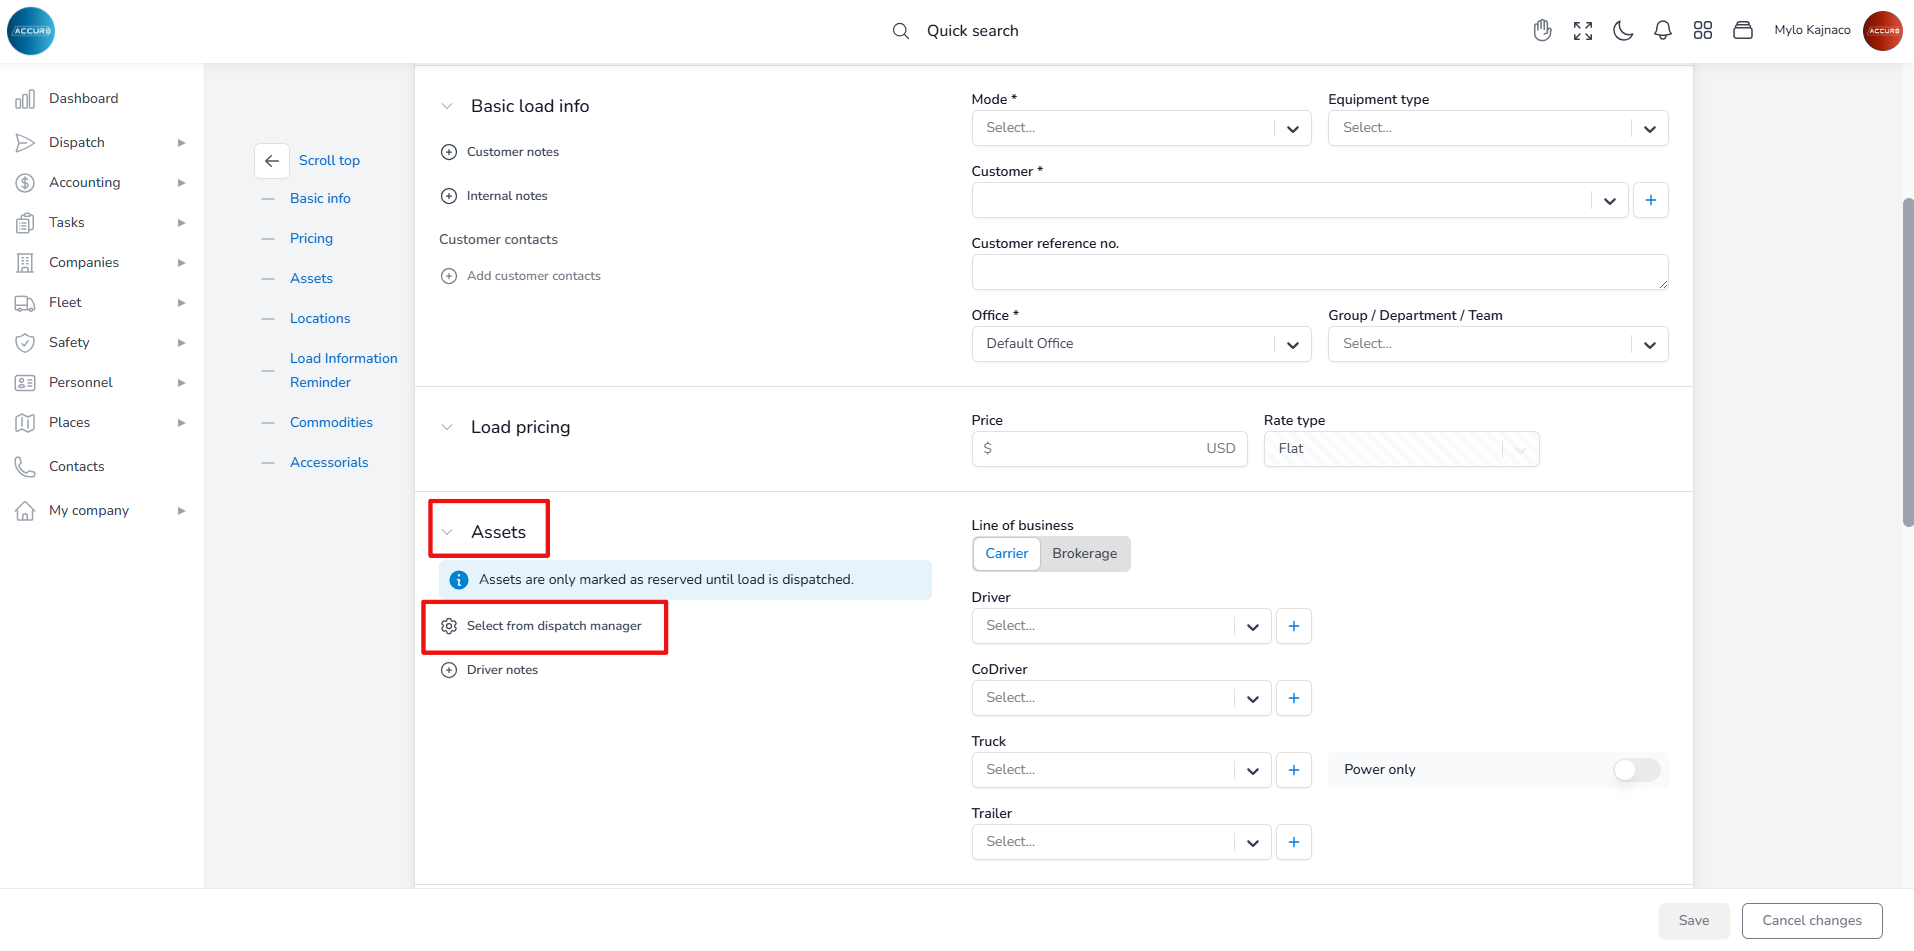
Note: To add a Unit to a load, use the Select from dispatch manager option under the Assets section on the Load’s details page.