The first step in starting with ACCUR8 TMS is to create user accounts within the system. To ensure efficient access management and task execution, assigning specific roles and defining permissions for each user is essential. System administrators can easily add and edit user accounts as needed and restrict access for users when necessary.
To access this page, click the My Company section in the left sidebar, then select System users. You will see an overview of all current system users on the right side.
1. How to Create a System User?
#
To create a new system user, click the Create New button in the top-right corner. A dialog box will appear where you will enter the required information for the new user. The mandatory fields marked with an asterisk are First Name, Last Name, and Email. Please ensure that the email address is unique within the system. To assign a role that defines the user’s level of access, click the TMS access and roles tab on the left. In the Roles* field, you can select multiple roles to assign to the user. Additionally, you can choose a group to which you will add the user in the field below. Finally, click the Save button to create the new system user.
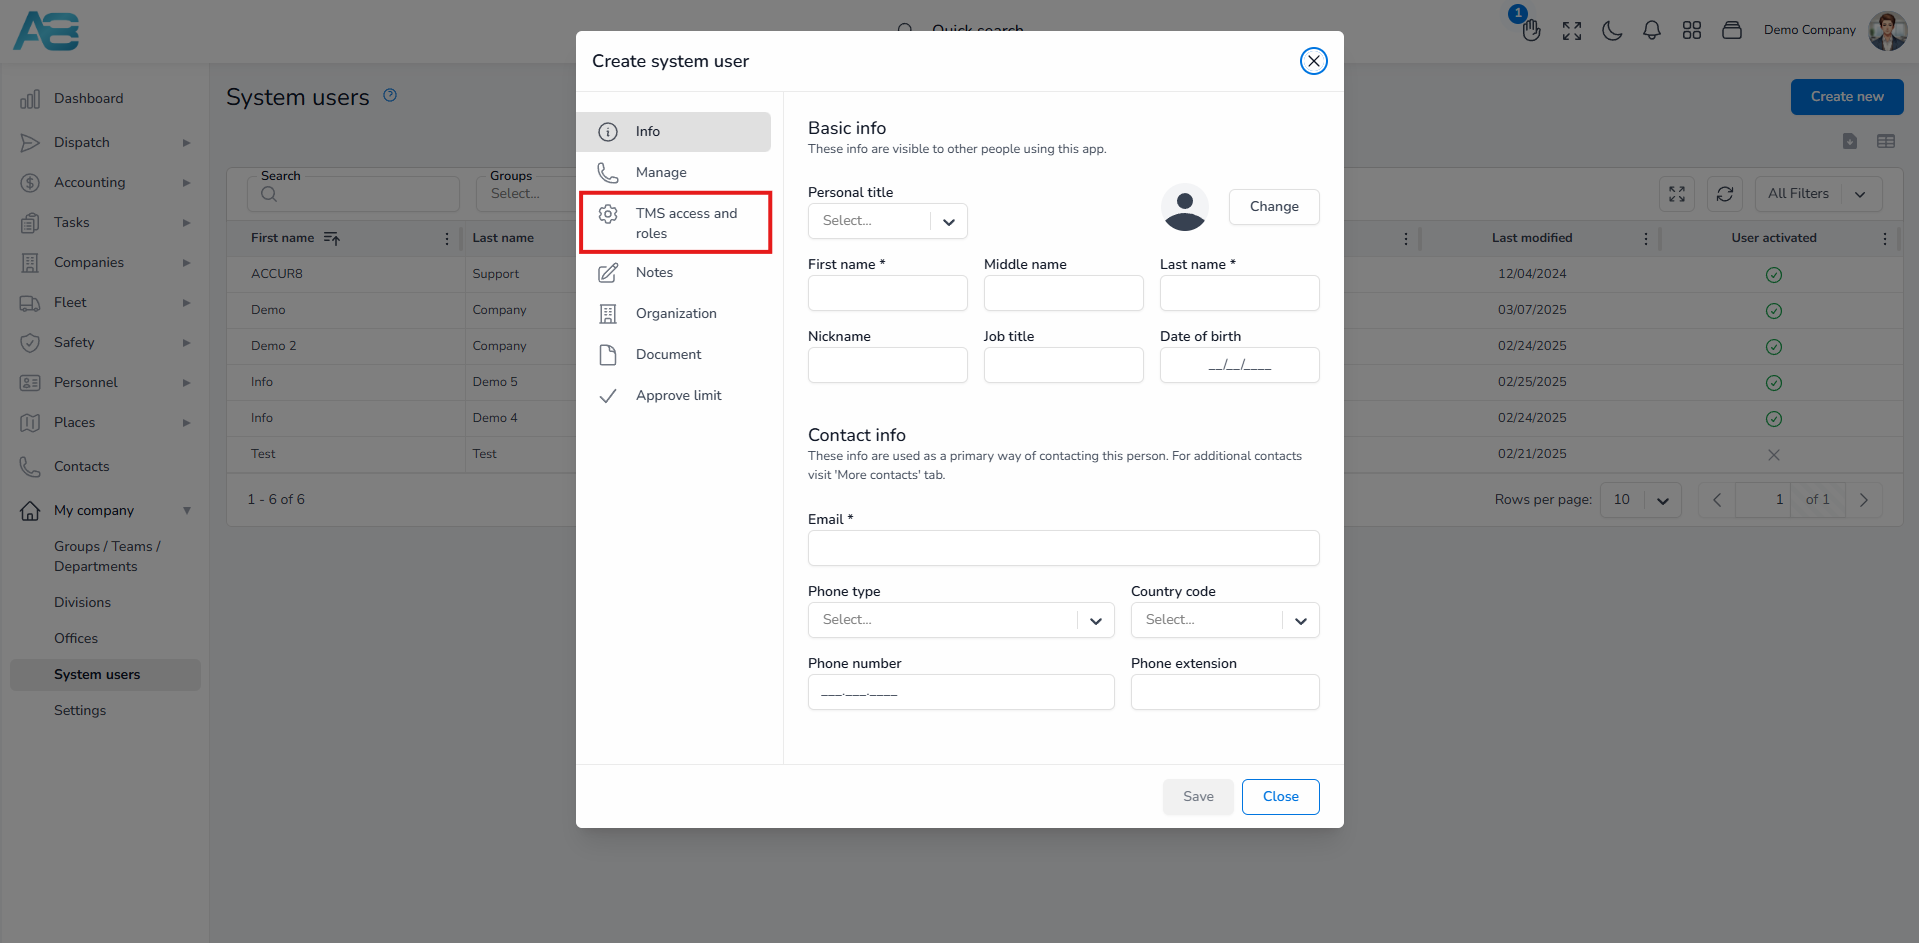
*Please note that only Super admin and Full accounting roles provide immediate access to all features. For other roles, it is advisable to set the appropriate permissions.
2. How do you activate the user and set the password after creation?
#
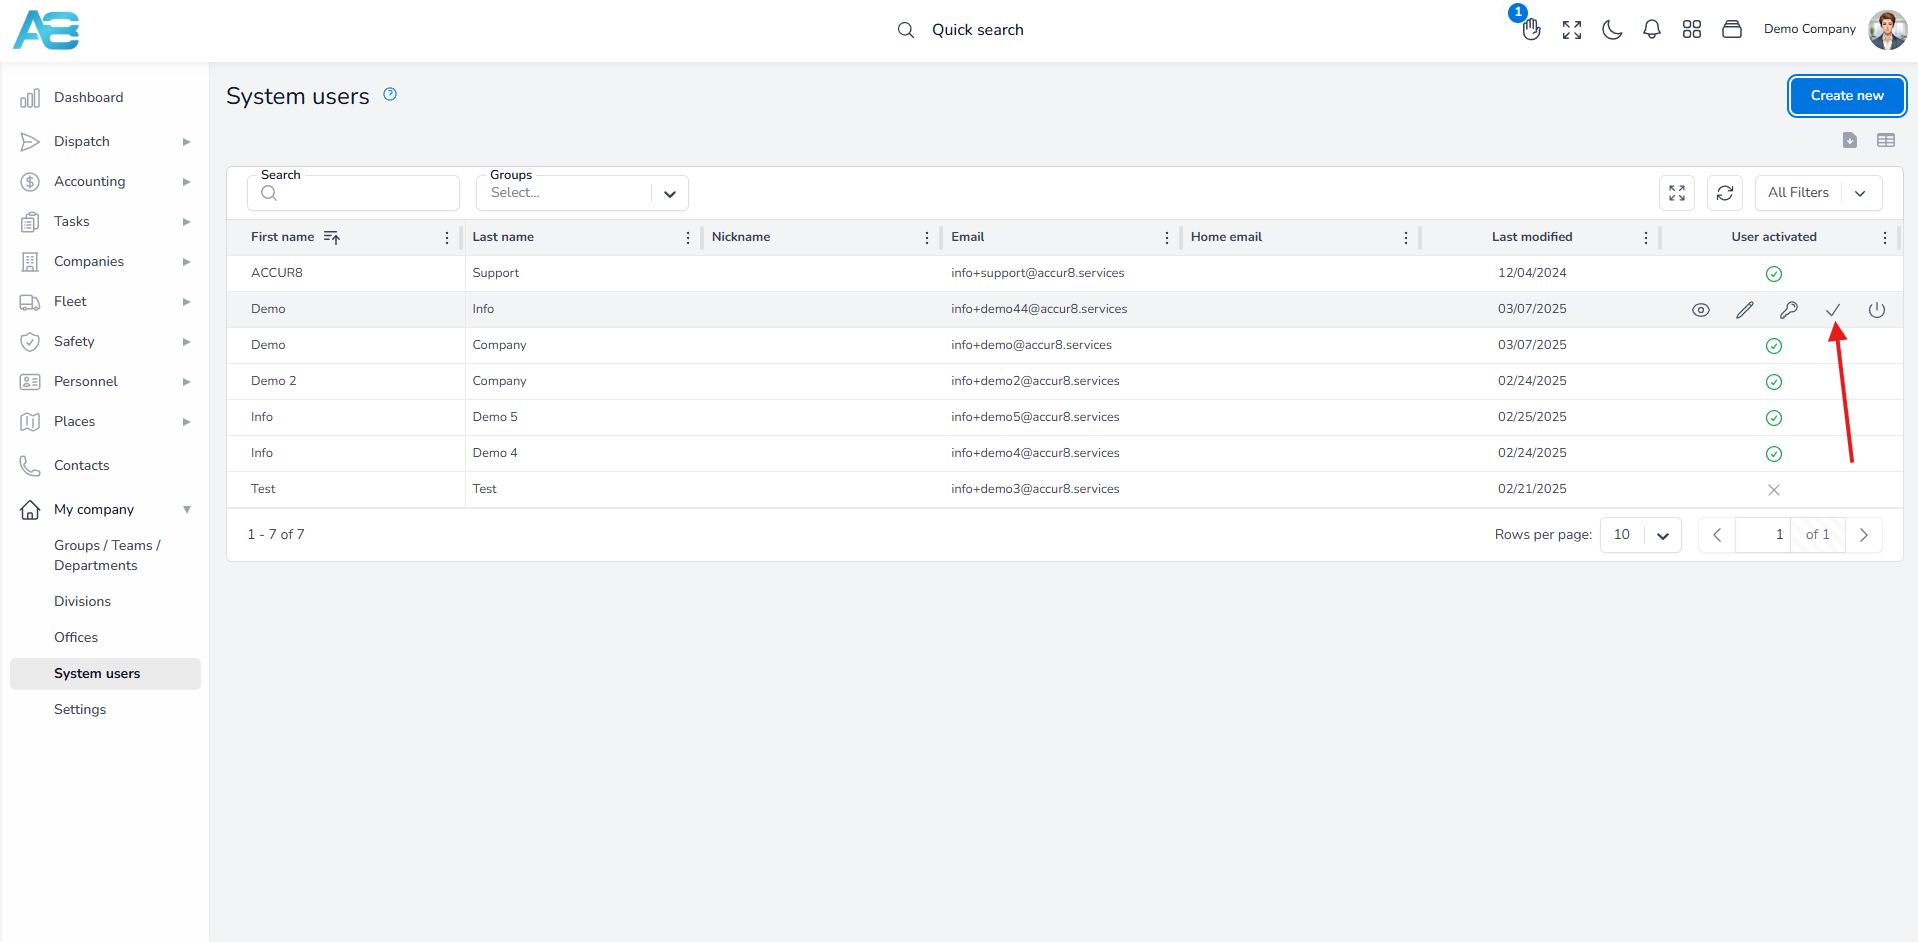
Once you have created a new user, their name will appear in the System Users list. Now, you need to activate them so that they have access to the ACCUR8 system. To do this, hover over the user’s name in the System Users list and click the check-mark icon.
3. How to Add Permissions?
#
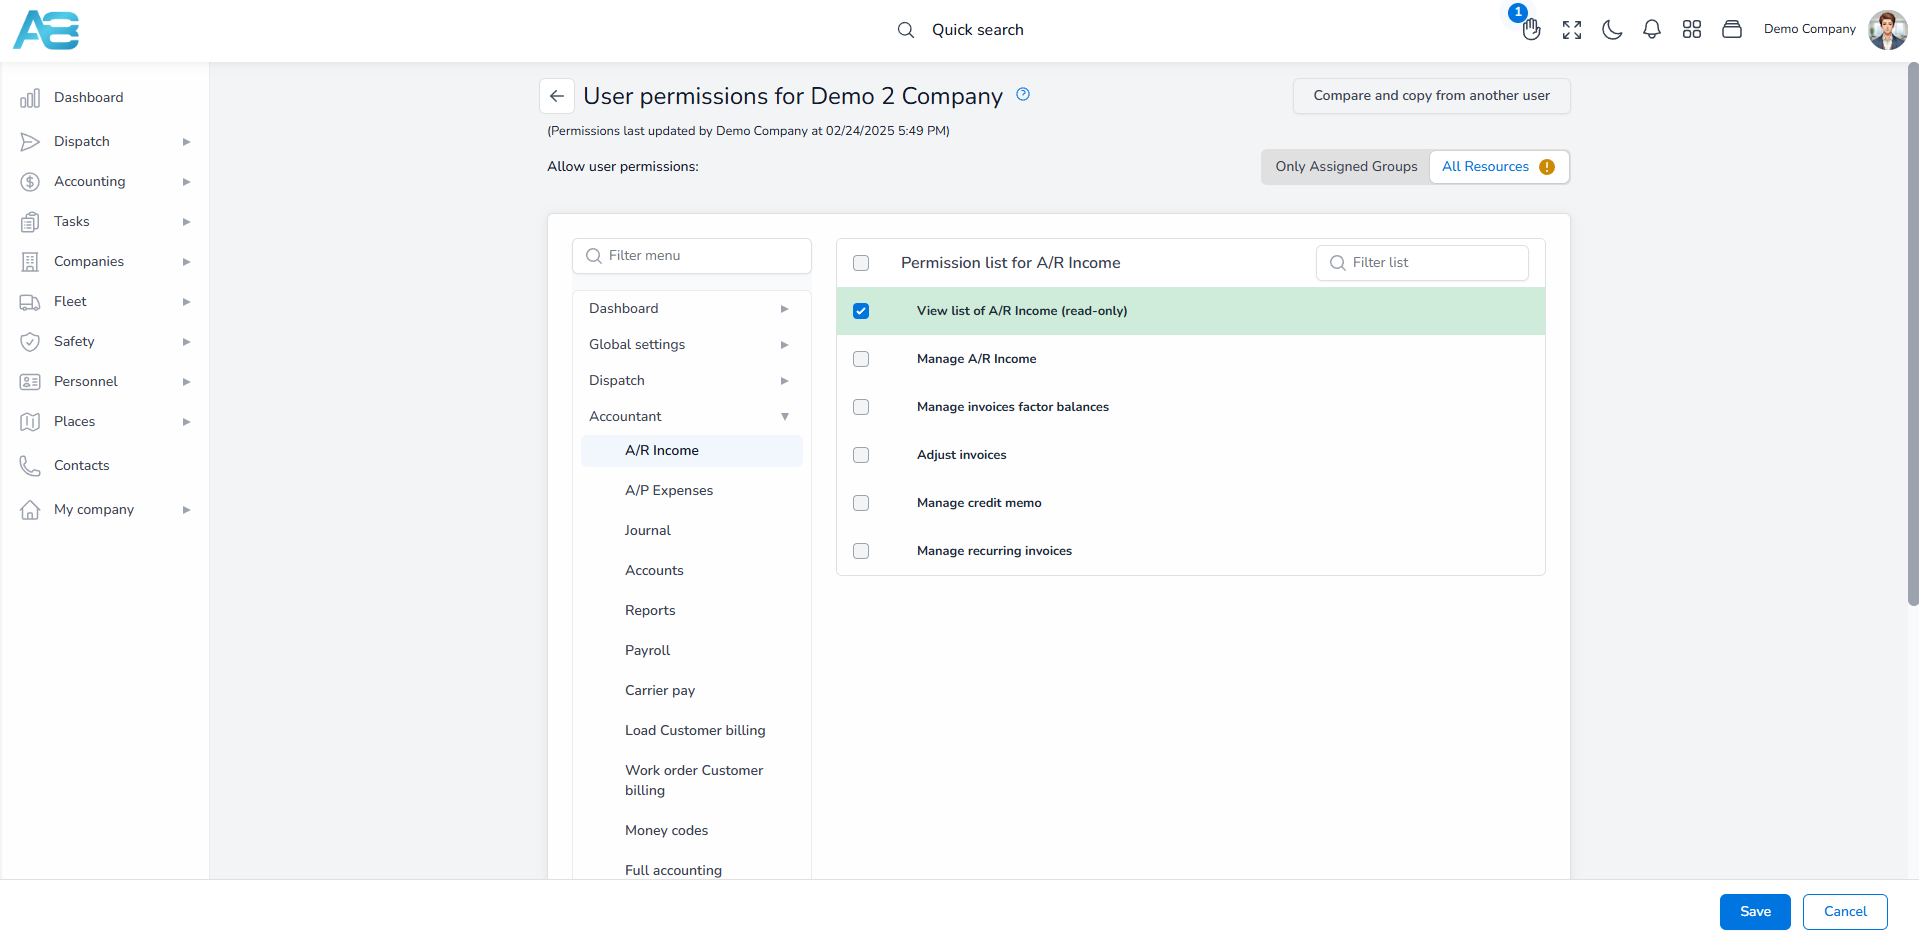
After creating and activating a user, you need to define their permissions based on job responsibilities. To do this, hover over the user’s name in the System Users list and click the key icon. This will open the User permissions page, where you’ll find a list of all system sections on the left menu. By clicking a section, a drop-down menu will appear with its subsections. When you select a subsection, a list of all related permissions will be displayed on the right side. To assign permission to the user, click the corresponding checkbox. Once you have made your selections, click the Save button to apply the changes. The system will automatically send the new user an email notification with login instructions. Creating users and assigning their permissions enables you to fully configure their access before inviting them to the system.
The system also allows you to copy permissions from another user, saving you time. To access this feature, click the Compare and Copy from Another User button located in the upper-right corner of the User Permissions page. This will open a new window displaying a list of all users, where you can Compare permissions or Copy them from the selected user by clicking the corresponding icon.
On the User Permissions page, you will find two fields in the upper right corner: Only Assigned Groups and All Resources. By clicking one of these fields, you can choose whether to grant the users access to all groups in the system (All resources) or only to the groups of which they are a member (Only Assigned Groups).
4. Additional Options: #
When you hover over any user in the System Users list, you will see other quick-access buttons that allow you to view, edit, resend the password, or deactivate the user. You can use these options to modify user details and roles or to lock users out of the system if necessary.
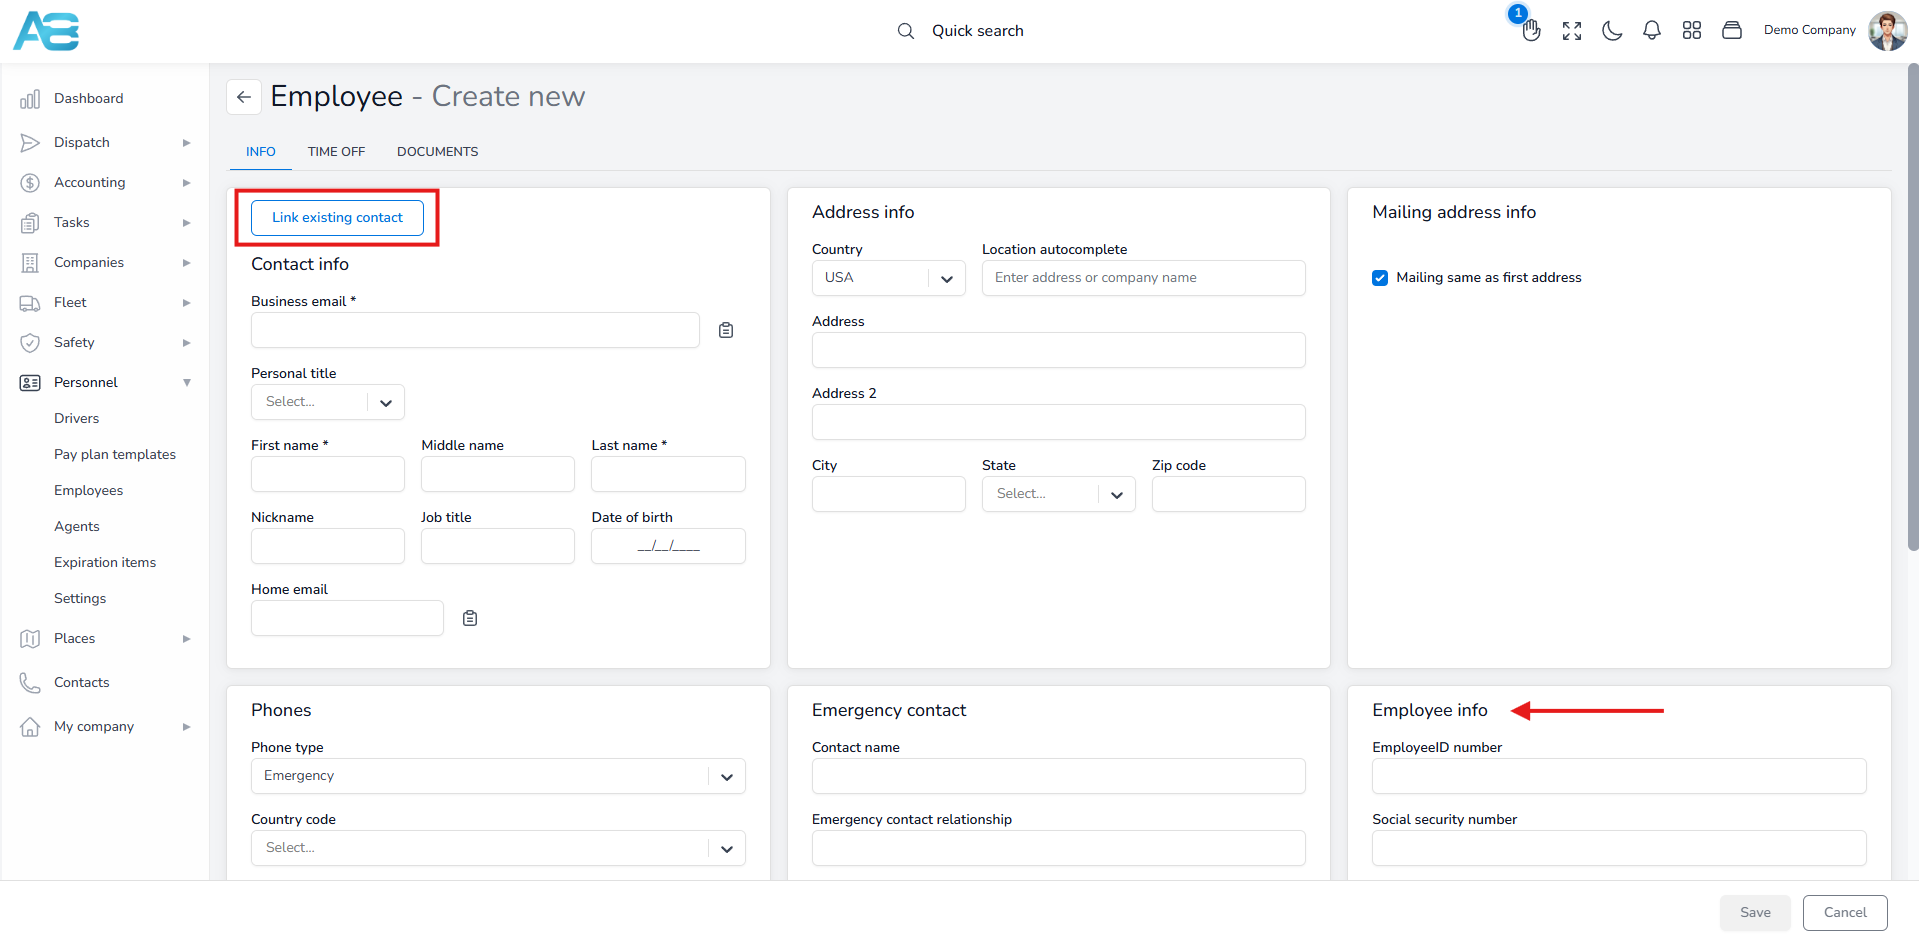
5. Linking a new user as an employee (optional): #
After creating a new user, you can link them in the Personnel section and assign a company role. To access this page, click the Personnel section in the left sidebar, then select the Employees category. To link a new user, click the Create New button in the top-right corner. A dialog box will appear where you will see the Link Existing Contact button at the top-left corner. After selecting the user from the Contact field, the system will automatically copy all the user’s basic information, such as name, email, phone numbers, and system roles. Additionally, you can assign the user’s company role on this page by checking the corresponding checkbox under the Employee Info section.