1. Dashboard: #
When you log in, you will see a customized dashboard that allows you to view and adjust the ACCUR8 TMS platform based on your needs.
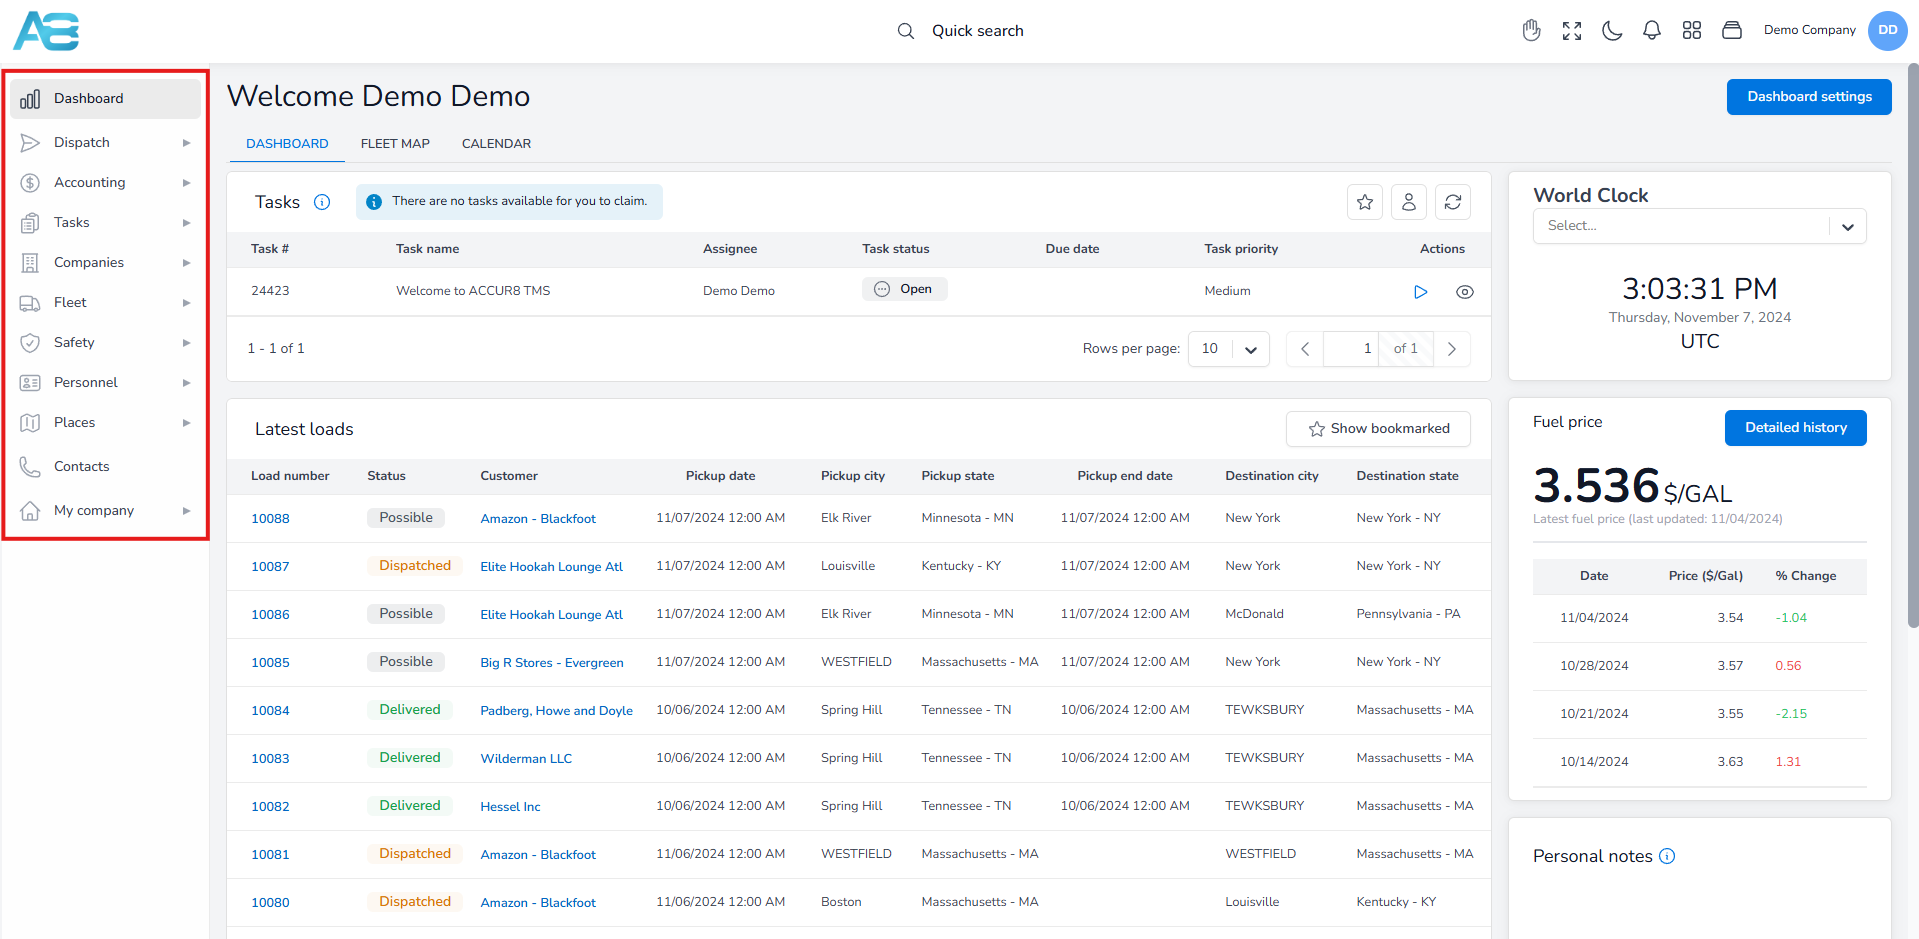
On the left of the dashboard, you will see a sidebar with all system sections broken down by departments. You can always collapse it if needed.
At the top of the screen, you will see a search bar. Clicking it will open a pop-up window where you can type the term you are searching for. When you begin typing in the search field, after 2-3 typed letters, the search engine will show you a list of sections that starts with, contains, or are equal to what you have typed, allowing you to find faster what you are looking for.
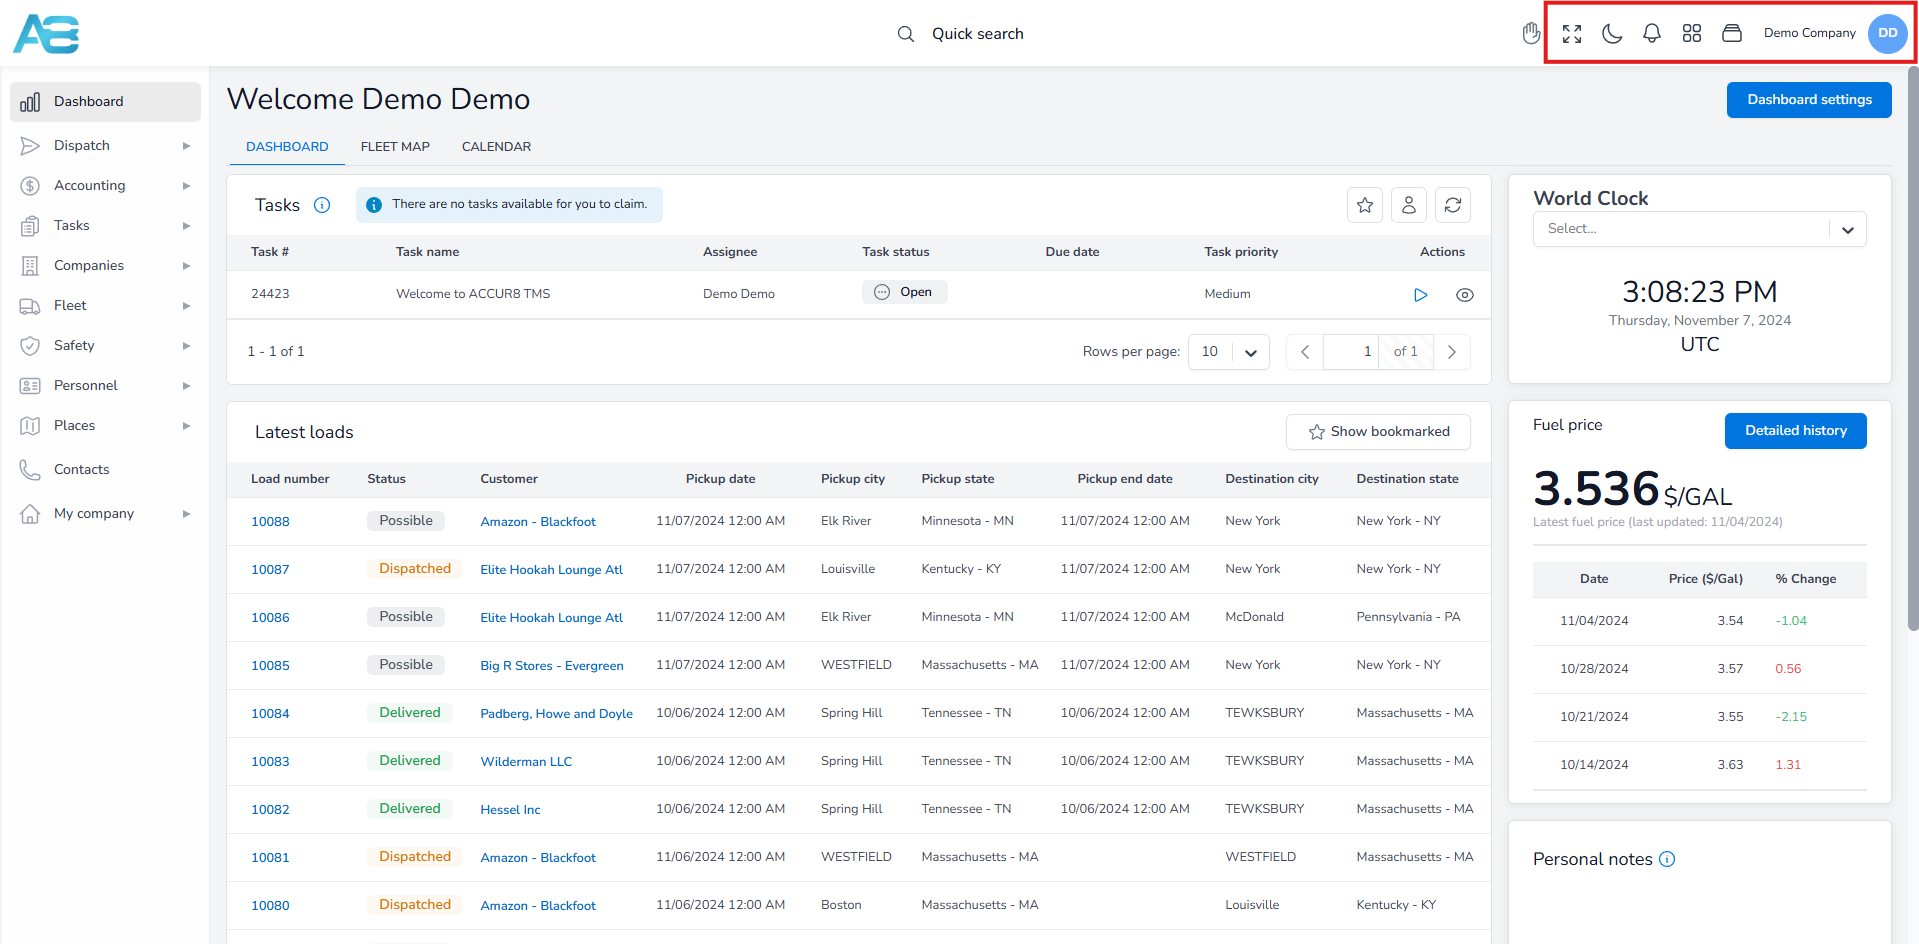
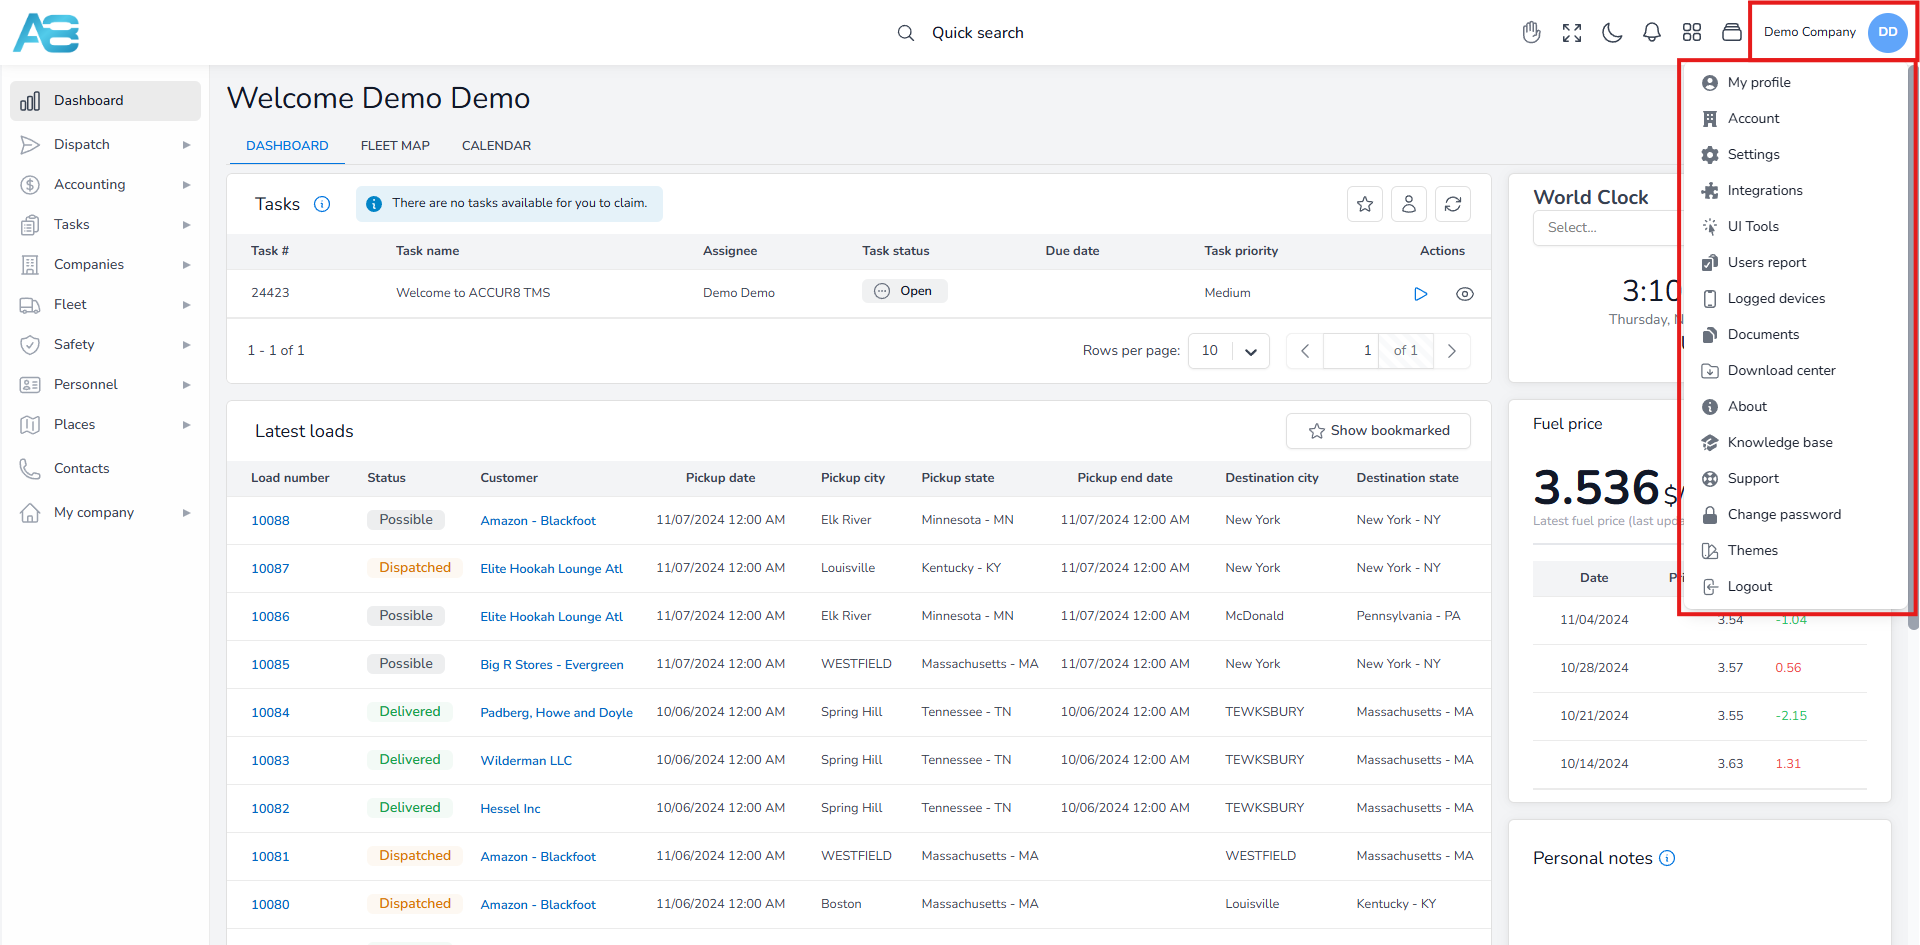
On the far upper-right corner, you will see a group of buttons that allows you to customize your dashboard. So, by clicking them one after another, you will see a full-screen button if you want to enlarge your screen, a light/dark mode button, a notification button that shows you a list of all notifications in the system, a quick access button that opens a drop-down window with shortcuts to different sections, then a button that allows you quick access to the ACCUR8 TMS available integrations and a user profile button with all users’ rights and permissions.
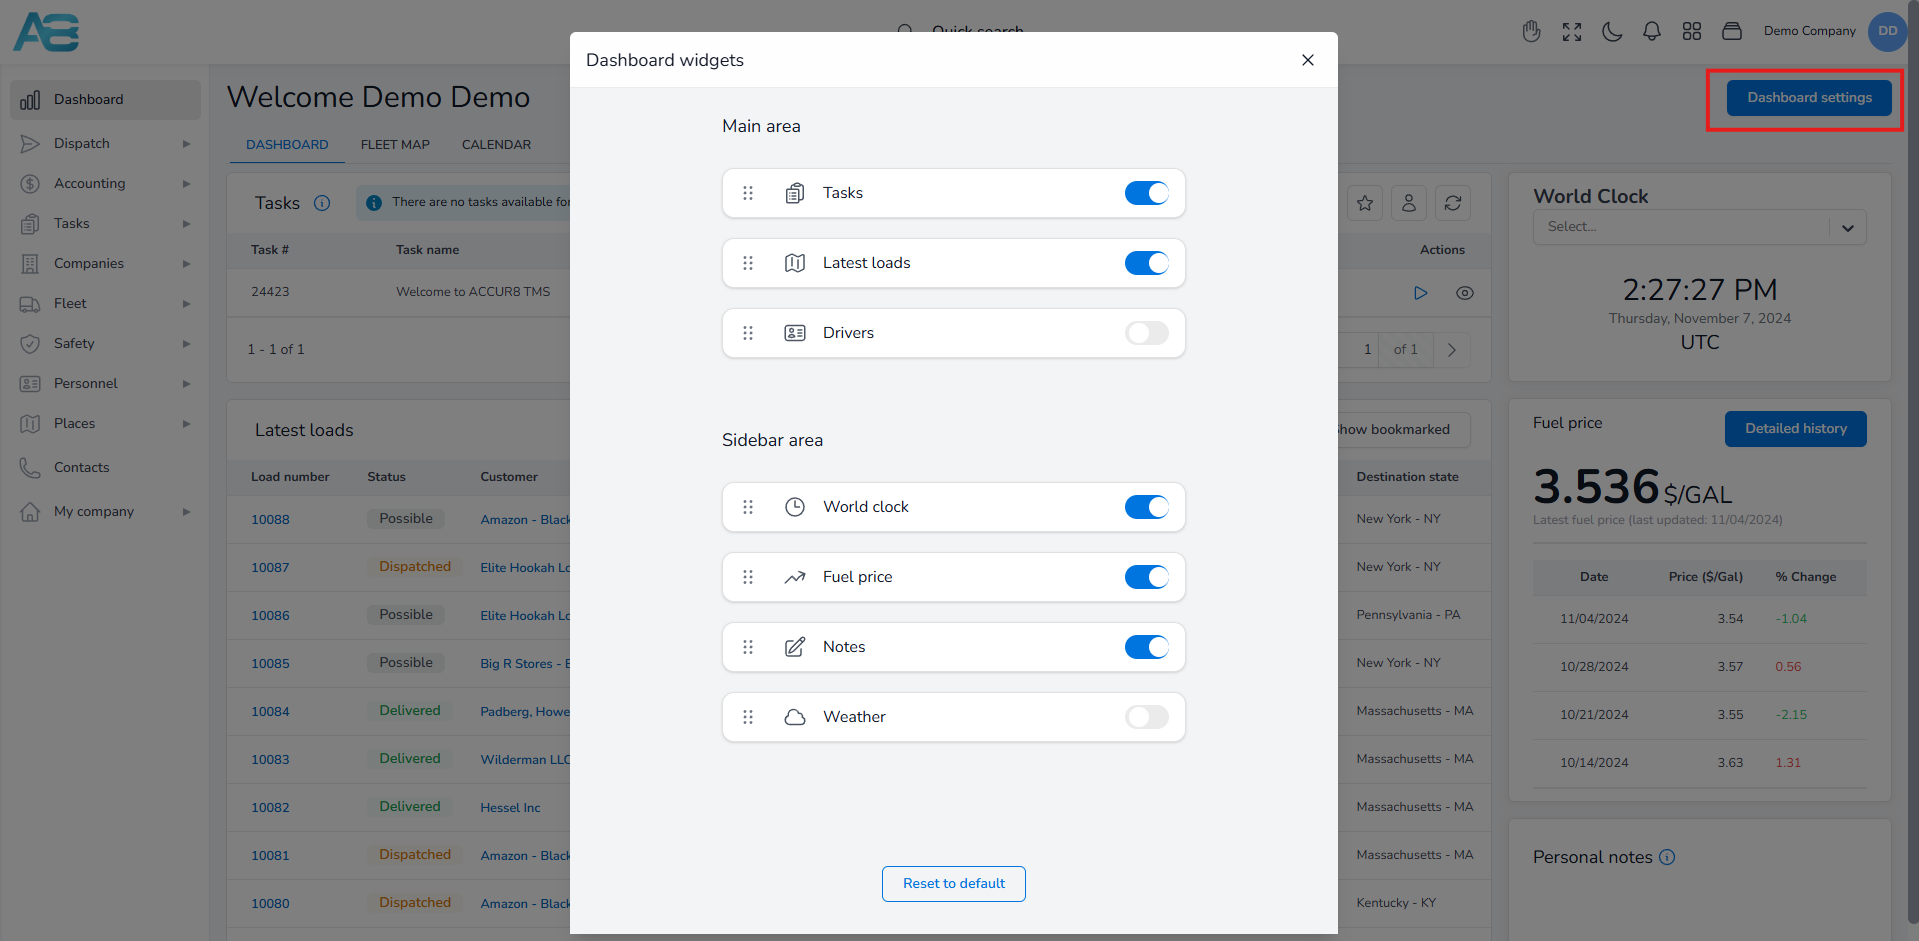
A Dashboard settings button helps you customize your dashboard according to your preferences. Clicking it will open a pop-up window where you can select the widgets you want to see on your dashboard. You can also organize their order or reset them to default. Once you have set up your dashboard, you can easily monitor the most important data.
2. User Profile Basics: #
Under the User profile button, you can set various features necessary for your work based on your specific users’ rights and permissions.
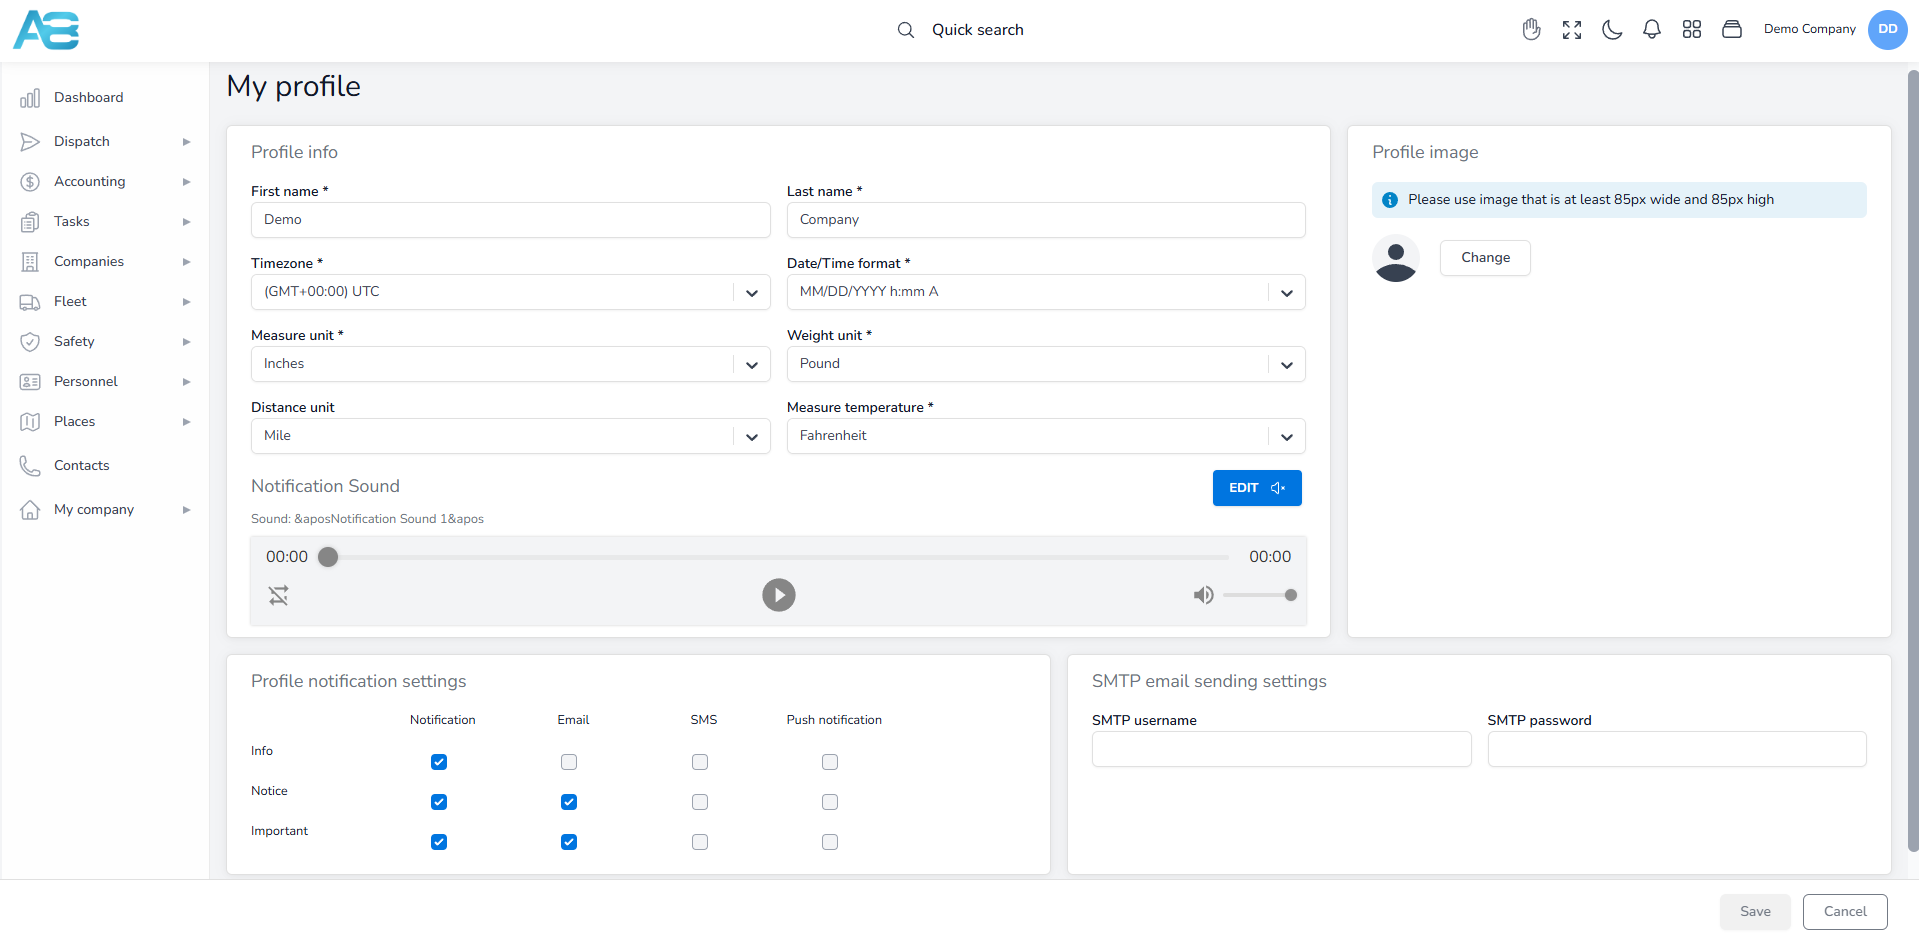
First, under My profile, which you can access through this link: https://tms.accur8.services/my-profile, you can set your profile by adding the required data regarding your profile info (first and last name, time zone, date and time format, measure, weight, and distance units, and measure temperature), profile picture, notification, and email settings.
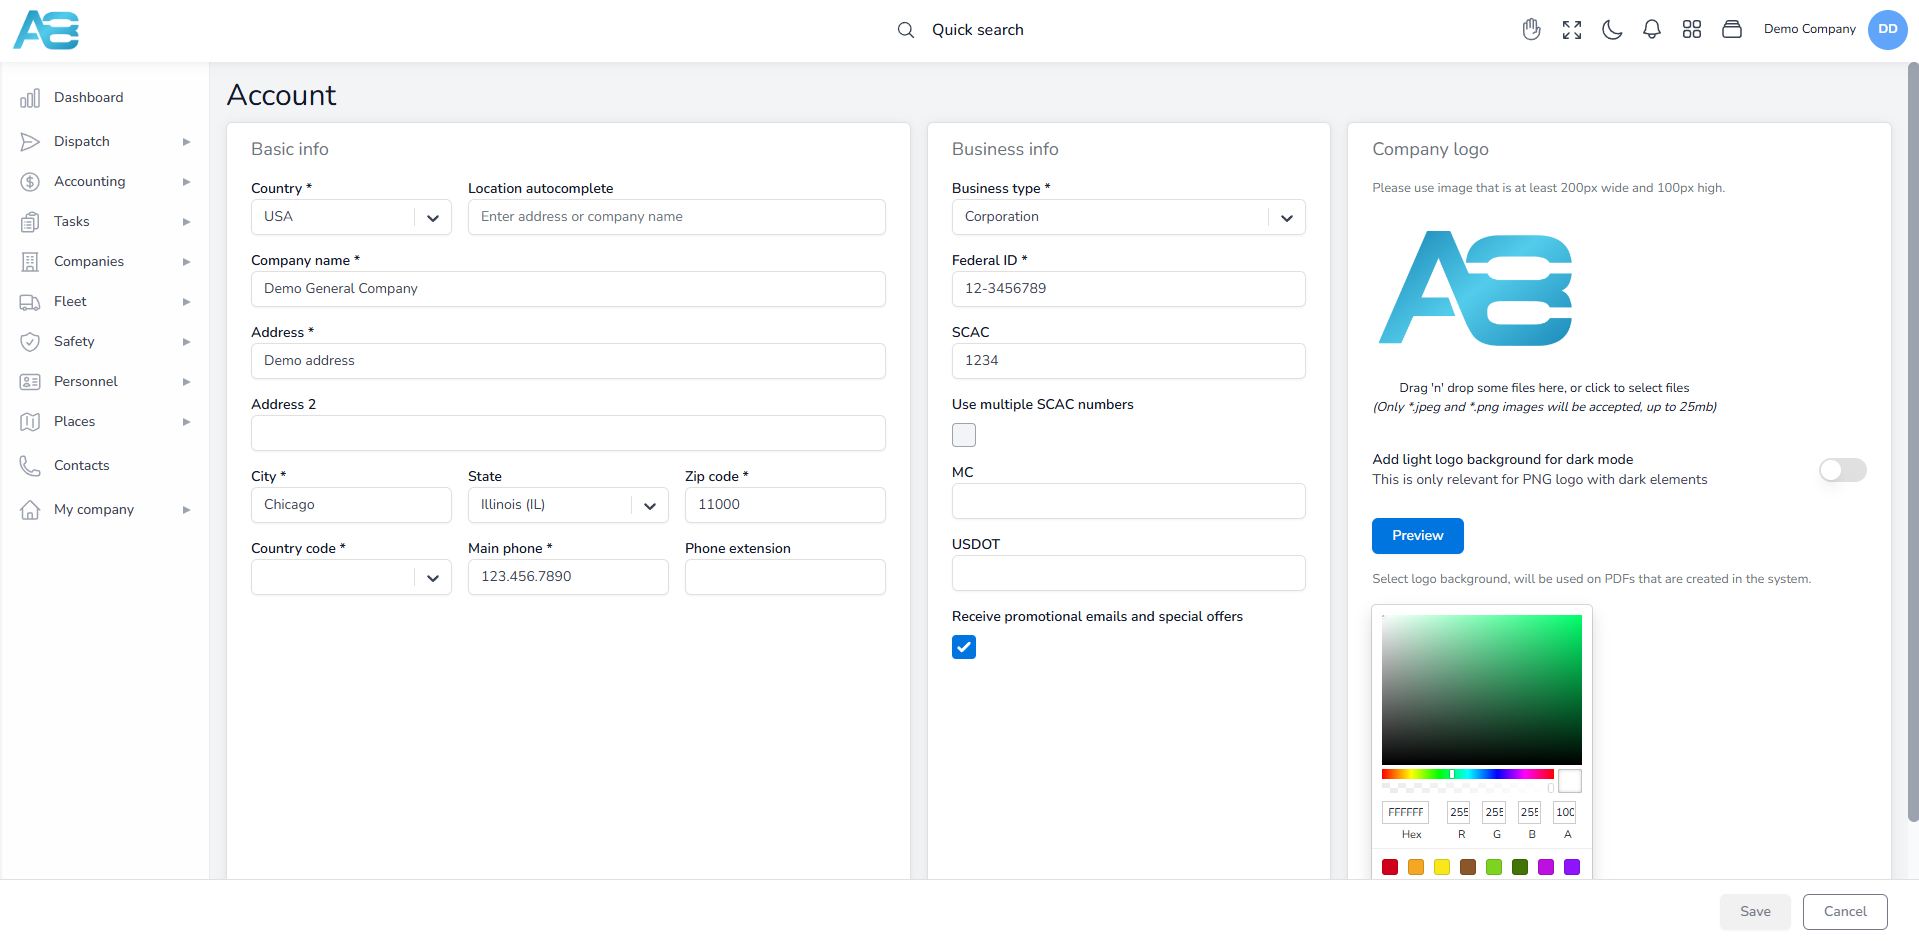
Under the Account section, accessible through the link https://tms.accur8.services/account, you will add all the information regarding your user account in sections like Basic Info and Business info and add your Company logo.
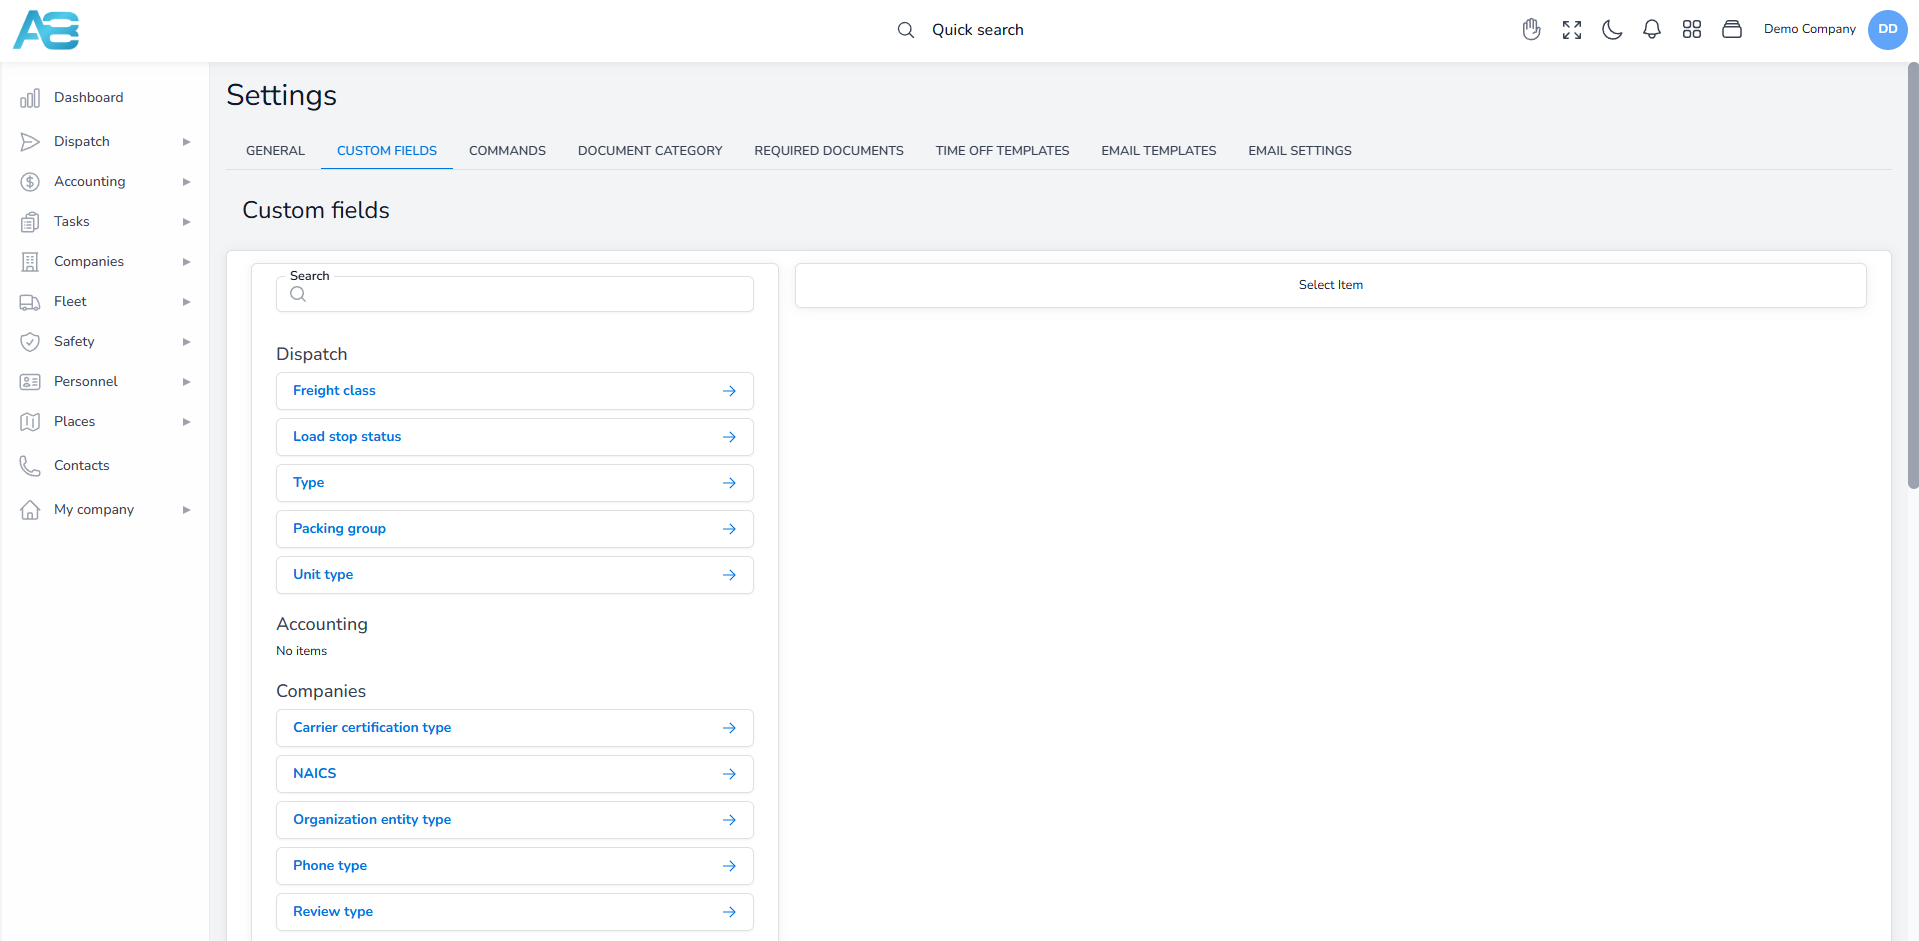
Under the Settings section, which you will access through this link: https://tms.accur8.services/settings, you can set up the ACCUR8 TMS platform based on your preferences and needs. Here, you can set custom fields for every single section of the platform. Then you can set keyboard shortcuts, add all required documents, as well as create new ones, see and create time off and email templates and set your default mail account.
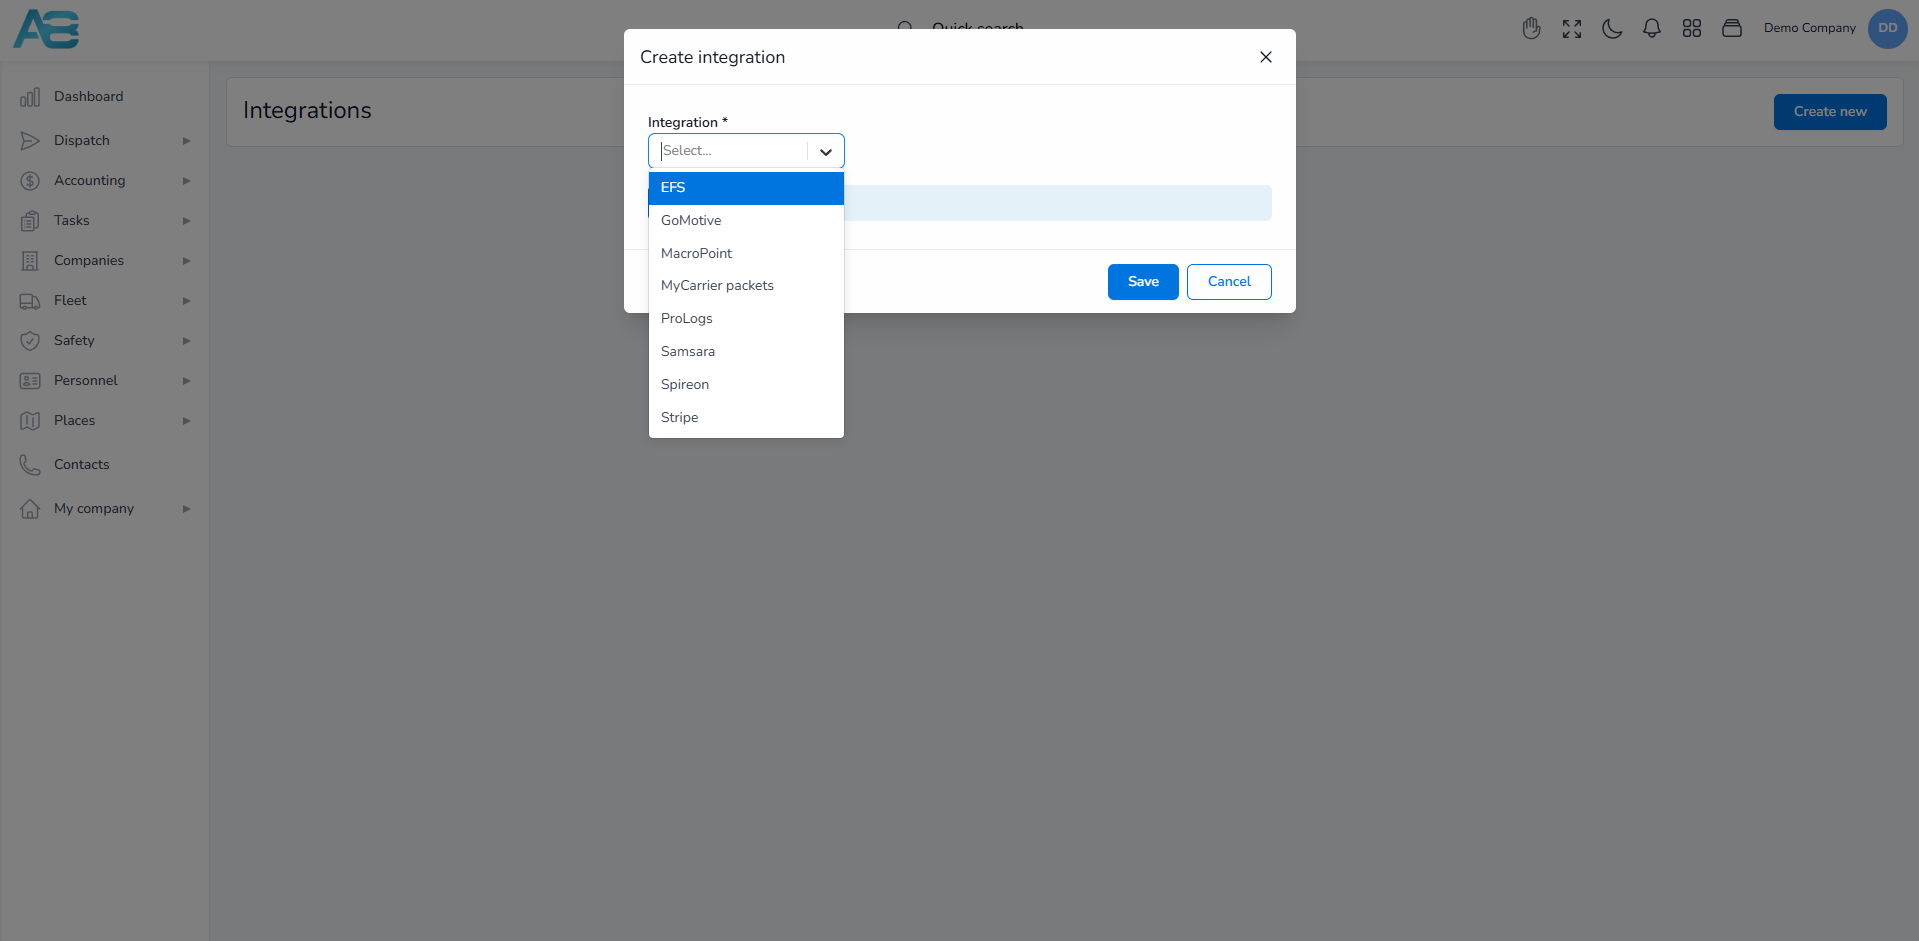
Under the Integrations, accessible through the link https://tms.accur8.services/integrations-center, you can see and add new Integrations, i.e., other software needed for your business.
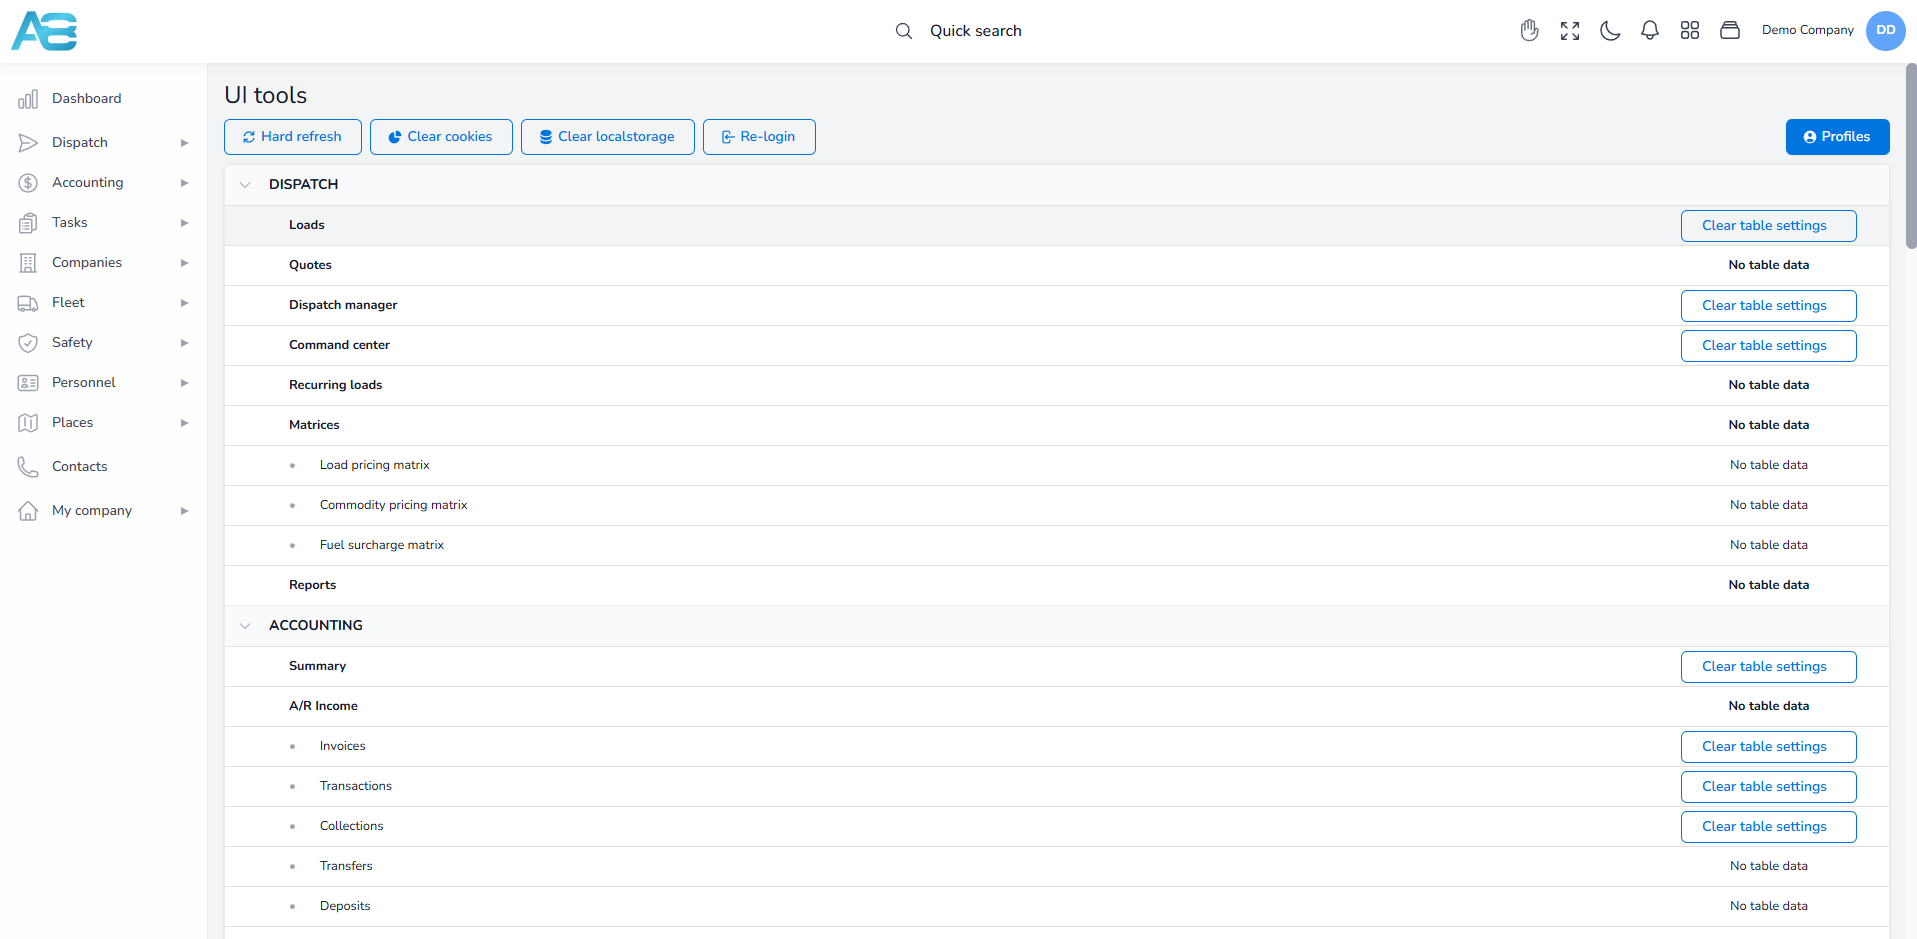
The UI tools section, which you can find at this link: https://tms.accur8.services/tools, allows you to clear preconfigured table settings for any section in the system. On this page, you will see the complete system’s sections list, and by clicking the Clear table settings button, you will reset each of them. Also, you will find here options for hard refresh, clear cookies and local storage, and re-login.
Under the Documents section, you can see a list of available documents and add new ones. Here, you can also search for any document as well as filter your list by selecting the document category and document file type.

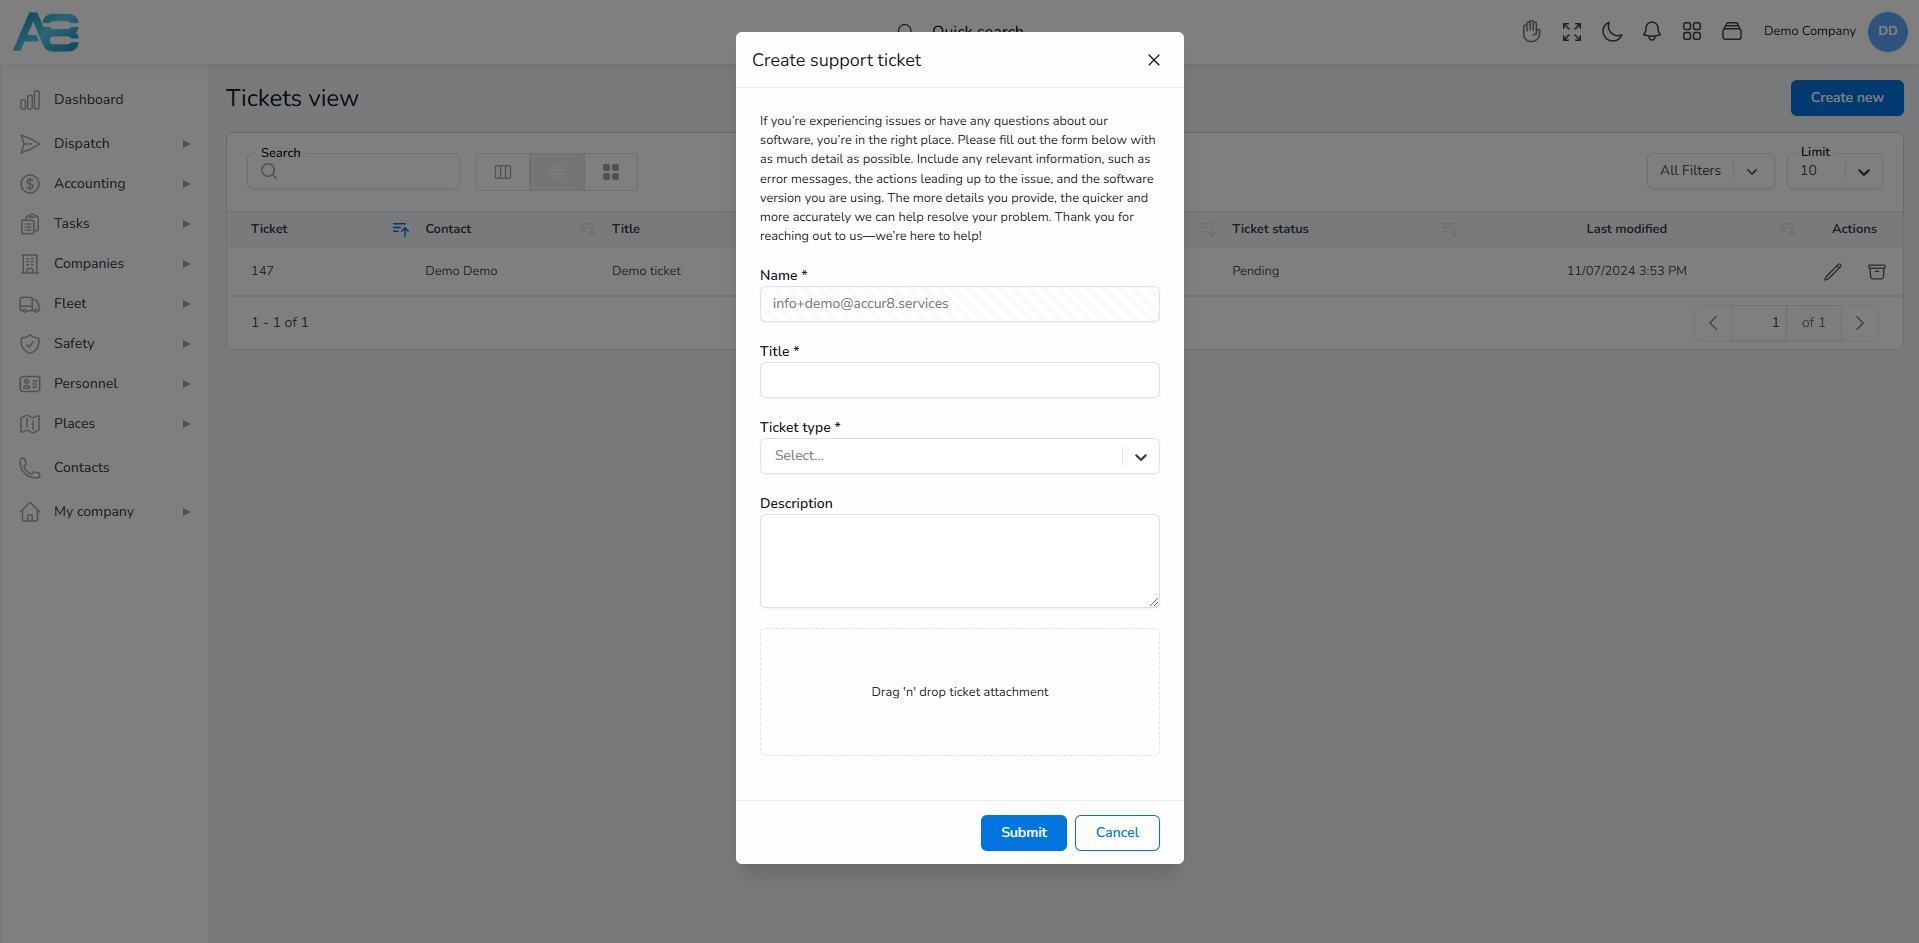
Under the Support section, you can see all the tickets sent, but you can also create a support ticket if you have any issues with the software. Clicking the CREATE NEW button will open a pop-up window where you can fill in the ticket form.
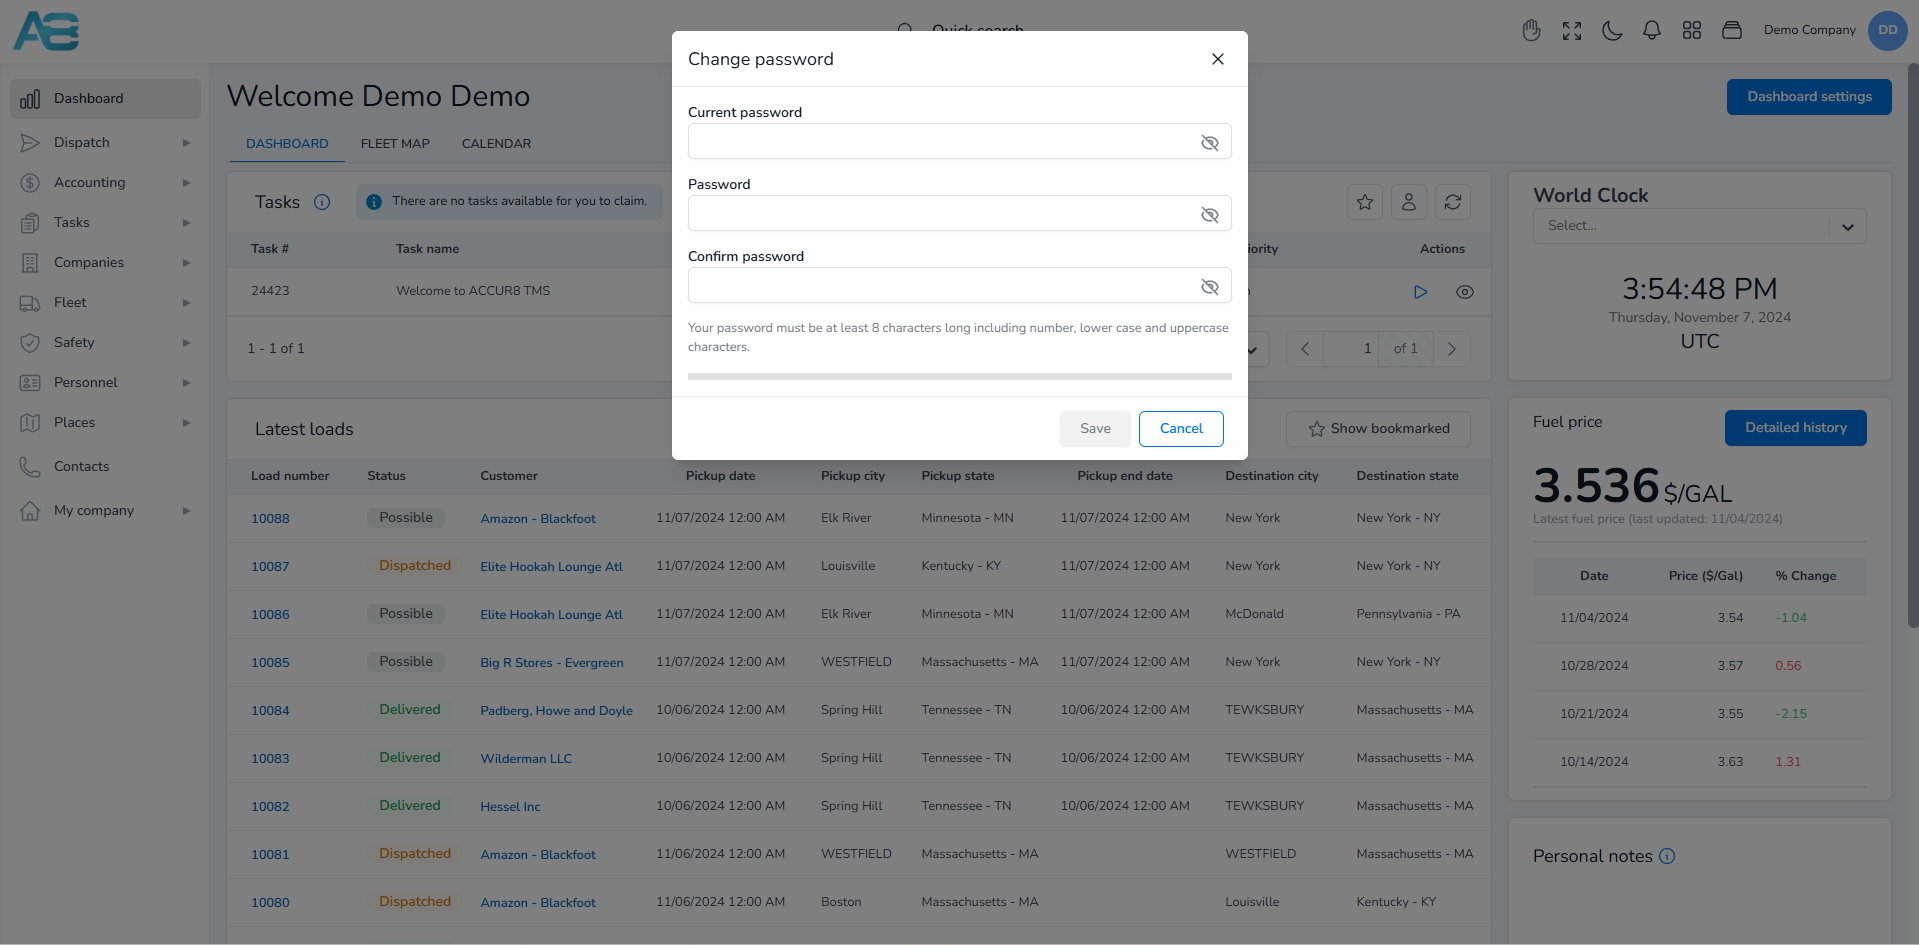
Clicking the Change password section will open a pop-up window. In it, you can see the current password and change it if needed.
Under the Themes section, you can change the background of your page by selecting a light or dark mode. You can also change the color of your buttons and titles by choosing a different color.

3. Search Options and Column Settings Basics: #
In the Search bar, you can search the system by more criteria such as load number, customer, driver, truck, etc. You can filter your search by selecting the All-filters button at the top right corner of the screen. Clicking this field will open a drop-down window where you can filter lists by selecting various options depending on the system section.
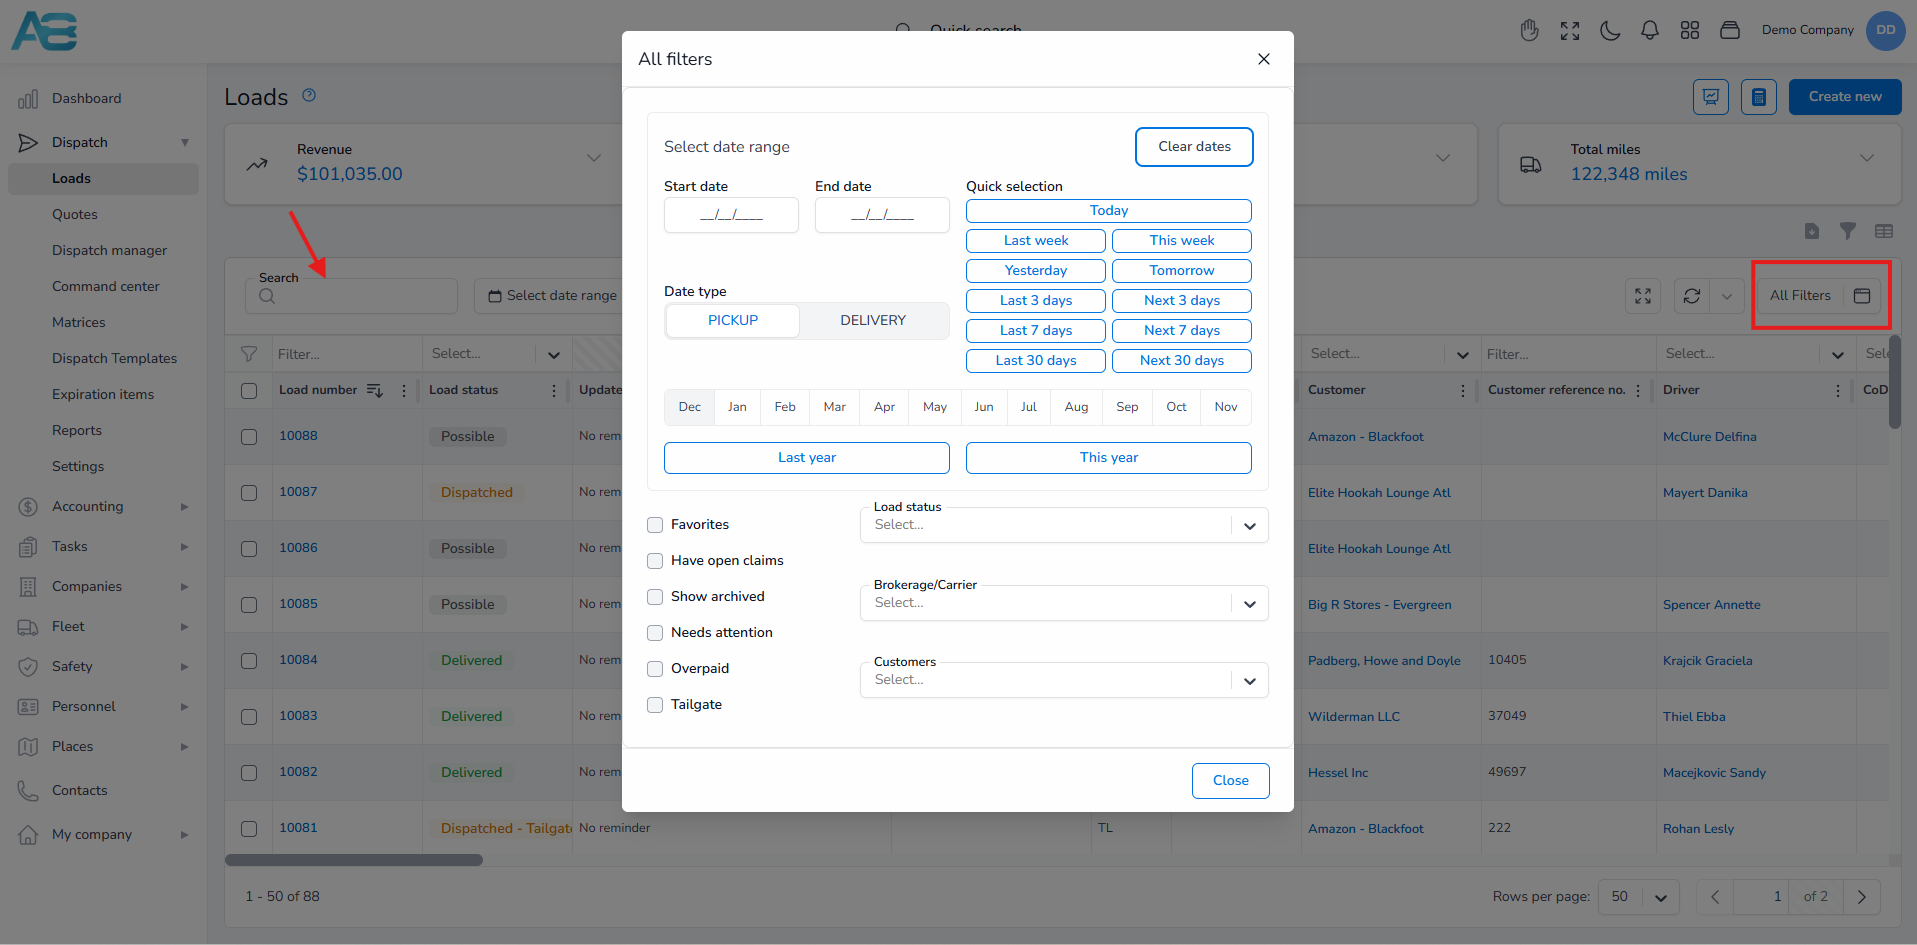
As we said, the search engine can differ depending on the TMS sections, but the column filters button is available only for the Loads section and offers very detailed load list filtering.
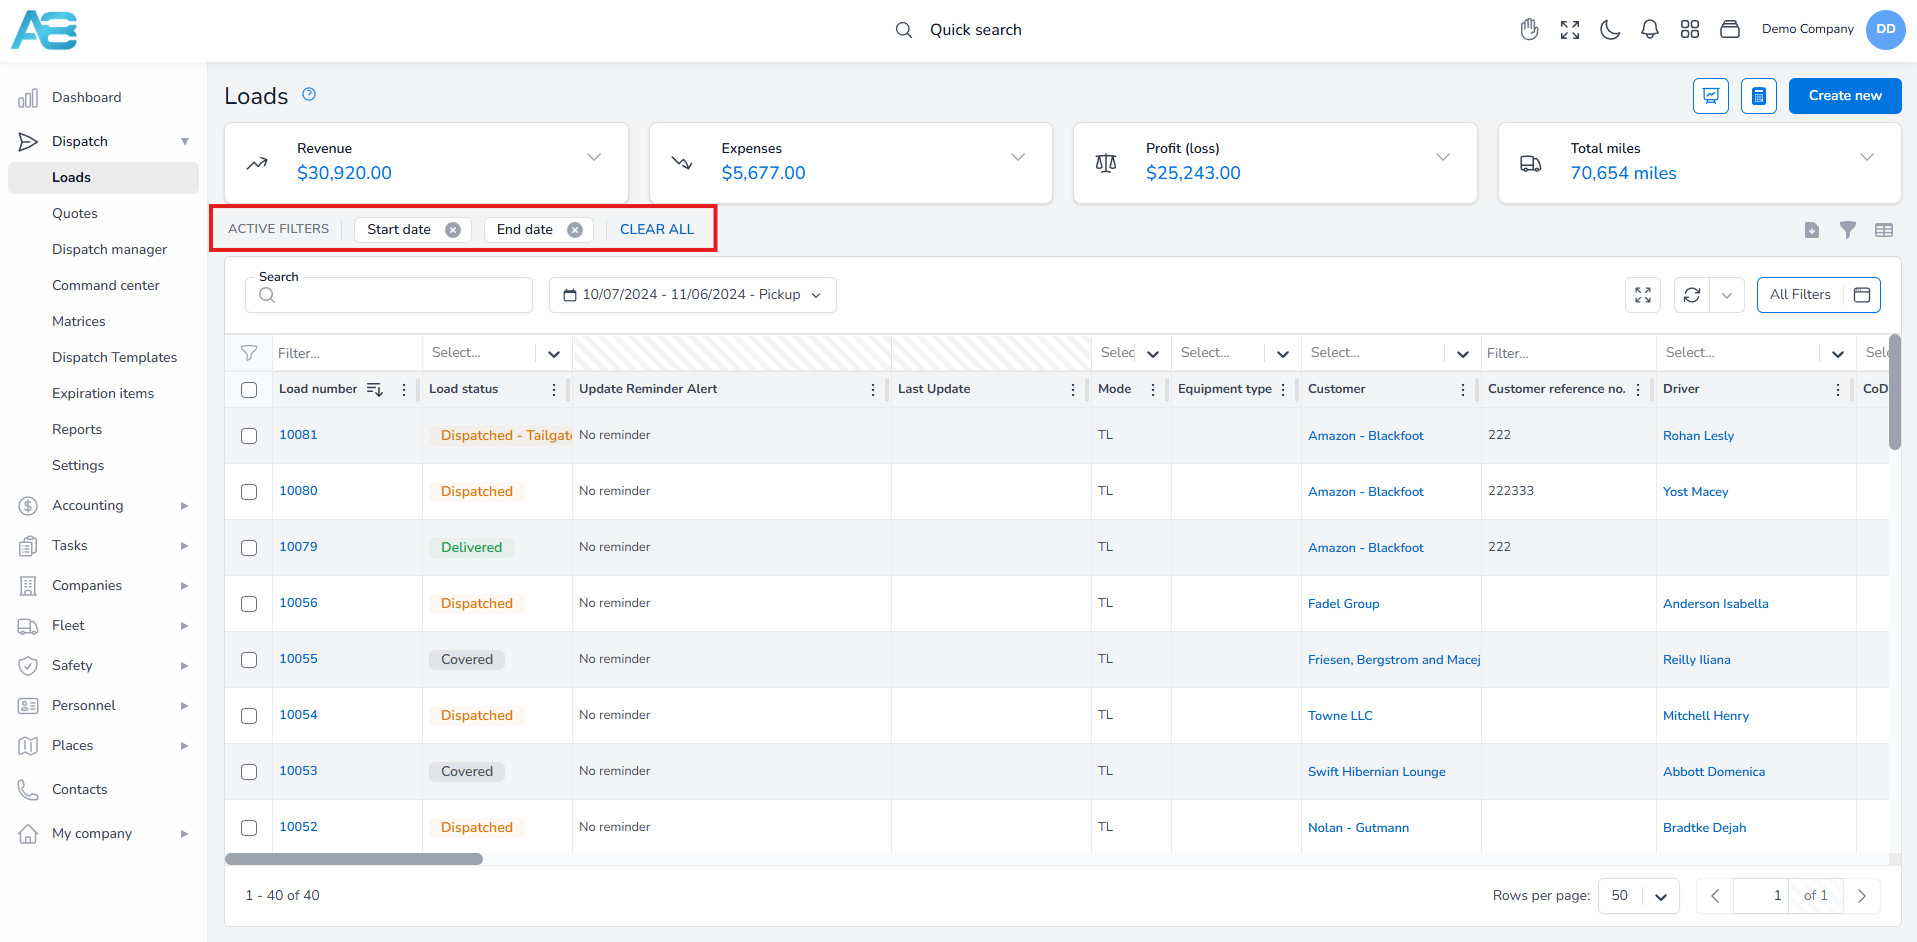
No matter what type of search you use, when you’ve filtered it, the title ACTIVE FILTERS will appear above the search bar, and you will see a list of loads filtered by your criteria. You can cancel these filters one by one by clicking the small X button next to each, or you can click the CLEAR ALL button to reset all filters.
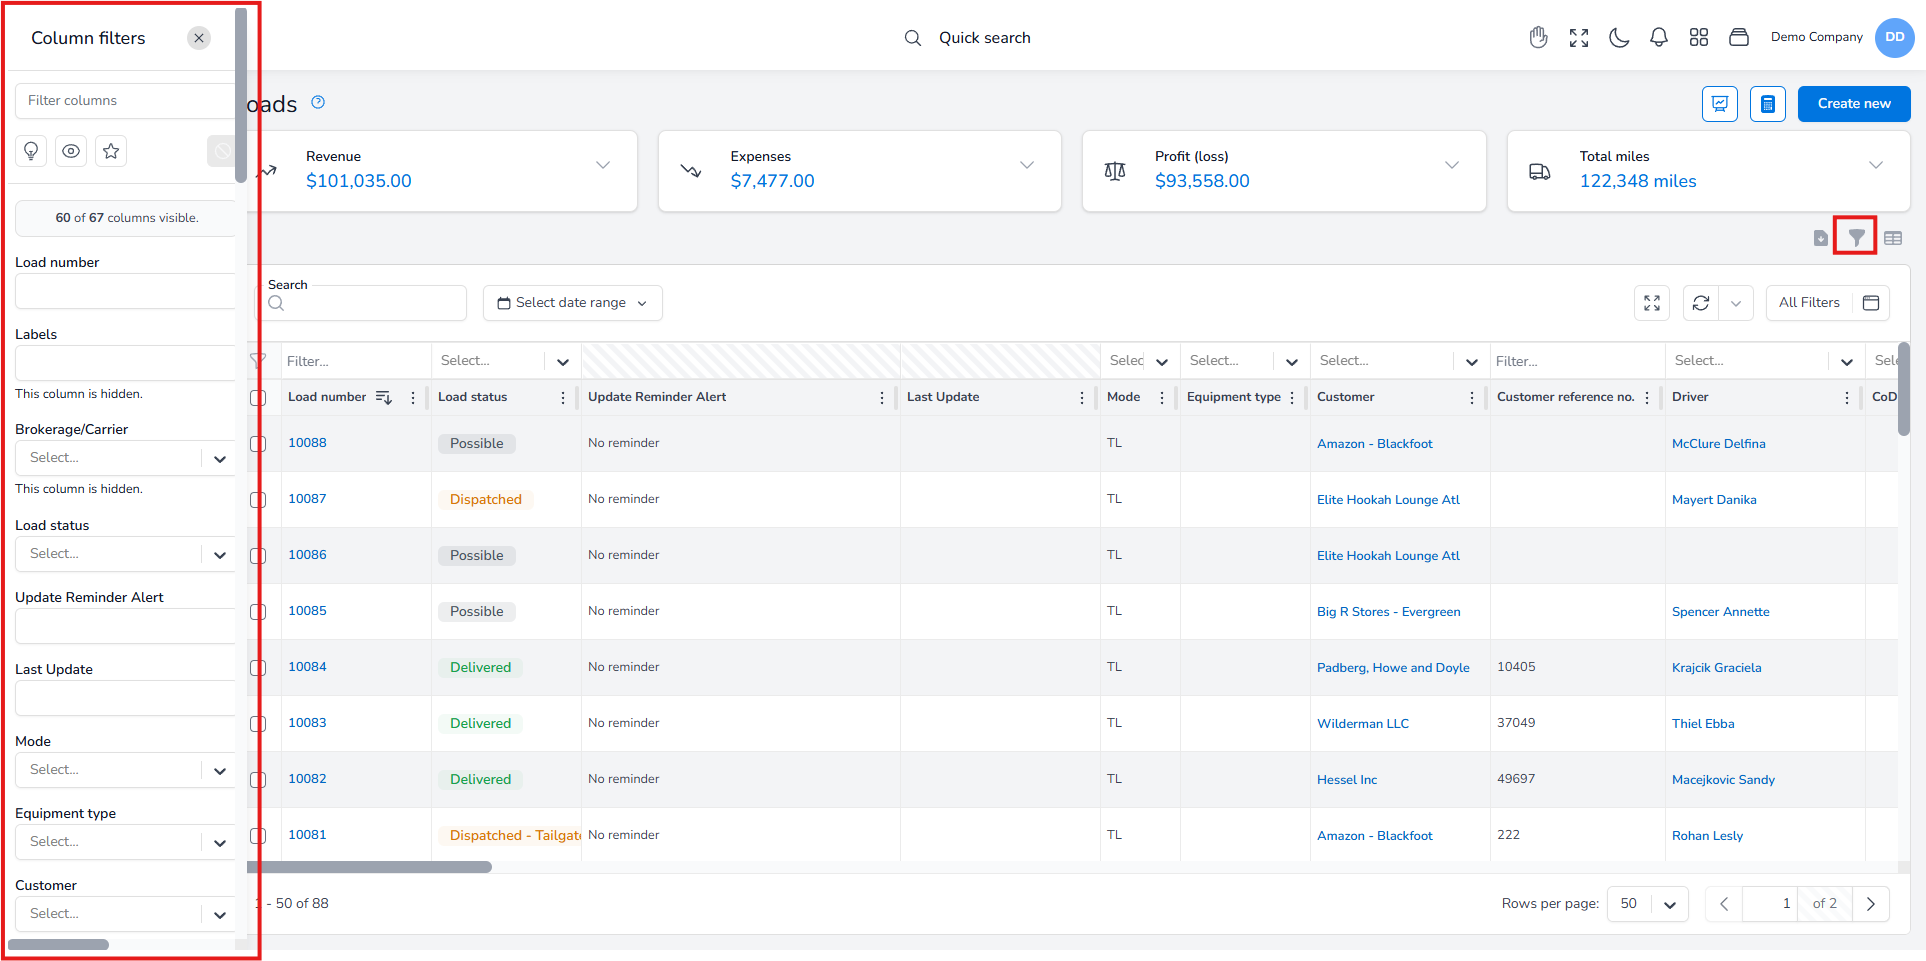
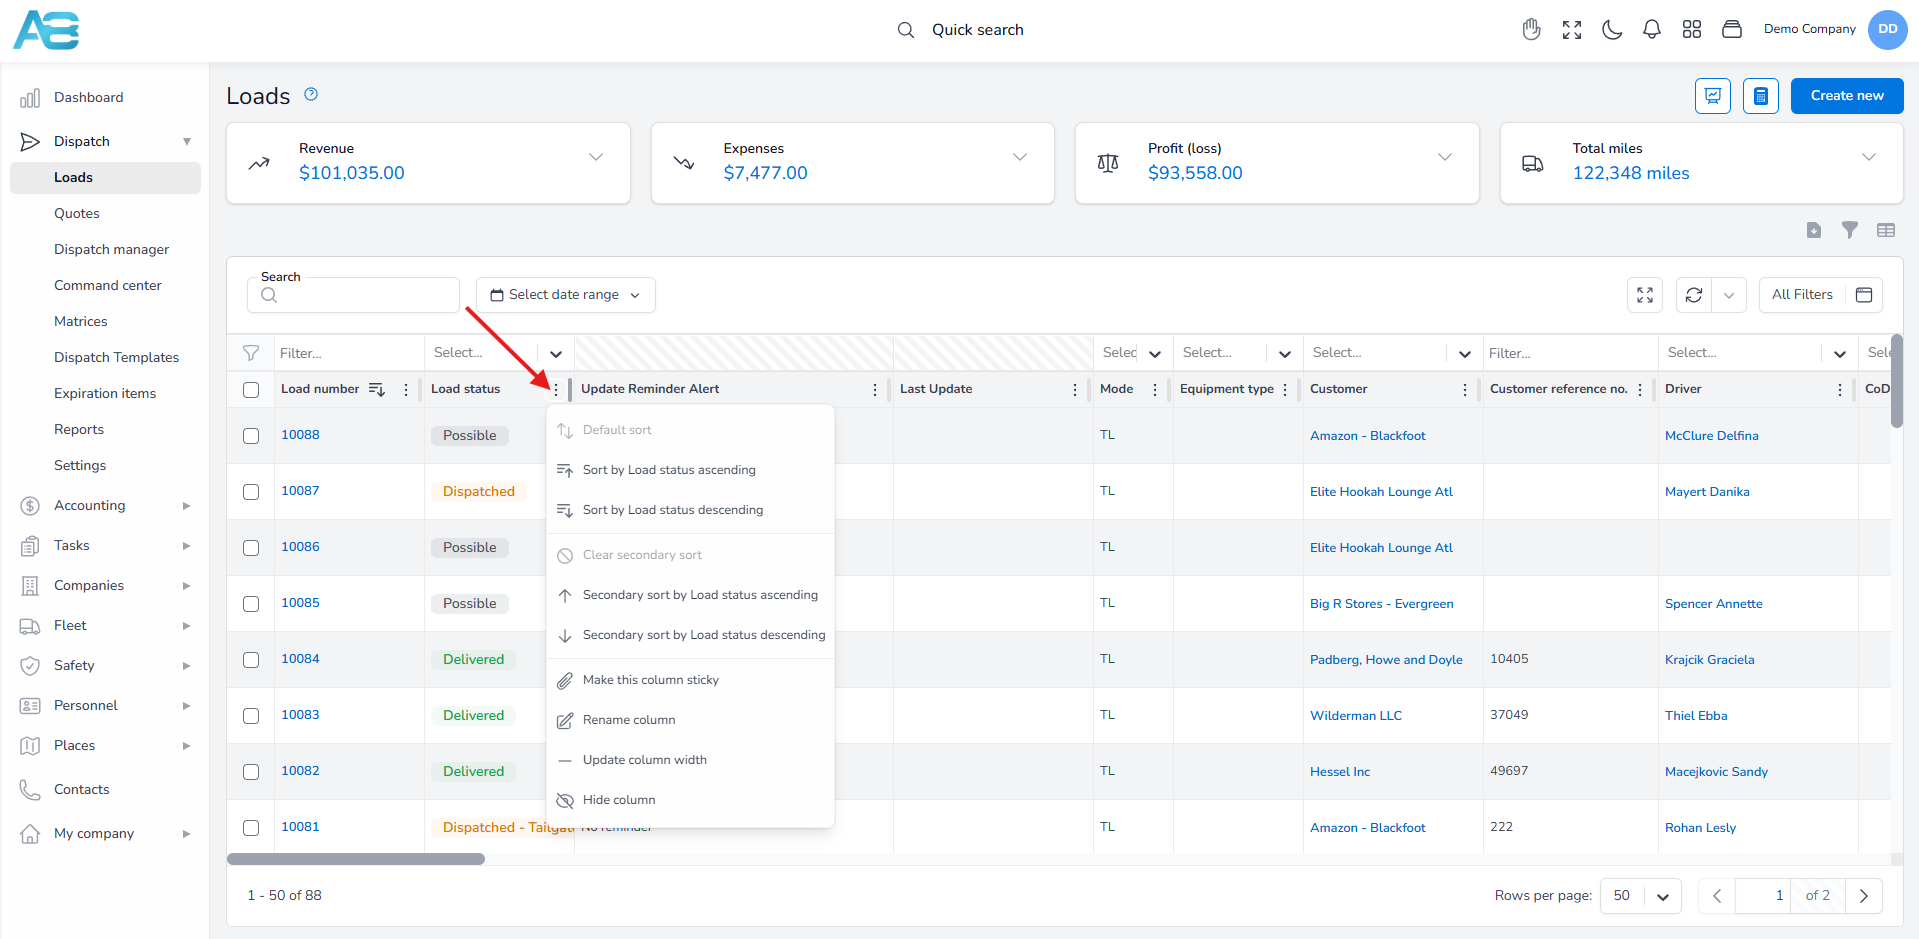
In every list, you can narrow and widen every column, hide it, rename it, or sort it by clicking the three dots next to each column title. This will open a drop-down dialog where you will see all possible options.
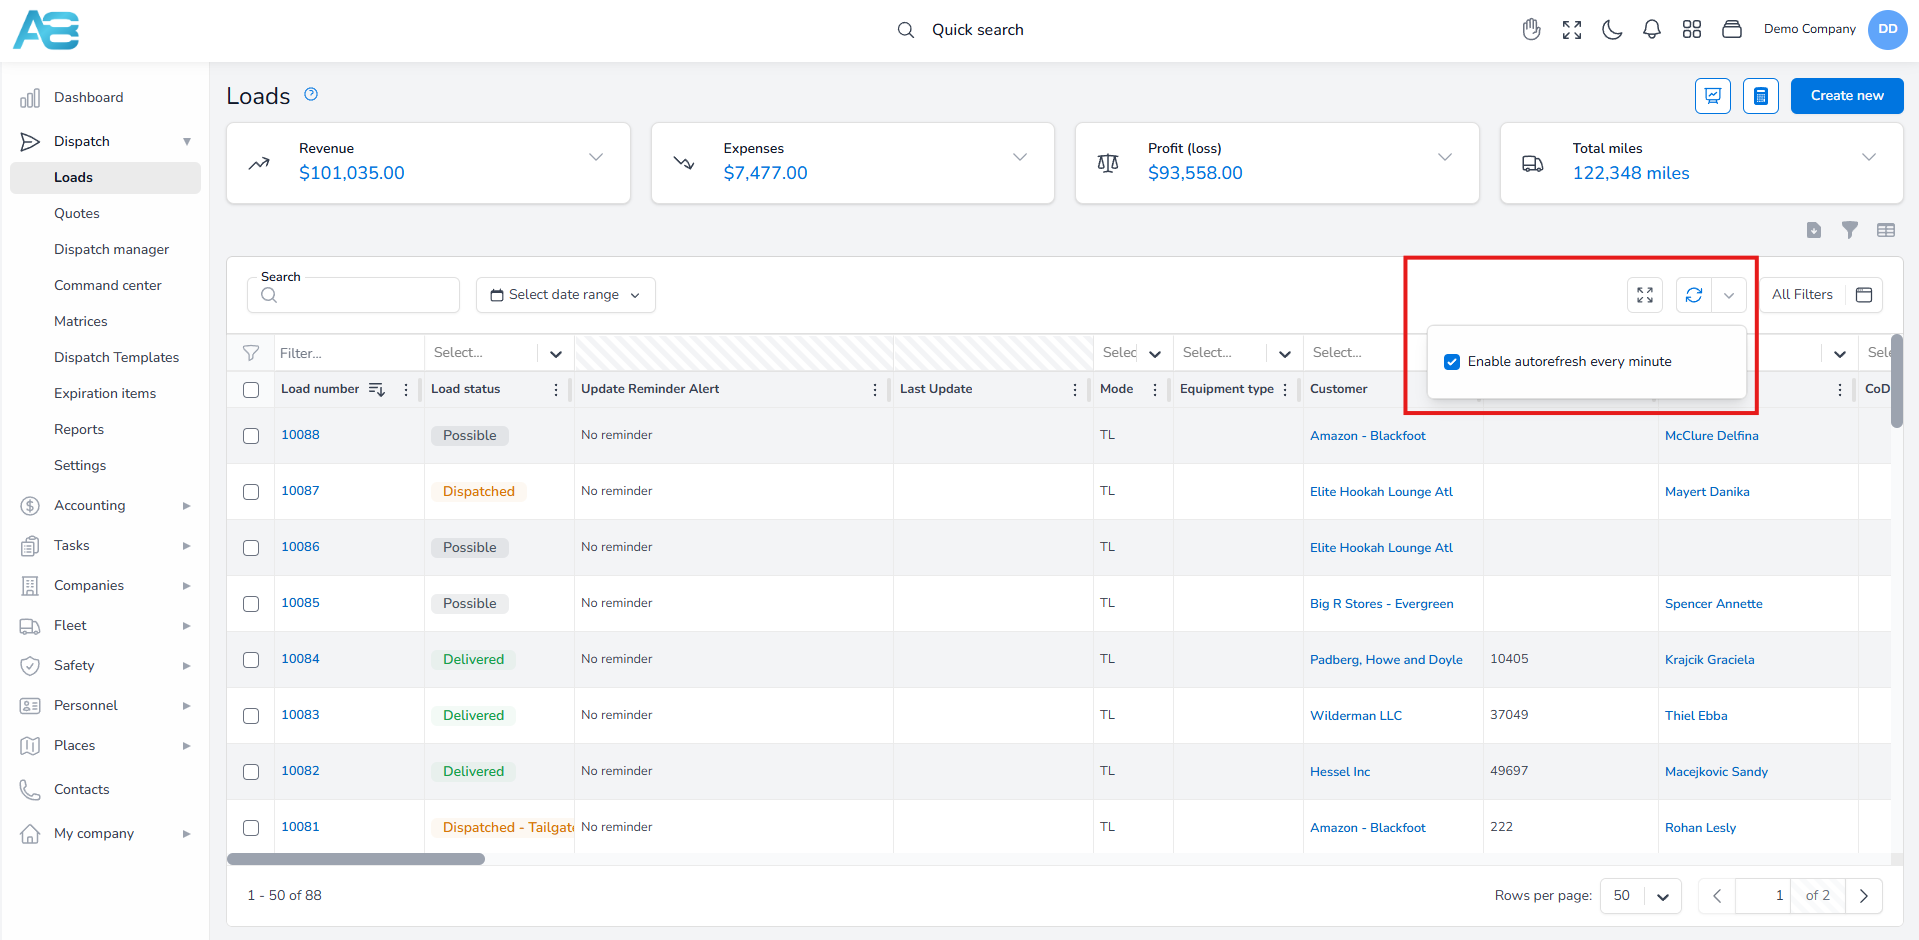
Above every list at the right corner, you will see a full-screen button to enlarge your screen and a reload button to refresh your page. You can enable the autorefresh every minute option by clicking the arrow next to the refresh button.
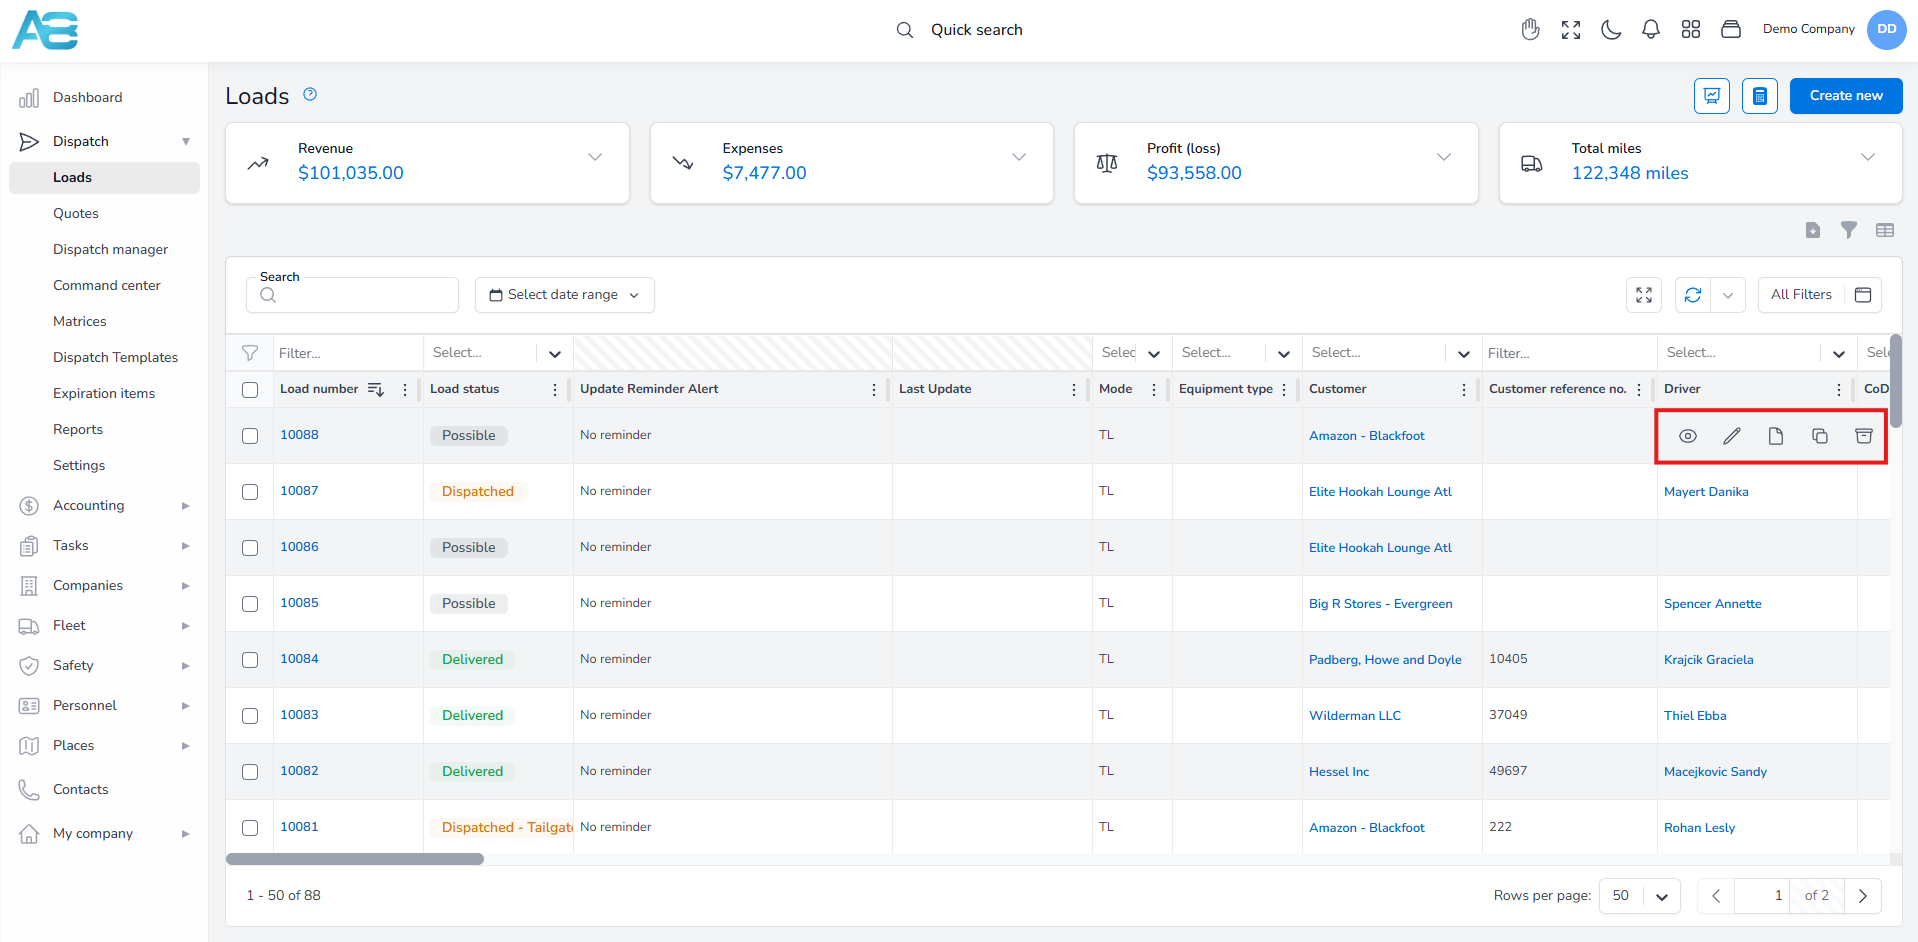
If you hover over any item on the list, you will see a few quick access buttons that help you access some options more easily. These buttons are usually for viewing, editing, uploading documents, etc., which again depends on the system section.
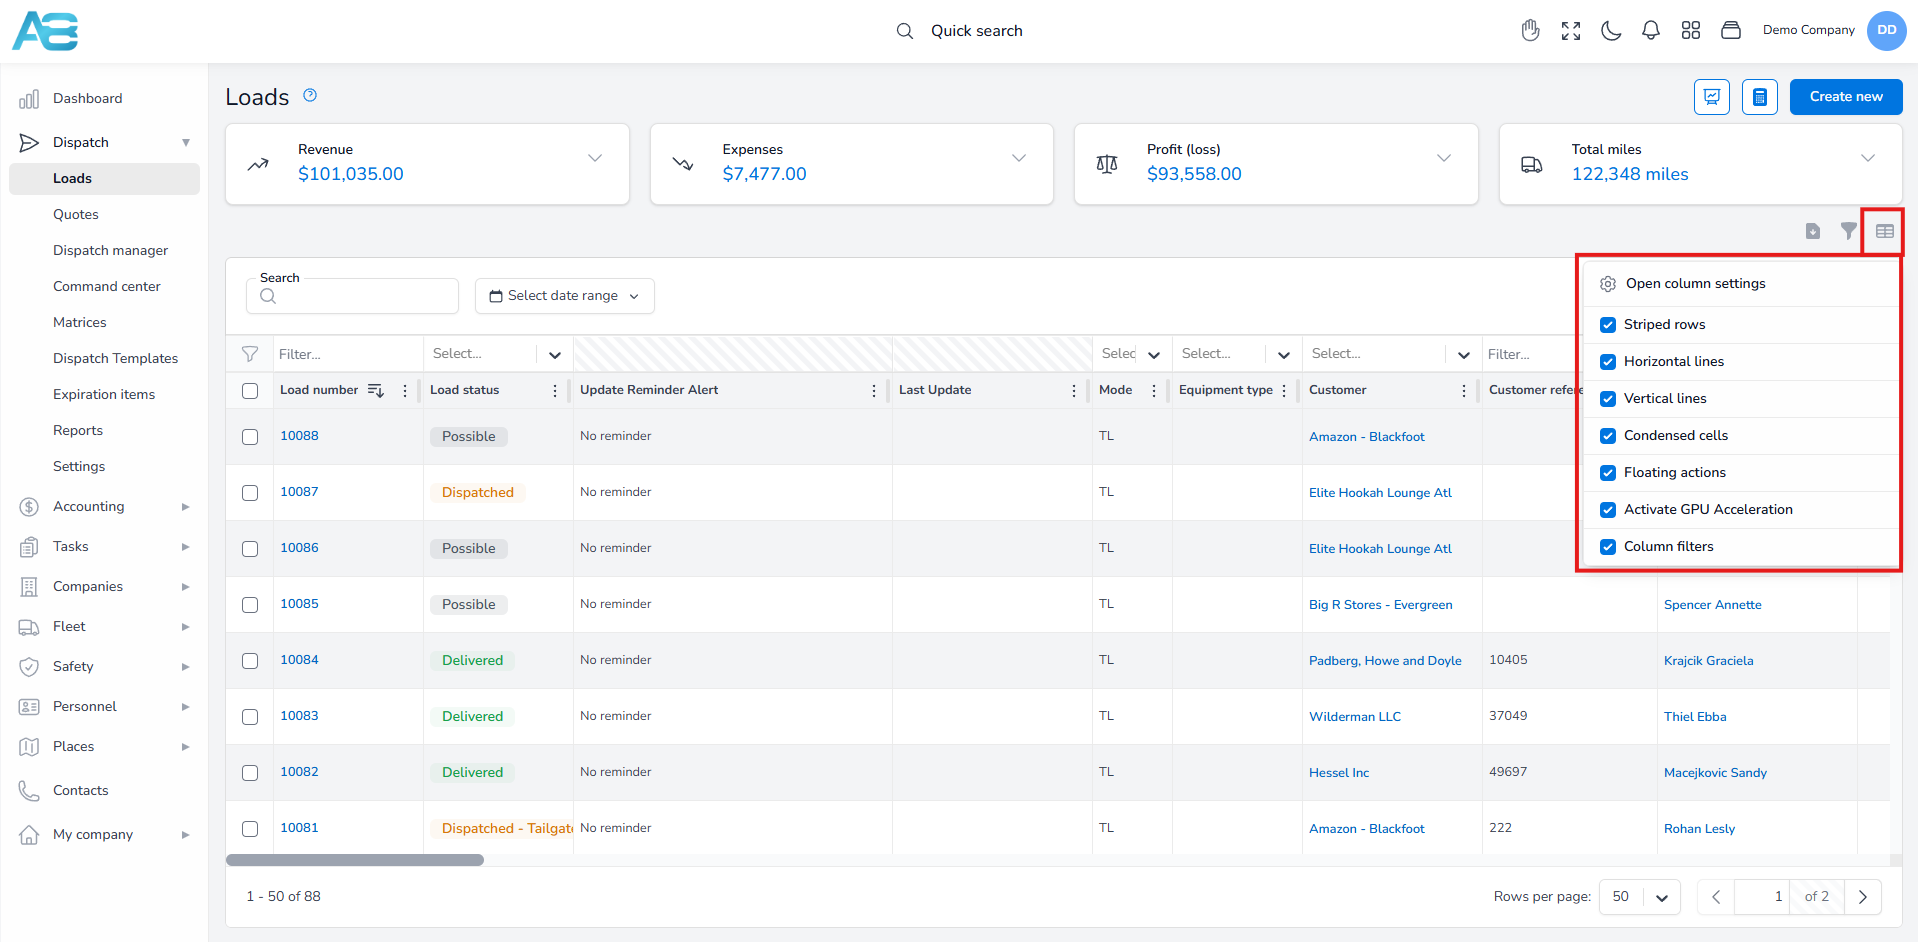
You can use the Table column settings button to arrange any list in the system according to your needs and preferences. Clicking this button, opens a drop-down list where you will first see the open column settings button, and below other options to customize the appearance of your lists (you can add vertical and horizontal lines, stripped rows, column filters, etc.).
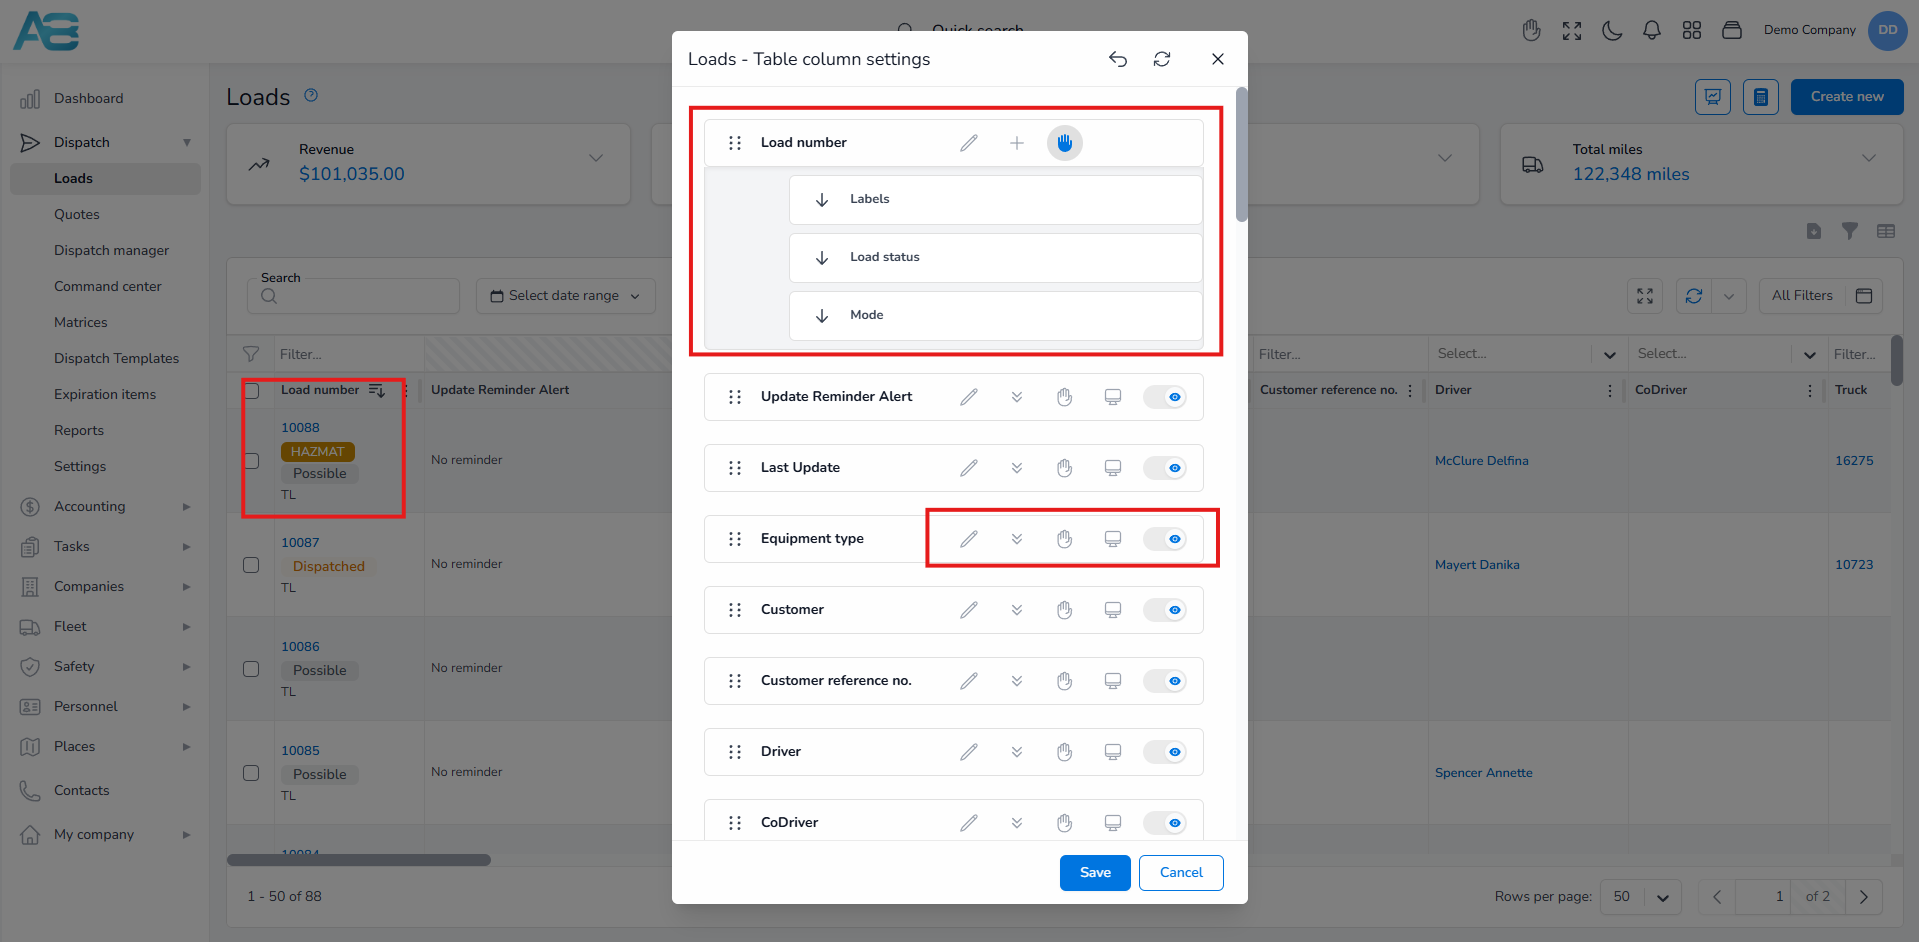
Clicking the Open column settings button will open a pop-up window where you can rearrange the order of columns, rename them, group more columns in one, select the freeze option, select the device optimization type, or hide columns.
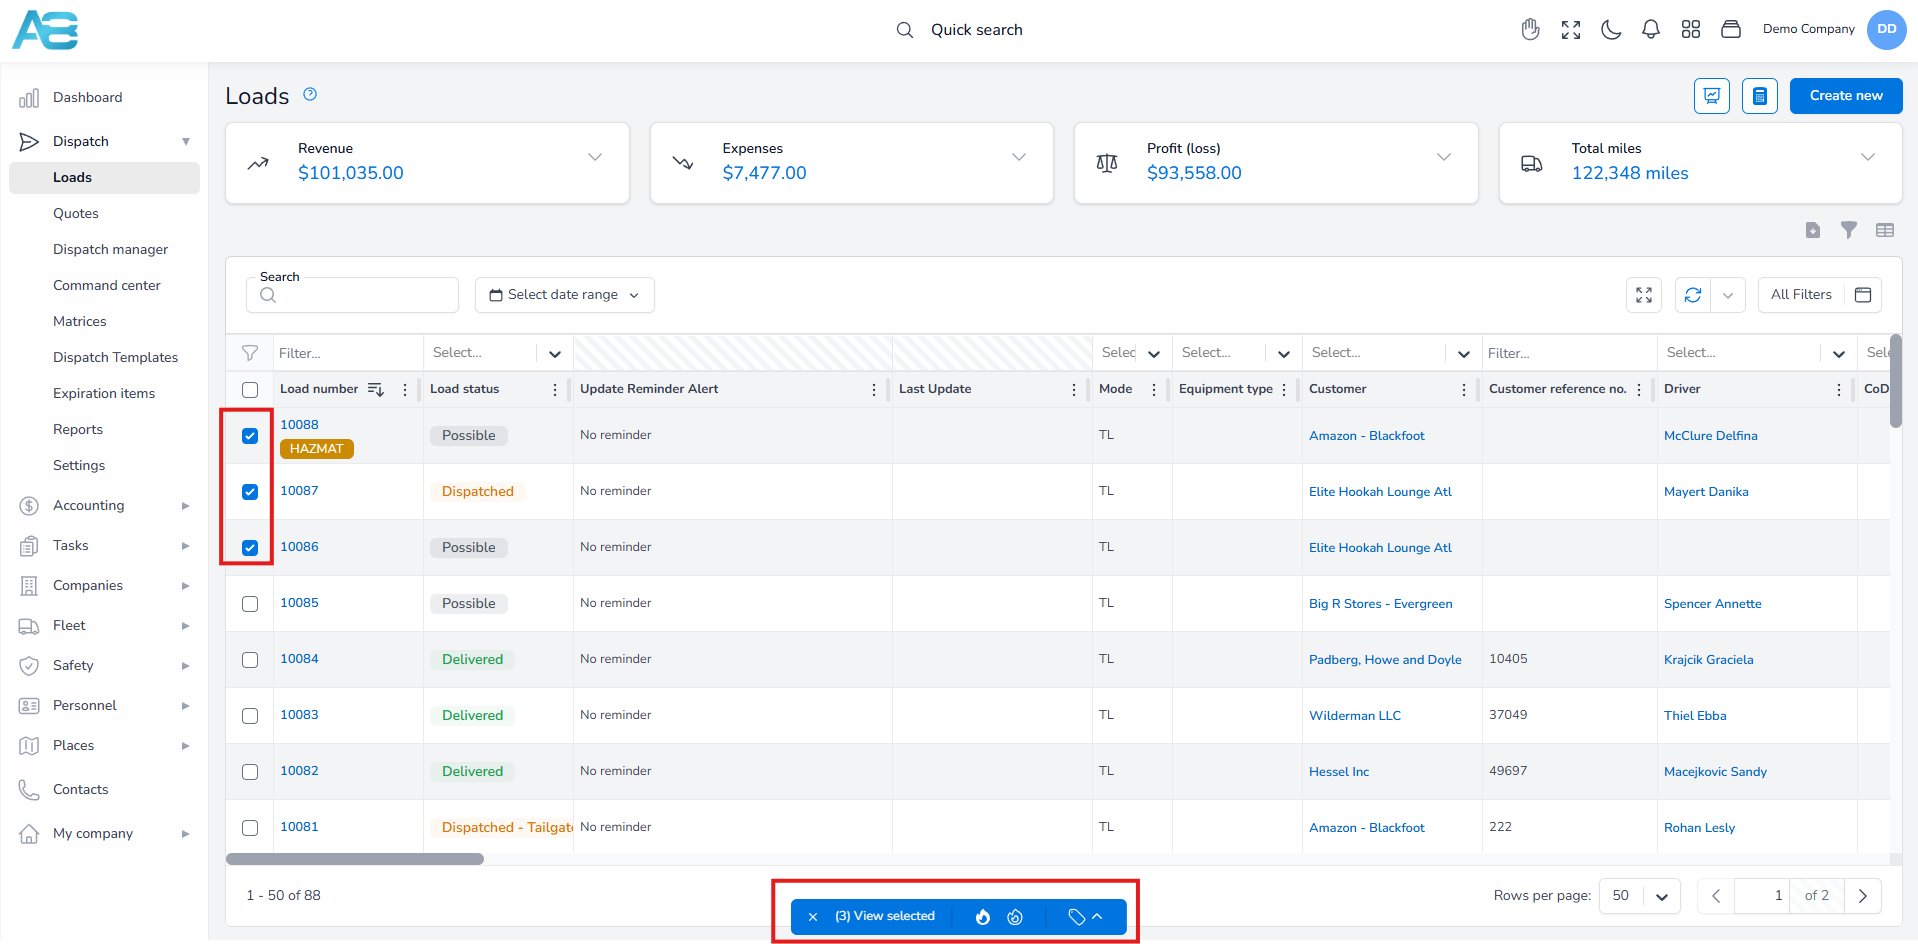
Using the multiple actions option, you can select more rows on a list, and a blue tab will appear at the bottom of the page that helps you quickly manage items on the list. This blue tab will contain different options depending on which page you are on.