Load pricing operations for Carriers #
To manage pricing details for a created load, navigate to the Pricing tab. This section is divided into the Income section (on the left, highlighted in green) and the Expense section (on the right, highlighted in red). An overview of total income, expenses, profit, and mileage is displayed at the top of the page.
How to enter a price for your load? #
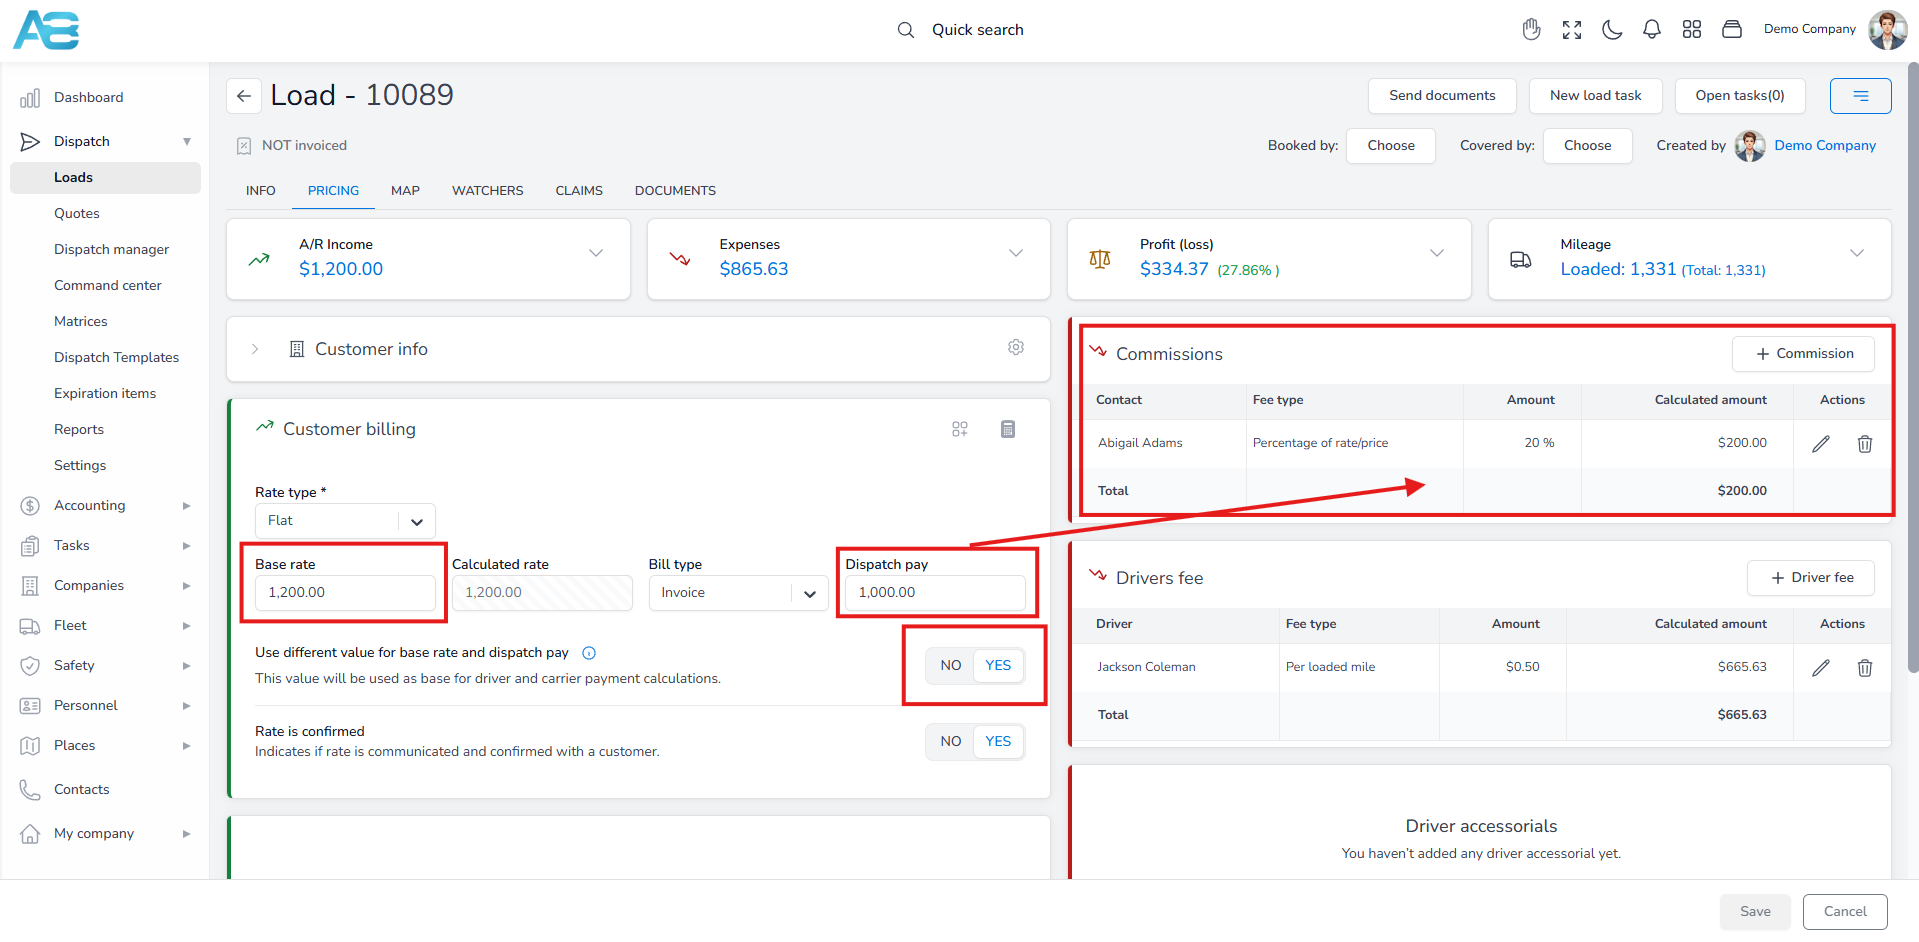
Under the Customer Billing section, you can configure key pricing fields.
The Rate Type field allows you to select the rate basis (e.g., flat, per mile, per piece, per volume, or per weight), which will be used for the payment calculations.
The Base Rate reflects what the customer will see on the Dispatch confirmation and represents the charge before any additional fees.
The Dispatch pay serves as the basis for calculating expenses based on the driver and carrier payment percentages.
By default, the base rate is set to equal the dispatch pay, meaning the entered base rate will be used to calculate expenses. However, if you select the Use different value for base rate and dispatch pay option, the dispatch pay field will be enabled, allowing you to input a different calculation base.
The base rate will depend on the rate type you choose, whether it’s flat, per mile, per piece, per volume, or per weight.
The “Rate is Confirmed” option indicates that the rate has been confirmed with the customer. Once confirmed, it will be displayed in the Customer Billing section and included in the load details.
How to add Accessorial Charges? #
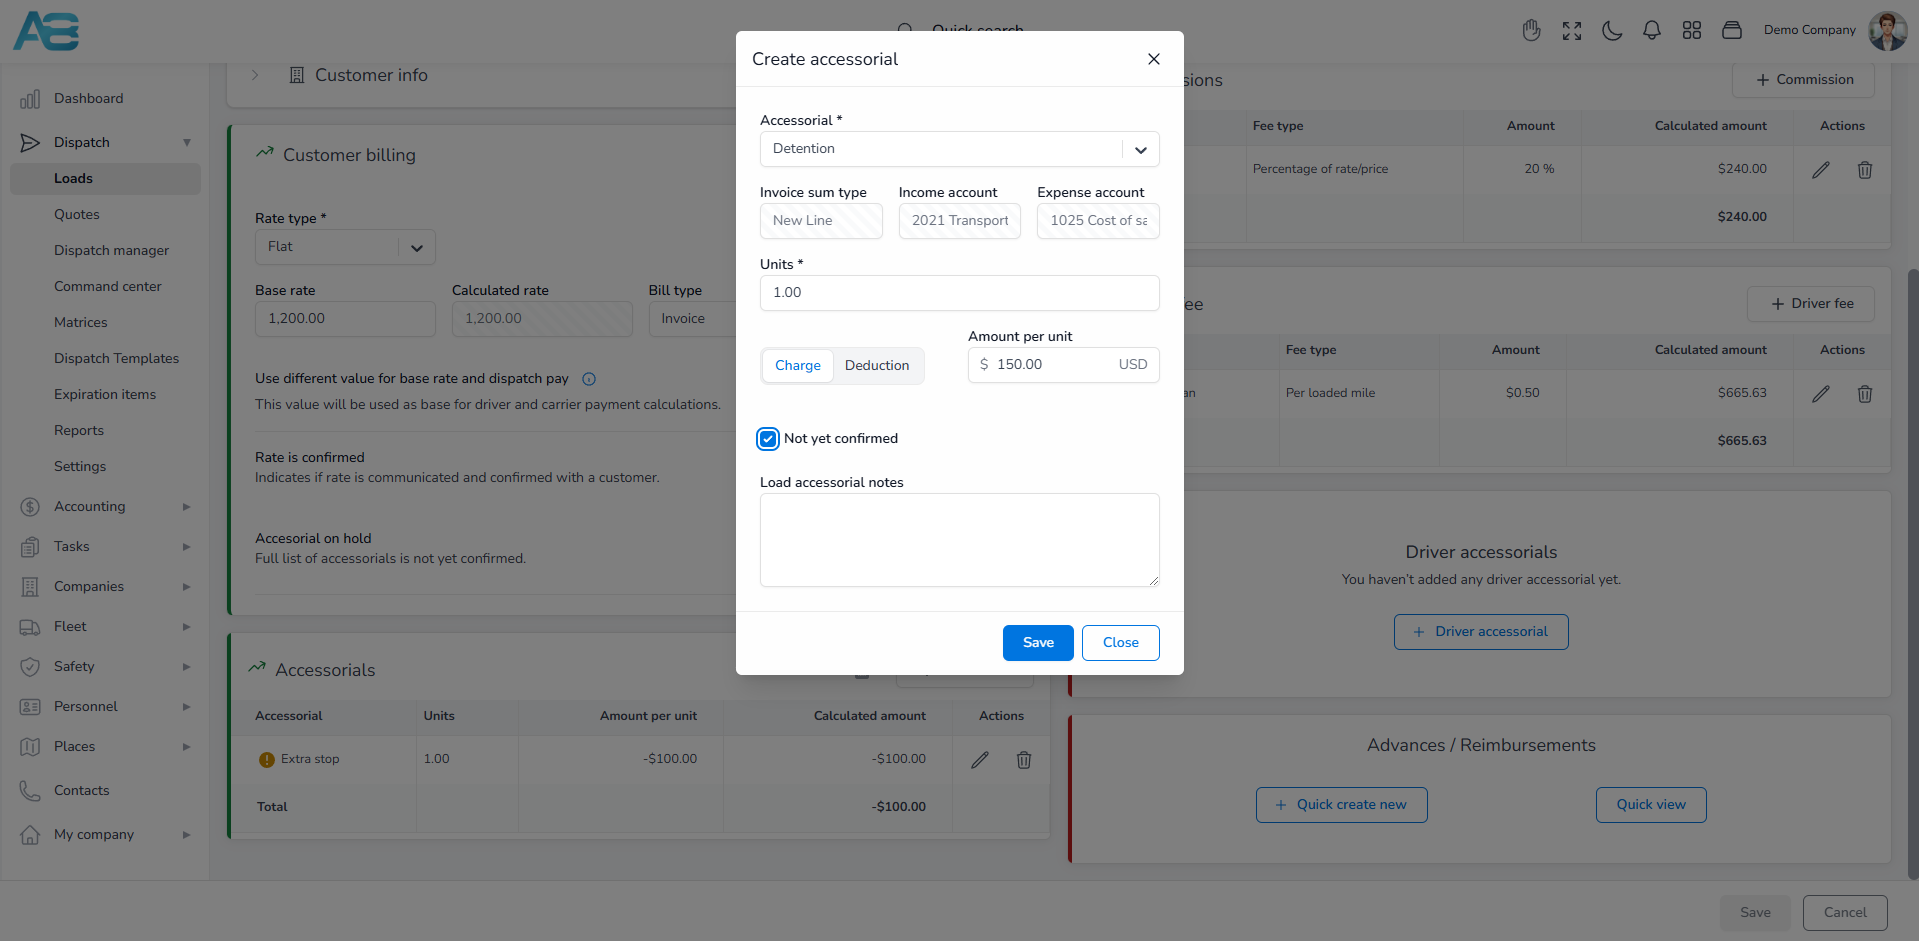
If you need to add an accessorial, click the appropriate button, select the accessorial type, and add units. Next, choose whether to apply a charge or deduction option that affects the customer’s charge.
How to confirm Accessorial Charges? #
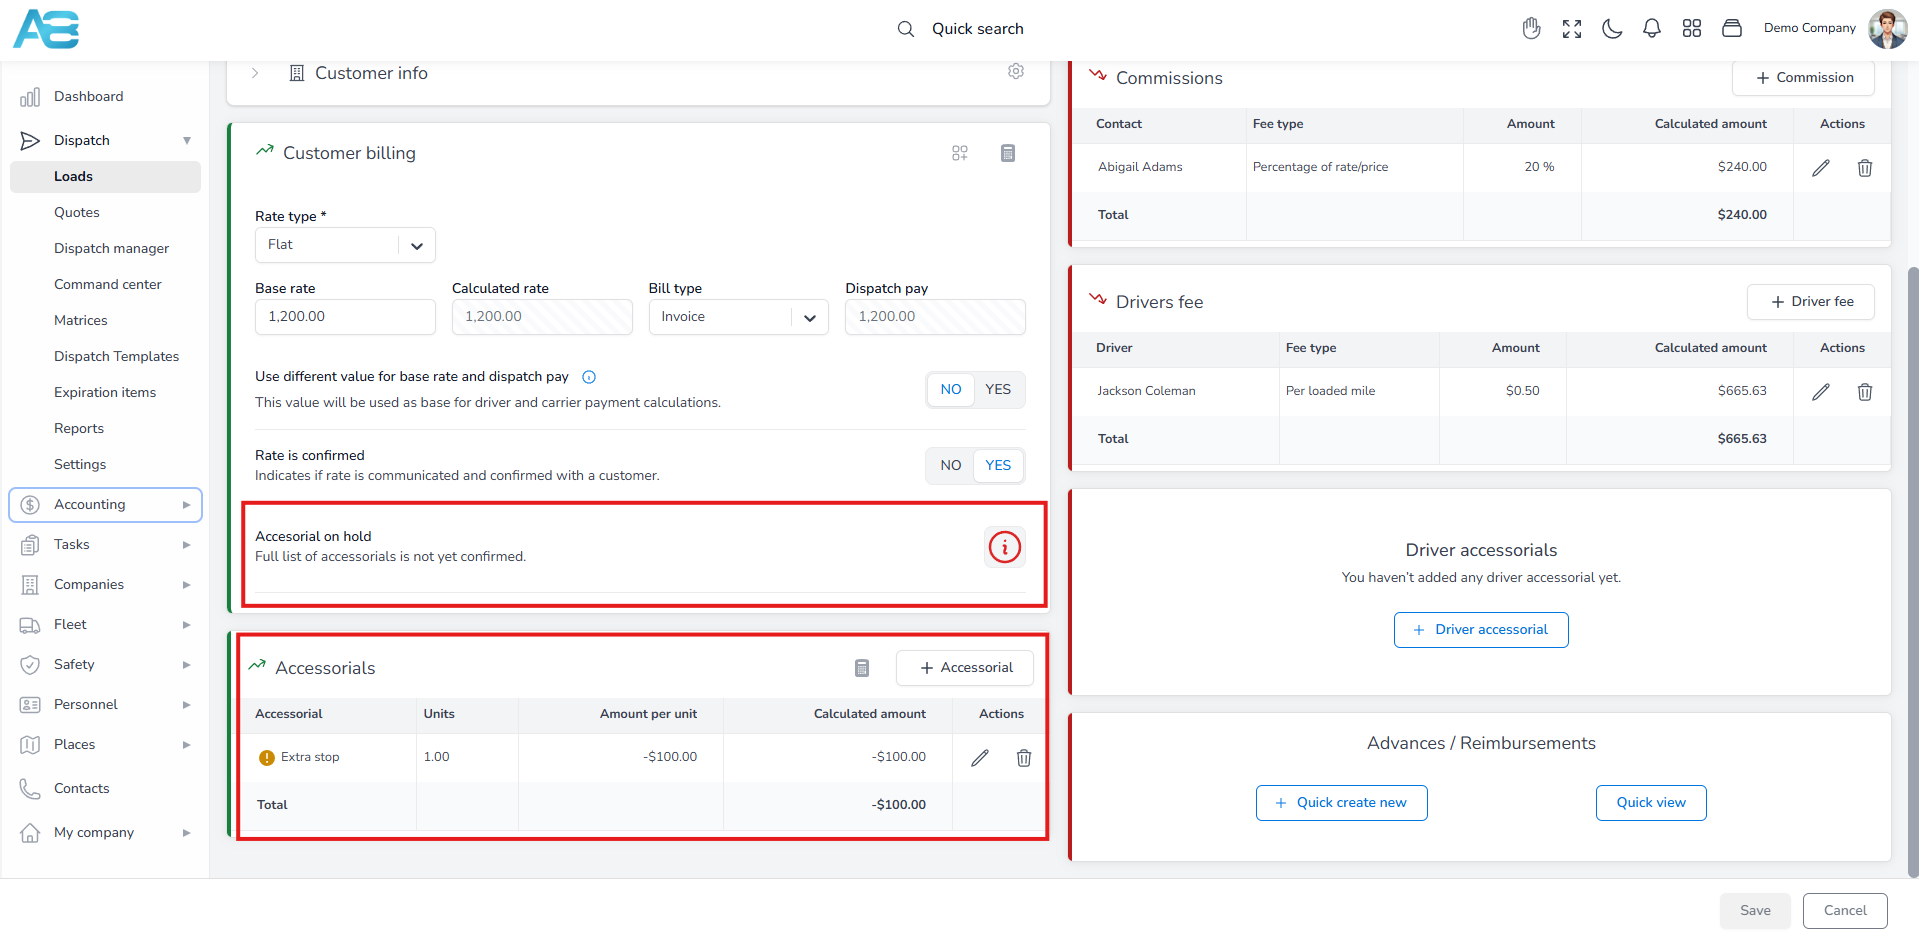
When you add an accessorial, it will be automatically confirmed. However, you can always select the “Not yet confirmed” option, which will generate an Accessorial on-hold notification in the Customer Billing section.
How to Attach Load Documents Properly #
Once you create an invoice, the left side of the pricing tab will be locked, and all fields will be disabled. That means that you cannot change the price anymore. However, you will still be allowed to add accessorial. If you add an accessorial after a load has been invoiced, the system will notify the person who created the invoice and all users on the mailing list under the Dispatch settings. You will then see the notification: “Load is already invoiced, accessorial adjustments can be added but will impact invoice price and may alter its status.”
Additionally, if the invoice was in “sent” or “paid” status, it will be marked as “Revised.”
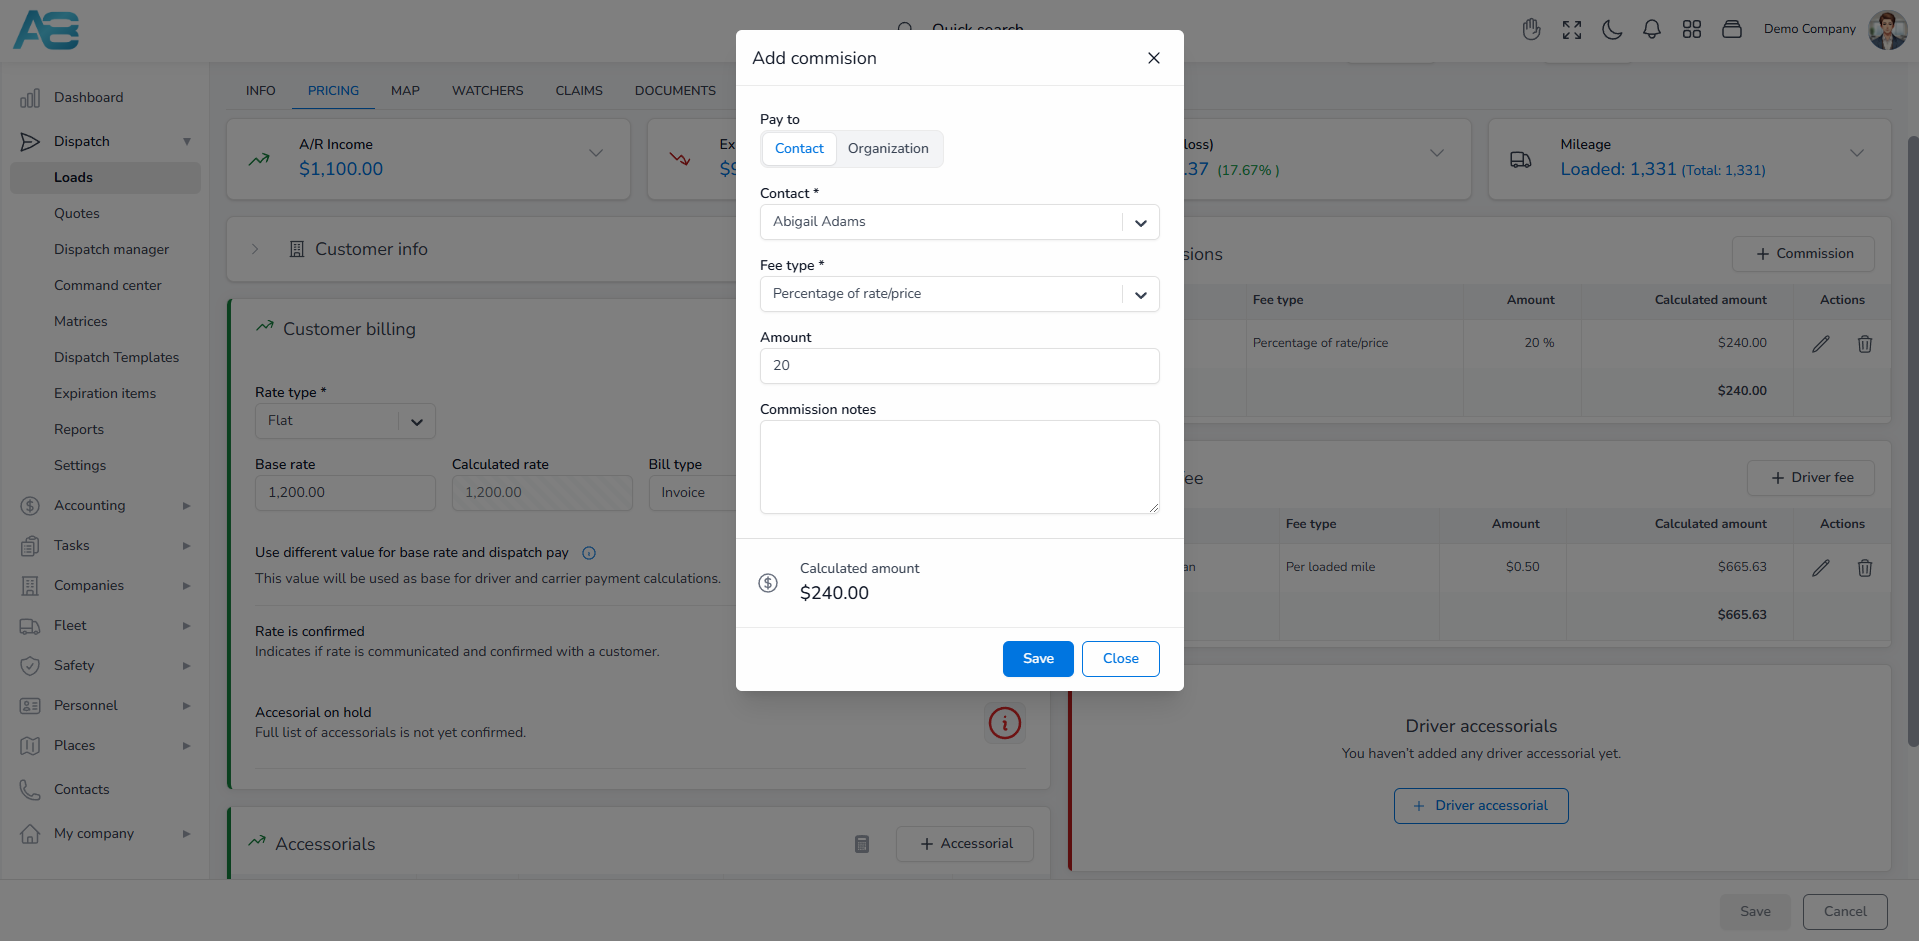
How to add commission to a customer? #
The commission for the selected customer is already set. However, you can do this under the Pricing tab if it is not pre-set or if you need to add a new commission. Clicking this option will open a dialog box where you can select whether to pay the contact or the organization, followed by choosing a fee type.
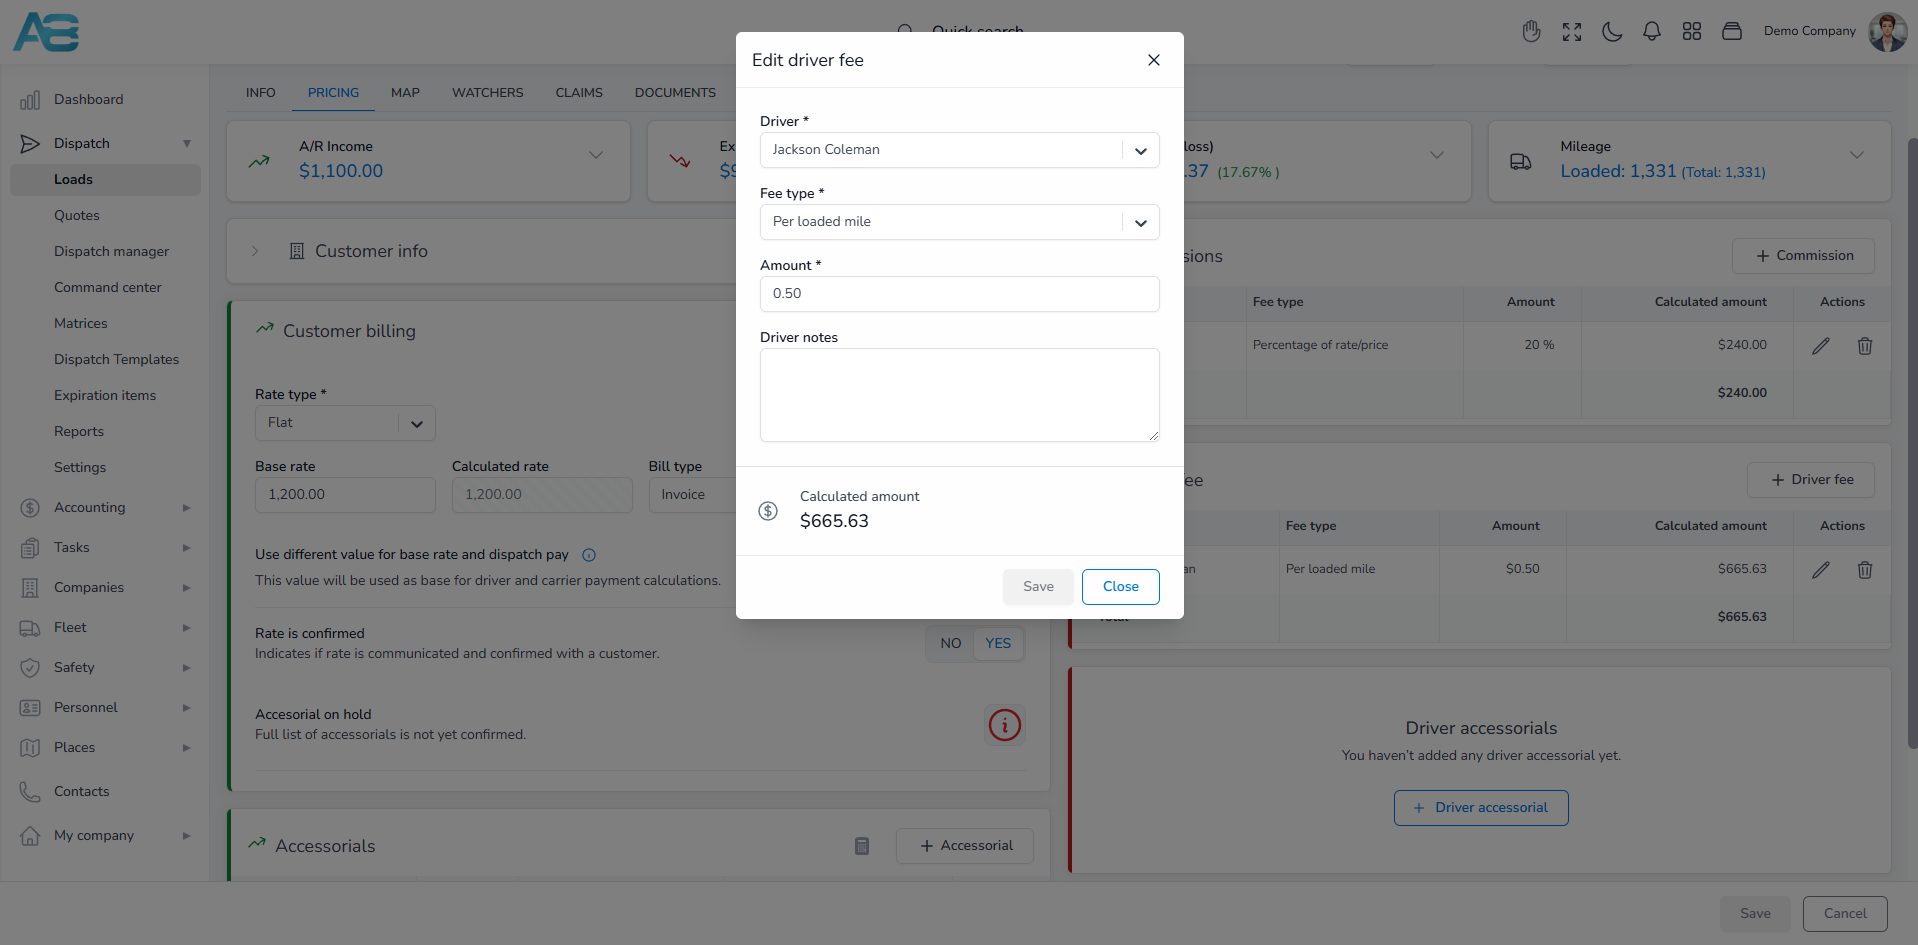
How to add a driver’s fee? #
The driver fee for the selected driver is already set under the Driver Payroll Setup tab. However, if it is not pre-set or if you need to add a new one, you can do this under the pricing tab. Clicking this option will open a dialog box where you will select the driver, the fee type, and input the amount.
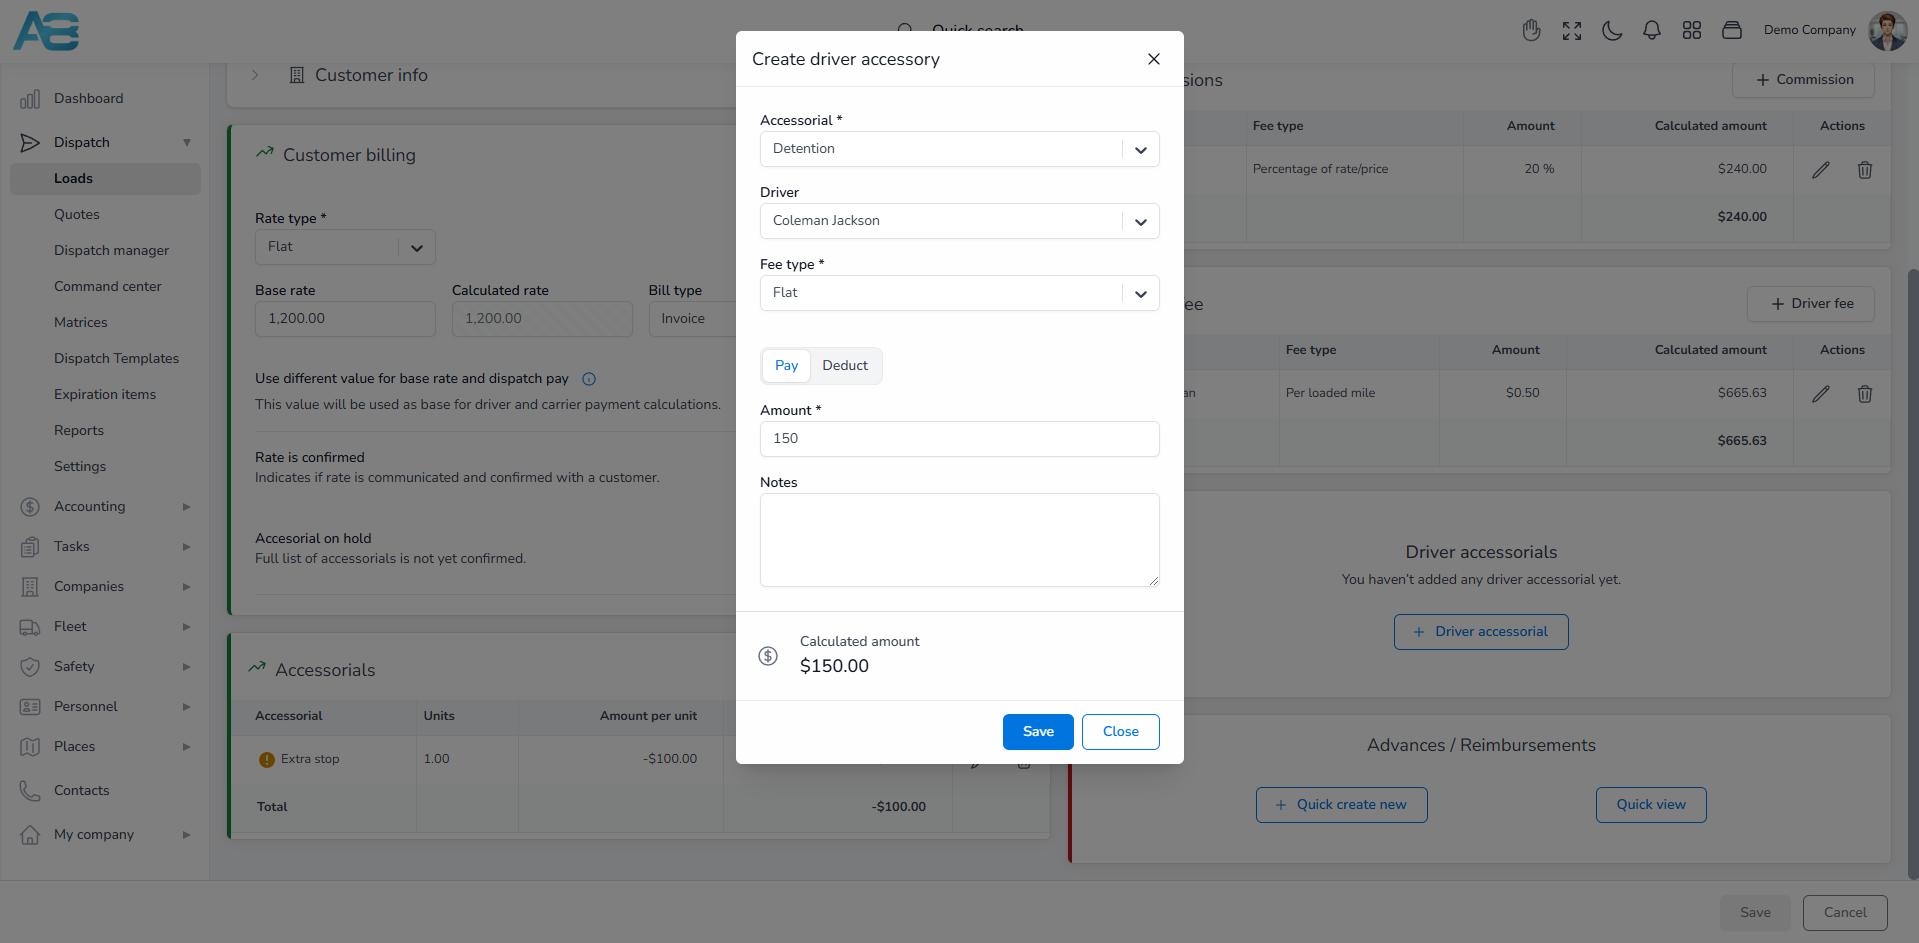
How to add Driver’s Accessorial Charges? #
If you need to add a driver accessorial, click the corresponding option. This will open a pop-up window where you can choose the accessorial and fee type and then select the pay or deduct option.
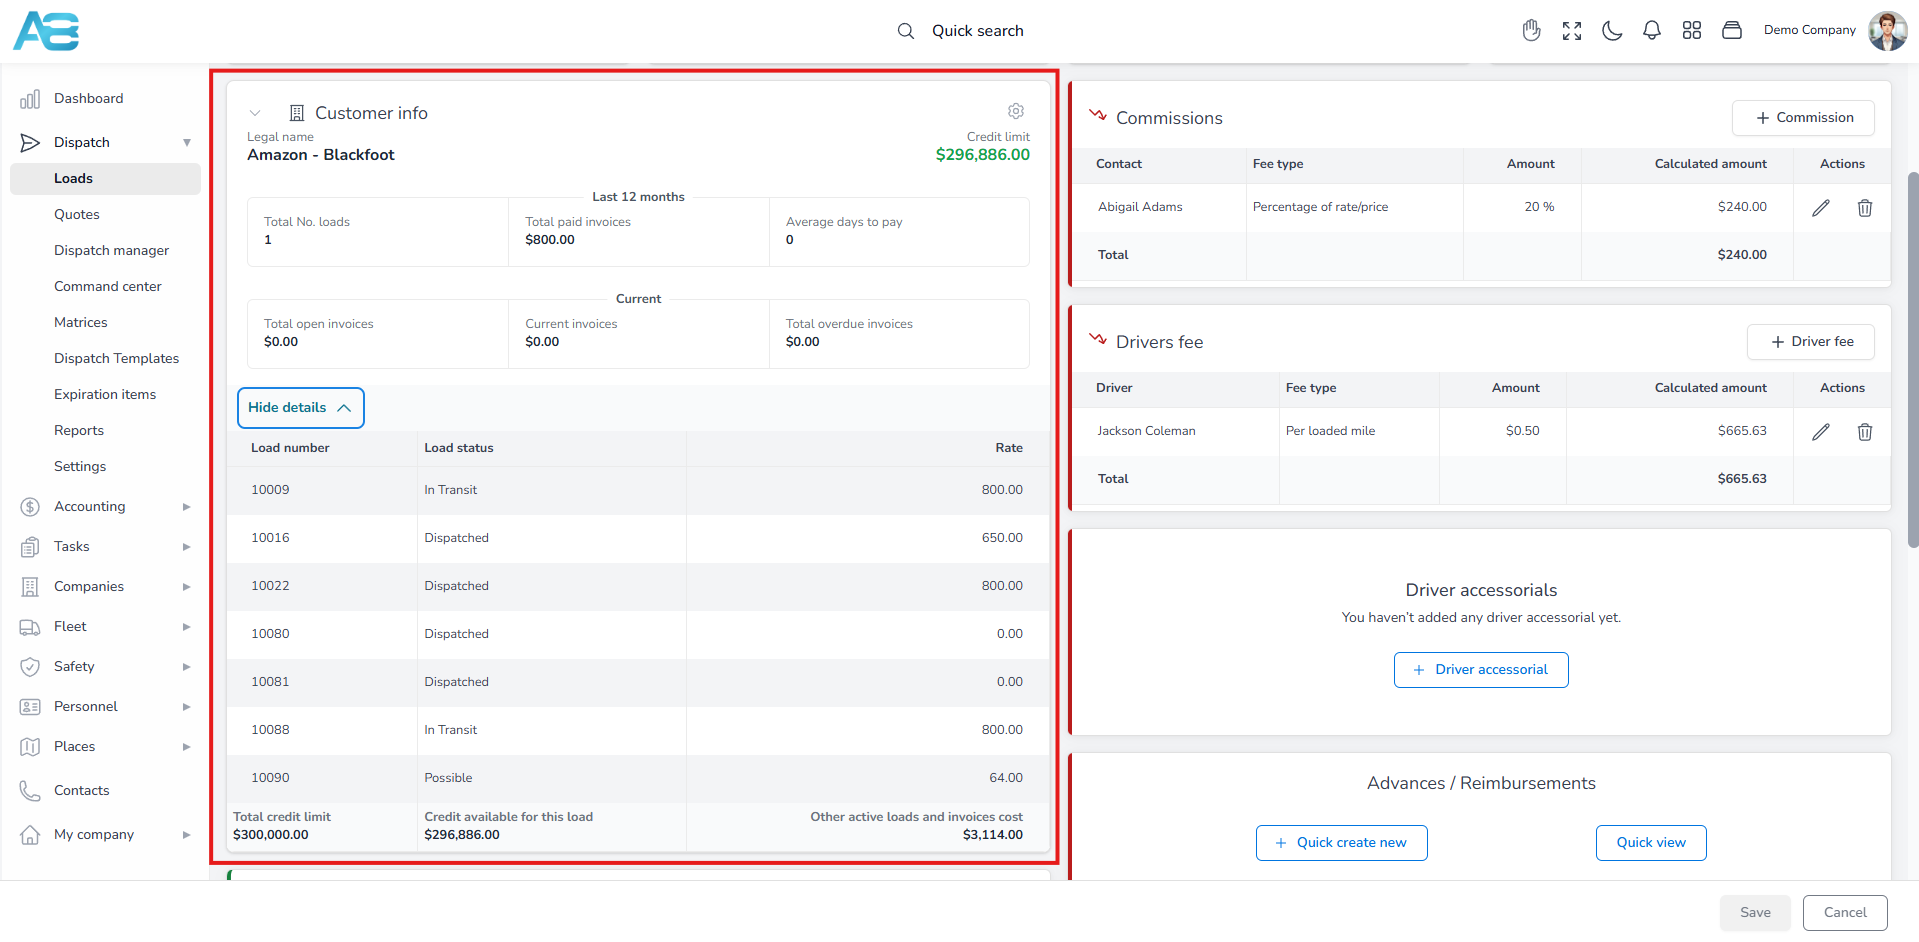
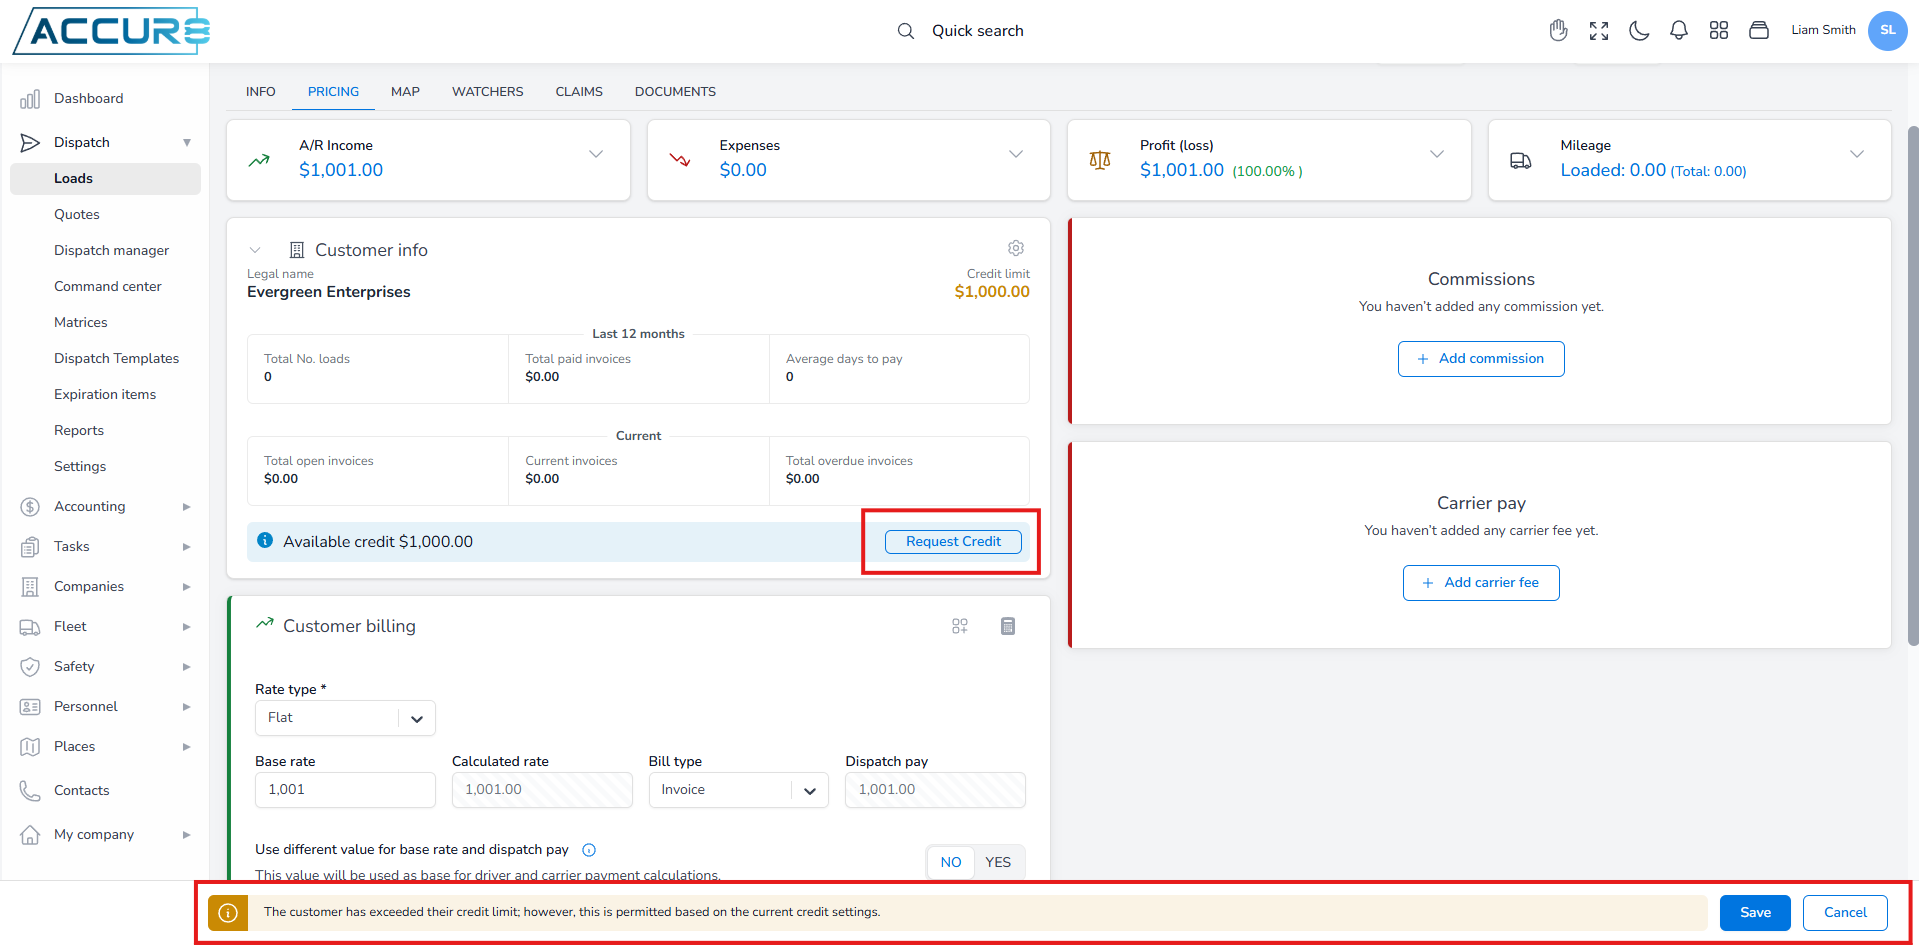
Customer Info section #
This section provides an overview of the selected customer’s business activities. If the customer has a credit limit, it will be displayed in the upper-right corner of this section. The rules for credit limits are the same as those used when creating a load. The “Check Customer Settings” button allows you to quickly navigate to that customer’s page, where you can view all the relevant information under the Credit tab.
How to set a customer’s credit limit? #
Setting a credit limit for a customer involves configuring options on the Credit tab of the customer’s page. To enable this feature, click the “Set Credit Limit” option, which will display a field for entering the desired customer’s credit limit.
The credit limit is determined by the customer’s paid bills – if the customer makes a partial payment, then he can use the remaining balance of the credit limit.
If you attempt to enter an amount that exceeds the allowed limit, a red warning message will immediately appear on the load’s detail page, preventing you from creating a load. However, if you select the “Allow Credit Limit Overrides” option, a yellow warning message will appear instead, and you will be able to proceed despite exceeding the limit.
On the load details page, you’ll also see the customer’s available credit and a Request Credit button. Use this button to submit a request to increase the customer’s credit limit as needed.
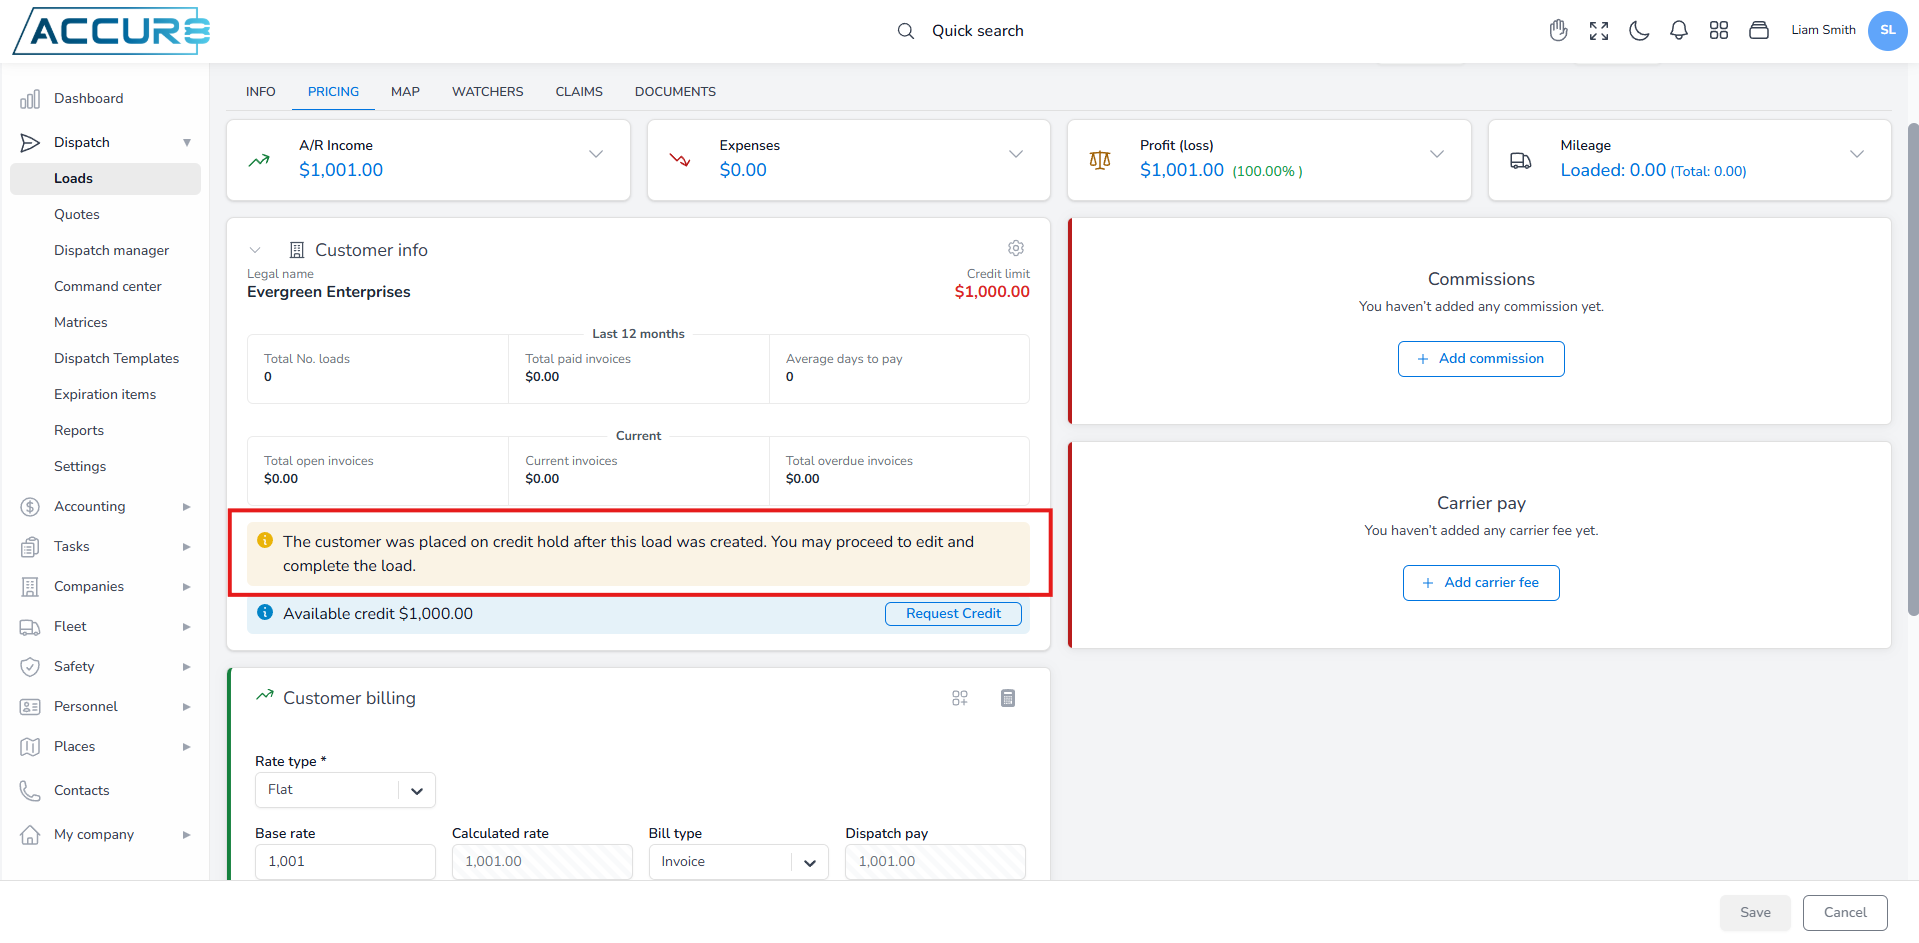
How to set a customer on a credit hold? #
If you need to temporarily suspend a customer’s credit or reduce his credit limit, go to the Credit tab on the selected customer’s page and check the Credit hold option. This action will prevent you from creating any loads for this customer, and the system will display a red warning message on the customer’s credit page that says: “Creation of loads is not possible while the credit hold check is enabled, loads that are already created will have an additional warning on the info and load pricing page, and values can be saved.”
If the customer associated with your created load is placed on credit hold after the load has been created, the system will allow you to proceed with that load. However, a yellow warning message will appear on both the load’s detail page and the load pricing tab to alert you of the credit hold status: “The customer was placed on credit hold after this load was created. You may proceed to edit and complete the load.“