Setting Stop Status and Completion Details #
When you have a load in the “Dispatched” status with added stops, then additional buttons will appear next to each stop: Post update and Complete this stop. Selecting the Post Update option allows you to add supplementary details not necessarily related to the location events.
On the other hand, by selecting the Complete This Stop option, you can see data related to the location and circumstances of the stop’s completion, which helps you track the load’s journey precisely.
How to post a Stop Update? #
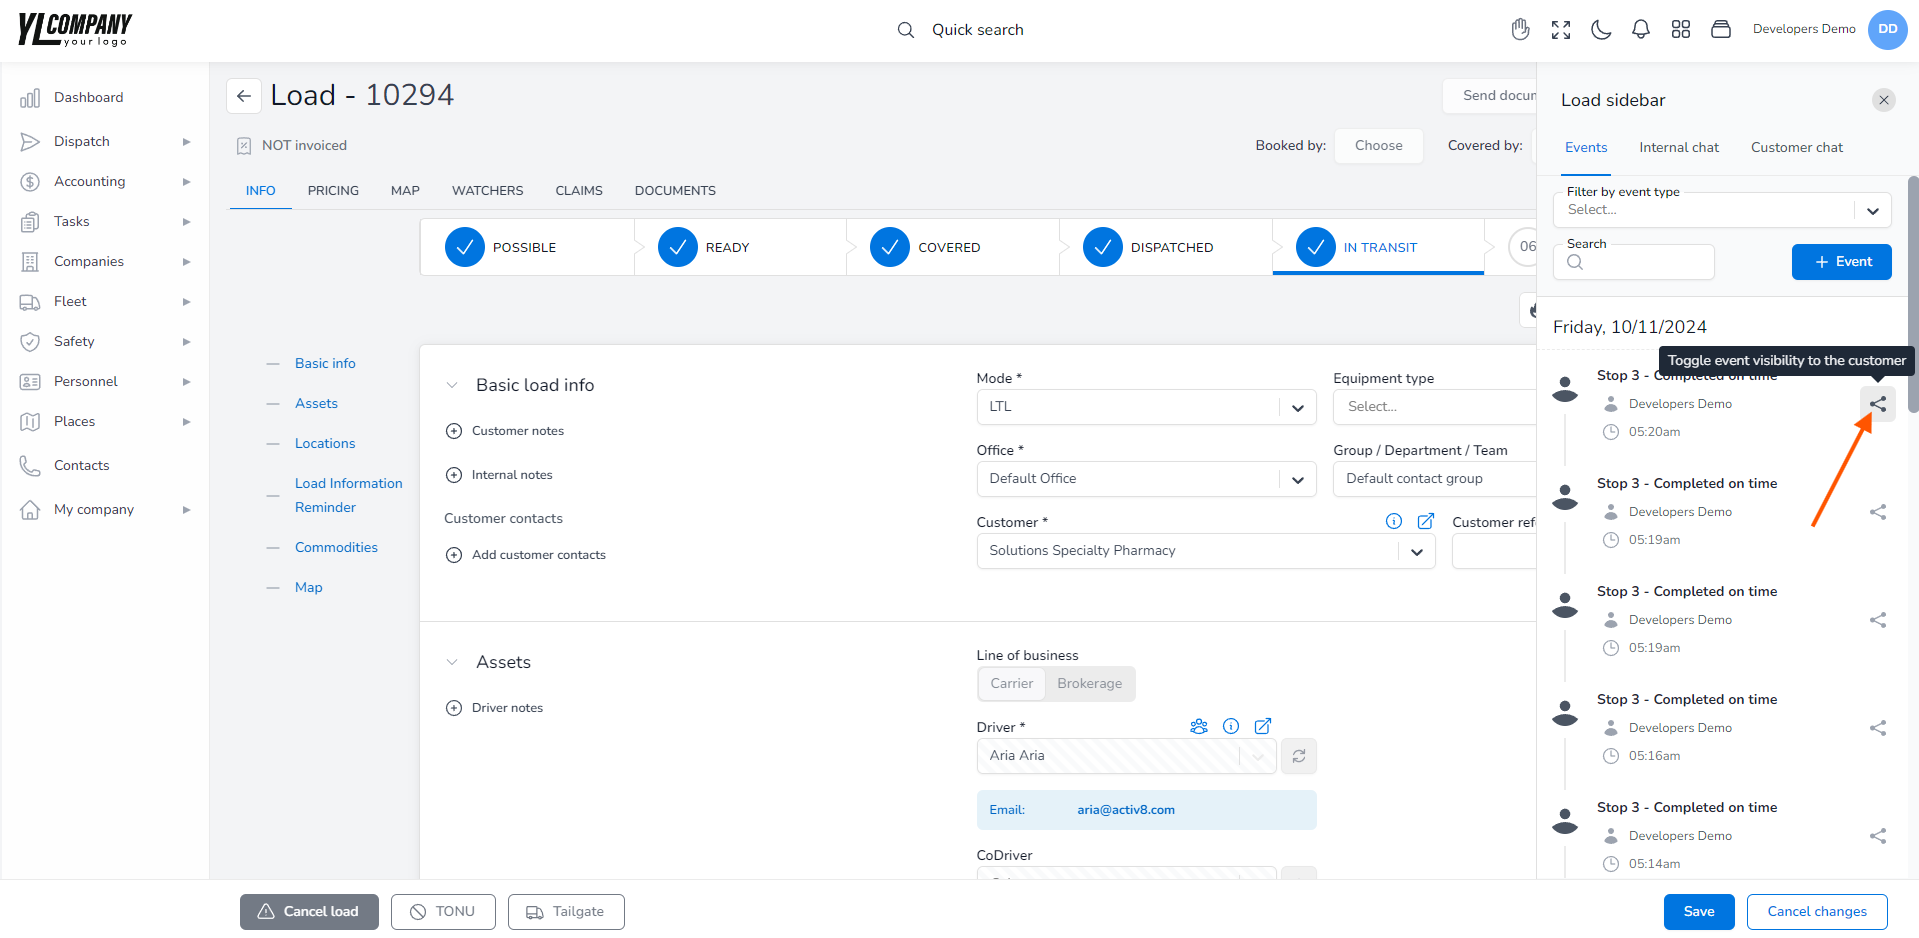
When you mark a load as “Dispatched” and need to post a stop update, the system will automatically generate an event entry that will be visible within the regular load event list in the “sidebar” at the upper right corner.
The system also allows you to share this stop-update information with your customers, keeping them informed throughout the process. But you will have to set this option manually for each location.
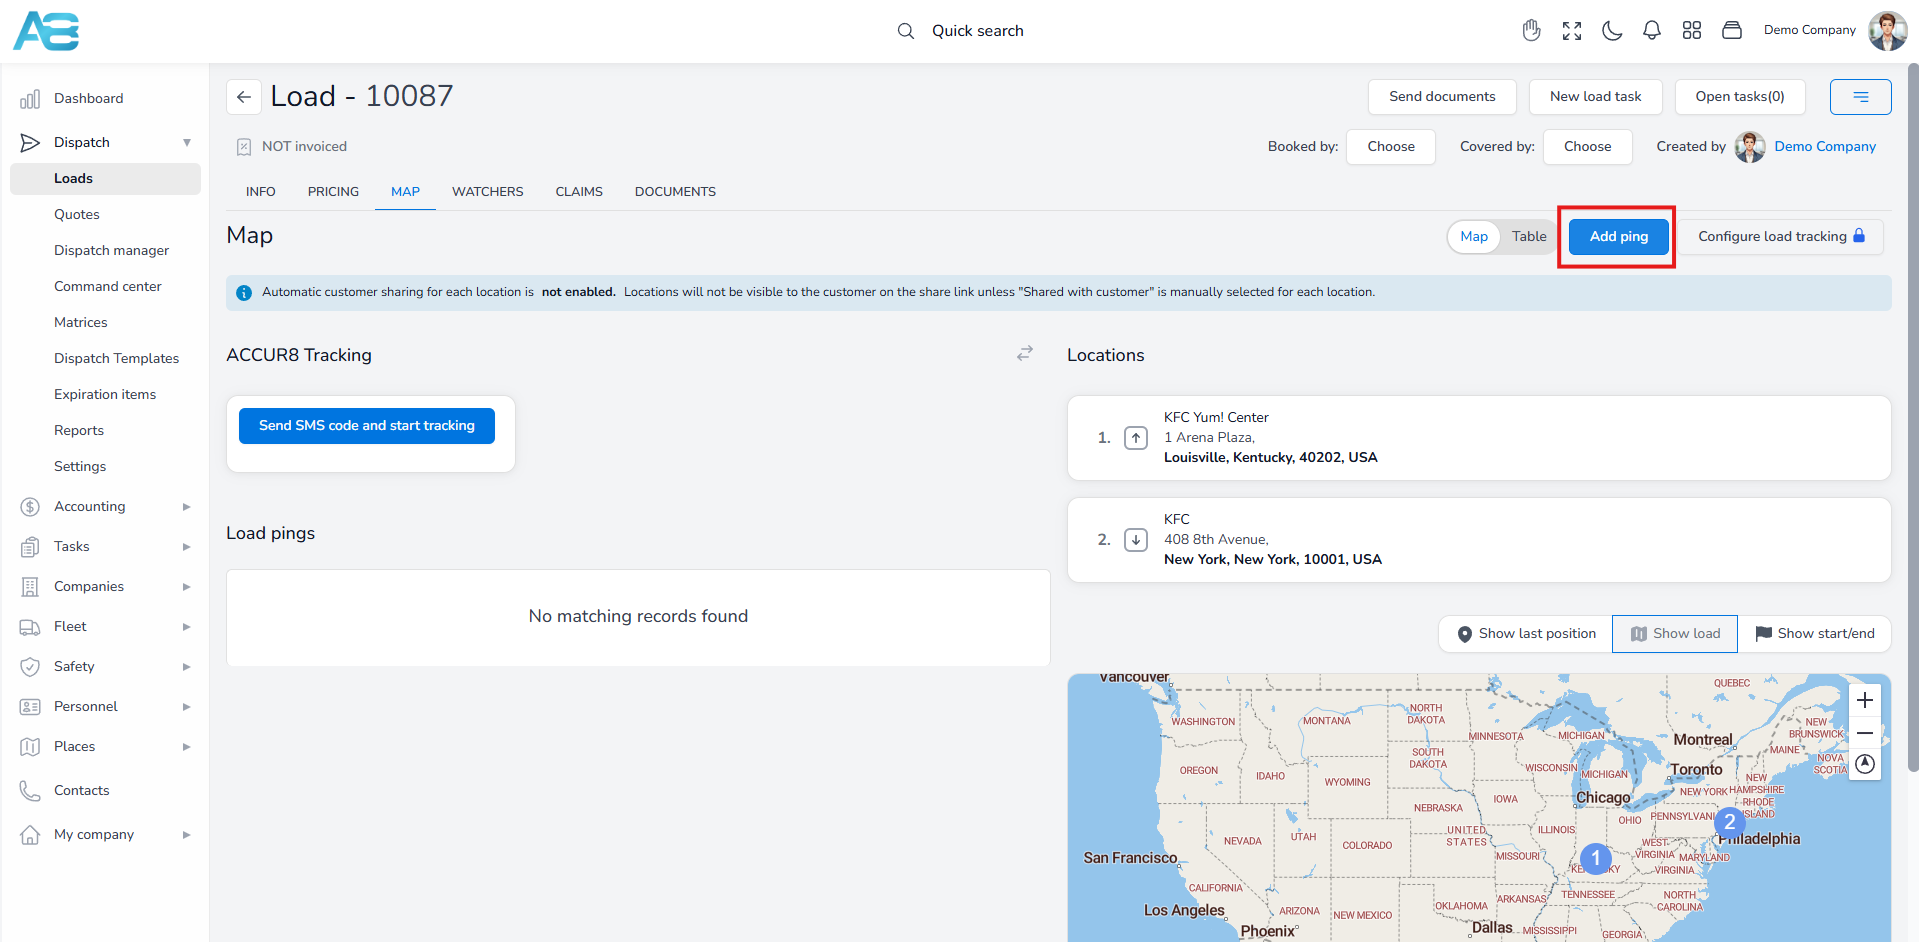
The system also allows you to enter the driver and truck location information by creating a “ping” entry under the Map tab. Clicking the Add ping button will open a pop-up window where you can add a location in three ways: by selecting a location from a drop-down list (only for those locations that already exist in the system), by adding a location manually (filling all required fields), or by dragging and dropping the pin location icon on the map.
How to add stop completion details? #
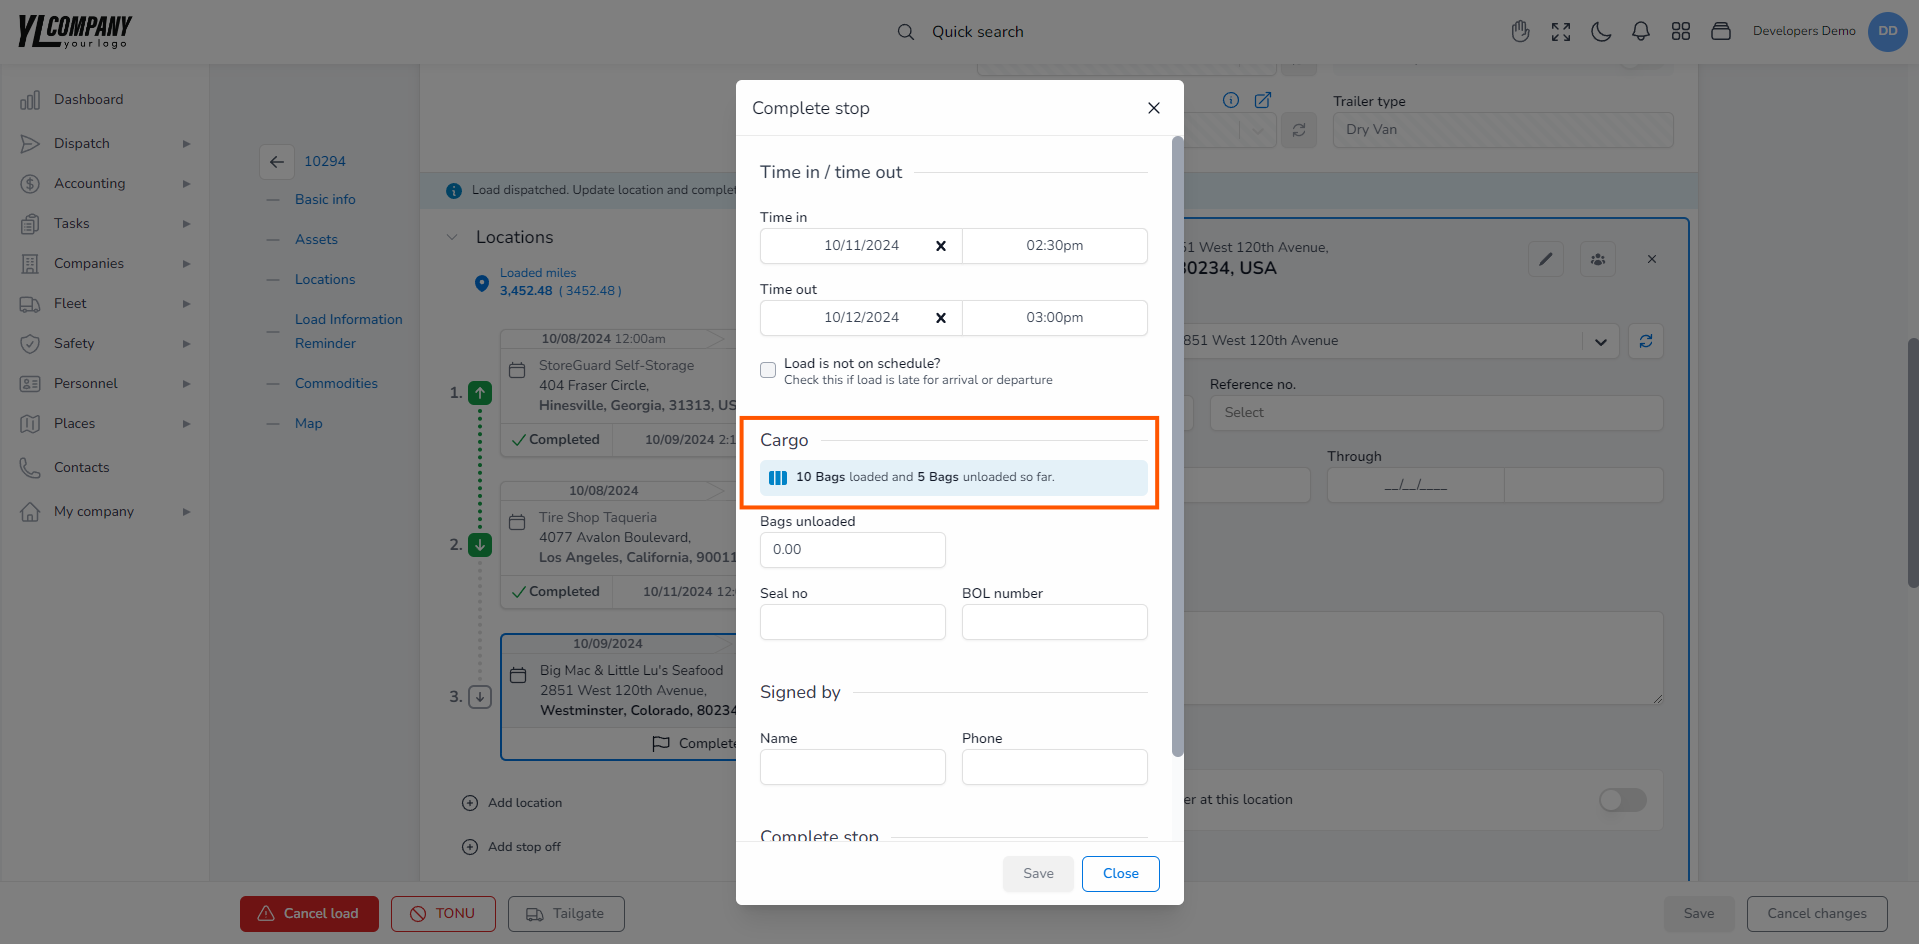
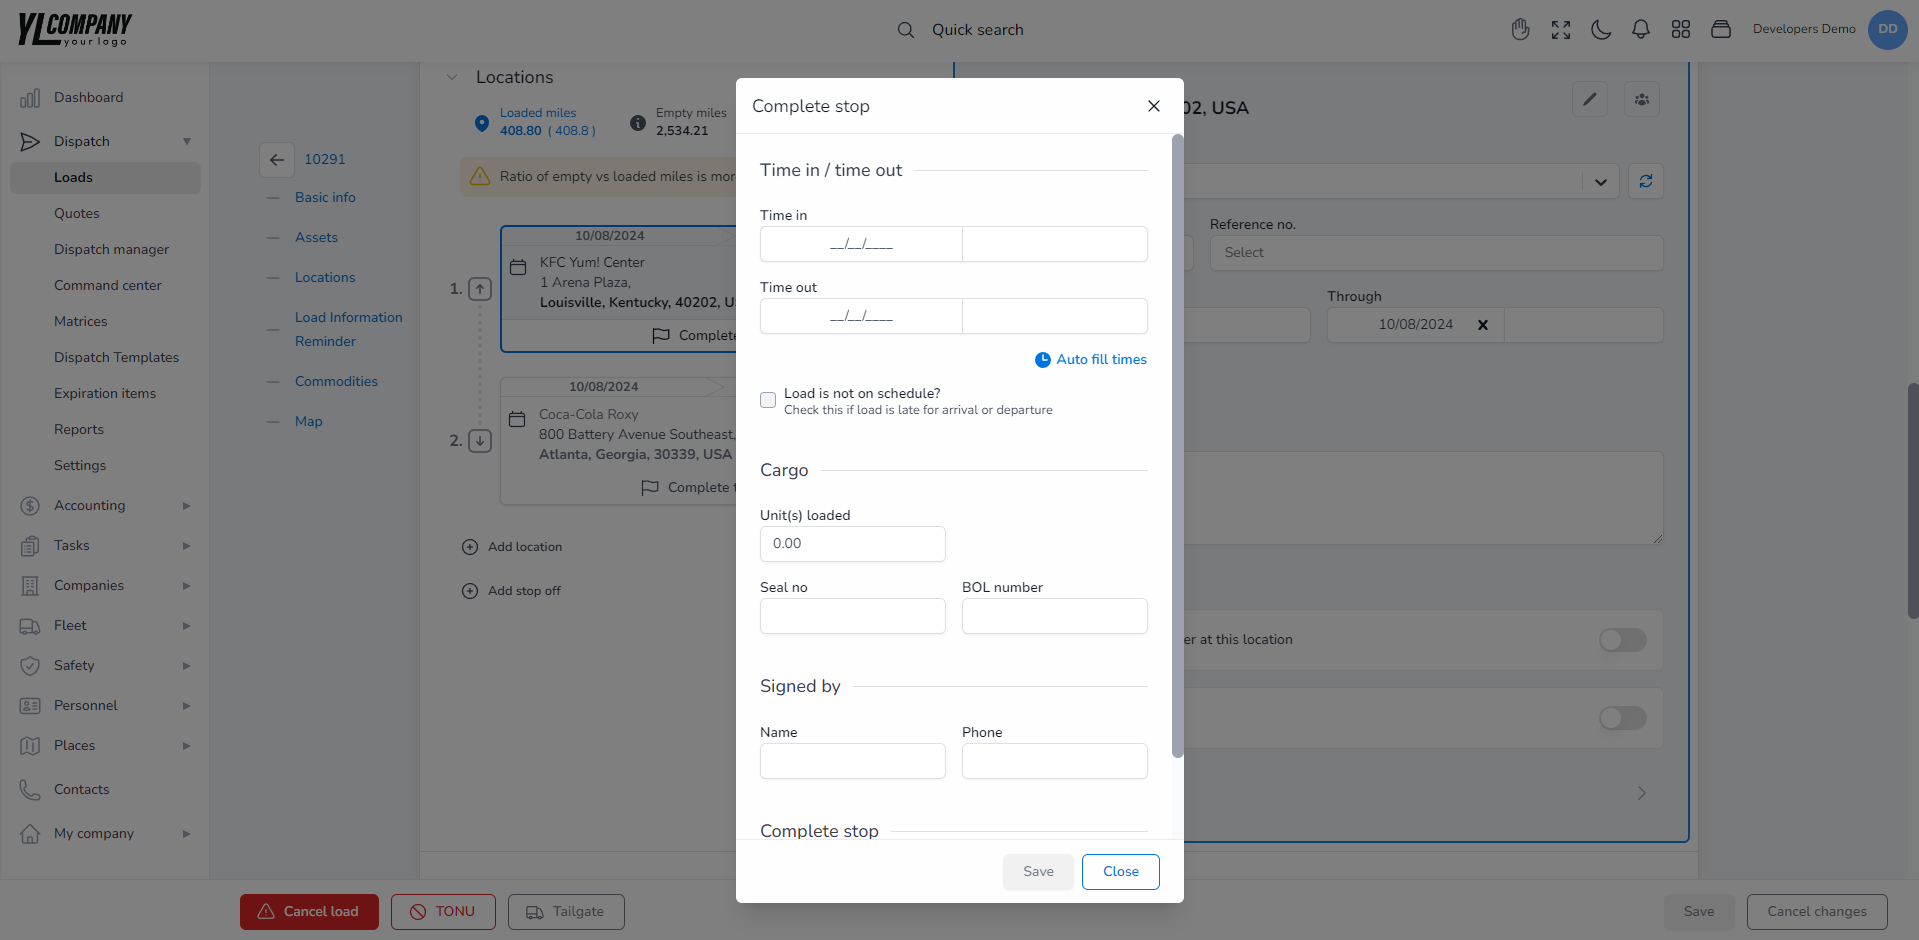
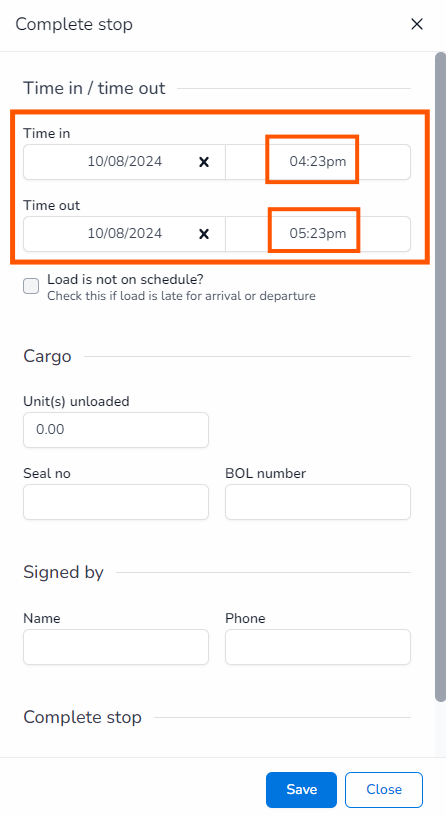
If you need to mark a load as completed at a specific location, simply click the Complete This Stop button below the location you want to complete. This action will open a dialog box where you will enter stop completion details, i.e., data related to the location and stop completion circumstances. The mandatory fields are “Time in”and “Time out,” representing the actual arrival and departure dates and times.
How to Update Stop Completion Data? #
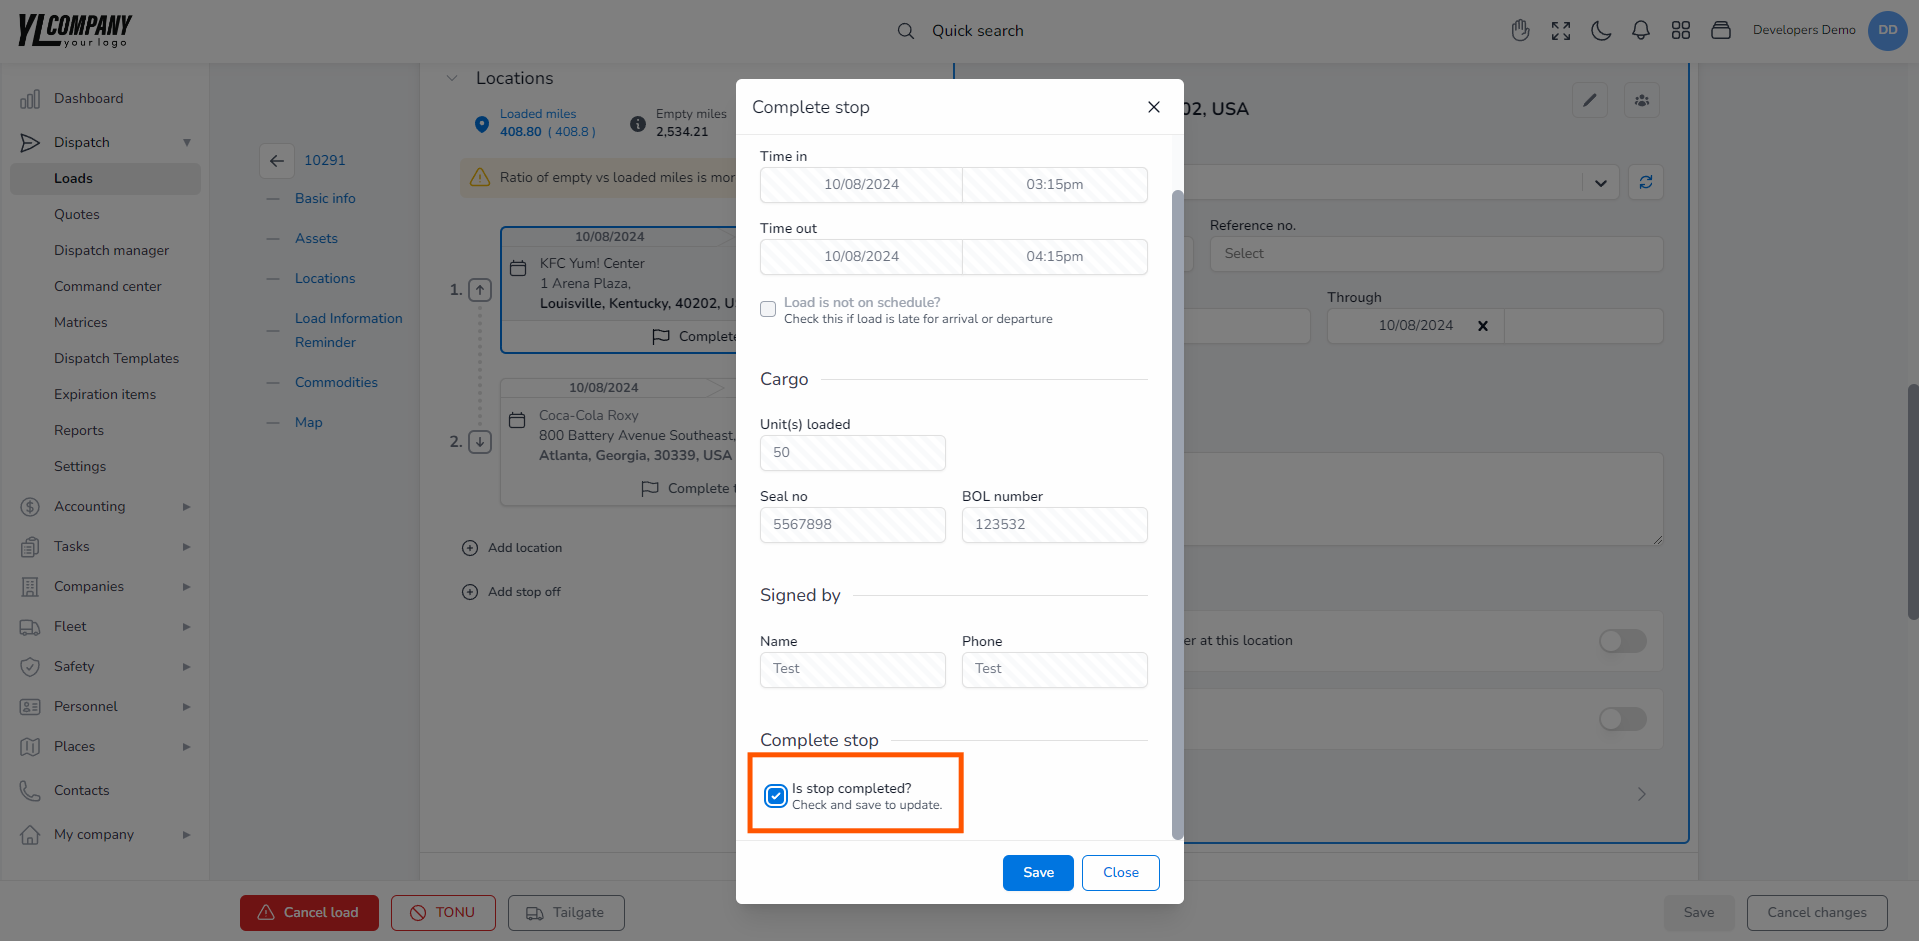
While you update the stop completion data, you are allowed to change it as many times as you want. However, once you have checked the complete stop checkbox, all data will become read-only, i.e., fields will be disabled, along with the save button, ensuring the information remains unchanged.
However, if you need to make further adjustments, simply uncheck the Complete stop checkbox. This action will enable all fields again, allowing you to make any necessary revisions.
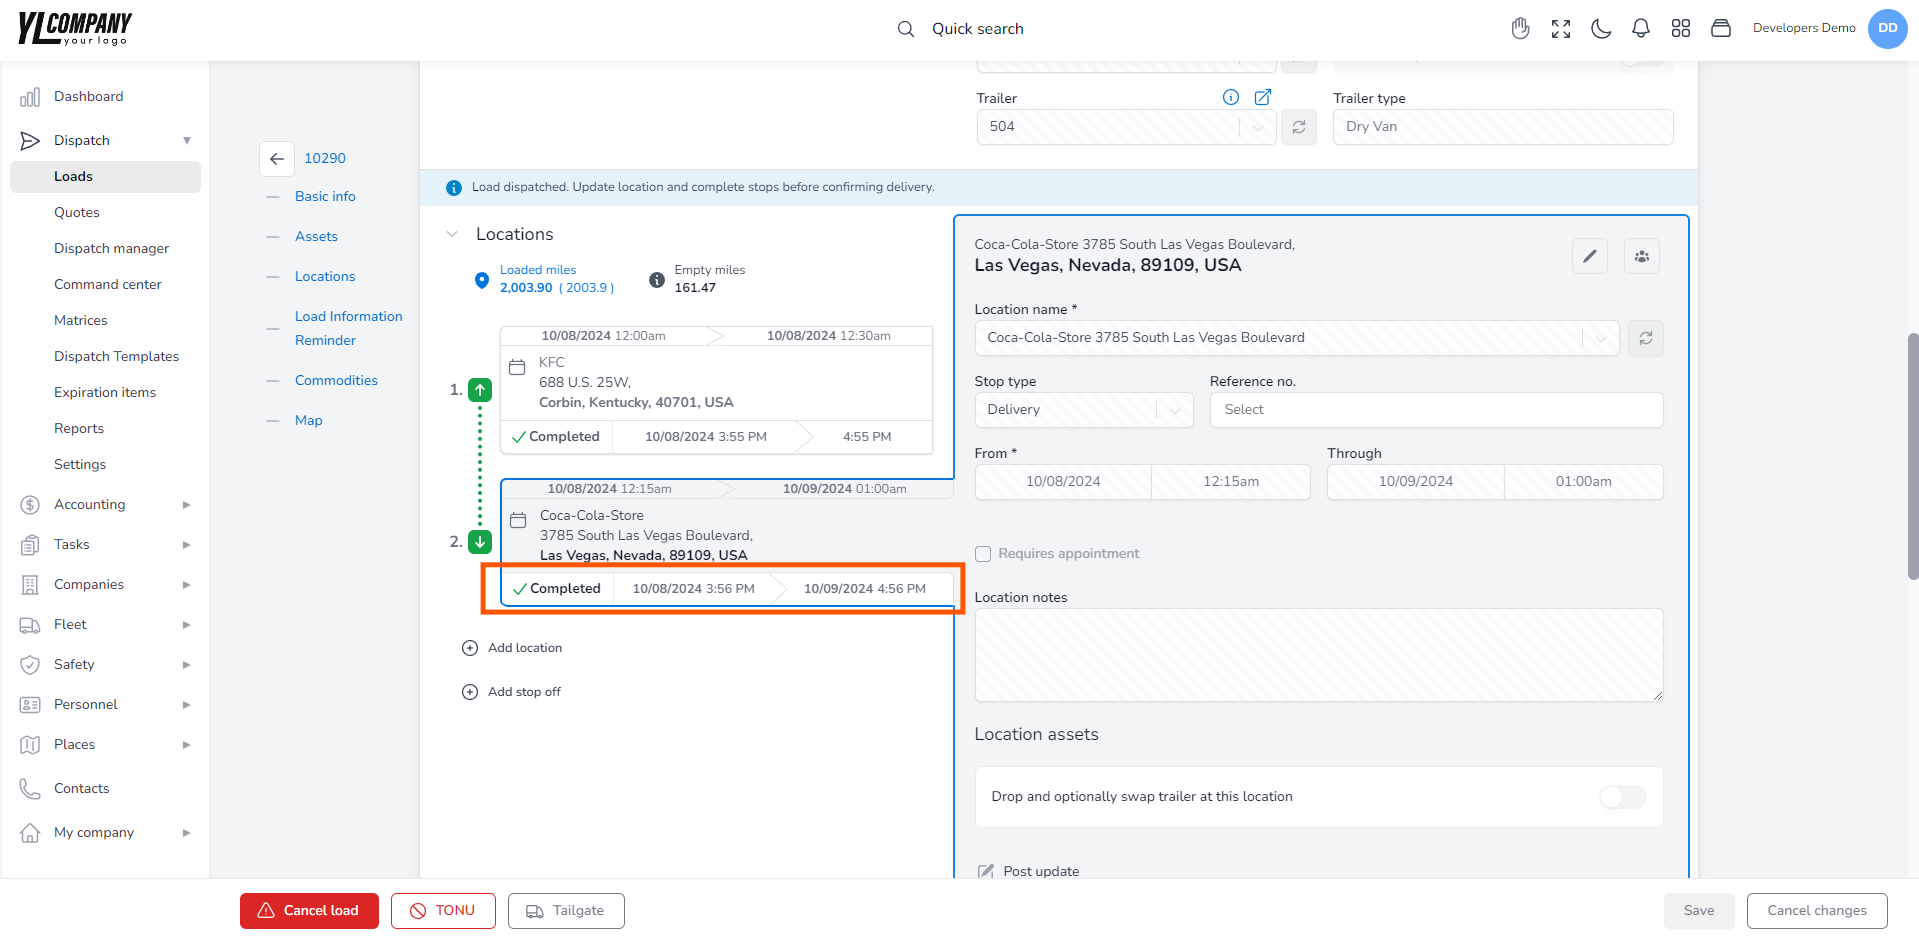
Completed stop #
Once you have updated and marked the stop-off as completed, the “Completed” button will appear under that stop in the “Locations” section. A simple click on this button will open the Complete stop dialog containing all entered data. If you mark a stop as delayed, the data on the Complete stop dialog will be displayed in red.
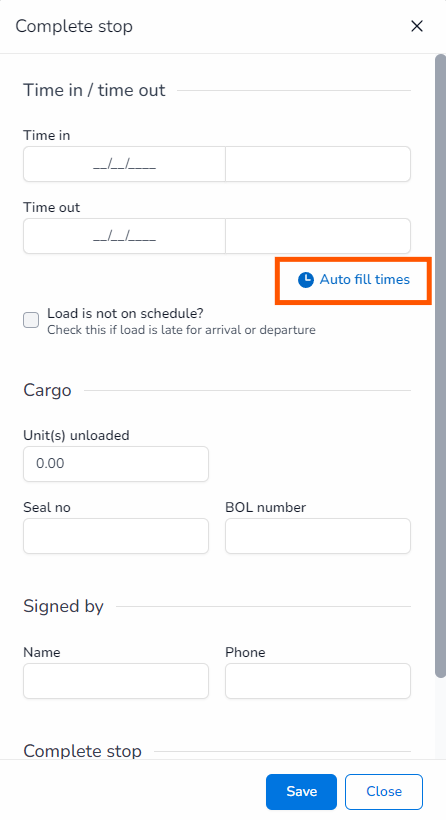
How to use the Autofill times option? #
If you have to fill in the stop completion form for the first time, you can use the Autofill times option, where the system will auto-populate these fields:
Time in – With the current local time
Time out – One hour later than the arrival time
How to include Planned Data in the Stop Completion Form? #
When you need to fill in the Completion stop form with the previously set data for the commodity, you will navigate to the Cargo section, where you will be able to see read-only fields with the planned number of pallets (or chosen packaging) containing the data for the scheduled cargo weight for that stop at the pickup.

If the planned numbers entered at the pickup location do not align with those recorded at delivery, on the Complete stop dialog, you will see a yellow warning notifying you that the planned pallets (or chosen packaging) don’t match loaded numbers. Also, a red warning will be displayed under the Locations section. This alert will notify you that the loaded and unloaded numbers of the chosen packaging do not match the indicated numbers of planned and delivered pallets.
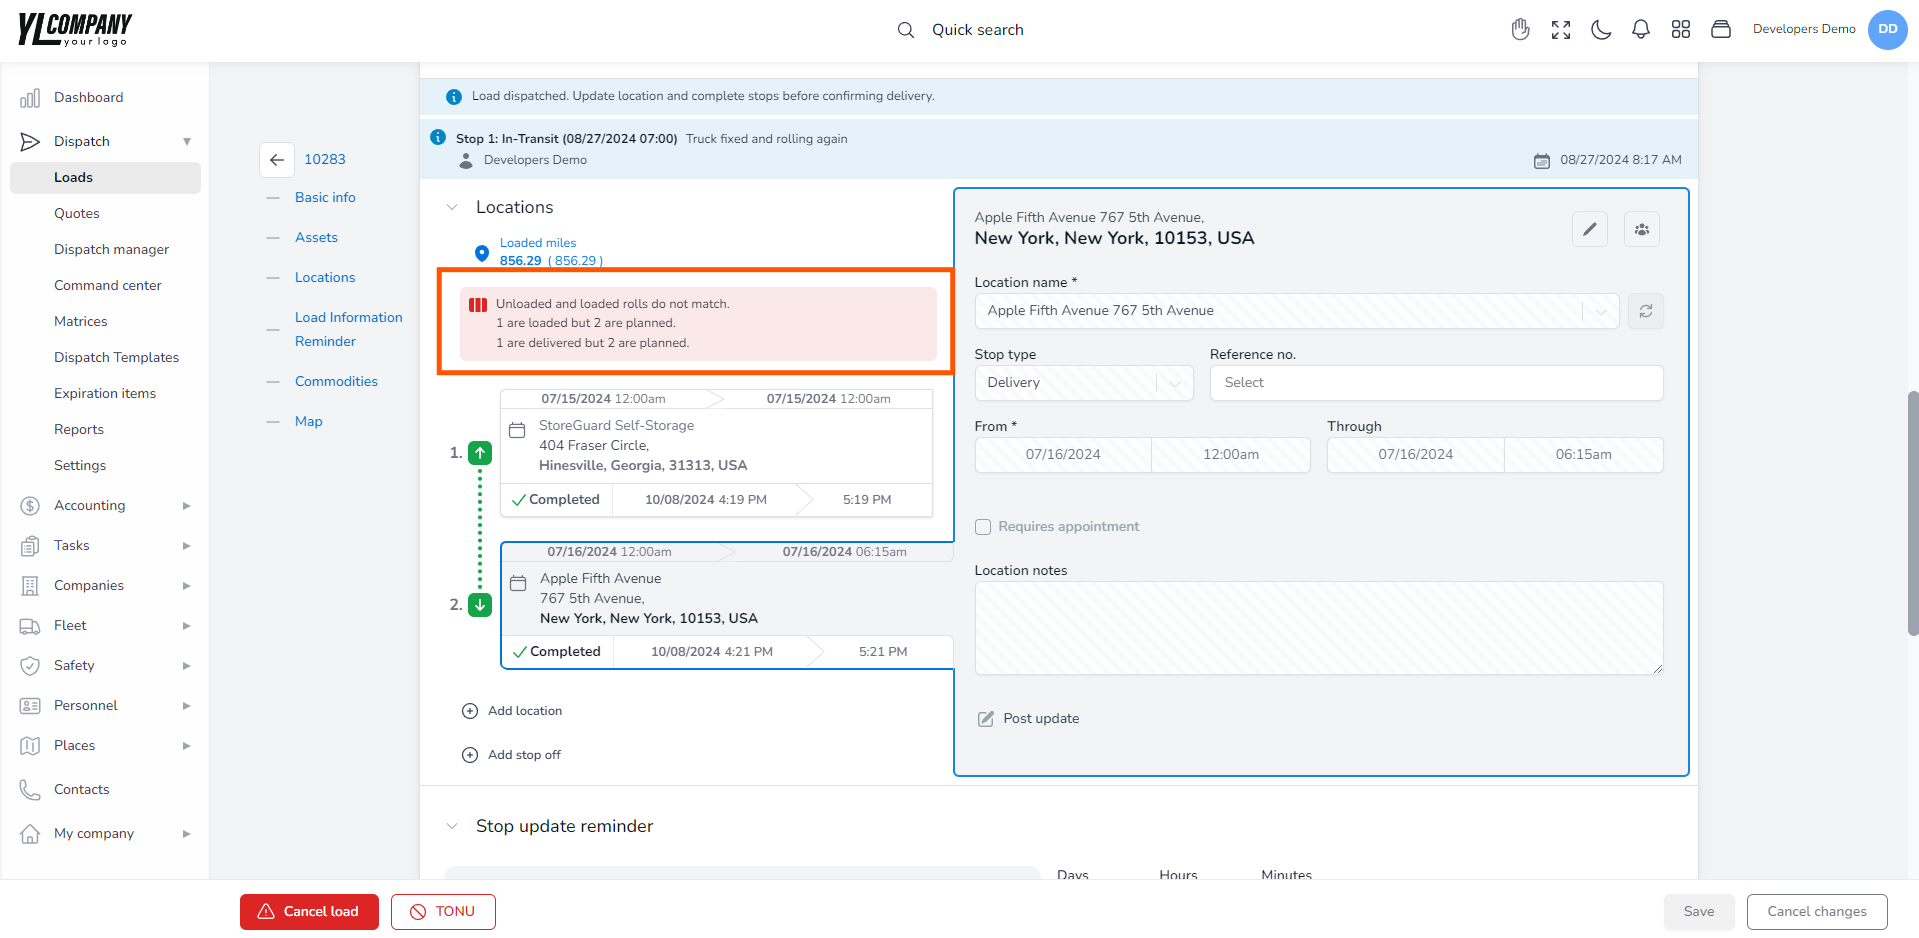
When you have multiple delivery locations to manage, the completion stop form under the Cargo section will display a message with the number of loaded and unloaded types of chosen packaging.