Initial Setup #
Chart of Accounts Setup: #
ACCUR8 TMS operates on double-entry bookkeeping principles, which requires setting up a chart of accounts for all transactions. The system comes with a preconfigured standard setup that works out of the box but can be customized to align with your company’s accounting practices.
To view, edit, or create a new account, visit the Chart of Accounts page.
To adjust default account settings and other accounting preferences, visit the Accounting Settings page.
Default Invoicing Emails and Email Templates Setup (Optional): #
If you frequently send similar emails, you can streamline this process by creating email templates. The system will automatically replace variables with specific customer details, saving you time and ensuring consistency. You can set this up on the Settings page.

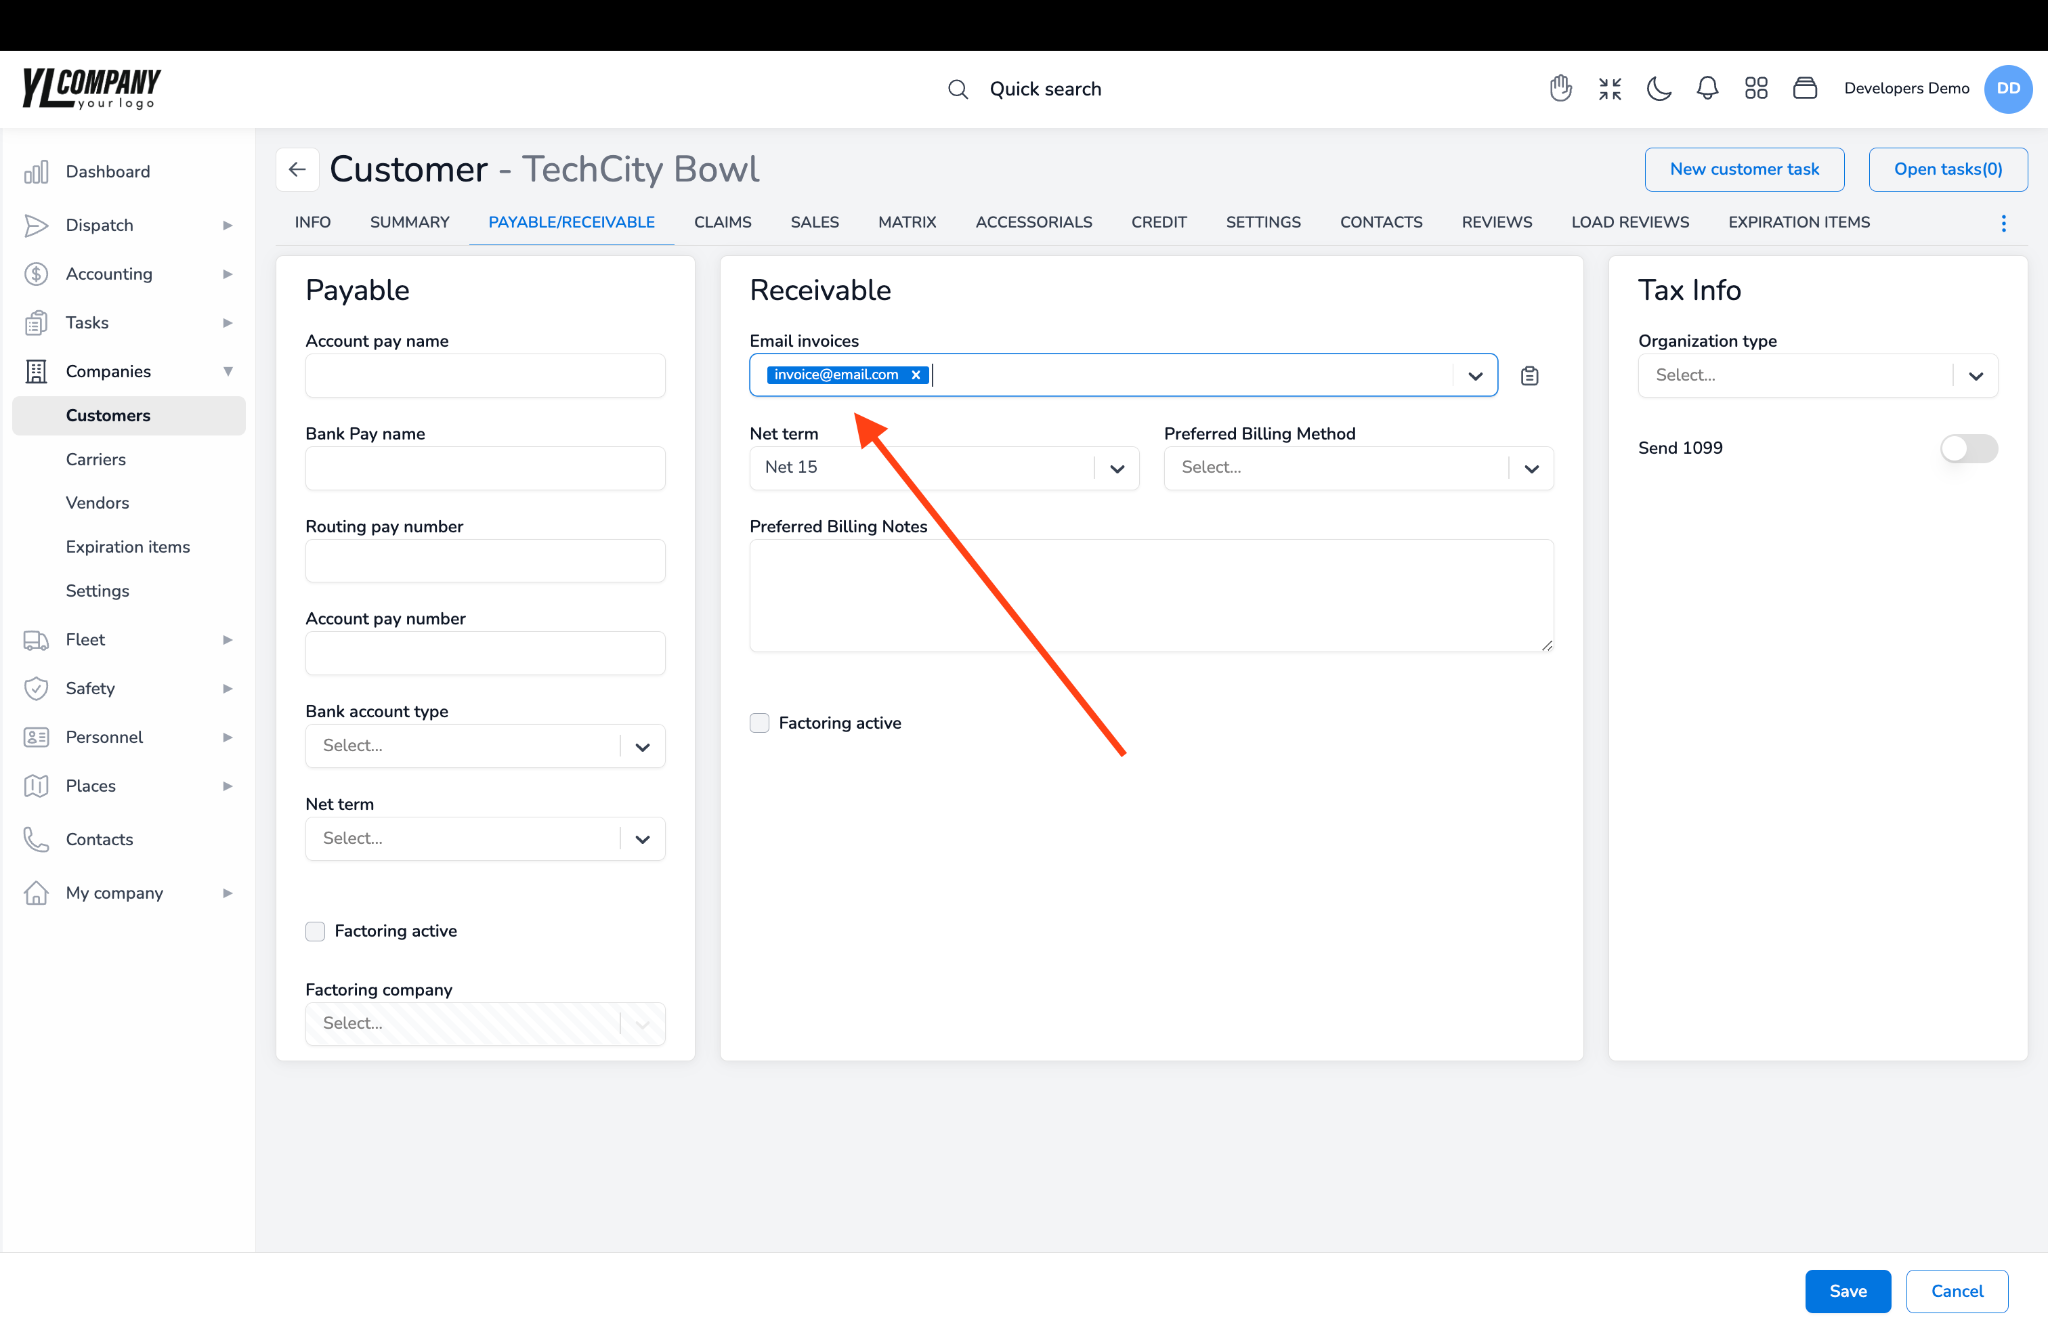
To avoid manually entering billing email addresses when sending invoices, you can set default email addresses for each customer. This can be done on the “Payable/Receivable” tab of the Customer Details page. The system will auto-fill these values whenever you send an invoice to the customer.
Creating and Sending Load Invoices: #
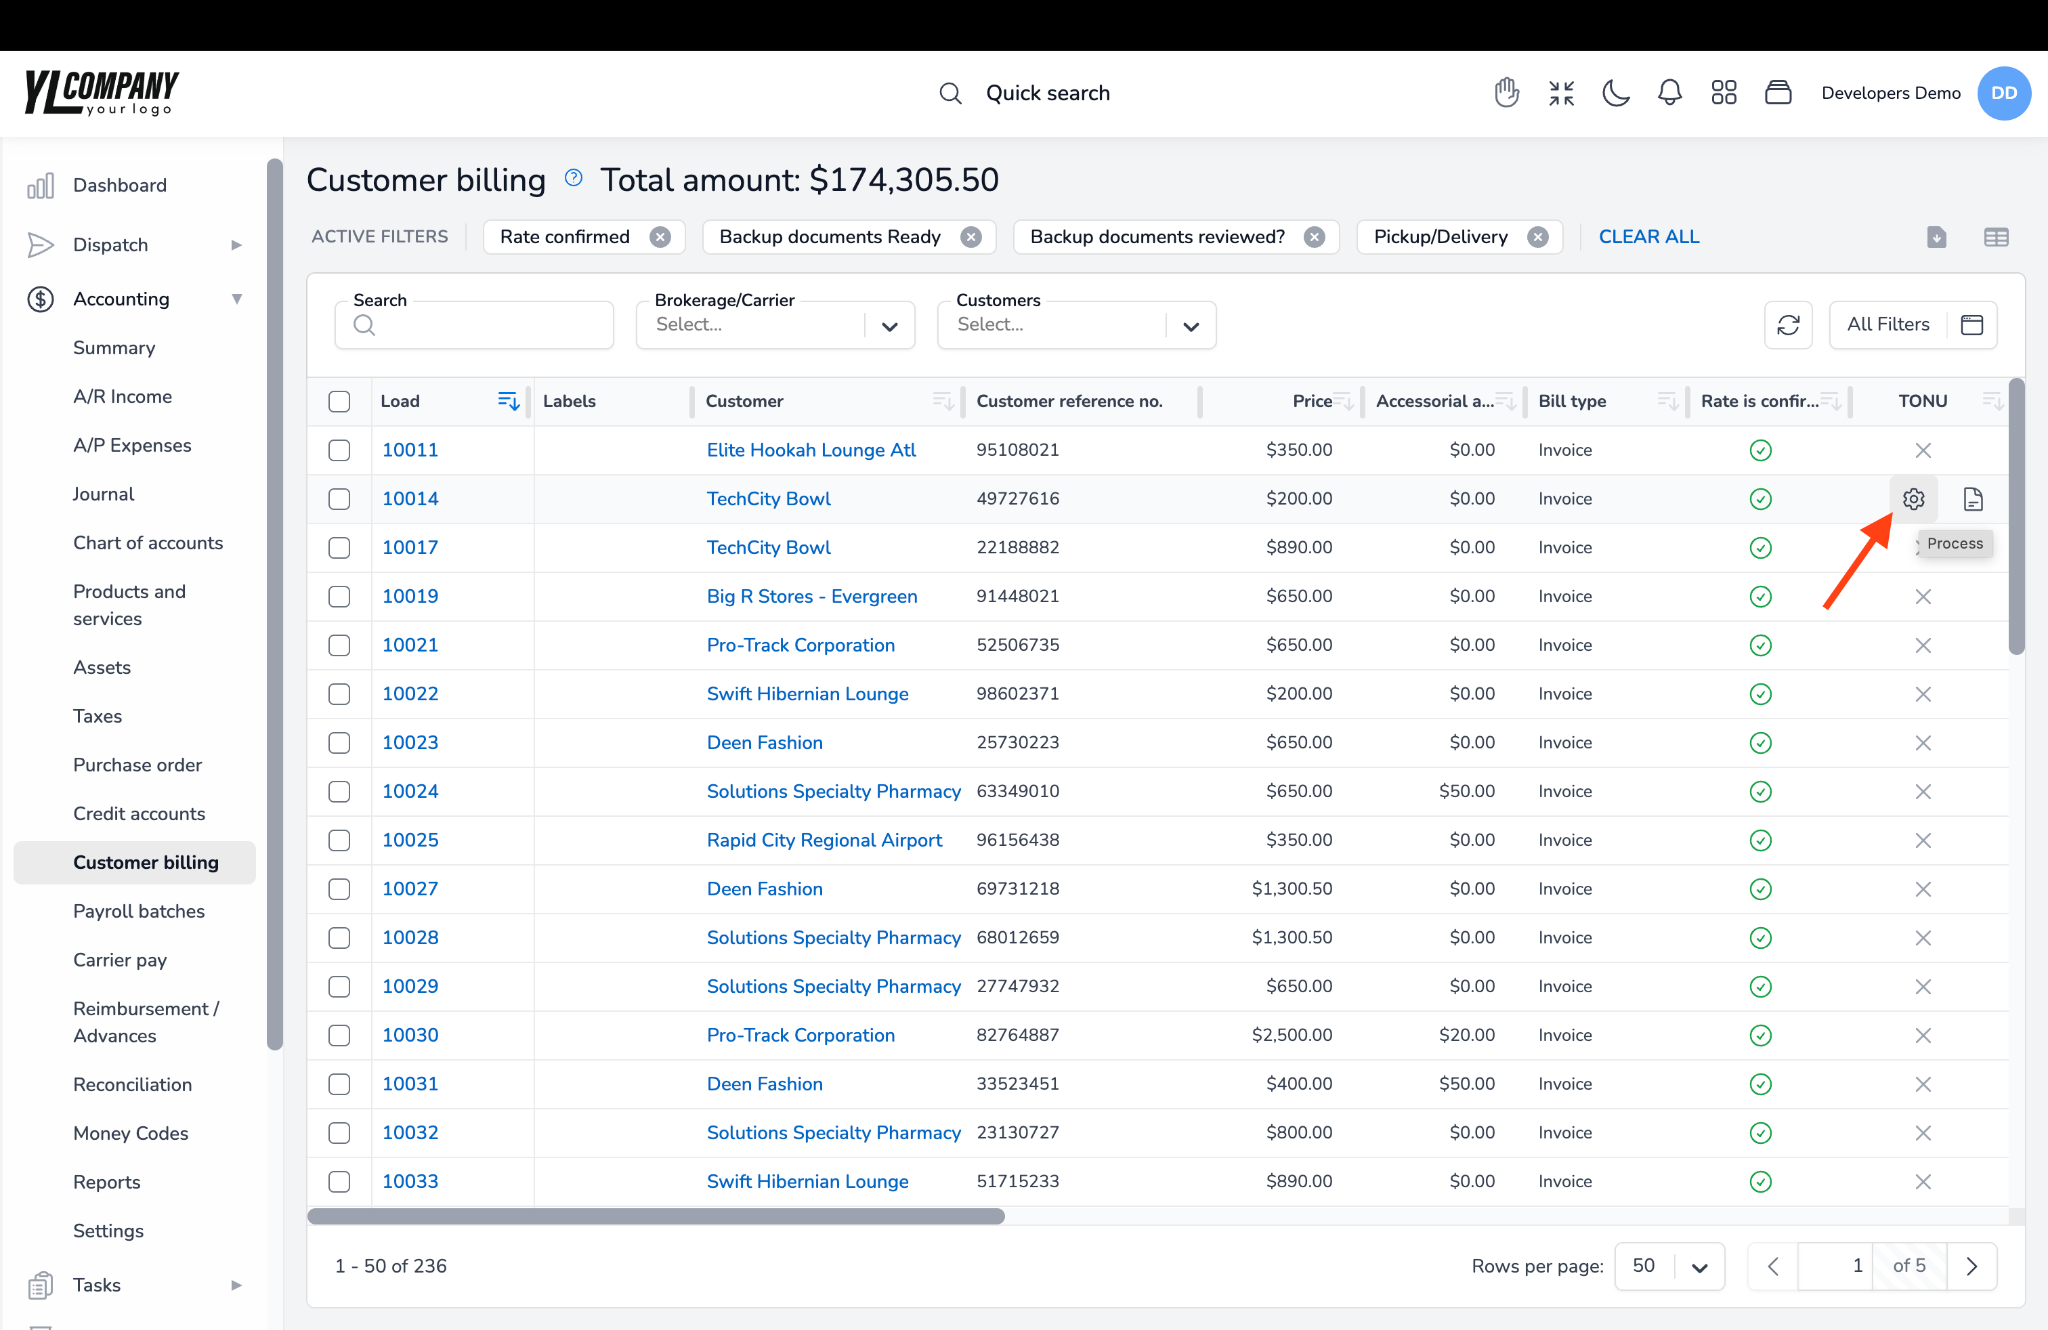
Each delivered load with a price value greater than zero will appear on the customer’s billing. You can access this on the Billing page.
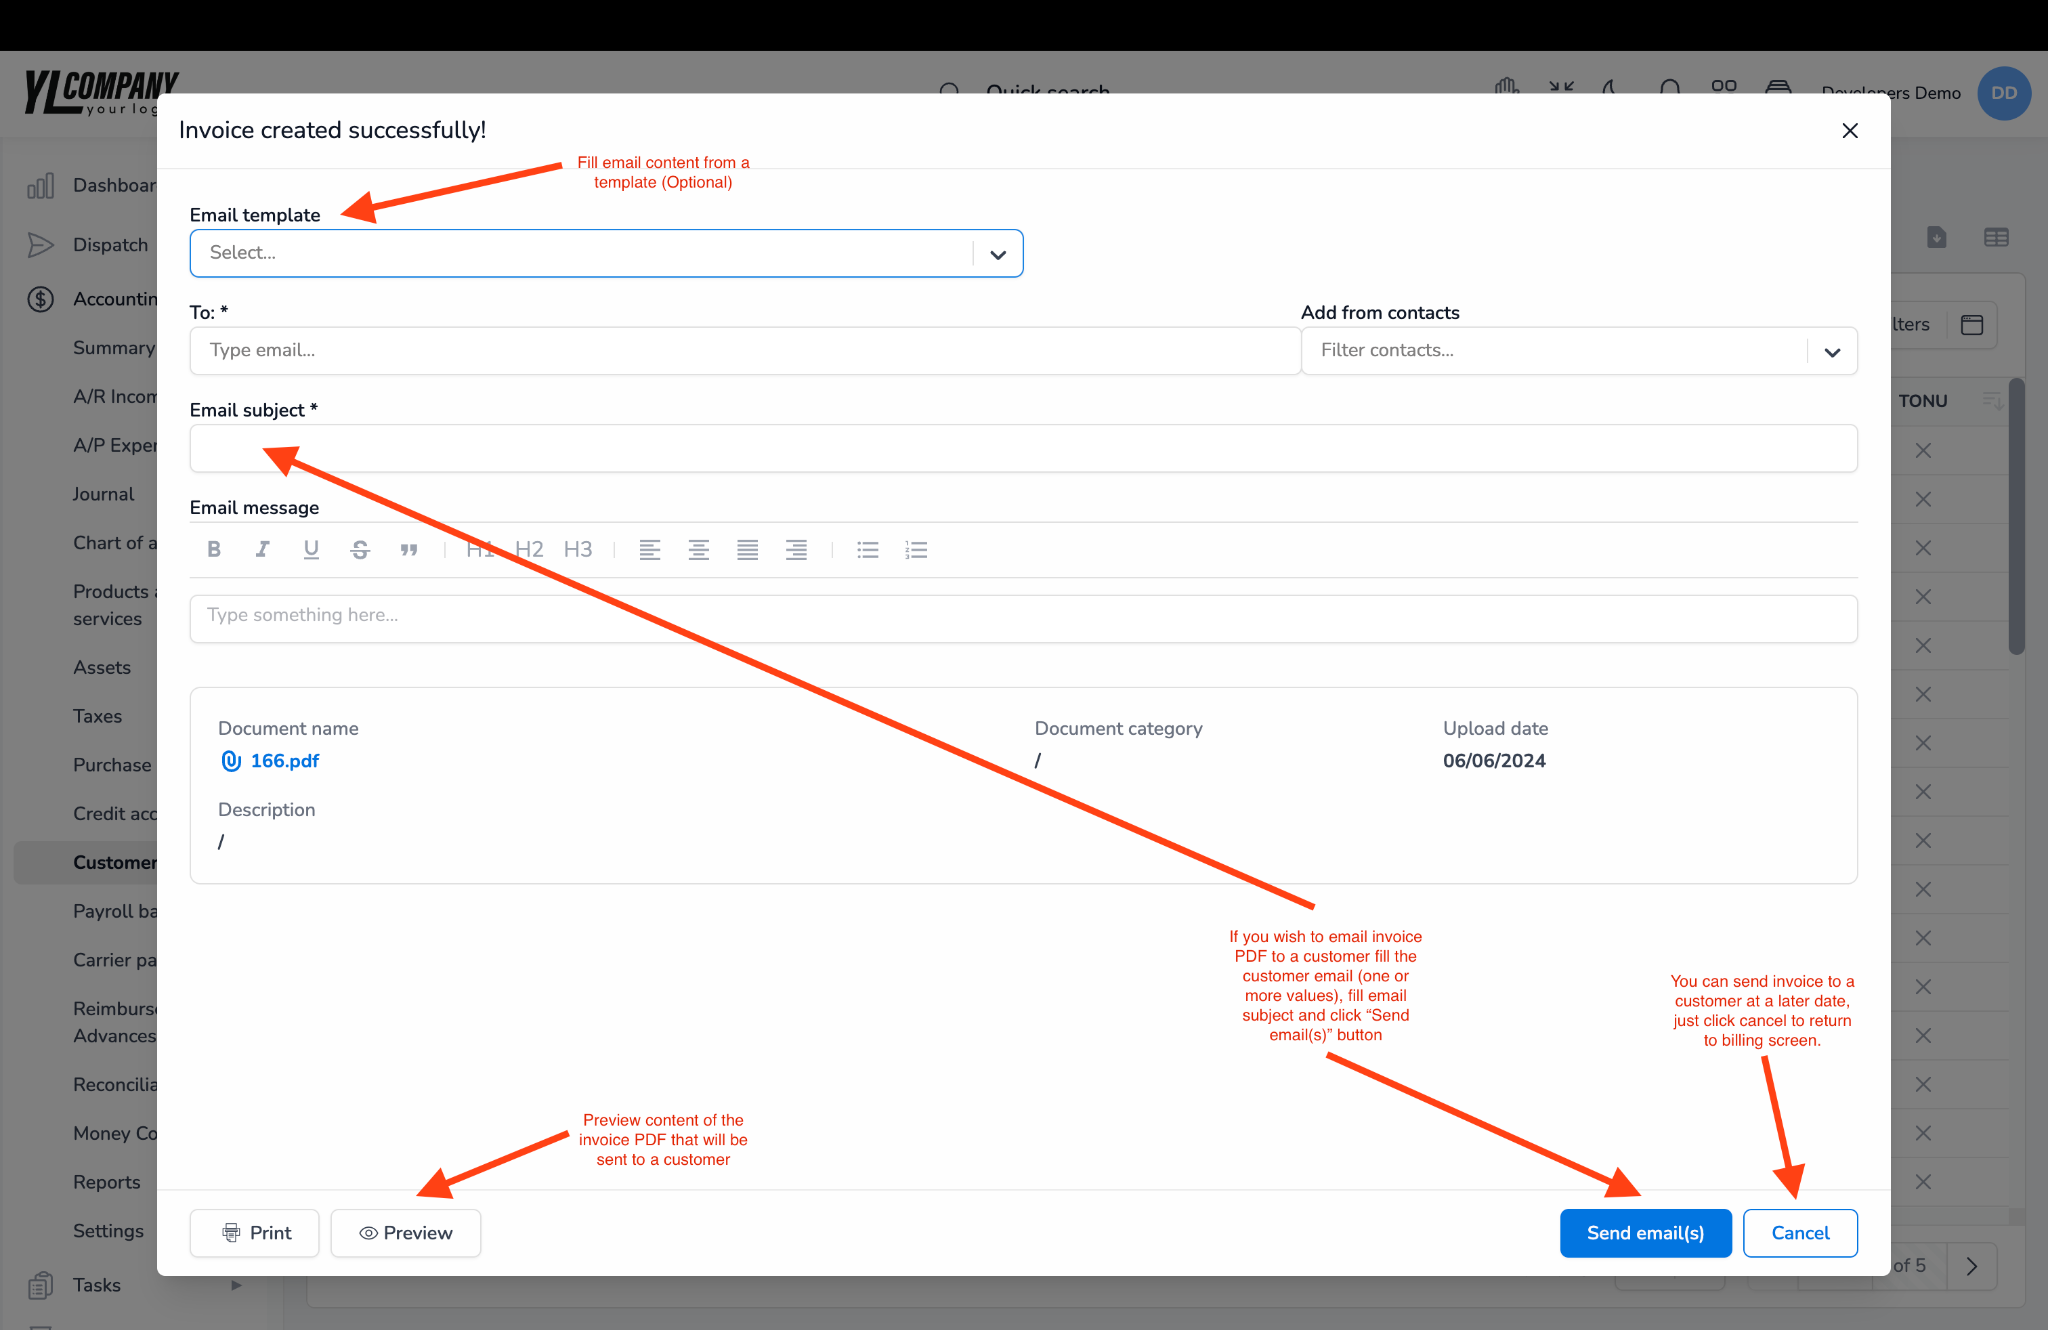
To generate an invoice for a load, click the “cog” icon next to the load entry.
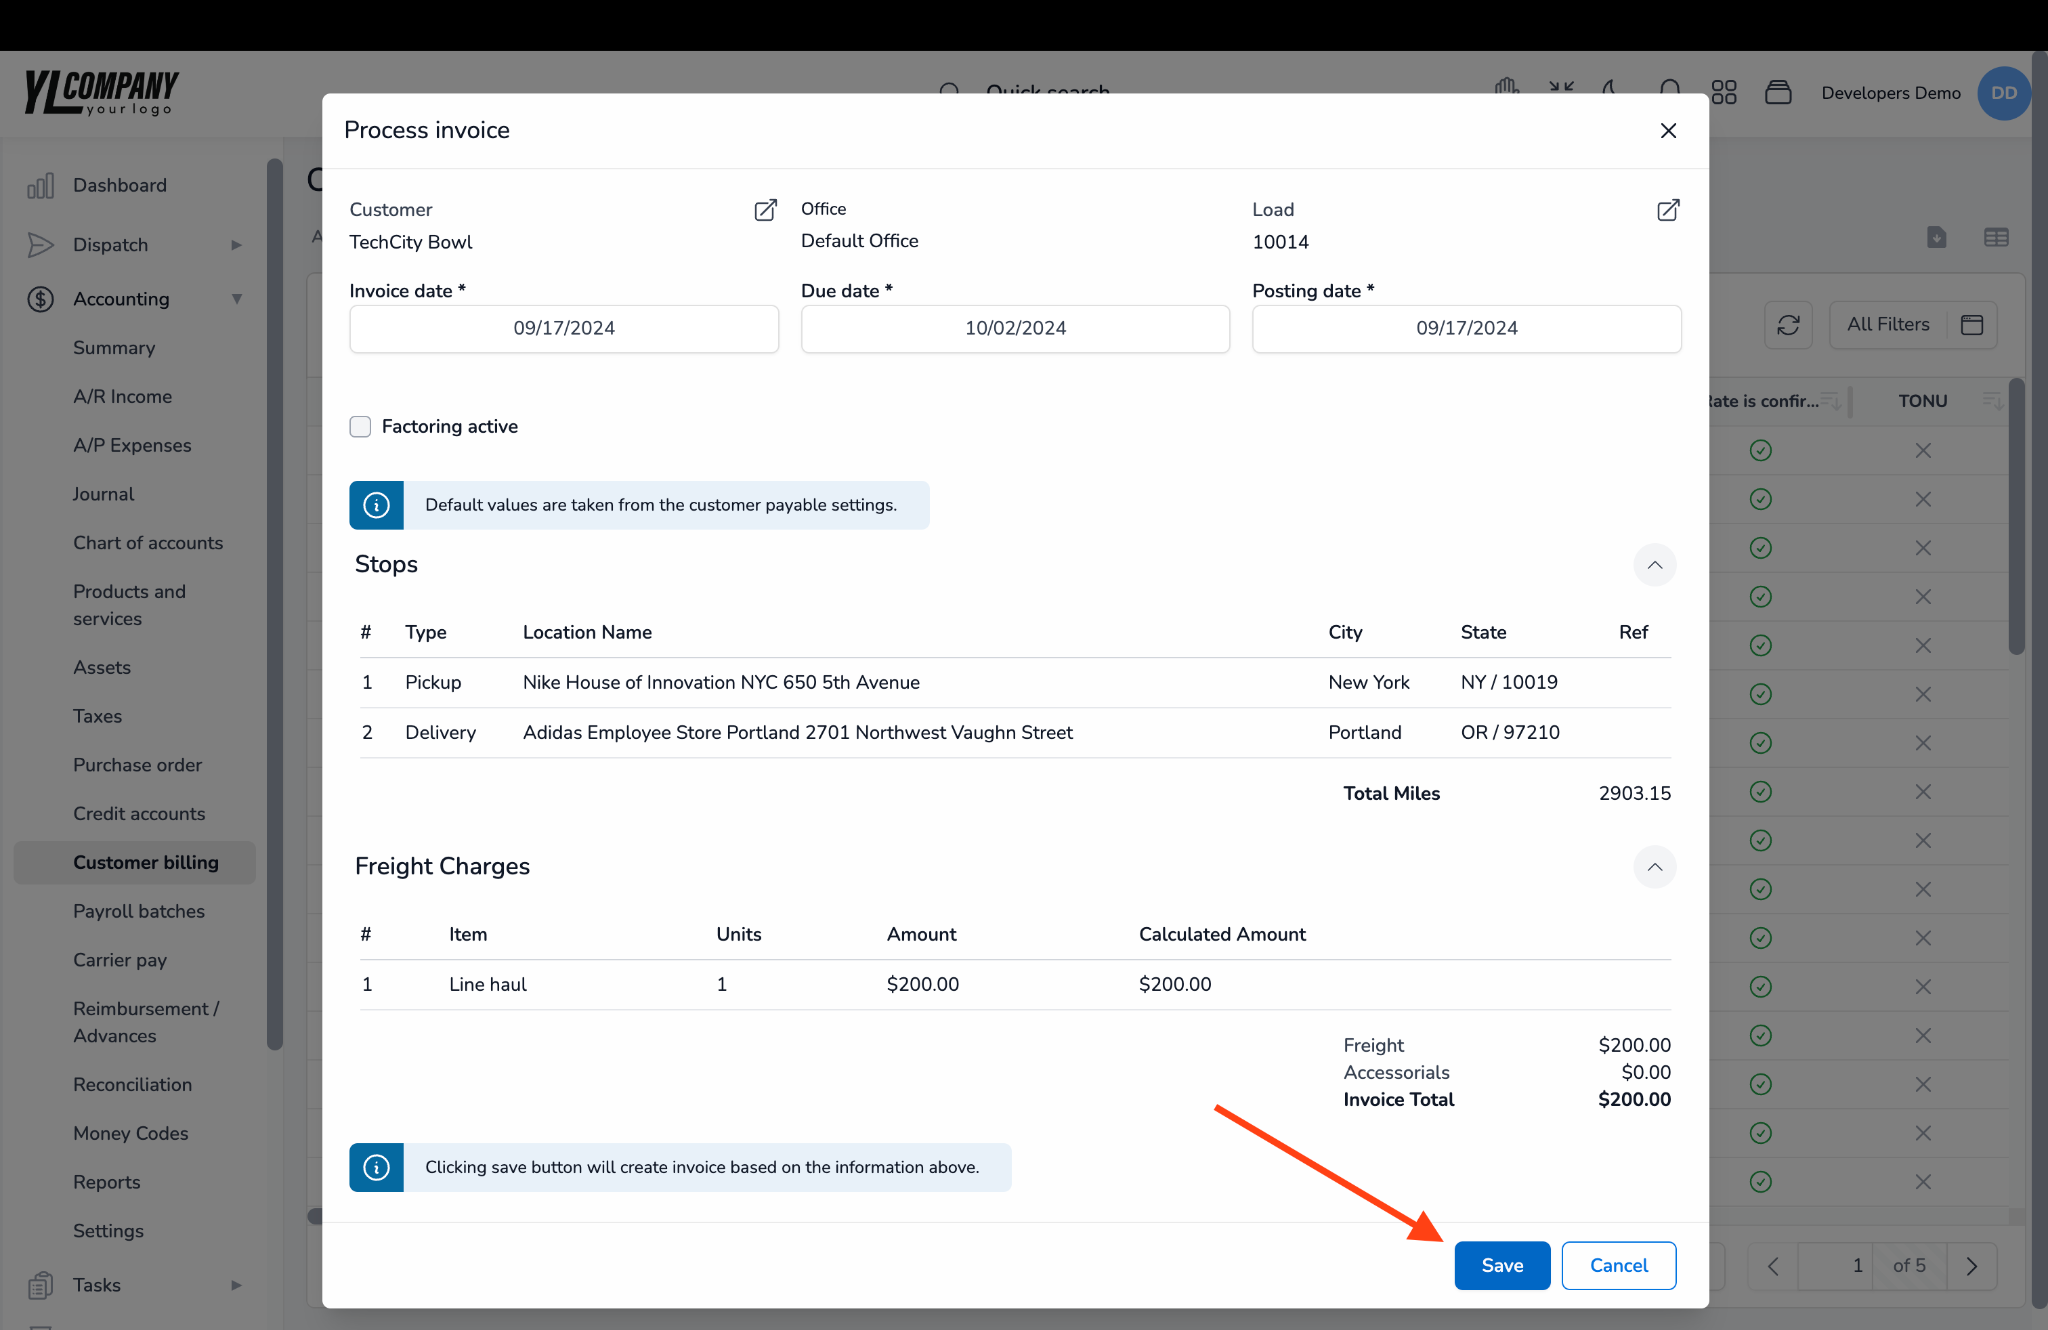
A processing dialog will allow you to review the information before finalizing the invoice.
Once created, the invoice can be sent directly to the customer. You can use pre-defined email templates or pre-filled customer email addresses if they have been set up earlier.
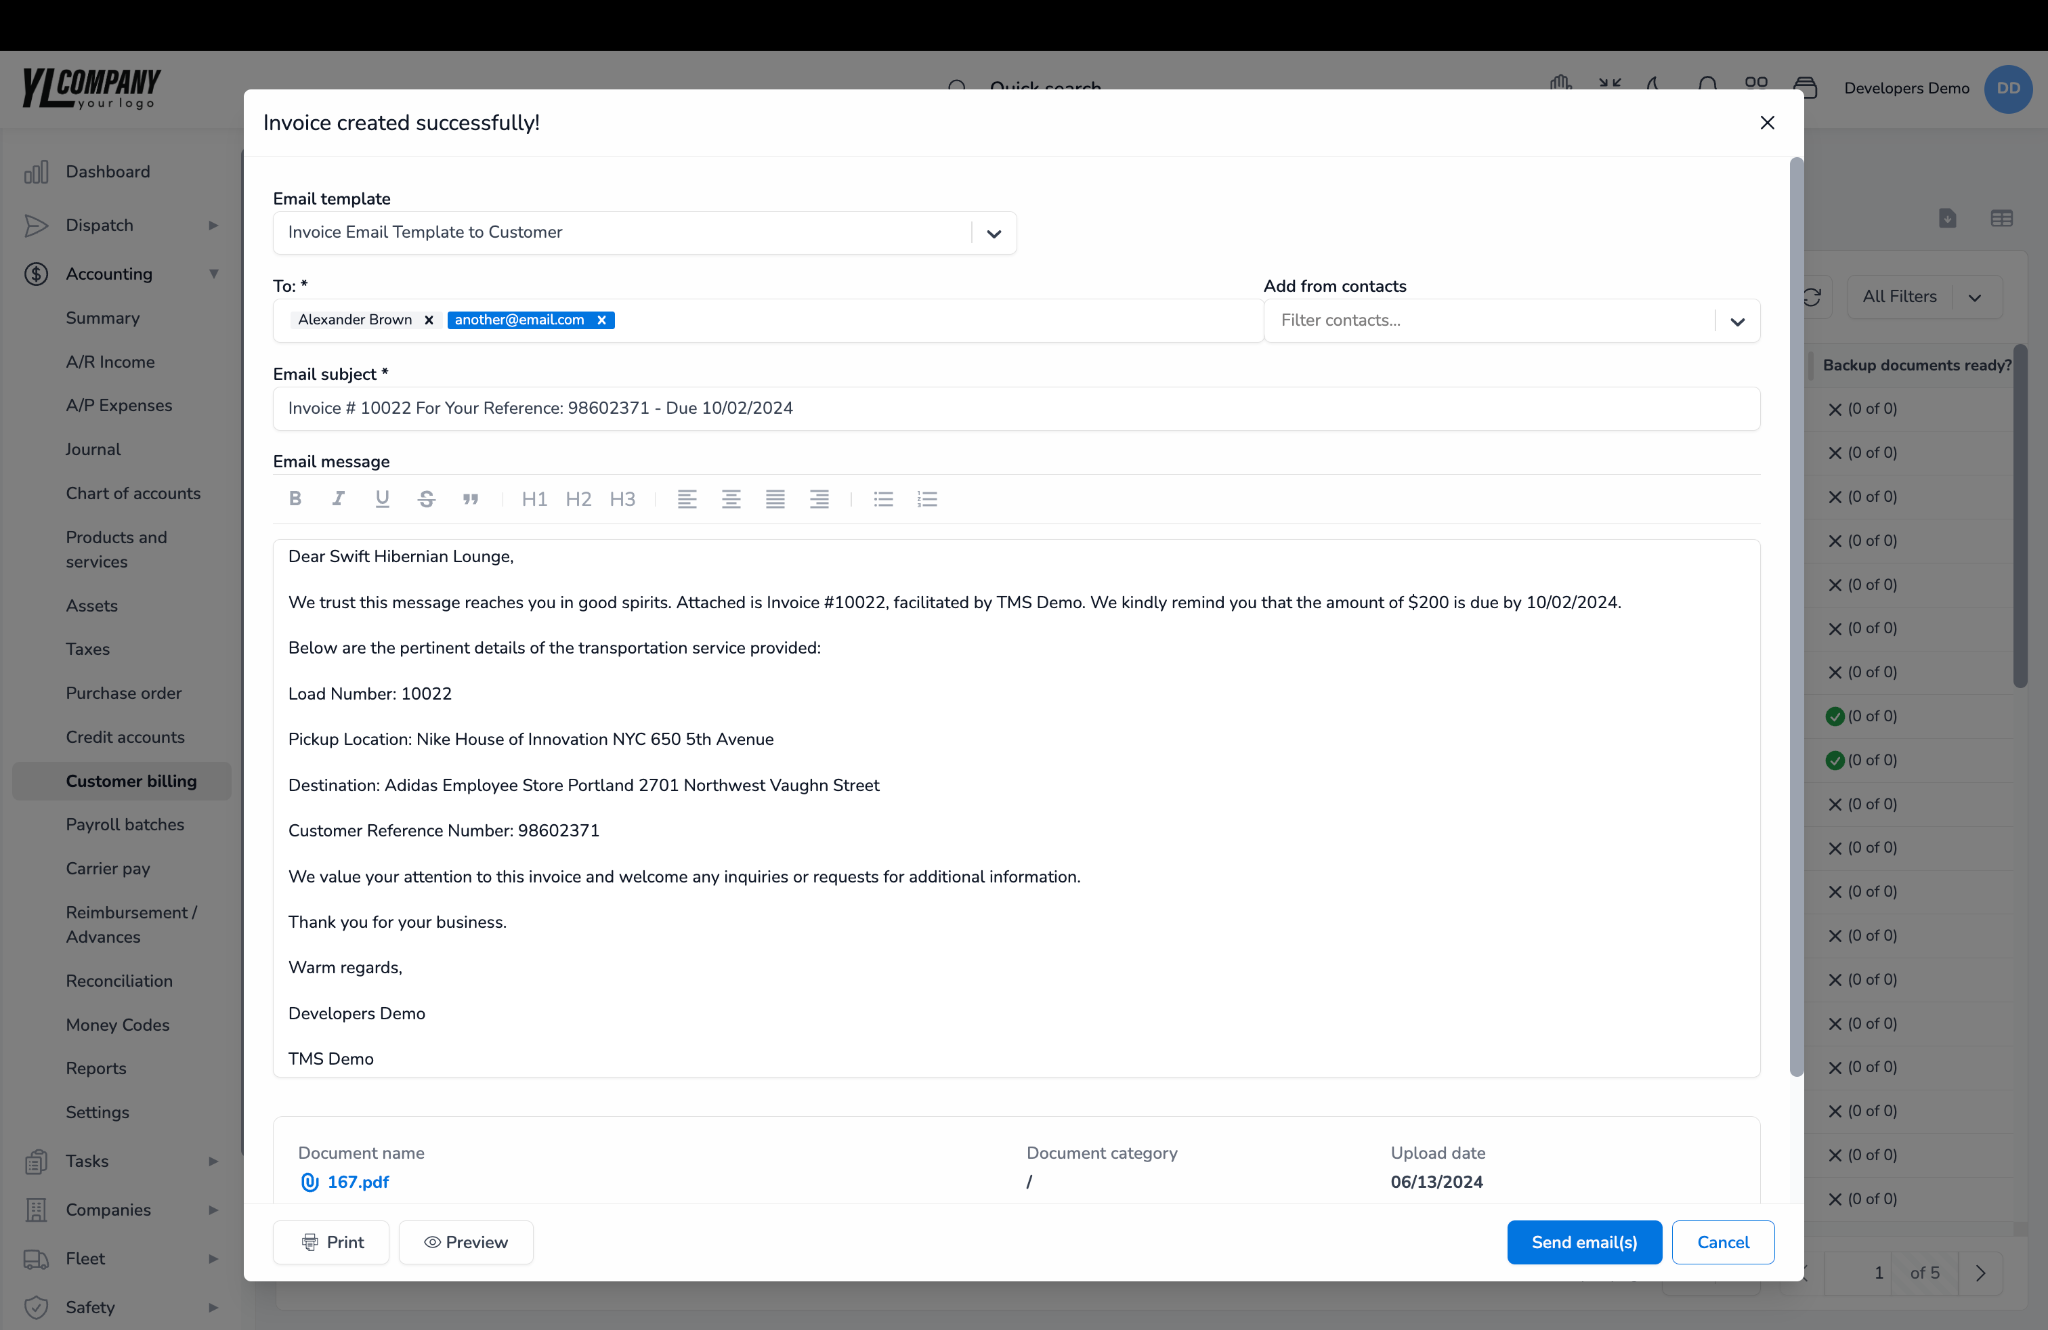
Please note that any documents attached to the load with the “Send with invoice” option checked will be appended to the invoice PDF and sent to the customer along with the invoice content.
Also, once the invoice is generated for the load, the pricing section becomes read-only, and only additional accessorials can be added to the load pricing. If someone adds accessorials once the load is invoiced, that invoice will be marked as “Revised,” and the user who created the invoice will be notified via email.
You can always use the “Preview” option in the bottom left corner to make a final check before sending an invoice to the customer.
If no default settings are configured, you can manually enter the necessary information and send the email with the invoice PDF attached.
Invoices listing #
All invoices, whether created through customer billing or manually, will be listed on the Income page. You can use various filters to search for invoices, such as by internal load number, customer reference, status, or date.
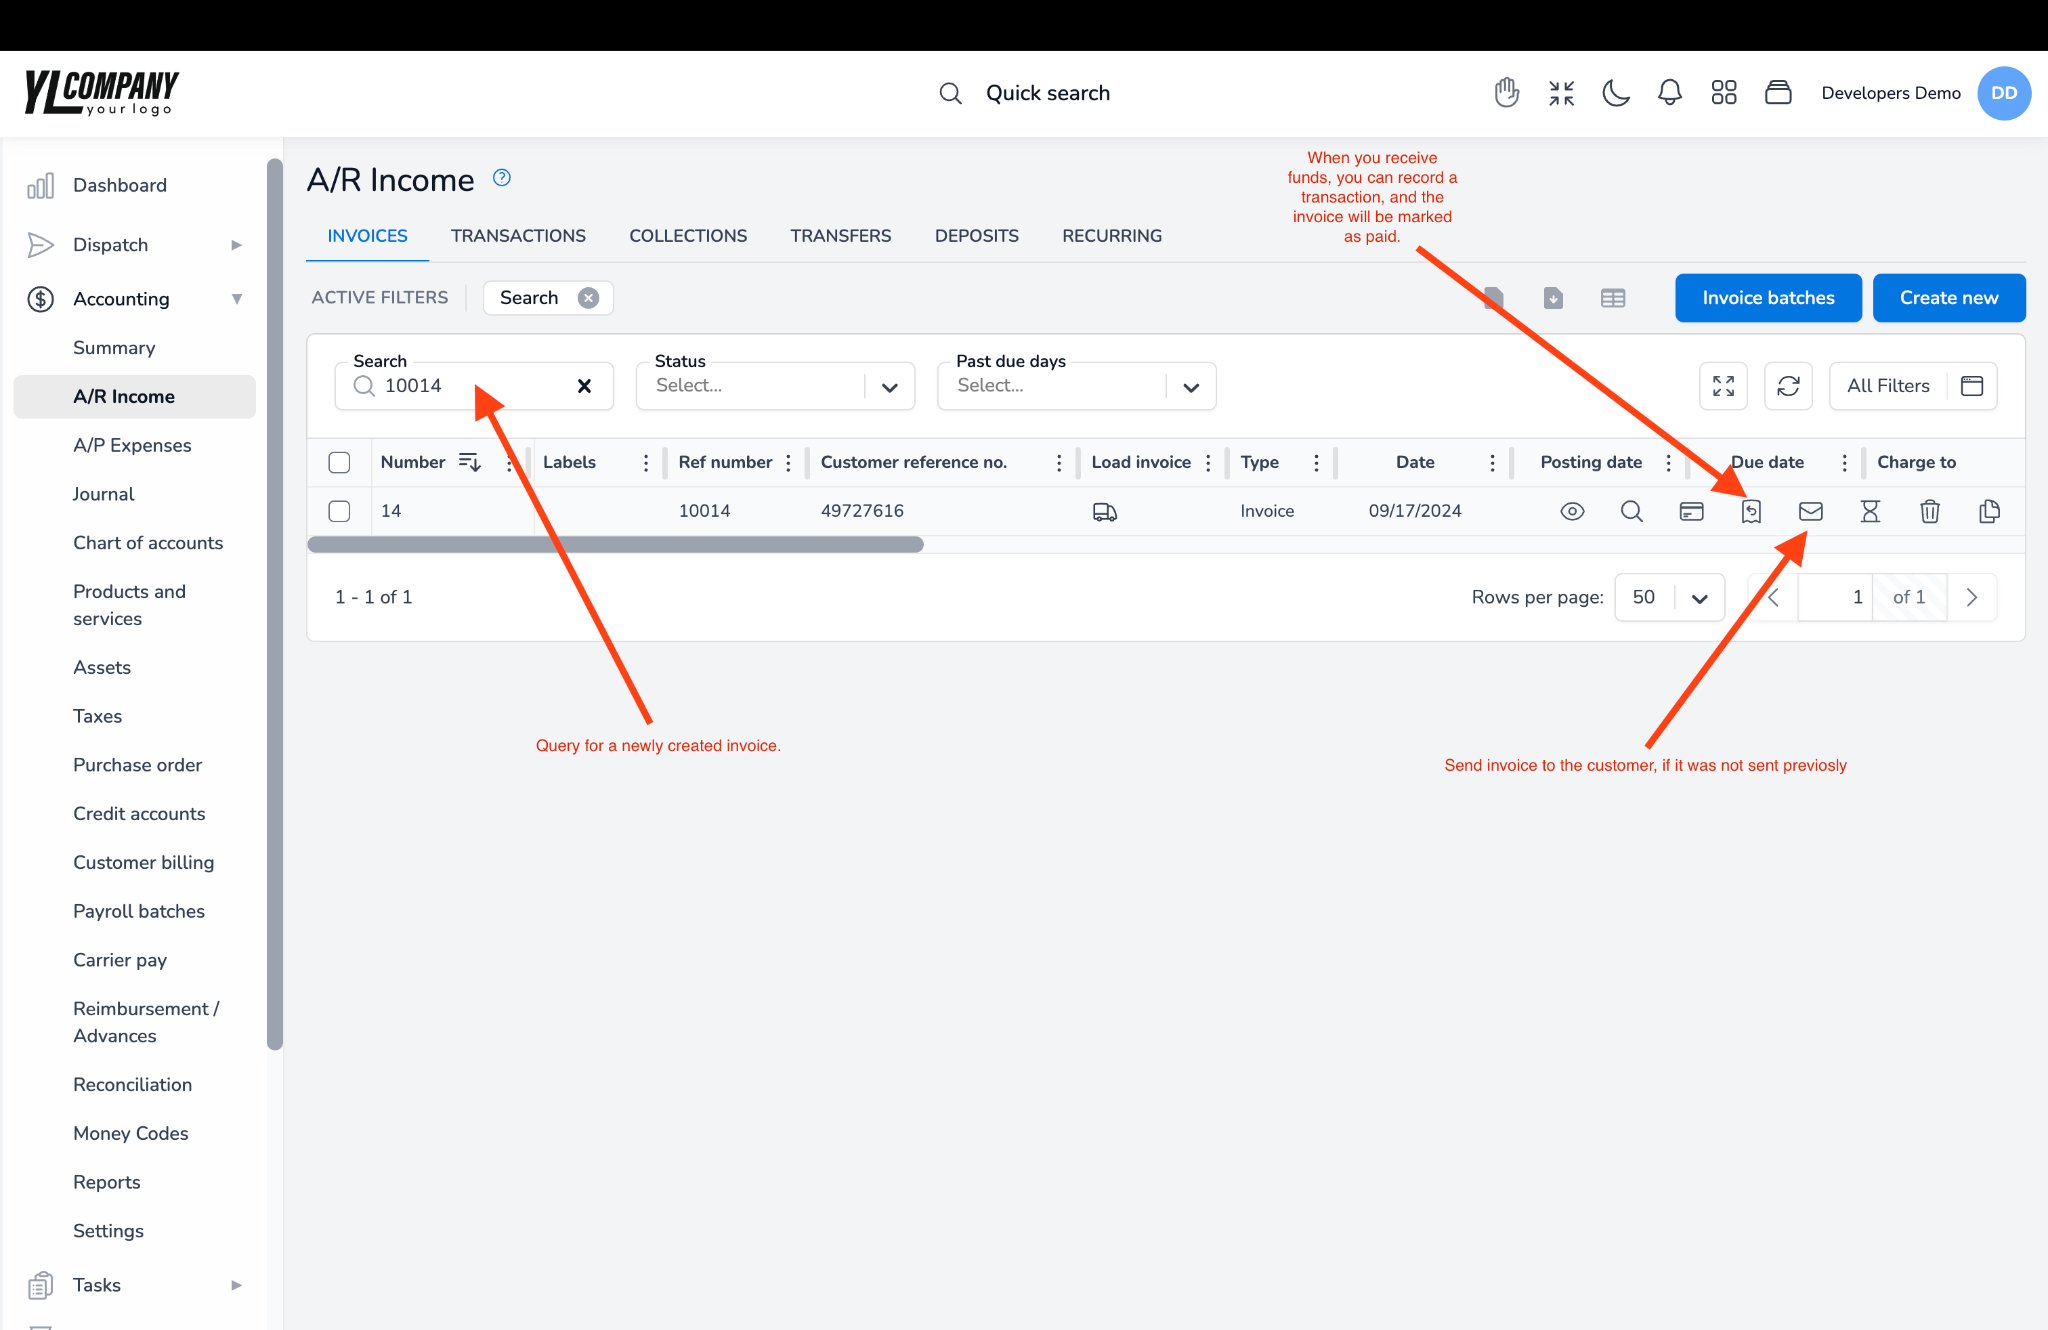
When a customer makes a payment, you record it according to the corresponding invoice. To record a payment, use the “Reverse arrow” icon on the invoice listing. Once payment has been recorded, the system will automatically update the invoice status to “Paid.”
If you did not use the previous step to send the invoice to the customer, you can do the same by using the “envelope” icon on the invoice listing.
Deleting an Invoice: #
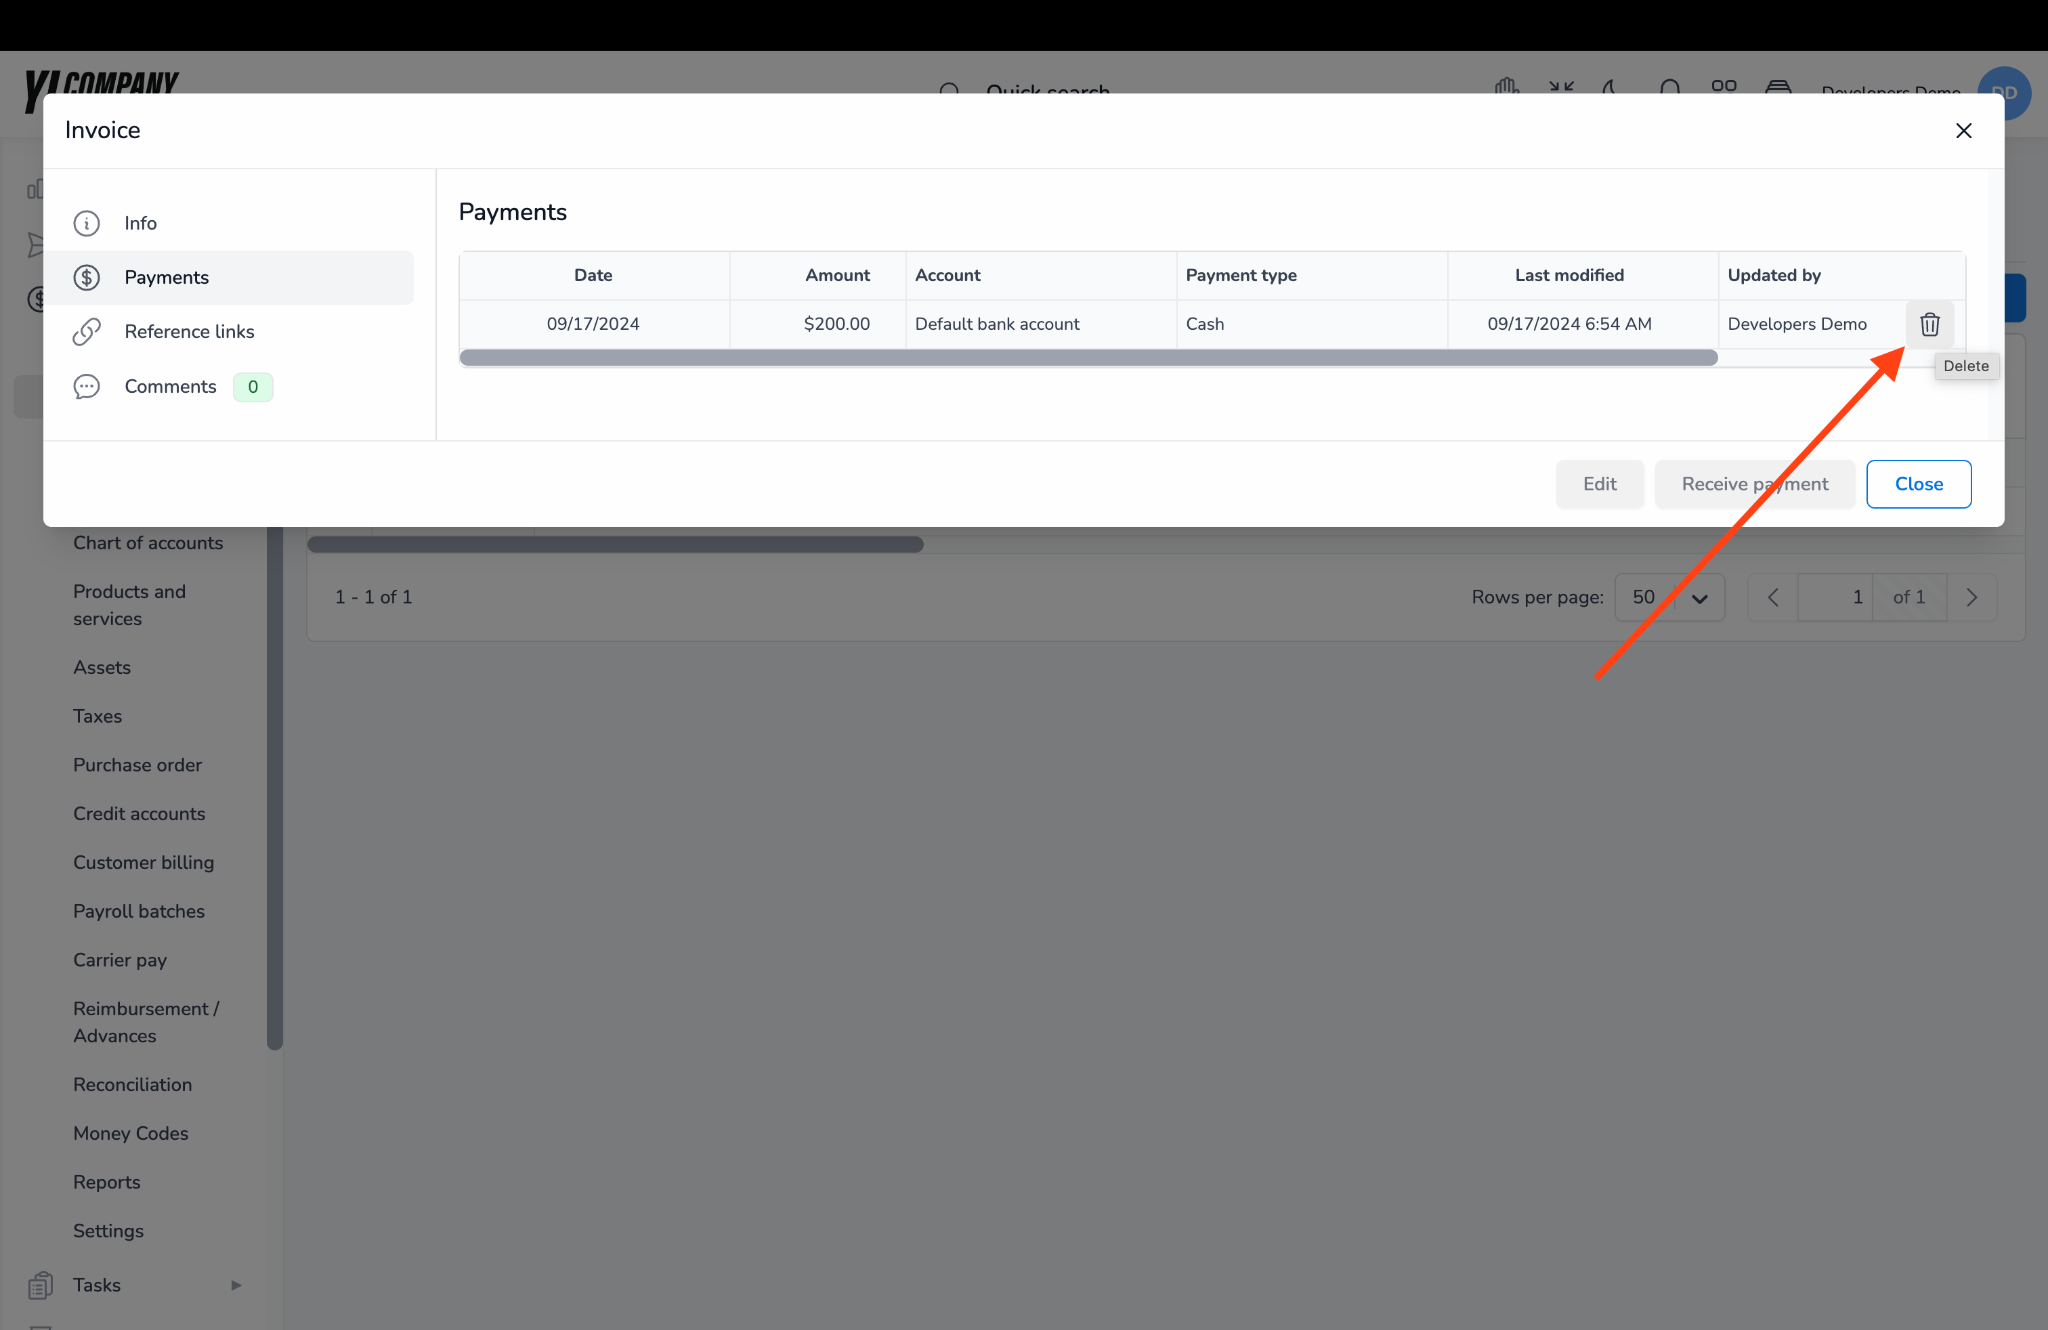
If you need to delete an invoice due to an error or for any other reason, click the trash can icon on the invoice listing.
Please note that if an invoice is marked as Paid, the system will prevent deletion. To delete a paid invoice, you must first delete the associated payment record. To do this, click the “eye” icon to view invoice details, then navigate to the “Payments” tab.