Initial Driver Payroll Setup #
When creating a new driver in the system, it is essential to add the appropriate Load payment plan to ensure accurate compensation and billing. This payment plan determines the default load pricing entry for the selected driver. Each time the driver is assigned to a load, the default entry with the specified values will be added to the load pricing record.
To access this option, please select Drivers from the left sidebar under the Personnel section. Clicking on the Driver’s name from the list will take you to that Driver’s page. You can find this option under the Payroll Setup tab.
How to set up the Driver’s Initial Payroll? #
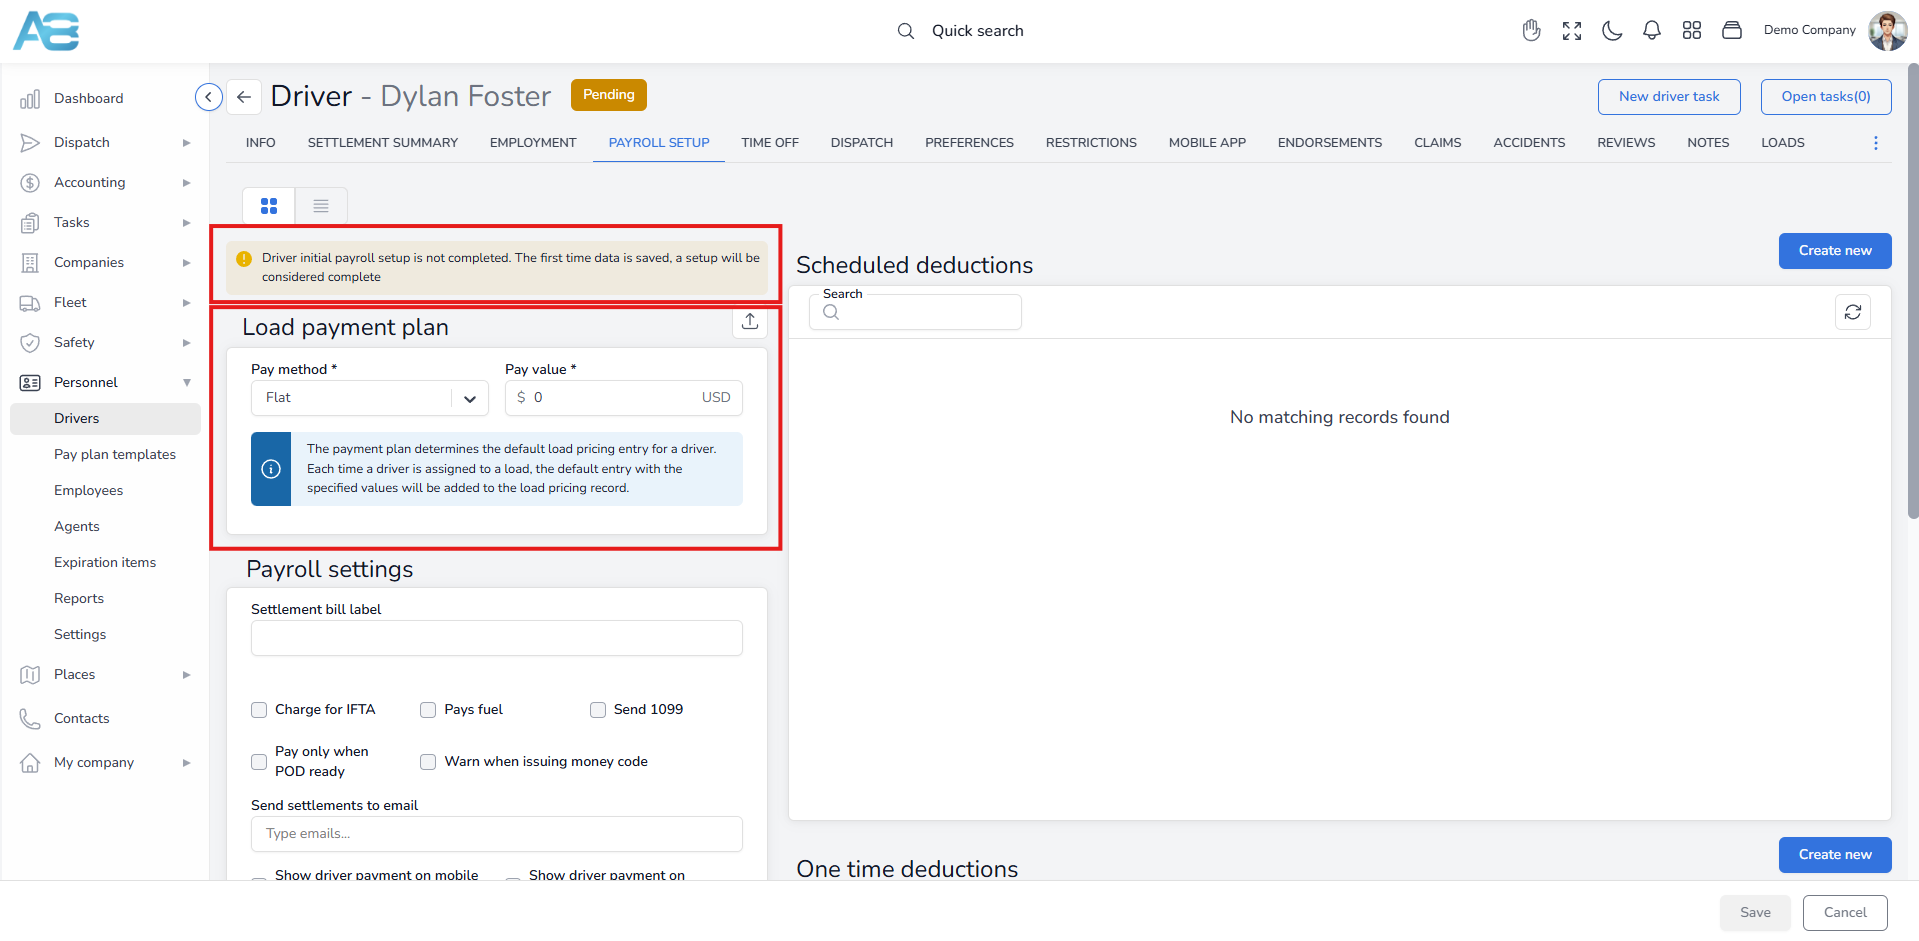
When you access the Driver Payroll Setup tab for the selected driver with an incomplete Load payment plan, a yellow warning message will appear at the top of the screen: “Driver initial payroll setup is not completed. The first time data is saved, a setup will be considered complete.”
This message indicates that the payroll setup is incomplete and will only be marked as complete once the required data is saved for the first time.
To set up a driver Load payment plan, from the driver’s page, navigate to the Driver Payroll Setup tab, select the appropriate Pay method, enter the Pay value, and save the payroll setup form without any issues. If you have already created templates for the driver Load payment plan, you can easily import them. Simply click the Import from Template button in the upper right corner and choose a template from the drop-down list.
After saving, the system will no longer display a yellow warning message, ensuring a smooth initial setup process.
Once created, the Load payment plan will, by default, appear in the Load pricing tab under the Drivers/Trucks fee* when you assign that driver to a load.
*You can set up this option under the Load payment settings. To access it, please select Settings from the left sidebar under the Dispatch section. Scroll down to the Load payment settings, where you will choose if load expenses will be associated with a driver, a truck, or both, and who will receive payments for loads by default.
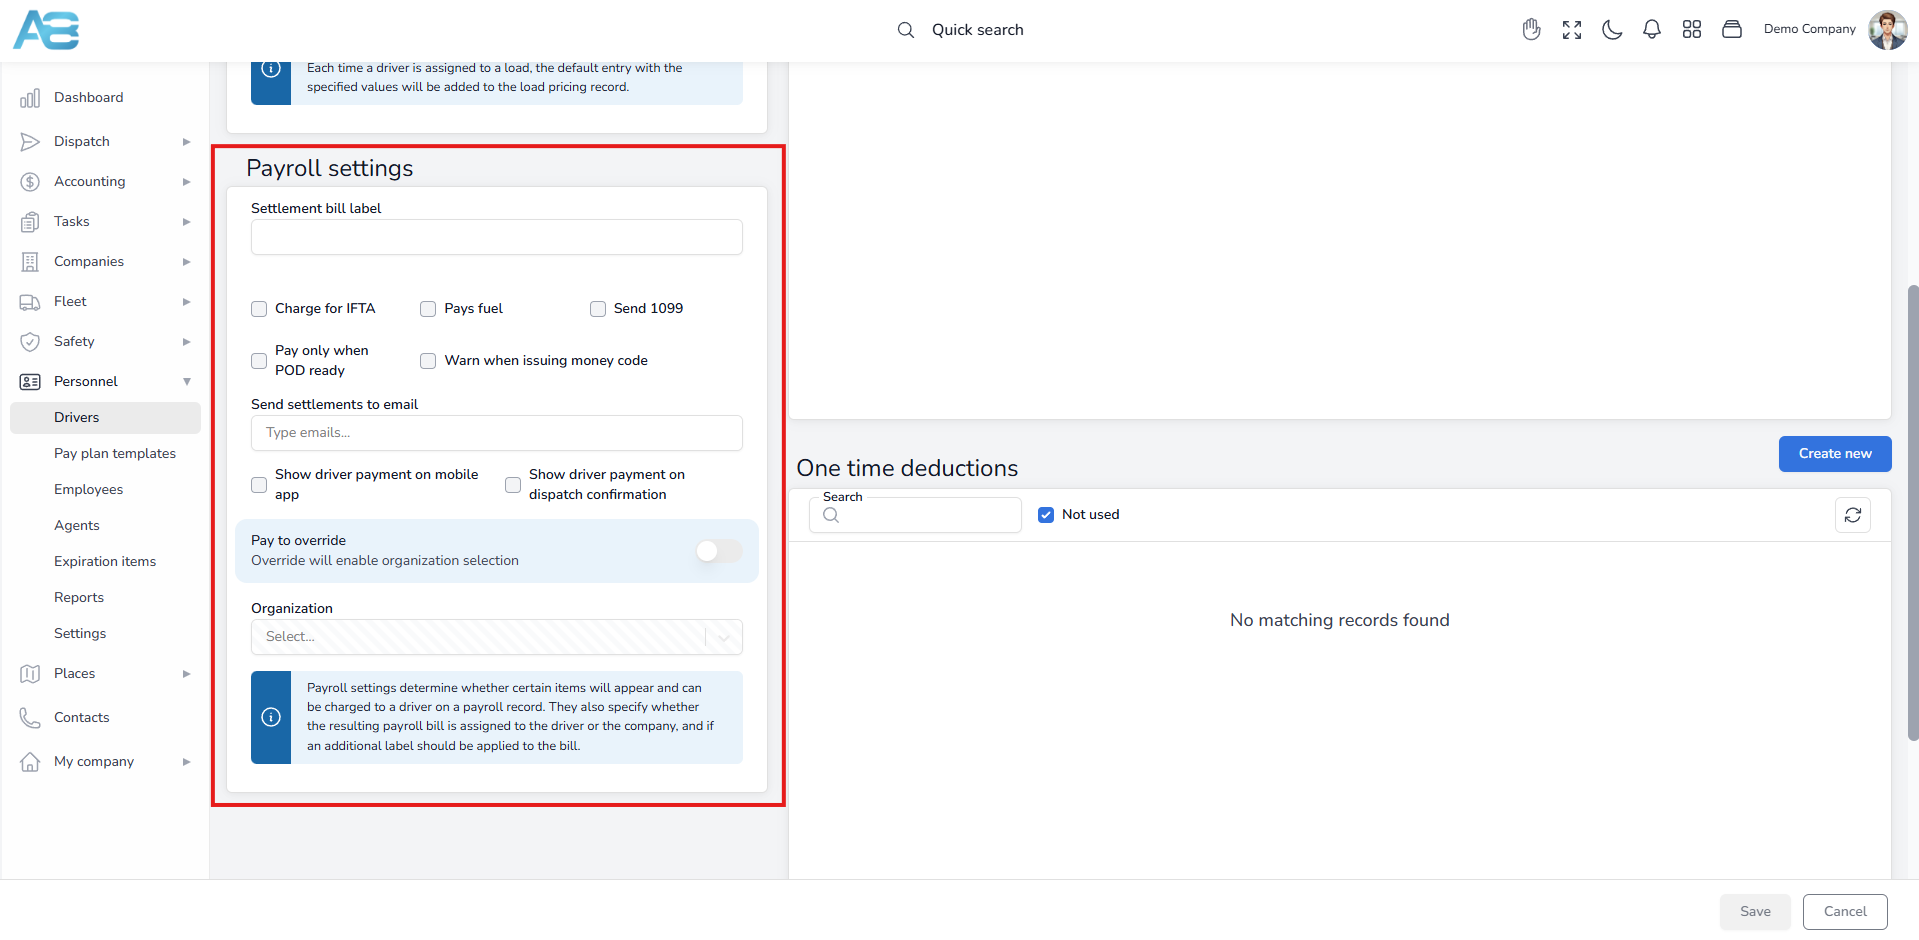
Under the Payroll settings section, you can add a label that should be applied to the bill or certain items that will be charged to a driver and displayed on his payroll record. These items are optional and specify whether the resulting payroll bill is assigned to a driver or a company.
Settlement bill label #
Adding a label to your settlement bill allows you to categorize your bills, making it easier to track expenses and reconcile your accounts. The label will be visible on the bill as well as in the label column of the expenses section.
You can add the option you need by marking the appropriate checkbox:
-Charge for IFTA – If this option is checked during the fuel import, the driver will be charged for the costs.
-Pays fuel – If this option is checked during the fuel import, the costs will be assigned to the driver or truck.
-Send 1099 – Check this option if the driver is an independent contractor.
-Pay only when POD ready – Payment will be made once the Proof of Delivery (POD) is added to the documents tab for the respective load. Also, when this option is checked, only loads with complete documents will appear on the payroll list.
-Warn when issuing Money Code – When the driver exceeds the Money Code limit, a message will be displayed „Expressed code should not be issued for this driver. Check before proceeding.“
Send settlements to email #
Entering an email in this field will pre-populate the email when sending settlements to a driver.
Show driver payment on mobile app and/or dispatch confirmation #
By marking these checkboxes, you choose where the driver payment information will be displayed.
Pay to override #
By enabling this option, you may select from the drop-down menu the company that will receive the driver’s salary.
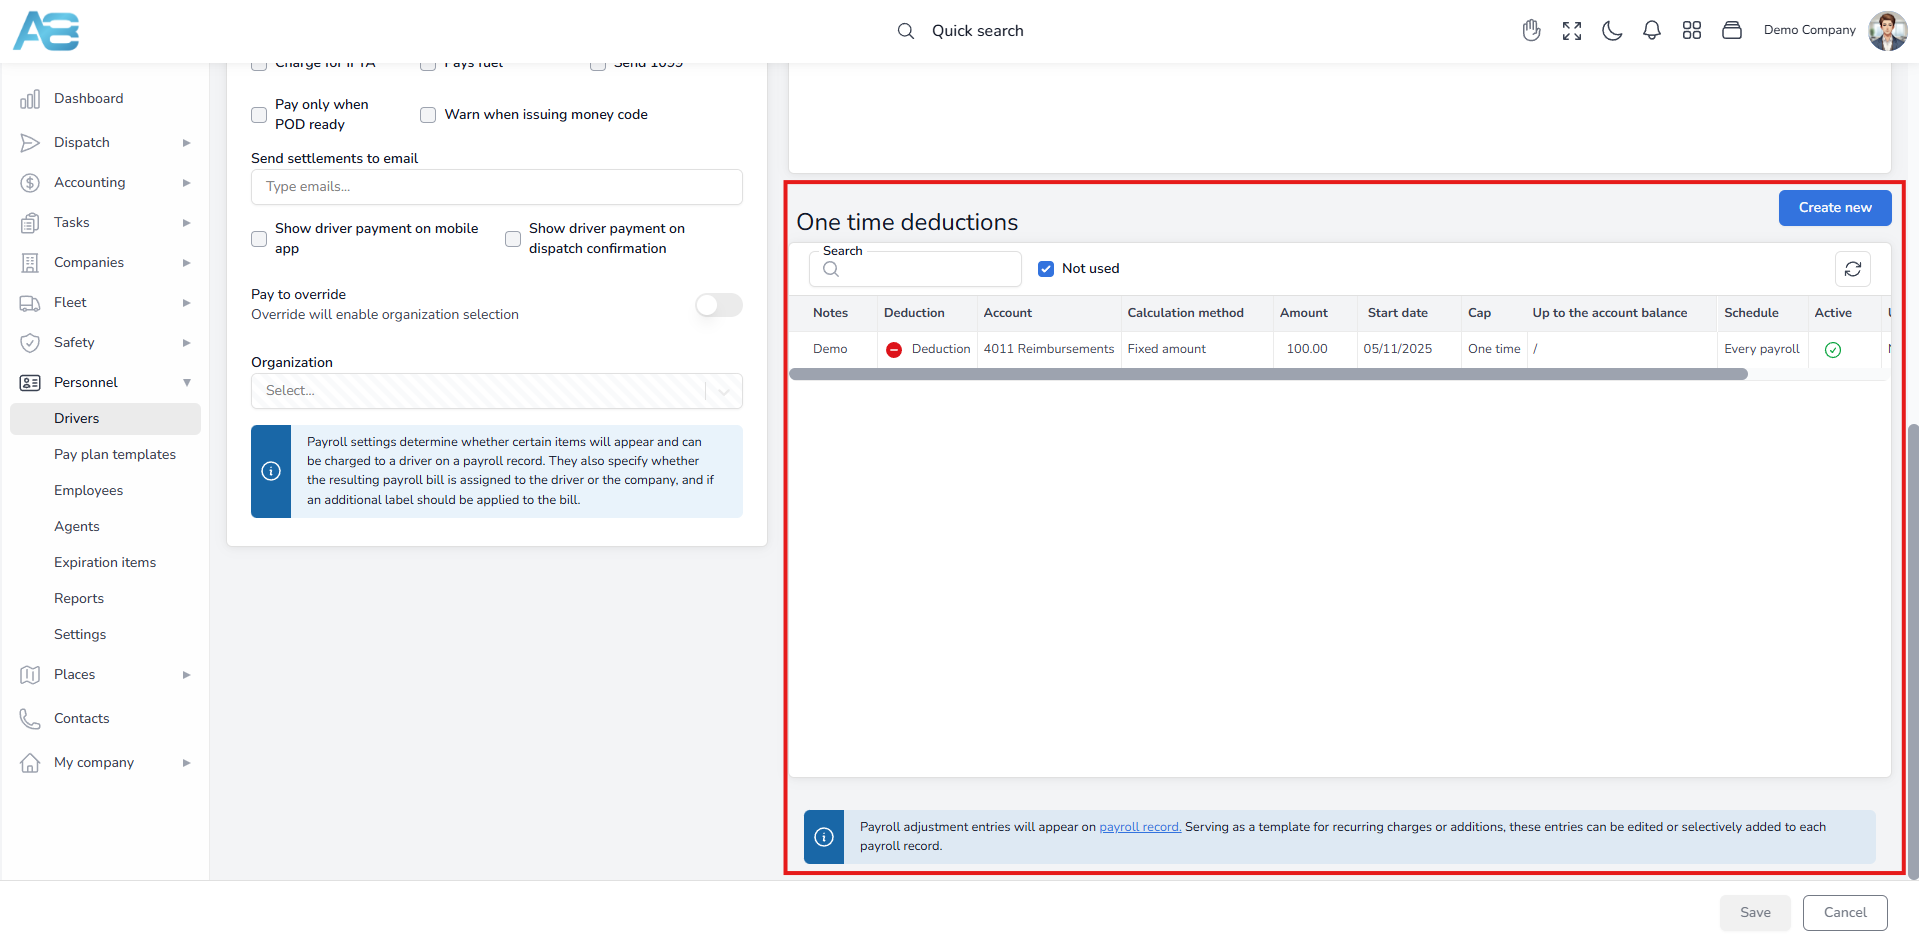
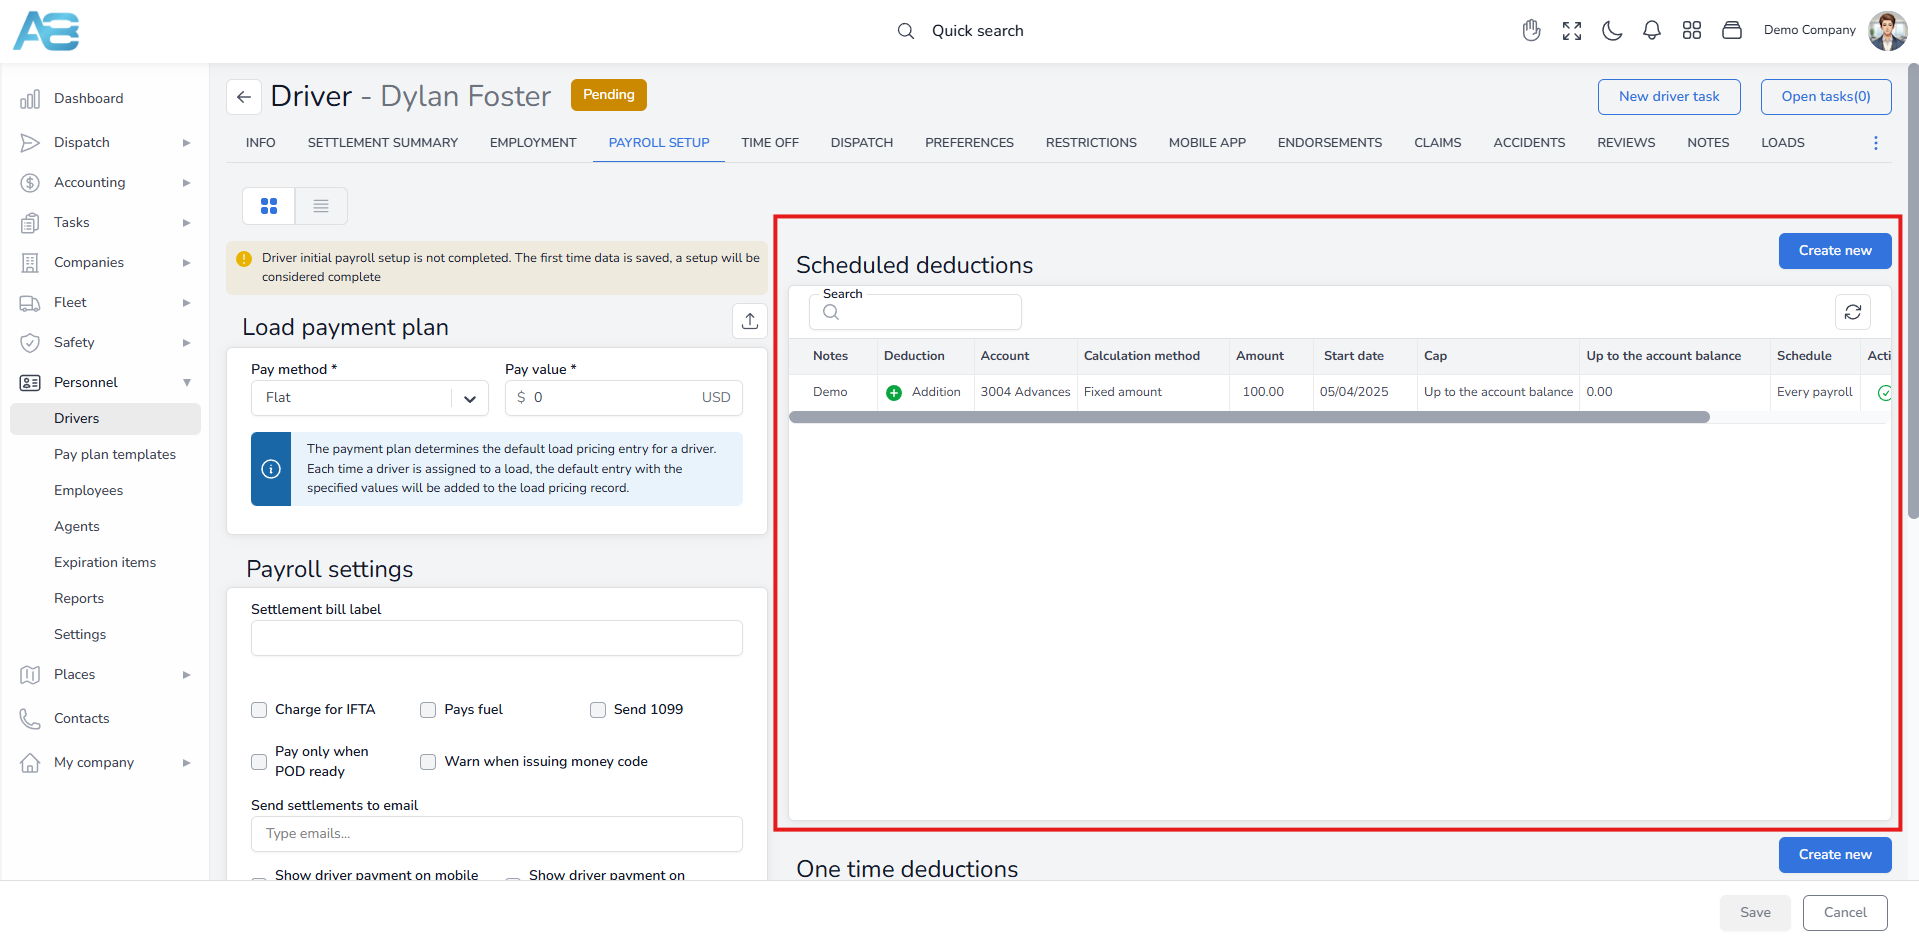
Under the Scheduled deductions section, you can add certain entries that will appear on every payroll record. These payroll adjustment entries can be edited or selectively included in individual payroll records, as they serve as templates for recurring charges or additions.
To create a new payroll adjustment, click the Create new button in the upper right corner of this section and complete the form that will appear in a pop-up window. Once saved, a new entry will be reflected on the driver’s payroll record.
For one-time entries, you will use the One-Time Deductions section. Again, click the Create New button in the upper right corner of this section and fill out the form that will appear in the pop-up window. After saving your new entry, it will also be displayed on the driver’s payroll record.