1. How filters work on the main pages #
Each main page that contains a table will remember the user-applied filters and table settings.
When users return to the page, the appearance and configurations will be the same as before. These settings are saved locally in the browser on the user’s computer. Therefore, if the user switches computers or uses a different browser, the settings will not be the same. This also applies to incognito mode.
To save their table settings and transfer them between different computers or browsers, users can do so on the UI Tools page (https://tms.accur8.services/tools).
The user first sets the filters and then creates an additional profile by clicking the Profiles button on the UI Tools page, under which the system will remember those settings.
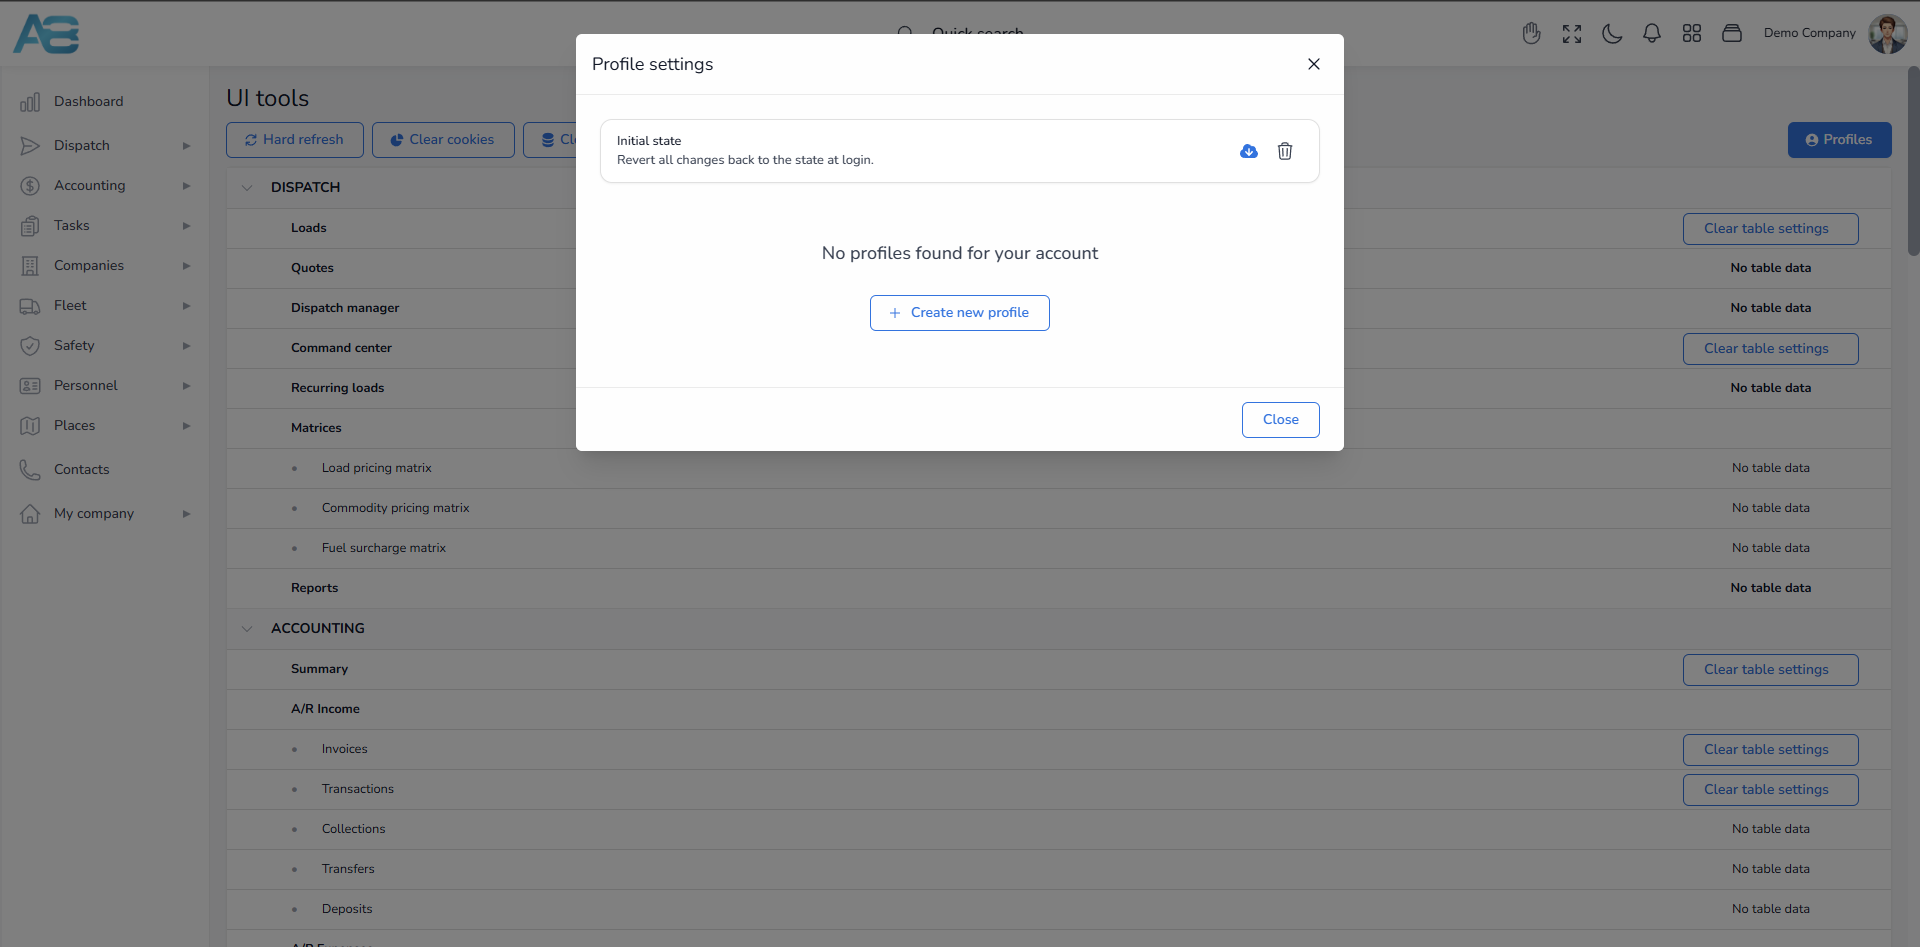
This function serves as a backup, ensuring that loading a profile will restore its previous settings and allow the user to access the system with the selected profile.
Additionally, users can clear table settings for each specific section.
2. How filters work on the Loads page #
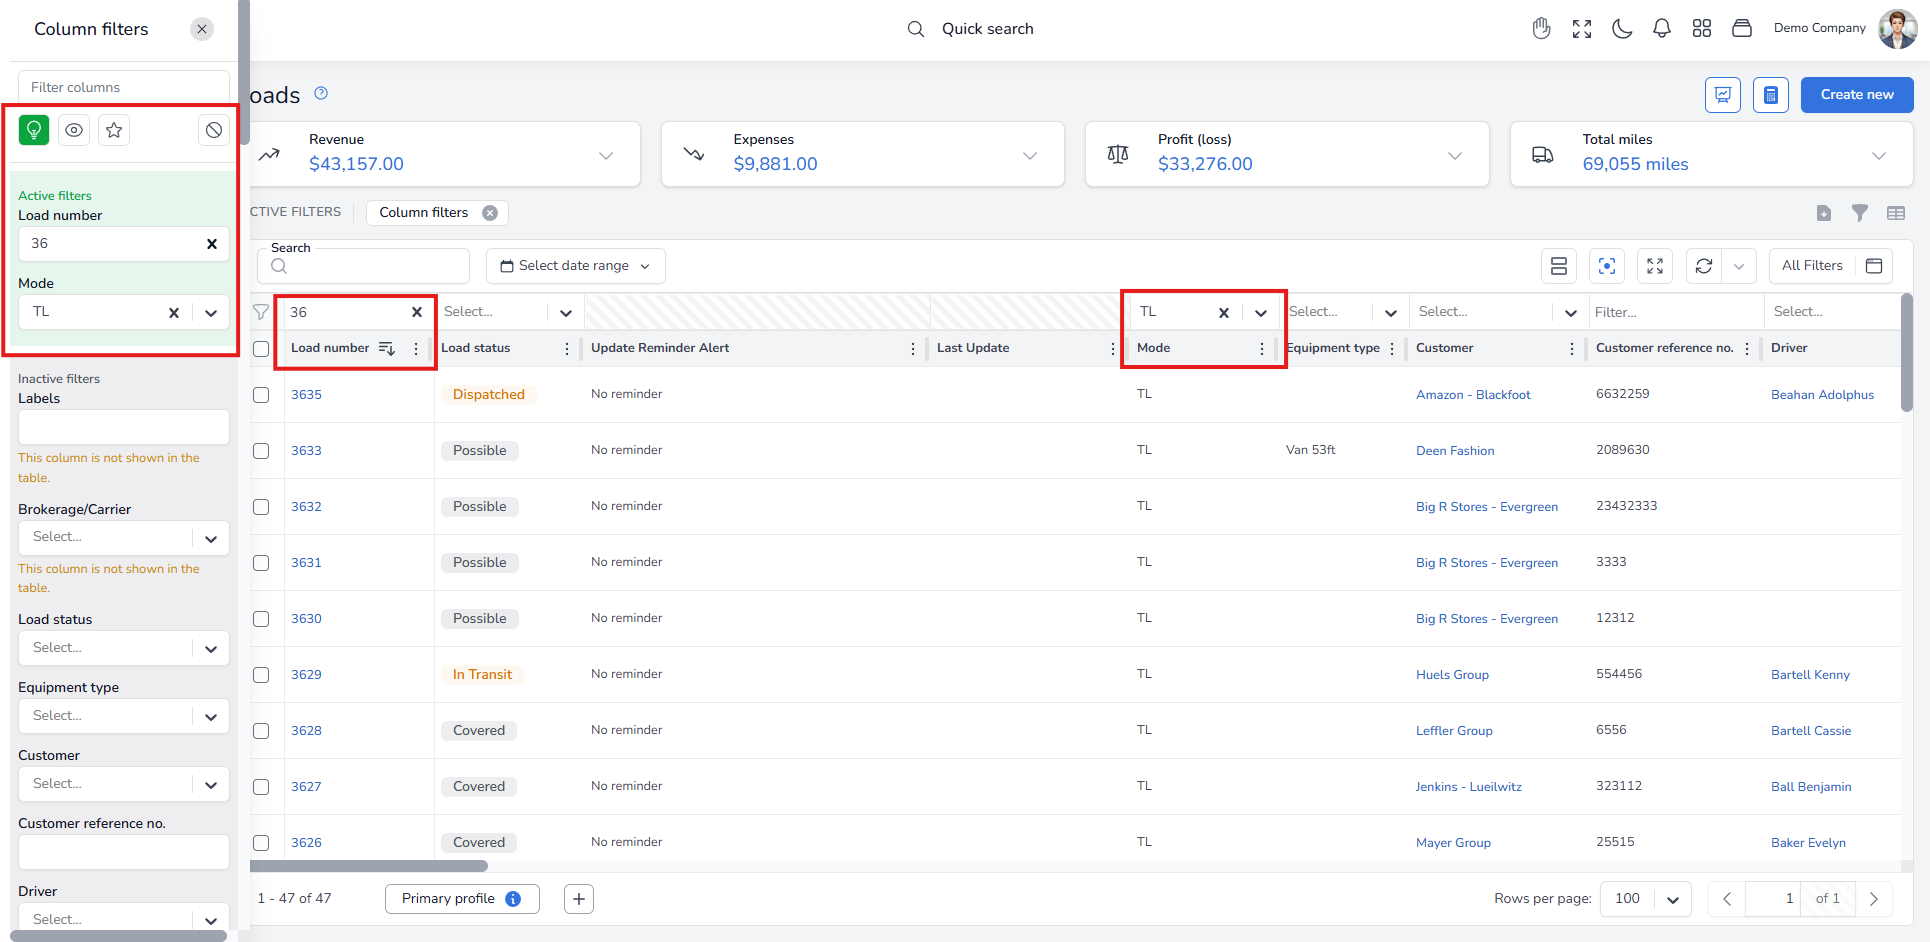
– The filters on the Loads page are more advanced than those on other pages. Users can filter each column individually and also use an advanced sidebar filter. These two filtering options are interconnected, meaning that if a user selects a filter in the Column filters option, it will also be reflected in the Sidebar filter option and vice versa.
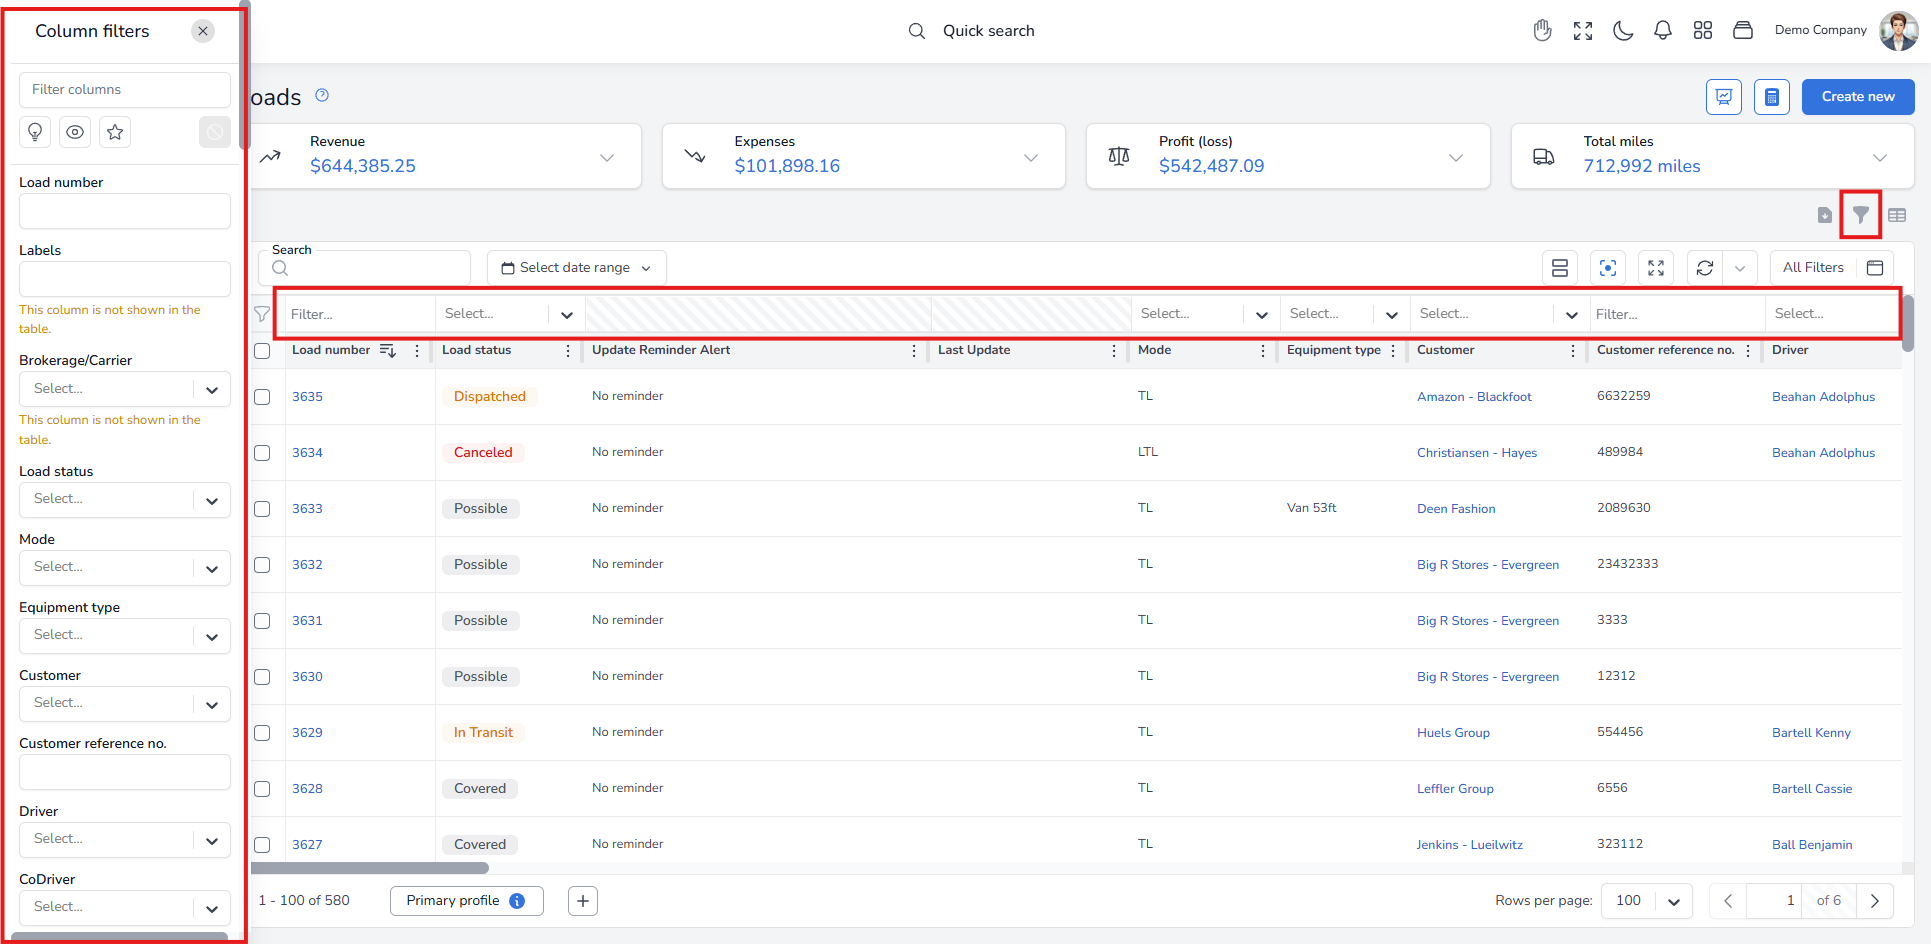
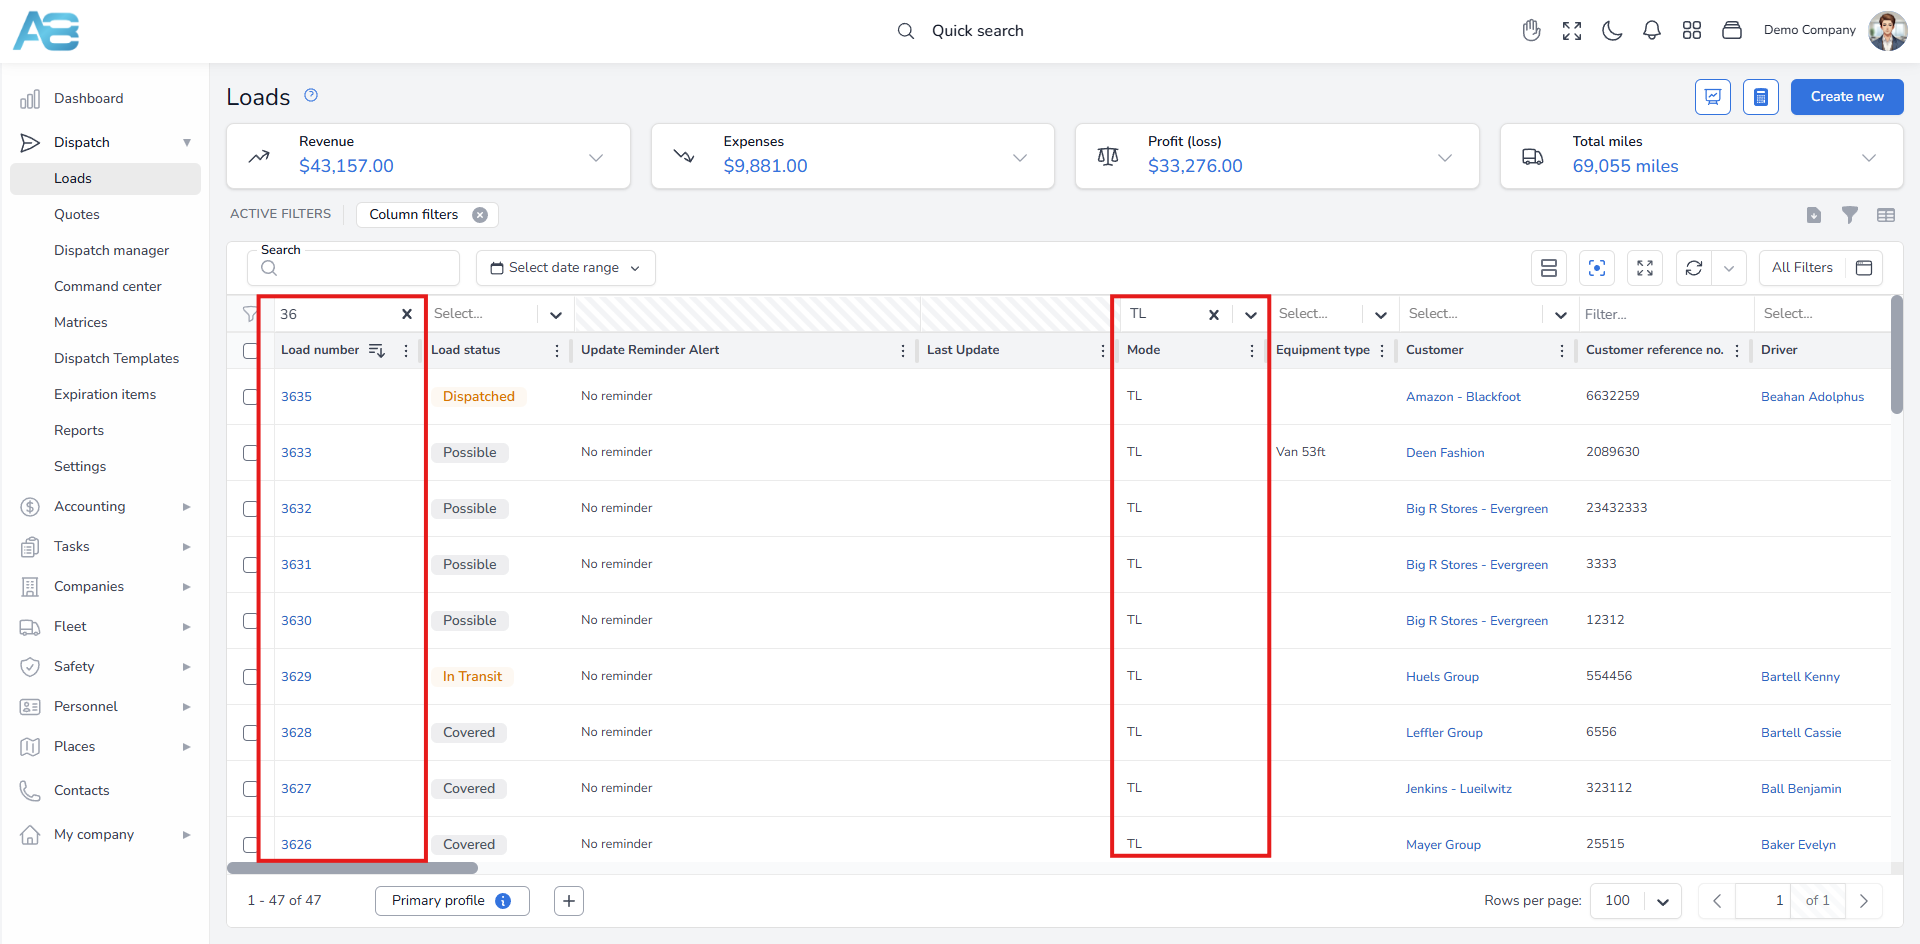
– A filter option is available at the top of each column, allowing users to search within a specific column or select from the available options.
– The sidebar filters include three icons.
The first icon, which looks like a light bulb, displays first the filters that have assigned values—these are the filters we have previously selected.
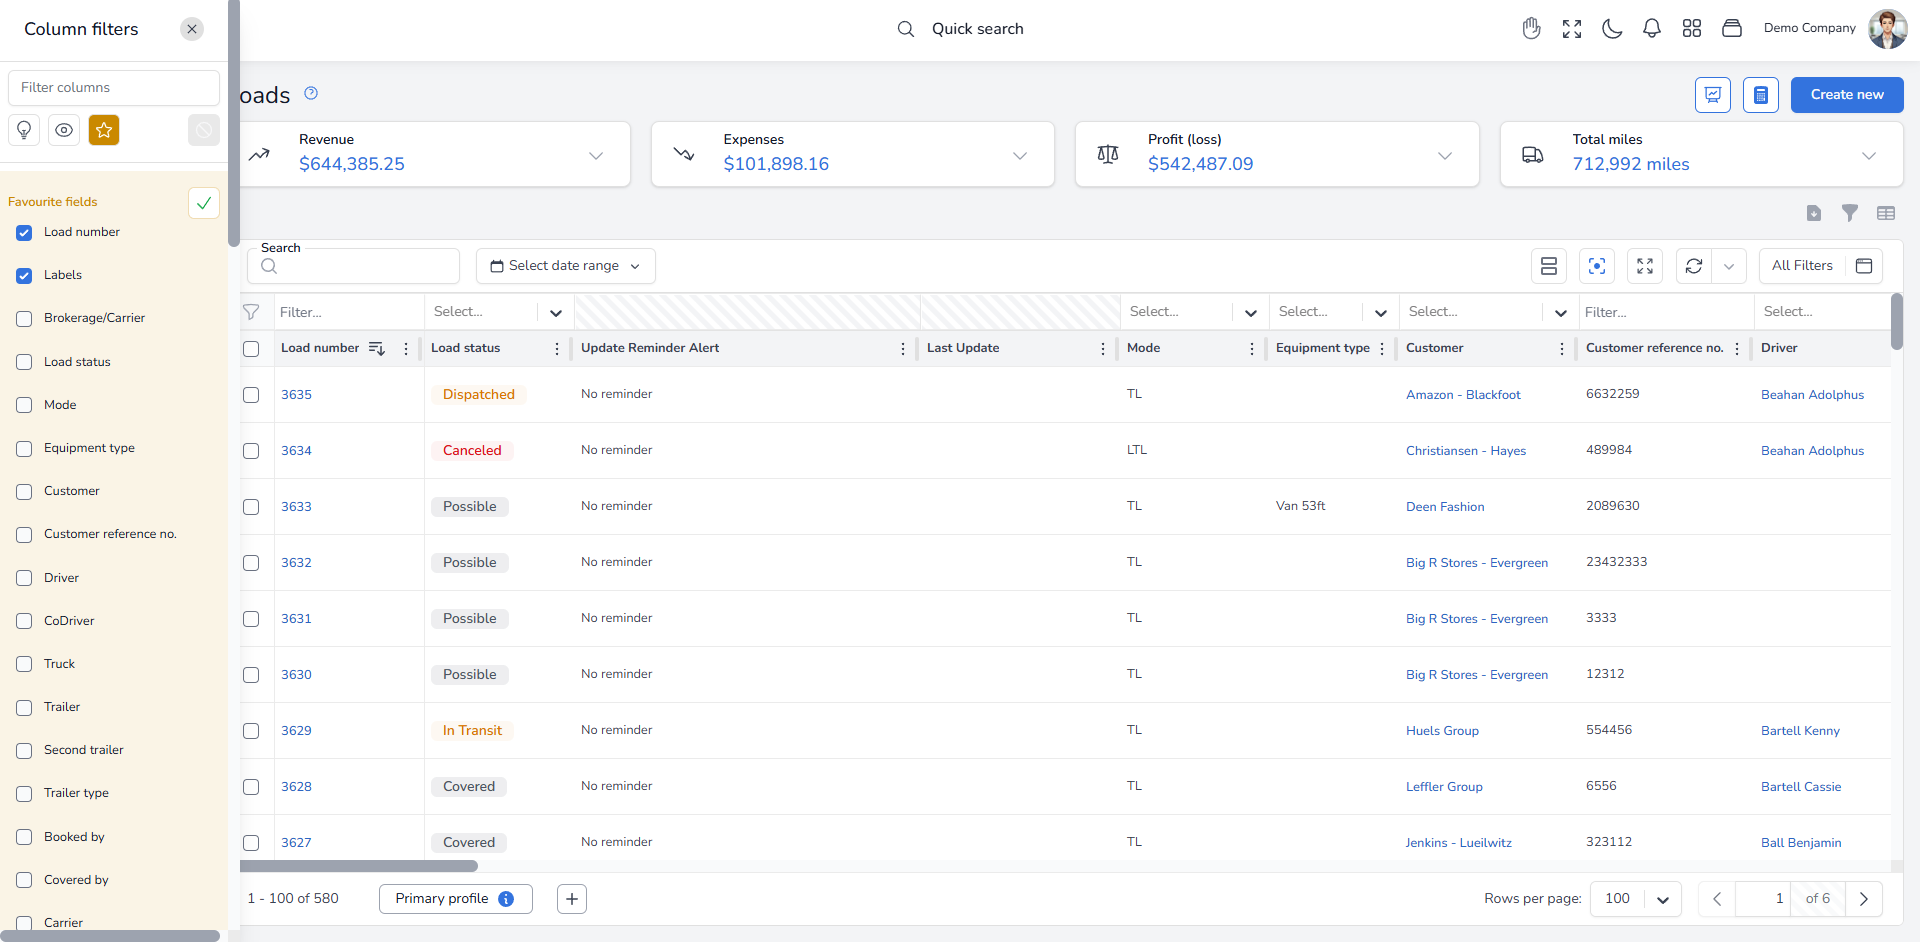
The second icon, which looks like an eye, displays only the filters that correspond to the columns currently visible in the table.
The third icon, represented by a star, allows you to mark your favorite filters, ensuring that only these selected filters are displayed.
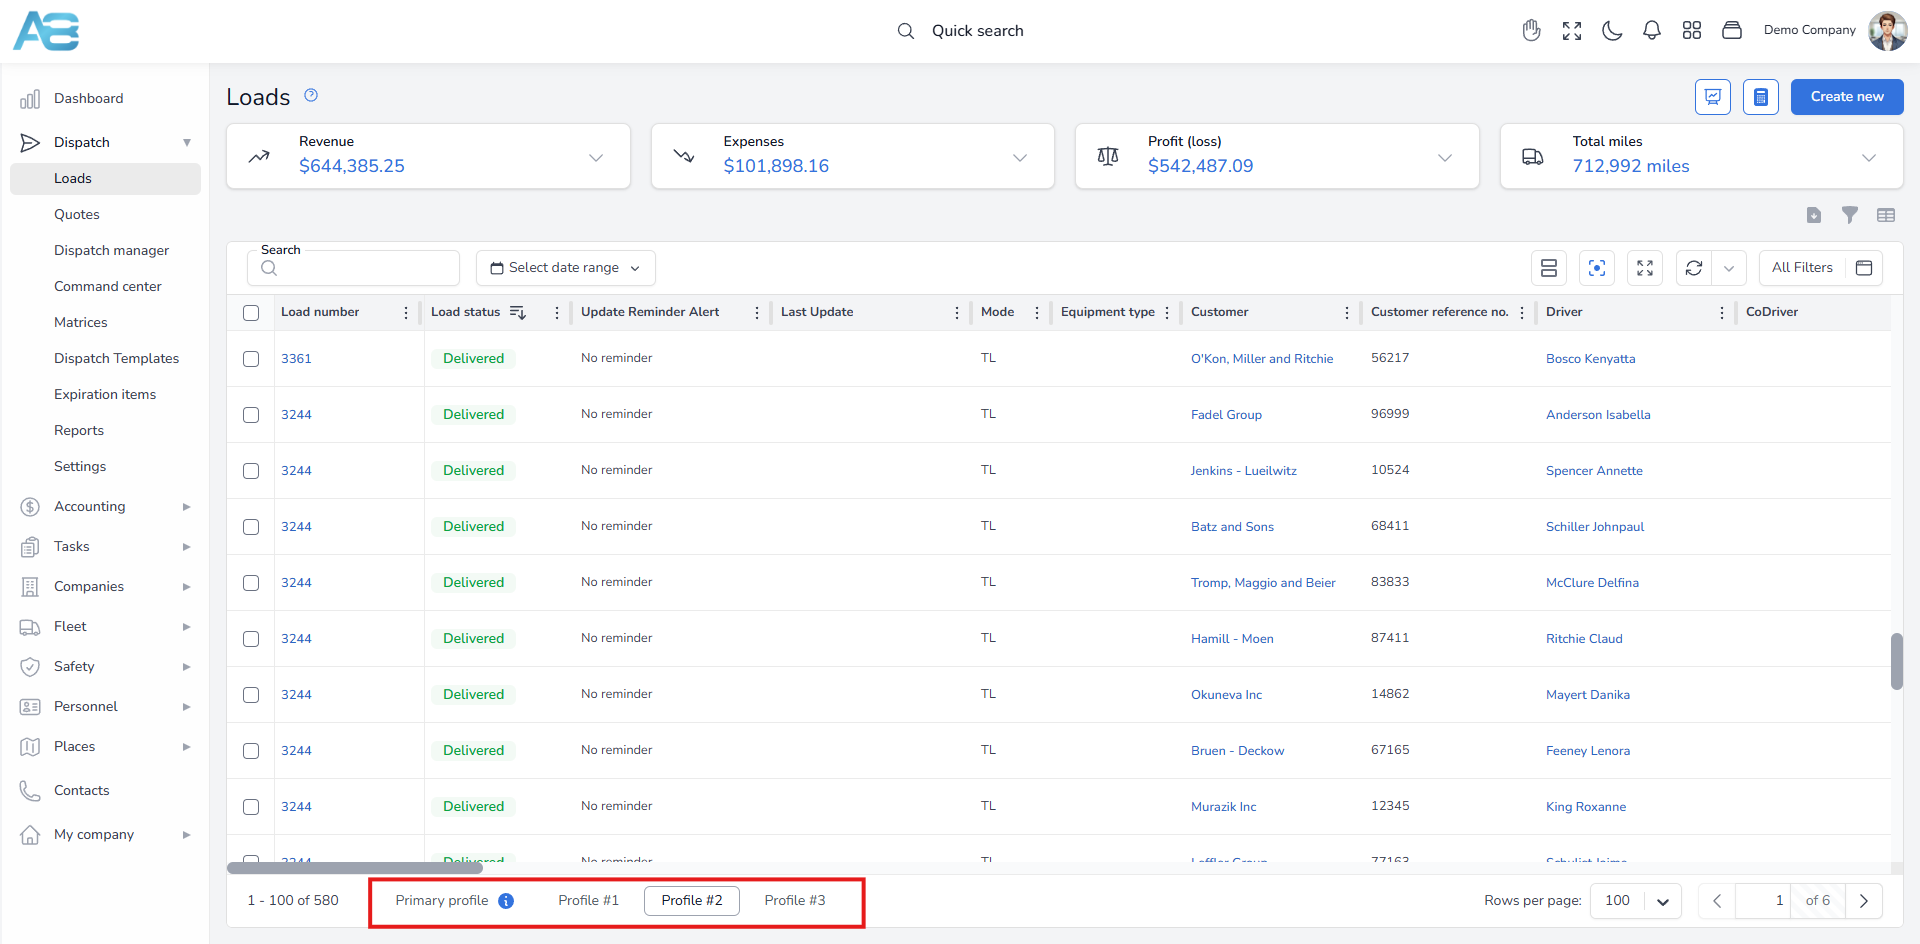
– On the Loads page, users can create search filter profiles and easily switch between them. You will find this option at the bottom of the page, next to the Primary profile. By clicking the plus button, you can add up to 3 additional profiles, giving you one main profile and three extra ones.
– On this page, you can use the Split view option (the first icon at the top-right above the table). The Split view follows the same rules as a single view, except it displays two tables.
– The system provides an Auto Refresh option that automatically updates the data in the table every minute, eliminating the need for manual clicks. To activate this feature, simply click the arrow next to the reload button and select this option. Since this is web-based software, if you choose not to enable the auto-refresh feature, you will need to periodically reload the page yourself to ensure that the system applies any changes.

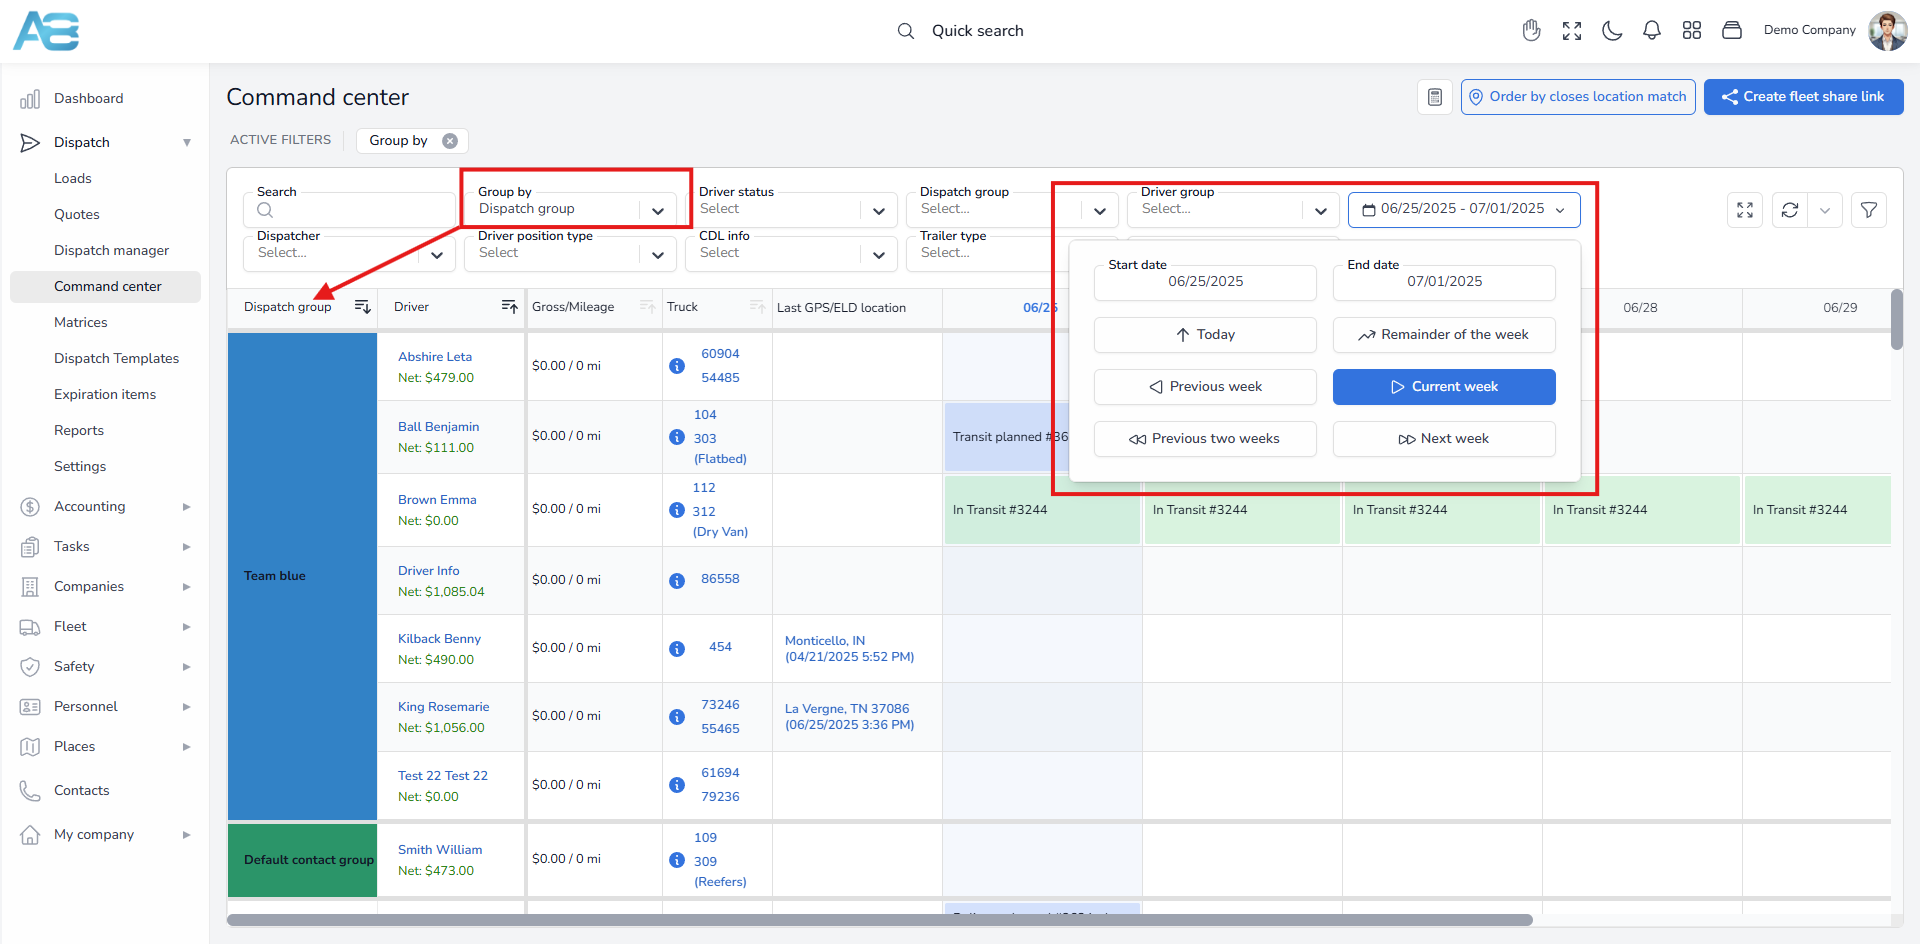
3. How filters work on the Command Center page #
– In the Command Center, filters are stored in the local storage, just like in all other sections of the system.
– The beginning of the current week depends on the general settings (https://tms.accur8.services/settings). This setting is configured at the user’s login, so after making any change, re-login is necessary. Please note that this setting is applied at the company level.

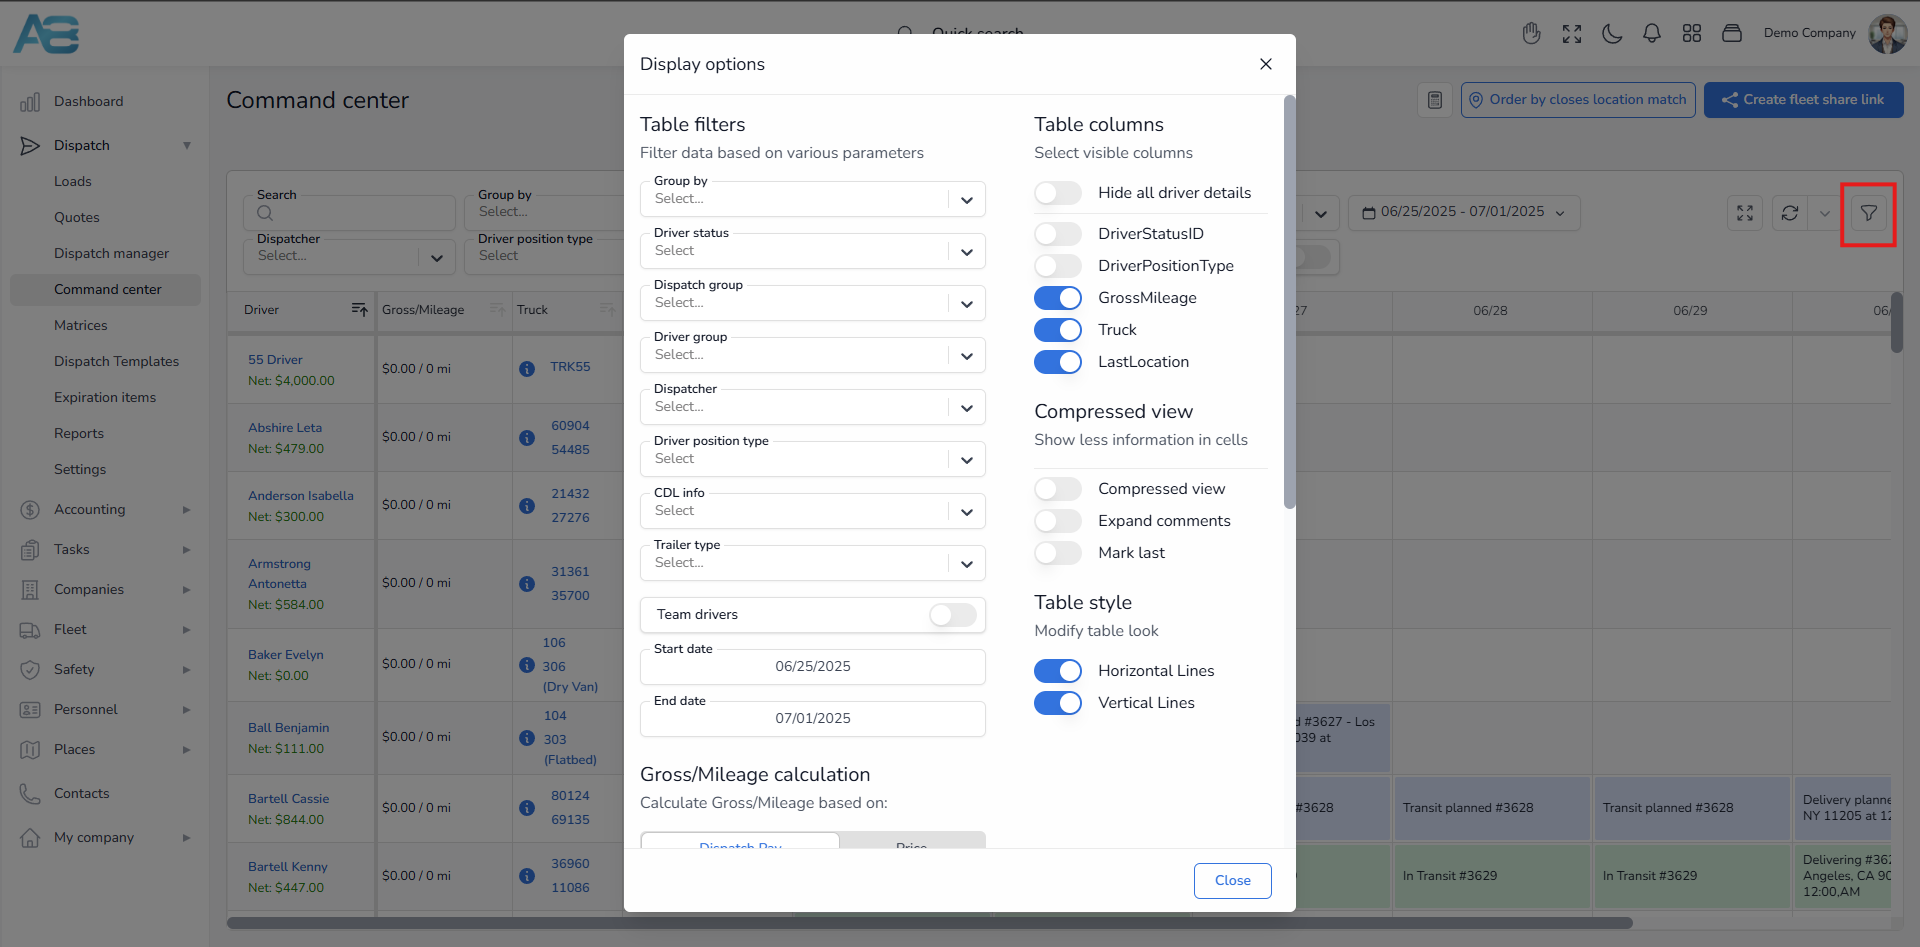
– Users can select different types of filters by clicking the filter icon in the upper-right corner. The chosen settings and filters will be automatically applied. Additionally, users can use shortcuts for the same filters located above the Gantt chart, that is, the table (however, this option may not be visible on smaller screens).
– The date filter operates within a specified range of dates, considering all loads based on either the pickup or delivery date, depending on the selected settings. Moreover, it includes all loads from one week before and one week after the specified date range to maximize the chances of filling the cells effectively.
– While the system will show all loads from one week prior and one week after the specified date range, only those filtered by date will be included in the gross calculation.
– The system considers all loads that have not been canceled. However, the relevant dates depend on whether the stops have been completed. If a stop is not completed, the system will use the planned date (the From date). Conversely, when a load is completed, the system will take the actual date (the Out date). Additionally, the scheduled time in the Command Center will change to the actual time once a stop is completed.
Note: For more information on how planned and actual dates function, please refer to our guide at the following link.
– When users filter the table by groups, the system applies the following rule: Grouping by driver group considers all driver groups, whereas grouping by dispatch group only includes the first group of dispatchers.
– The date filter can be set to any range, as long as the range does not exceed two weeks. If the chosen start date results in a range longer than two weeks to the end date, the end date will automatically adjust to be two weeks after the start date. Similarly, if the start date is adjusted, the end date will be modified accordingly to maintain a maximum range of two weeks.