1. Setting the customer’s credit limit #
Credit limit is something that influences on the process of creating a load, i.e., the system will allow you or not to create a load.
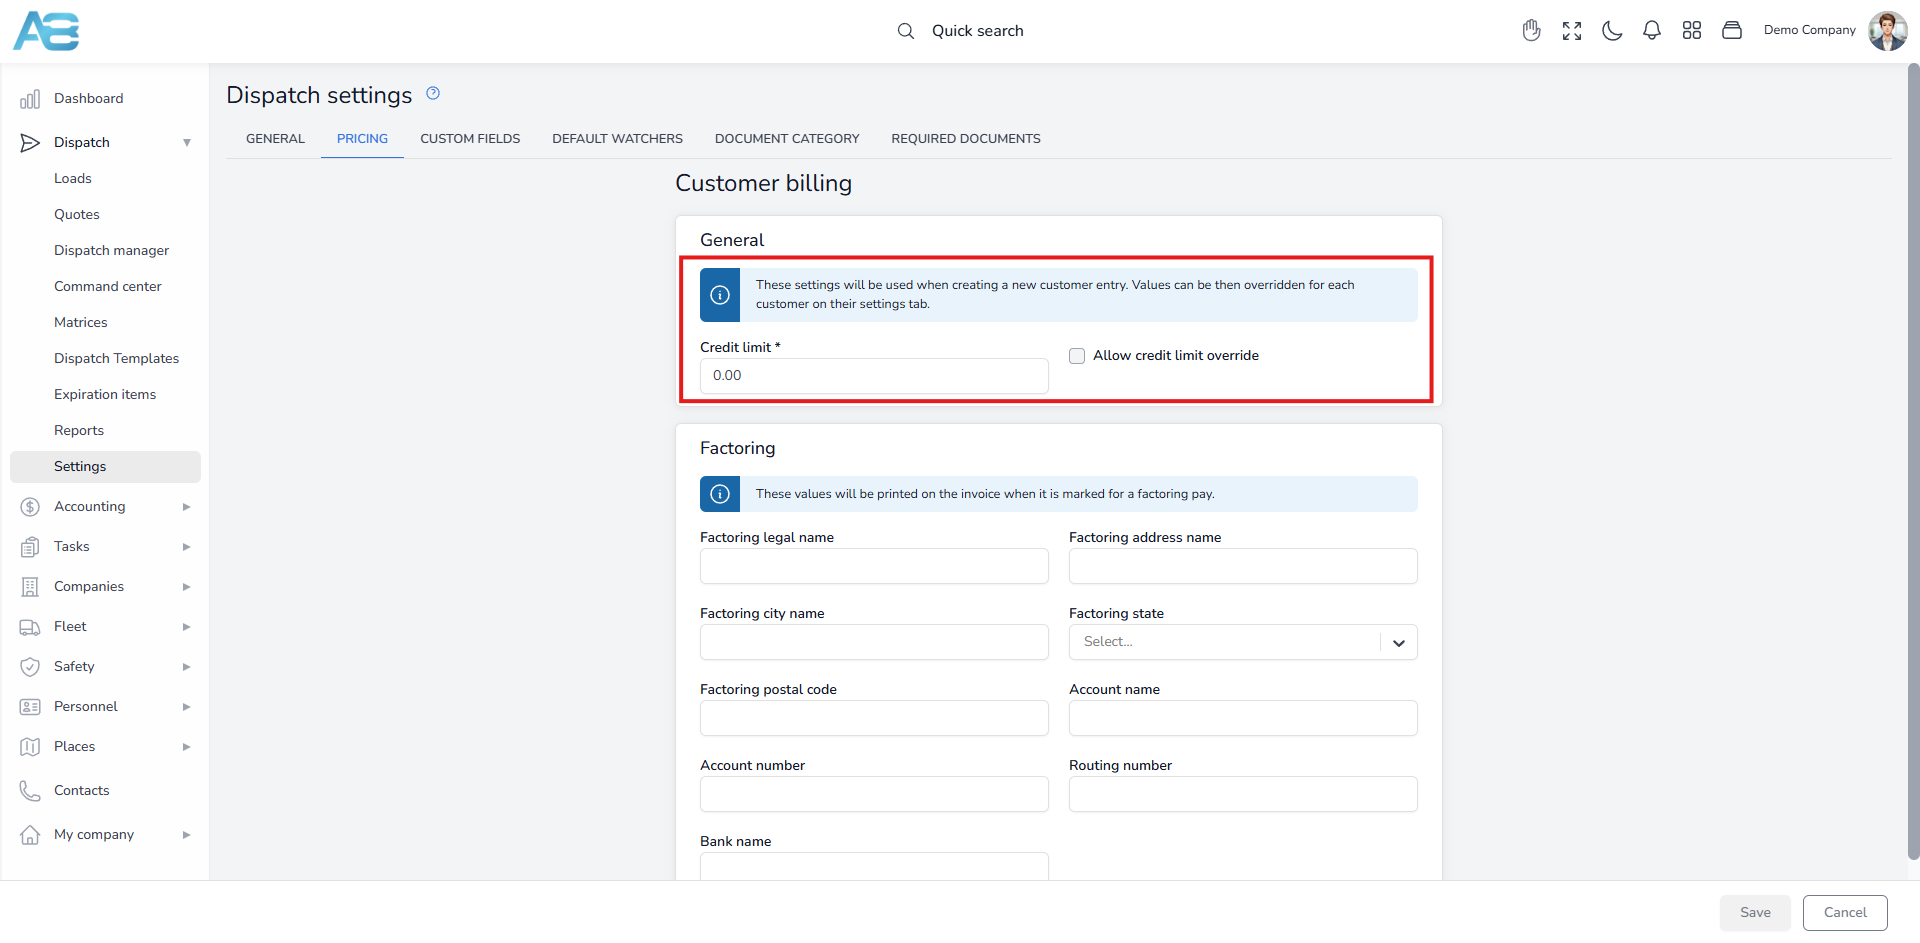
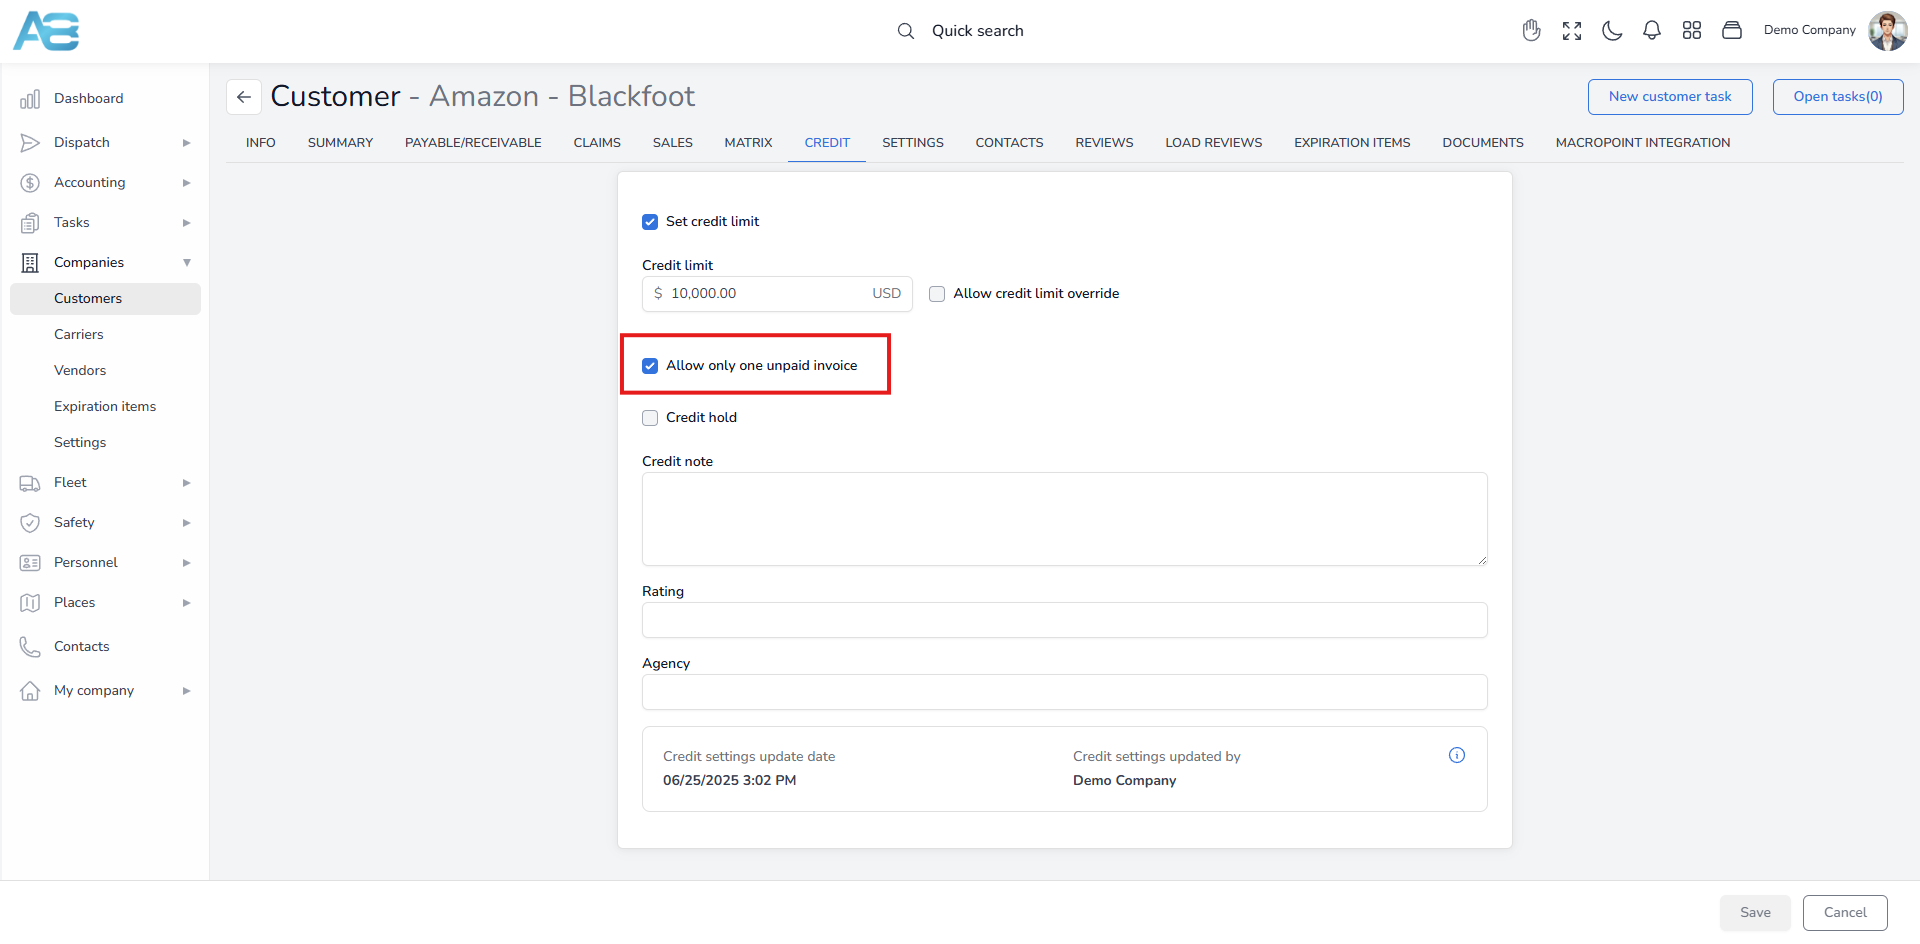
To set a credit limit for a customer, you need to configure options on the Credit tab of the customer’s page. To enable the credit limit feature, mark the “Set Credit Limit” checkbox, which will unlock a field for entering the desired customer’s credit limit.
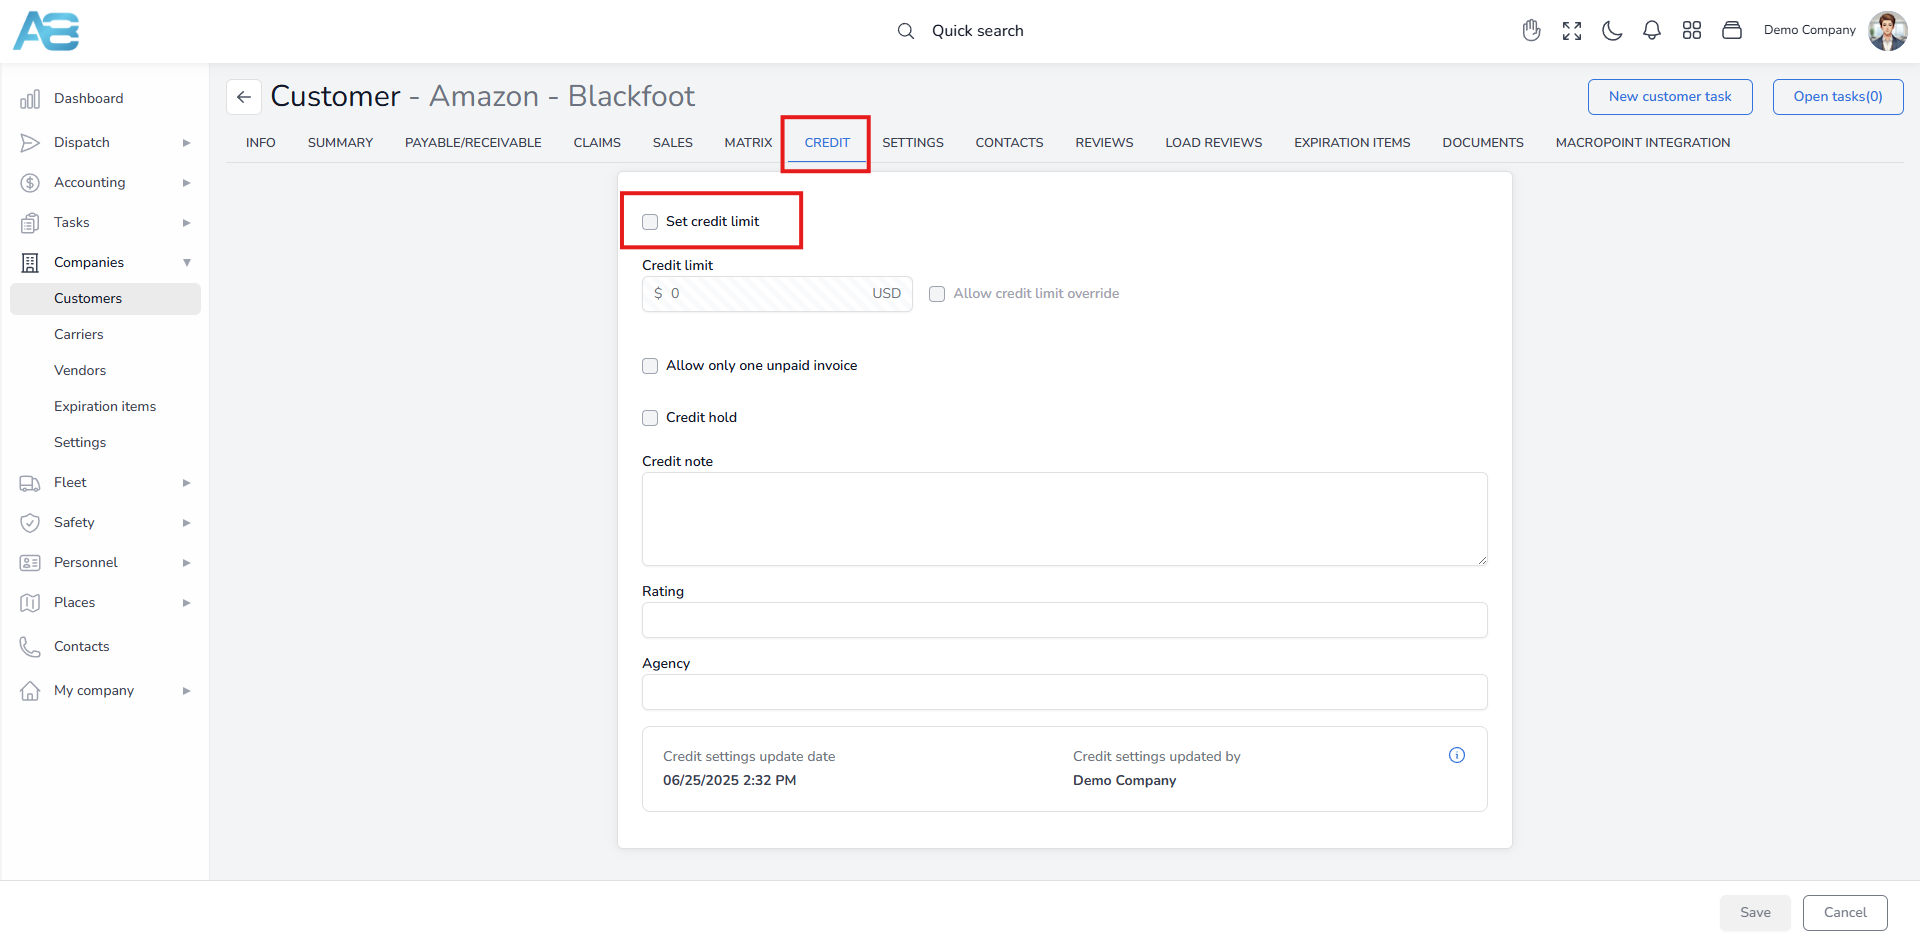
Note: A credit limit of zero indicates an unlimited limit, and if this is entered, no warnings will ever be displayed.
The credit limit is determined by the customer’s paid bills – if the customer makes a partial payment, then he can use the remaining balance of the credit limit. If the credit limit is exceeded, the system’s response will depend on whether the Allow Credit Limit Overrides option has been enabled or not.
2. Overriding the customer’s credit limit #
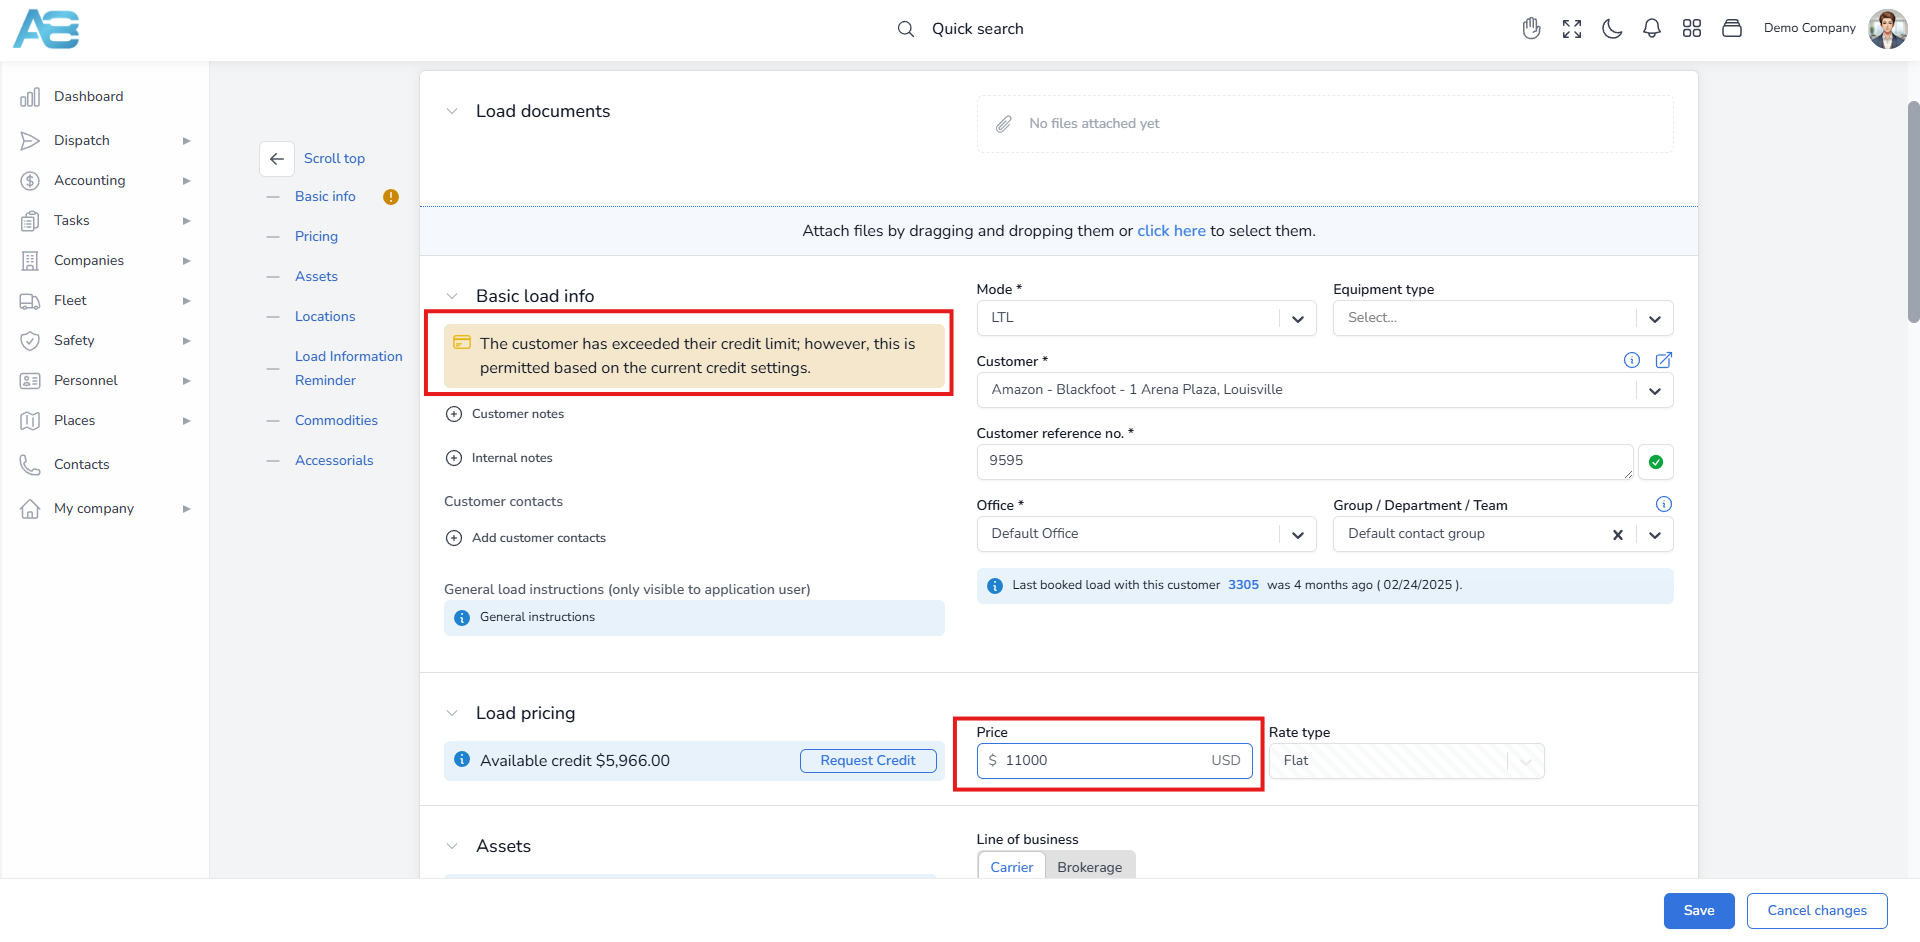
When the Allow Credit Limit Overrides option is enabled, and the credit limit is exceeded, the system displays a yellow warning message stating The customer has exceeded their credit limit; however, this is permitted based on the current credit settings. This indicates that the system allows you to create a load even when the limit is exceeded.
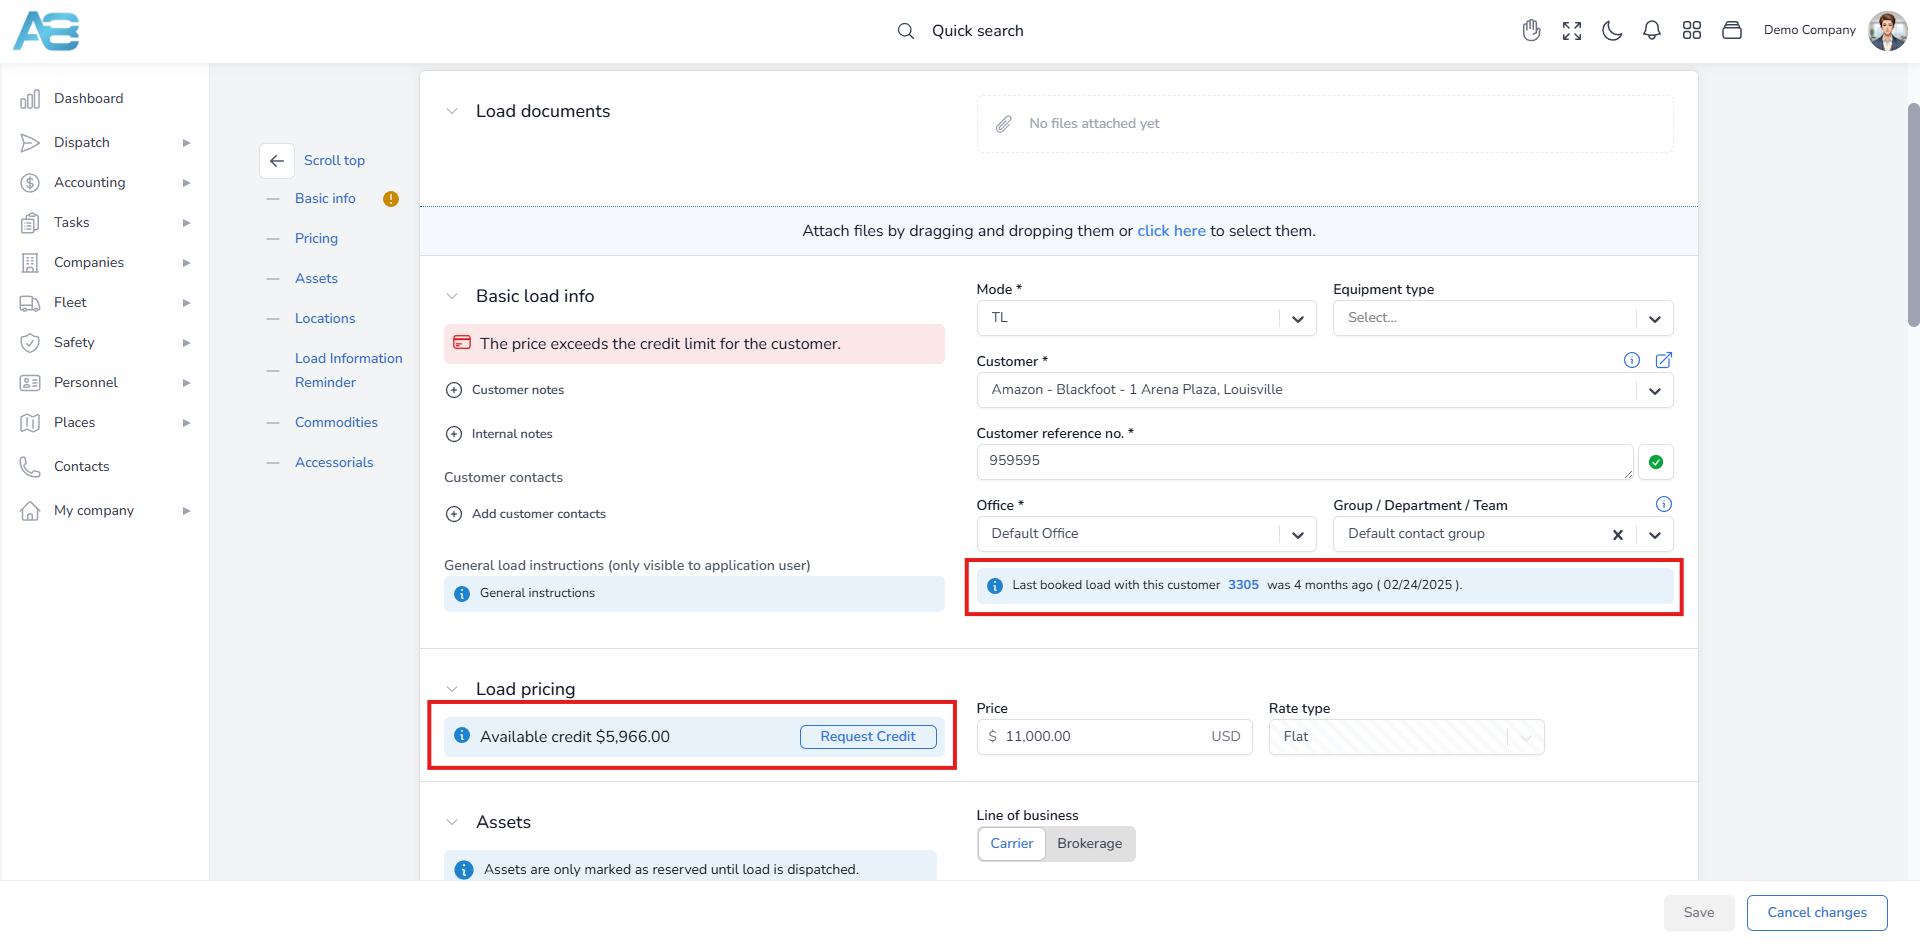
Contrarily, if this option is disabled, a red warning message will appear stating, Customer exceeded the credit limit, and the system will prevent you from creating a load. When the amount is within the allowed limit, it is displayed in blue, indicating that everything is in order.
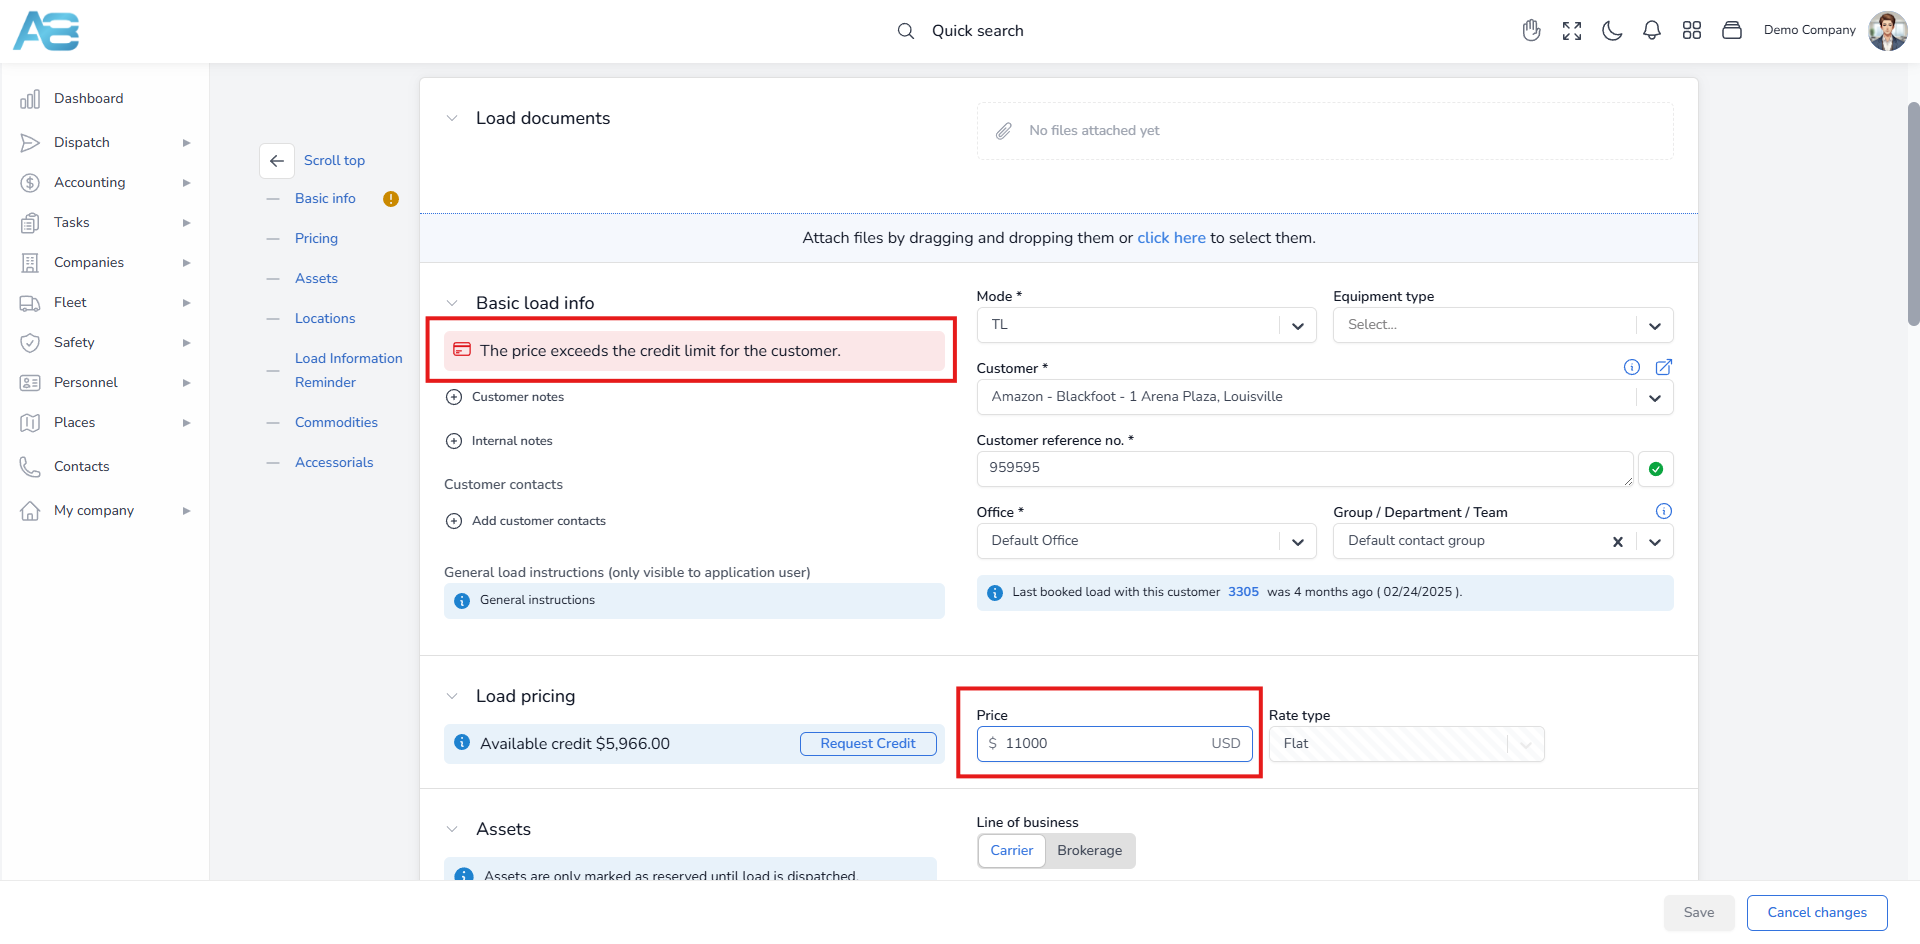
In all cases, the warning messages appear immediately on the load’s detail page, keeping users informed about any relevant regulations before they proceed.
On this page, you’ll see the customer’s available credit and a Request Credit button. Use this button to submit a request to increase the customer’s credit limit as needed.
Also, when selecting a customer, the system displays information about the last booked load associated with that customer, indicating that this may also serve as a signal for credit checks if sufficient time has passed.
3. Restricting load creation to paid invoices #
When the Restrict load creation to paid invoices option is checked, users must have all other invoices settled before creating a new load. You can activate this option on the Credit tab of the customer’s page.
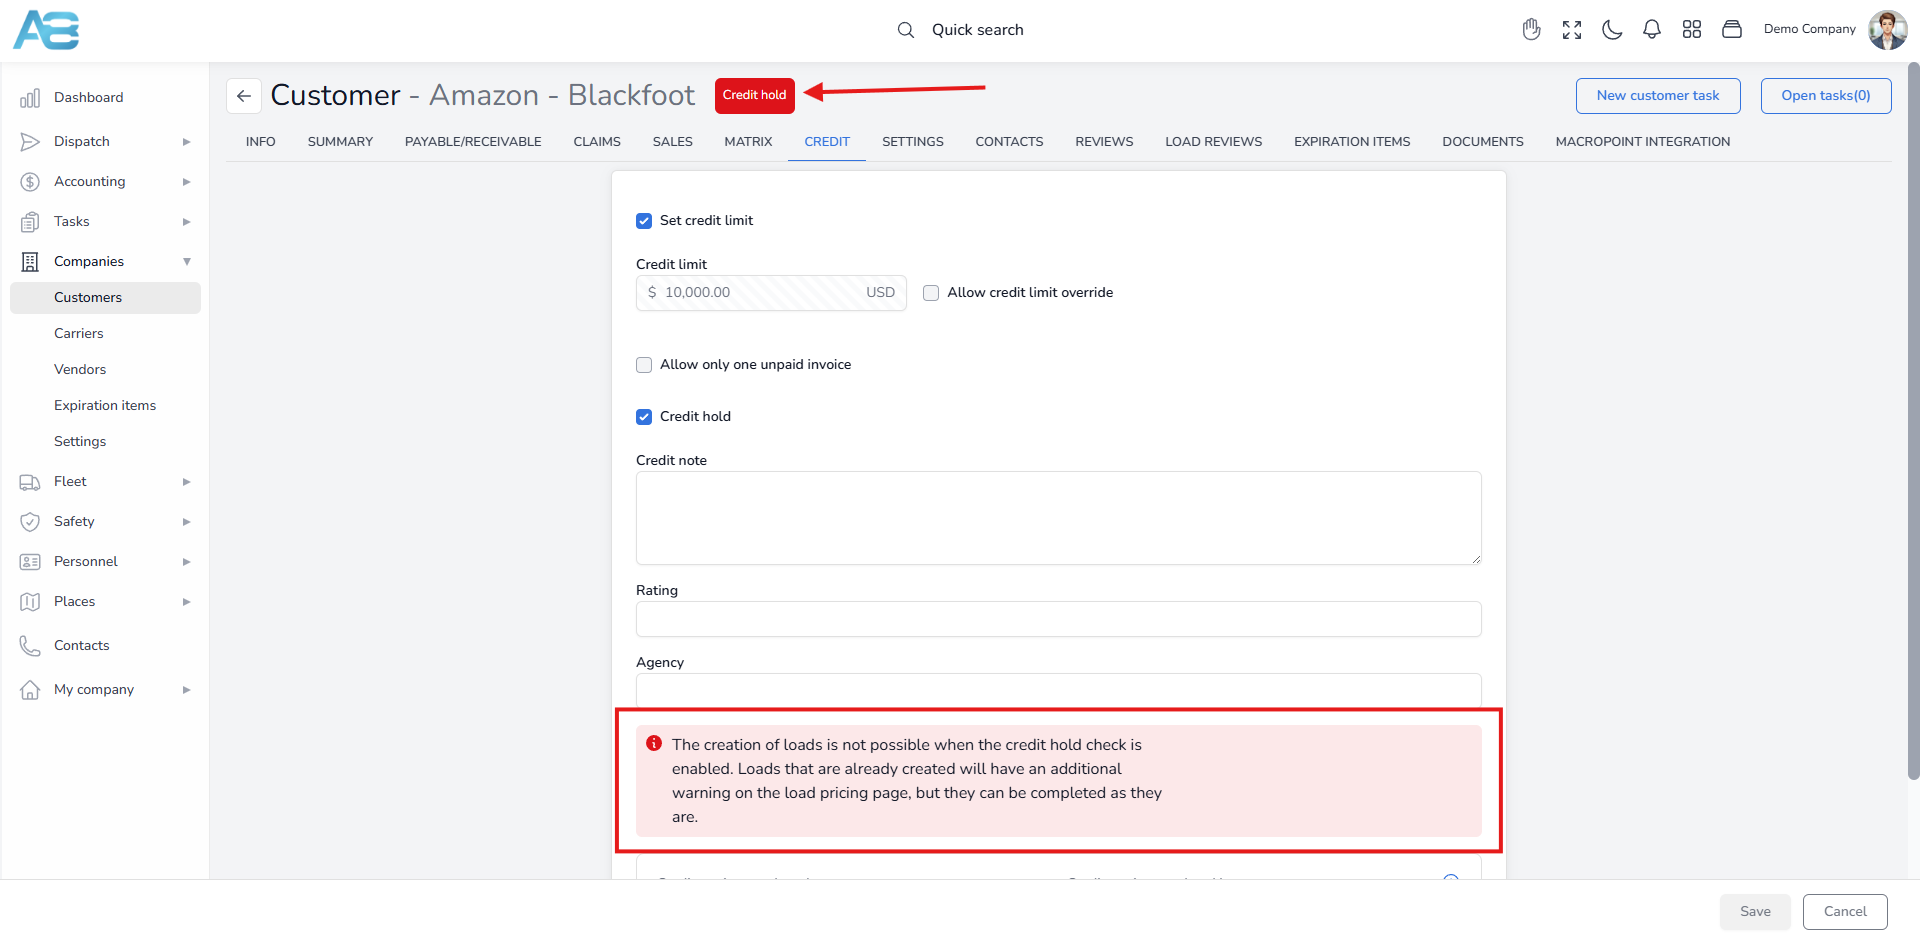
4. Setting a customer on a credit hold #
To temporarily suspend a customer’s credit, navigate to the Credit tab on the selected customer’s page and select the Credit Hold option. This action will prevent you from creating any loads for this customer and you will see a red blinking Credit hold warning at the top of the customer profile. Also, on the customer’s credit page, a red warning message will be displayed: The creation of loads is not possible when the credit hold check is enabled. Loads that are already created will have an additional warning on the load pricing page, but they can be completed as they are.
If the customer associated with your created load is placed on credit hold after the load has been created, the system will allow you to proceed with that load. However, a yellow warning message will appear on both the load’s detail page and the load pricing tab to alert you of the credit hold status: The customer was placed on credit hold after this load was created. You may proceed to edit and complete load but it is advised to perform additional checks.

5. Selecting Customers on Credit Hold #
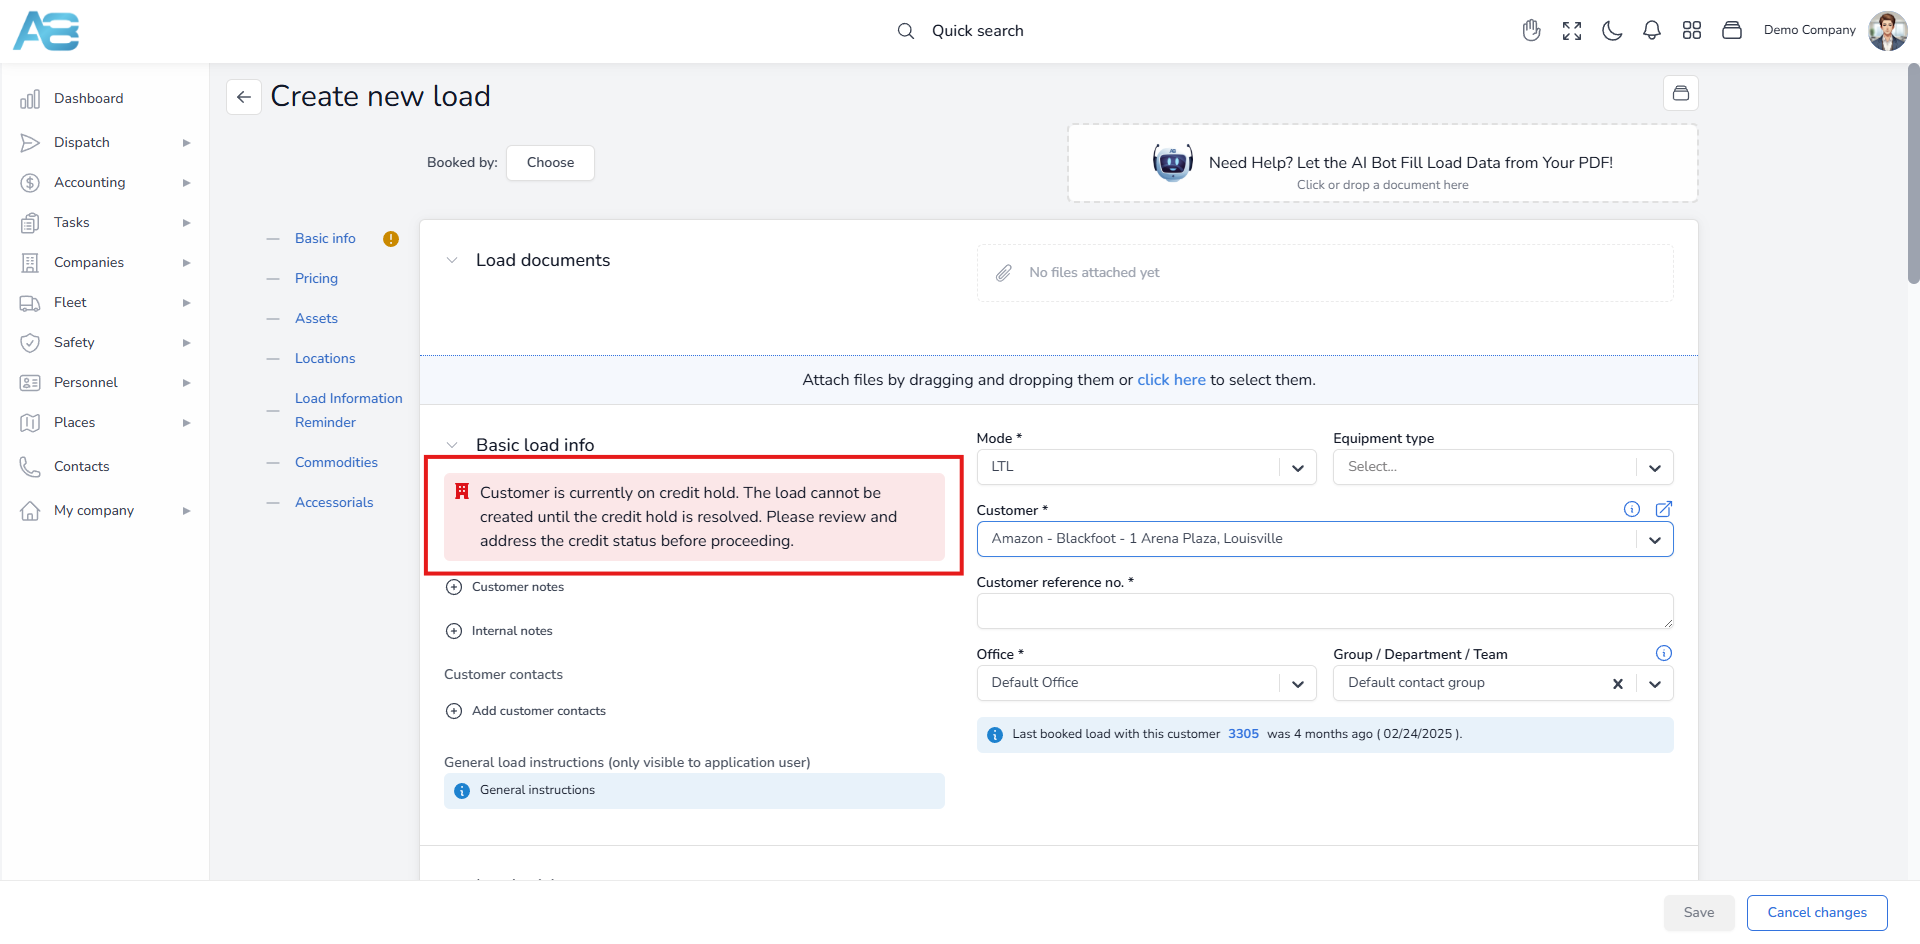
If you attempt to create a load for a customer with a credit hold, the system will automatically display a red warning message: Customer is currently on credit hold. The load cannot be created until the credit hold is resolved. Please review and address the credit status before proceeding. This alert prevents you from creating a load under these conditions.
Note: When you create a new customer, the credit settings will be automatically replaced by the configuration set in the Dispatch Settings under the Customer Billing section in the Pricing tab (https://tms.accur8.services/dispatch-settings).