
Skip to content
ACCUR8 Platform Knowledge Base

How Things Work

  • How the new candidates’ recruitment management works
  • How importing transponders works
  • How EFS Integration works
  • How importing and creating fuel entries work
  • How load history works
  • How loaded and empty mileage calculation works
  • How driver’s status management works
  • How Load Mileage Recalculation Works
  • How driver e-mail usage works
  • How the Command Center filtering works
  • How to share a load with a customer
  • How to archive invoiced and not invoiced loads
  • How the credit limit works
  • Inventory Management in ACCUR8 TMS
  • How filters work on the main pages
  • How date on loads rules work in ACCUR8 TMS

FAQ

  • Intro – Basic Carrier
  • Intro – Basic Brokerage
  • Adding System Users
  • Dashboard Basics
  • Document Management Guide
  • E-mail Settings
  • Email Configuration for Sending Emails from Personal Addresses from the ACCUR8 TMS

Dispatch Carrier

  • Load Planning
  • Intro – Basic Carrier
  • Tailgate Load Management
  • Load TONU
  • Load Drop
  • Load assets warning
  • Document types
  • Document Management
  • Changing assets by using “Assets Drop and hook” (Optional)
  • Stop Management in Dispatched Status
  • Stop completion and load asset statuses’ lifecycle (carrier mode only)
  • Load pricing operations for Carriers
  • How to progress load status from start to delivered (Carrier mode)
  • Load Creation Carrier Mode

Accounting

  • Printing a check
  • Correcting and Deleting Fuel Bills
  • 1099 Report
  • IFTA Report
  • Payroll management
  • Invoicing and factoring
  • Truck payroll setup – accounting
  • Driver payroll setup – accounting
  • Customer load billing manual

Dispatch Broker

  • Intro – Basic Brokerage
  • Load pricing operations in Brokerage Mode
  • Load Creation Brokerage Mode
  • How to progress load status from start to delivered (Broker mode)
  • Load TONU (Broker)
  • Document types (Broker)
  • Document Management (Broker)

Mobile App

  • Driver Mobile app
  • Driver Mobile app – Drivers’ manual

Safety

  • Creating and Configuring Driver, Truck, Trailer, and Dispatch Unit Setup
  • Freight Claims & Accidents Management
View Categories

Printing a check

2 min read

0:00 / 1:53
  • View as Markdown Open this page as plain Markdown (opens in a new tab)
  • Open in ChatGPT Ask questions about this page (opens in a new tab)
  • Open in Claude Ask questions about this page (opens in a new tab)
  • Open in Google AI Studio Ask questions about this page (Google account required) (opens in a new tab)

Printing a check #

VIEW GUIDE IN FULL SCREEN

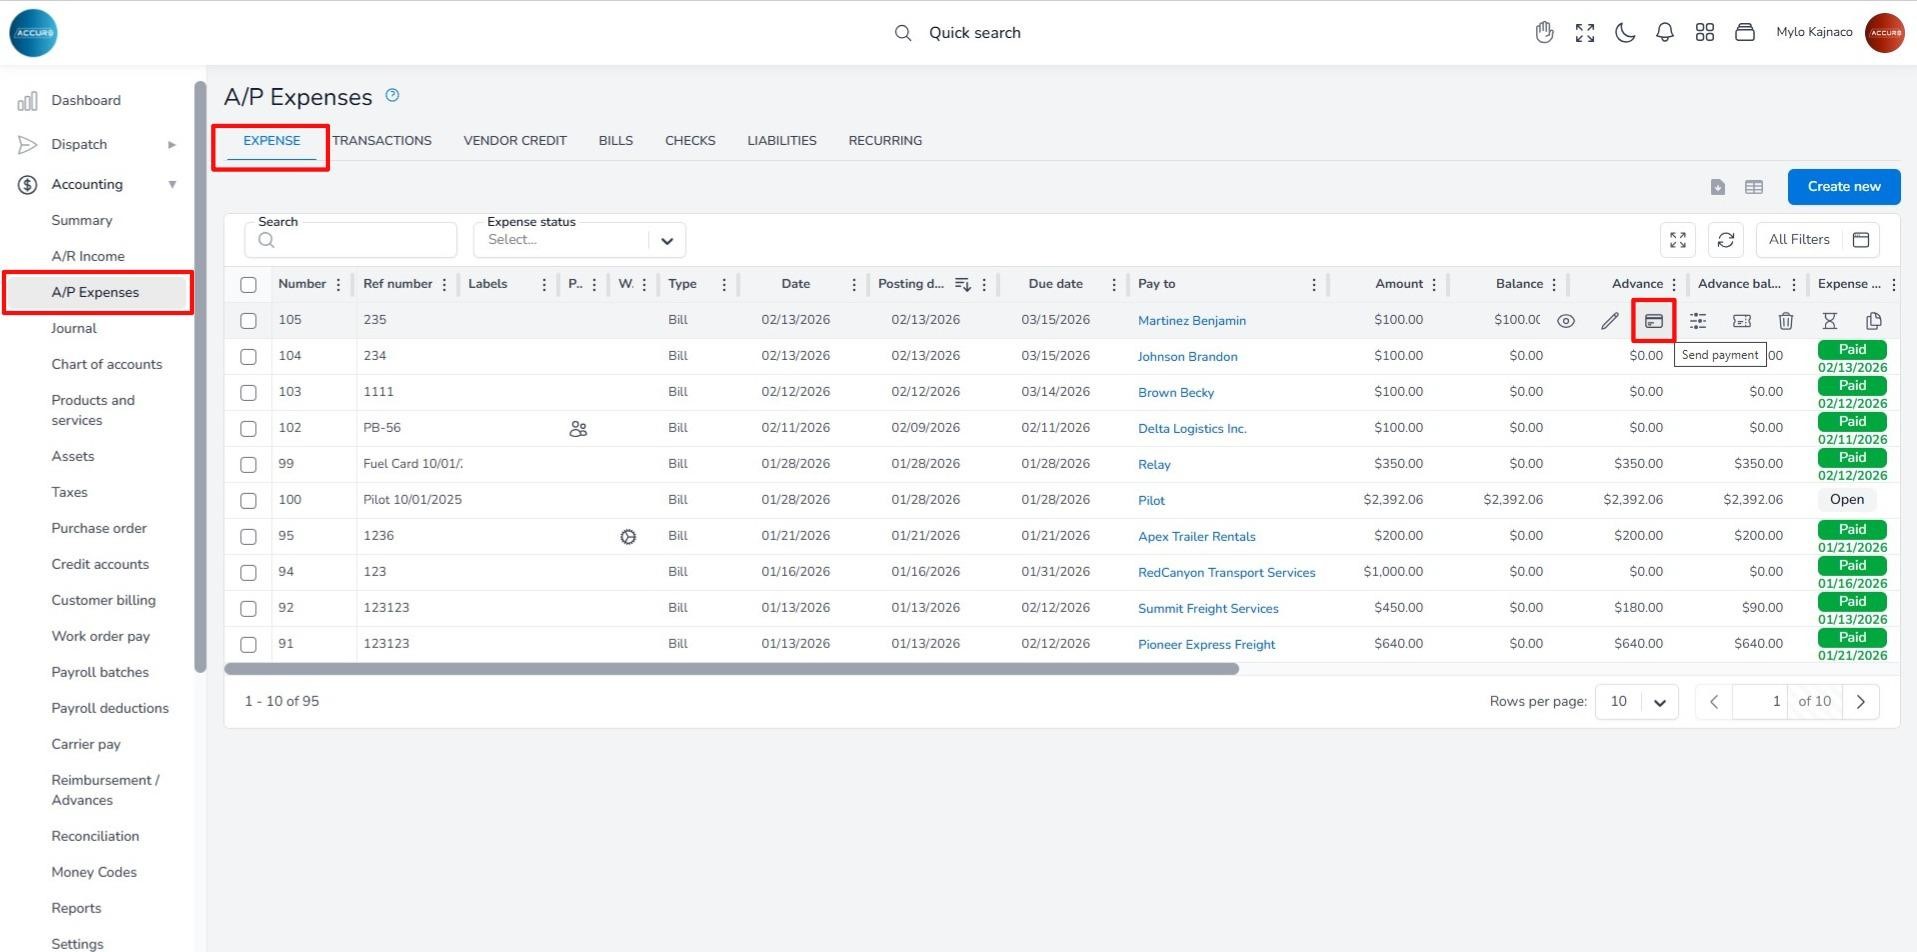
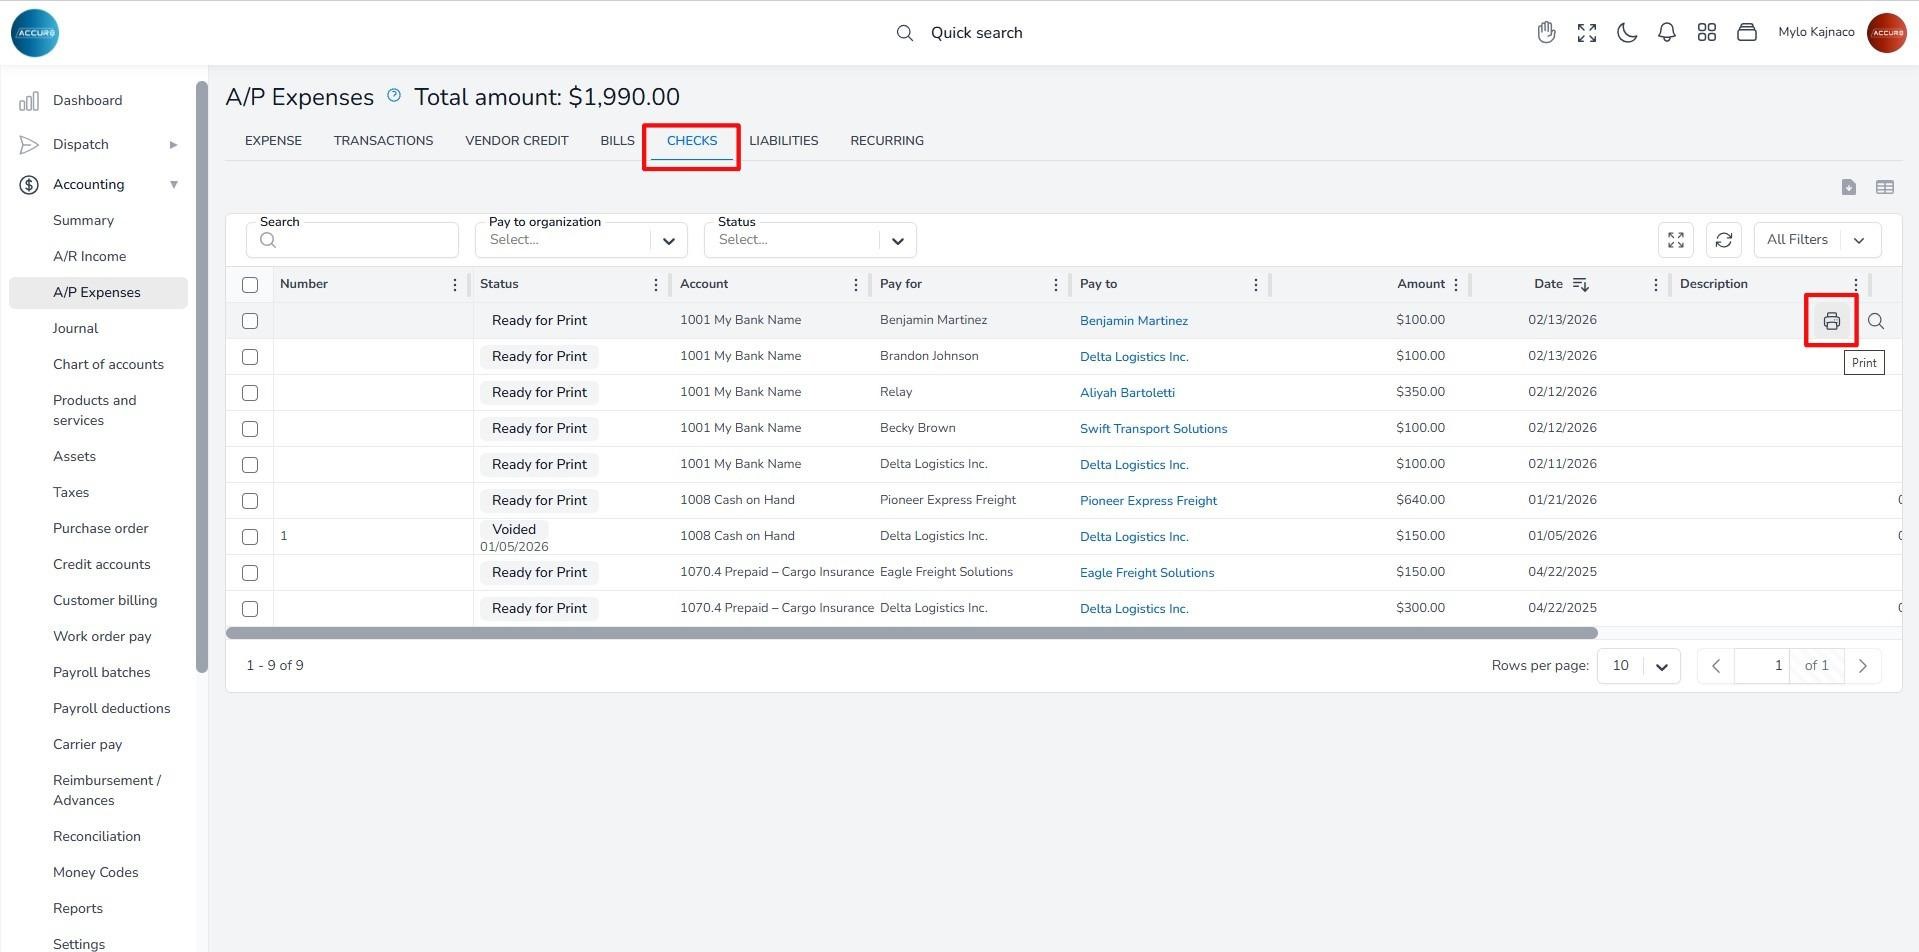
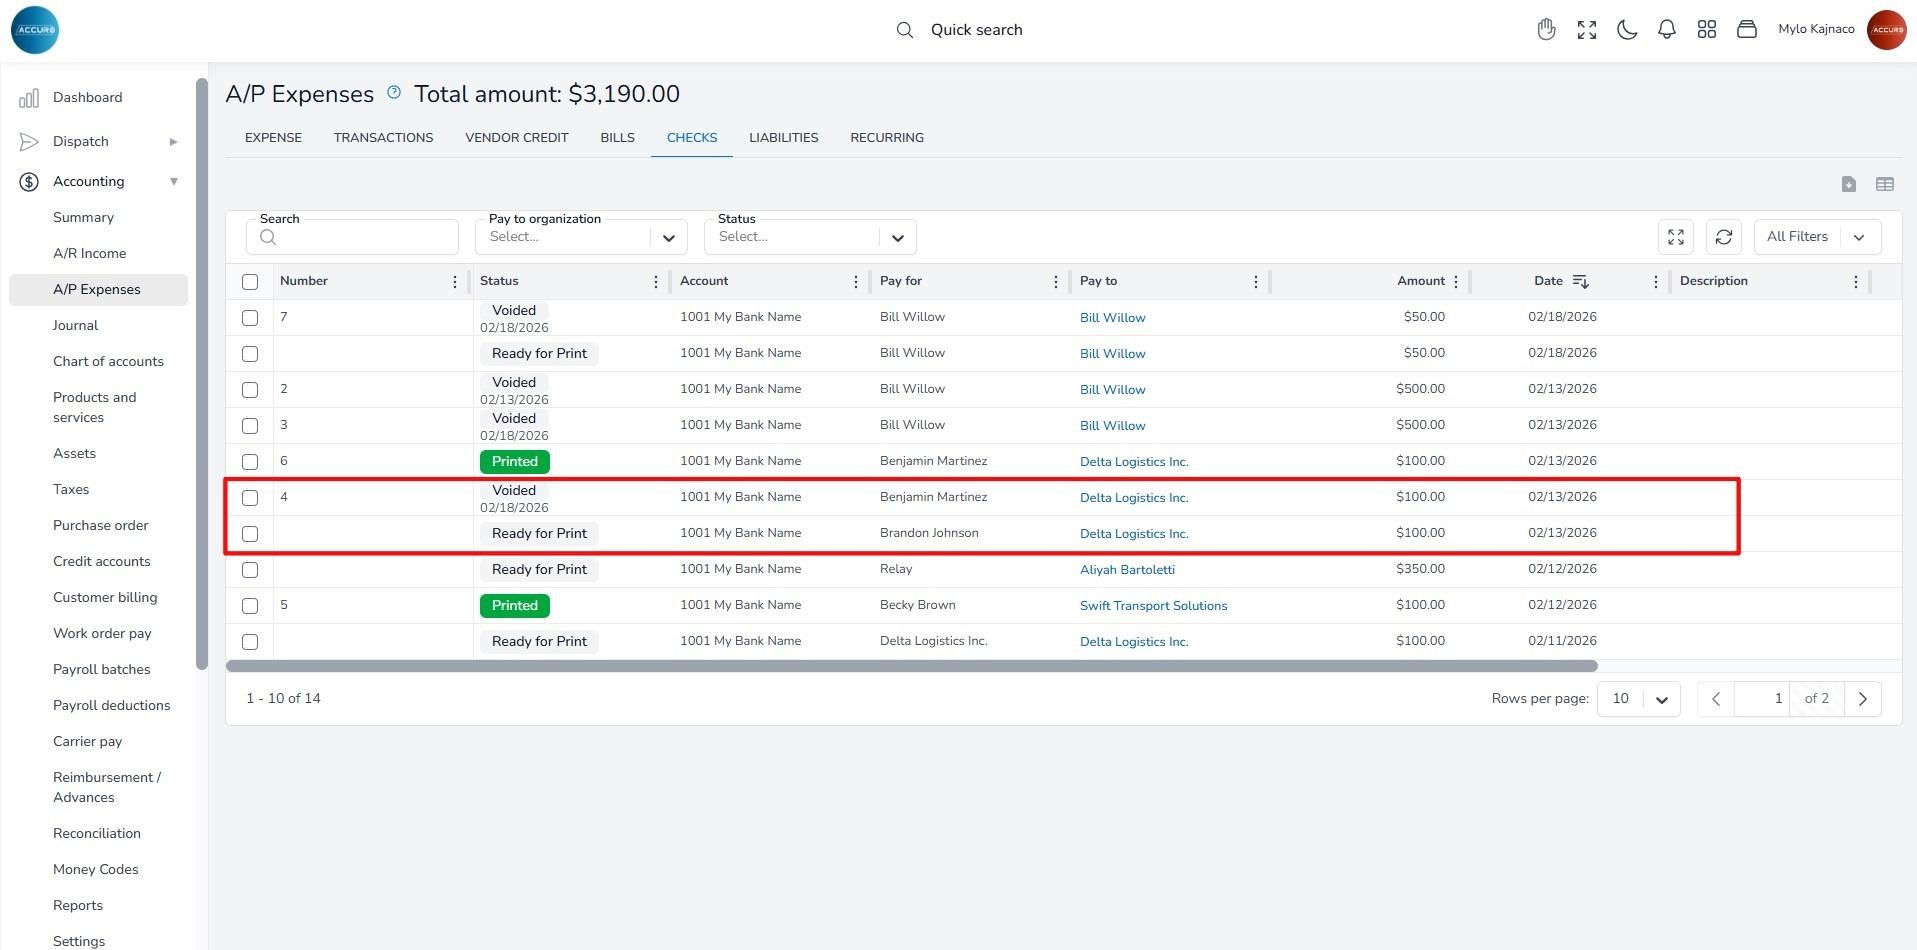
You can find all created checks in the system under the A/P Expenses section, in the Checks tab. For a bill or expense to appear in the Checks list, you must select that option when processing the payment.

So, after you create a bill or expense, locate it in the Expense list, hover over the entry, and click the Send payment option.
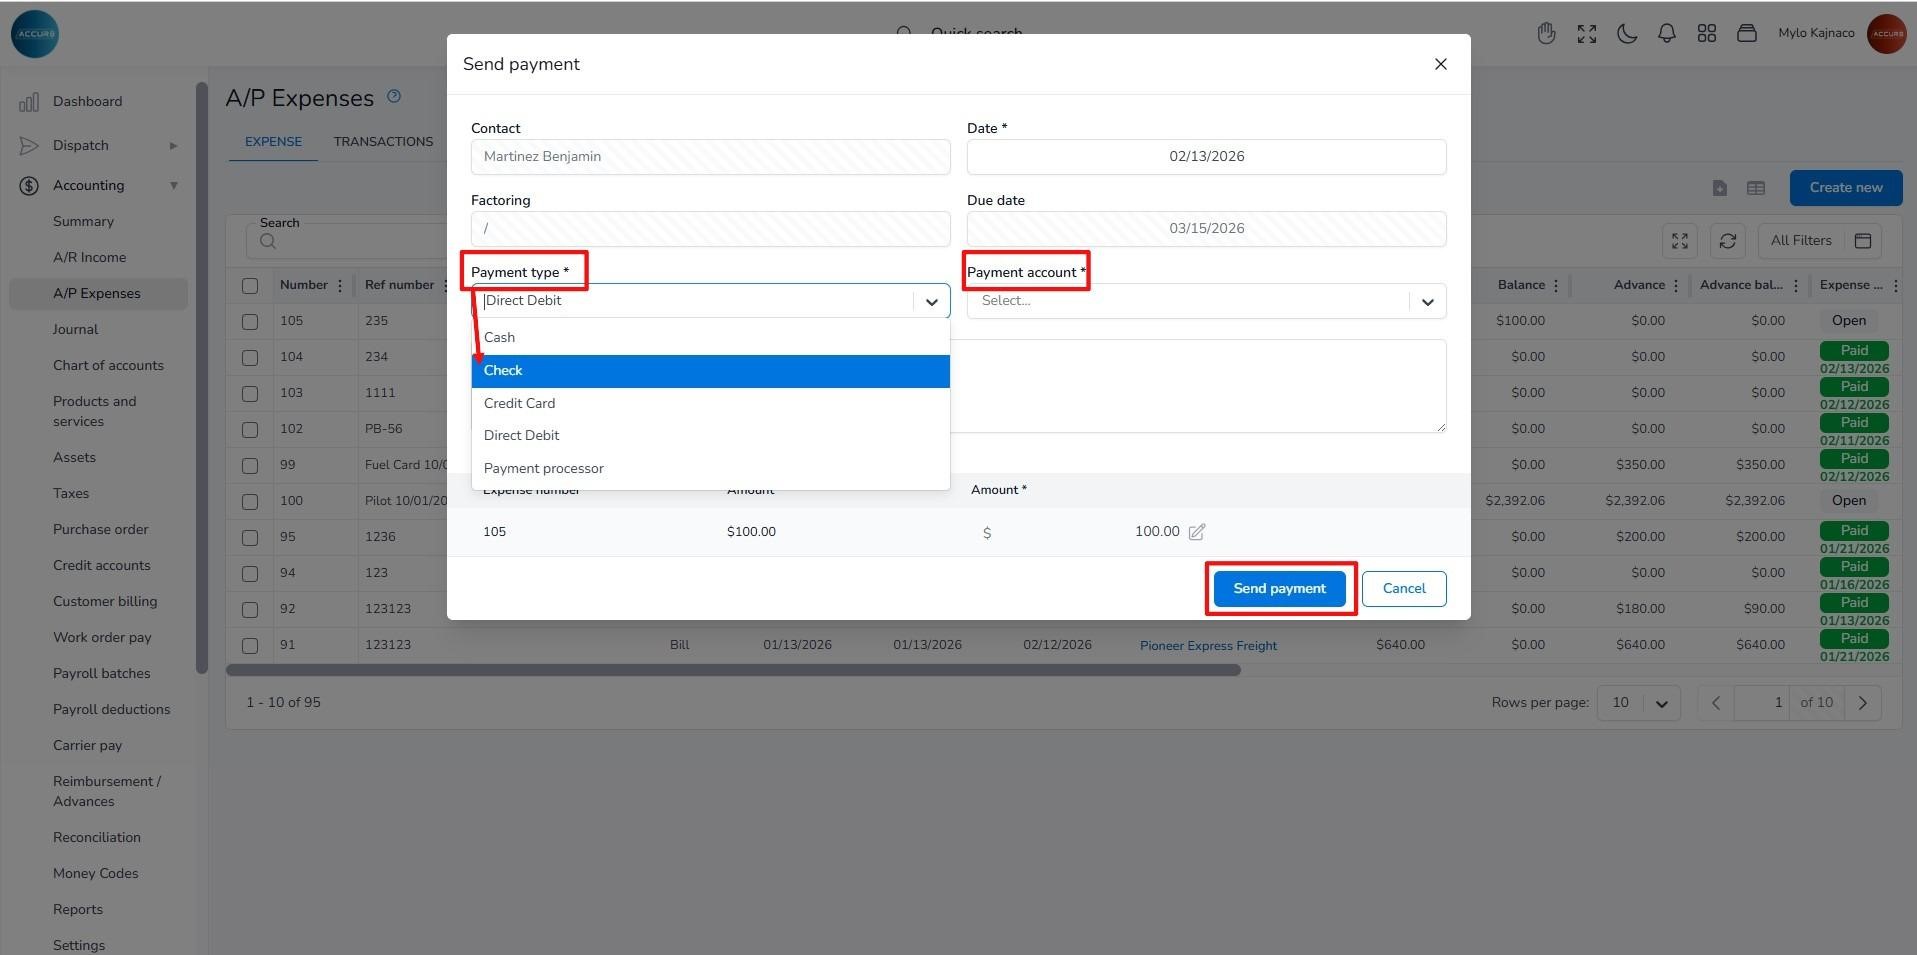
A pop-up window will open where you will select the Check option as the Payment type. Next, you will choose the appropriate Payment account. By clicking the Send payment button, the check will appear on the Checks list.
The check status is now Ready for Print. To print a check, hover over the desired entry in the list and click the Print button.
A dialog box will appear, prompting you to complete the required fields, such as the Starting check number, and to select either Contact or Organization under the Charge to option. Based on your selection, choose the corresponding contact or organization from the drop-down menu.

The Attn field is optional, and may be used to specify a particular recipient, if needed.
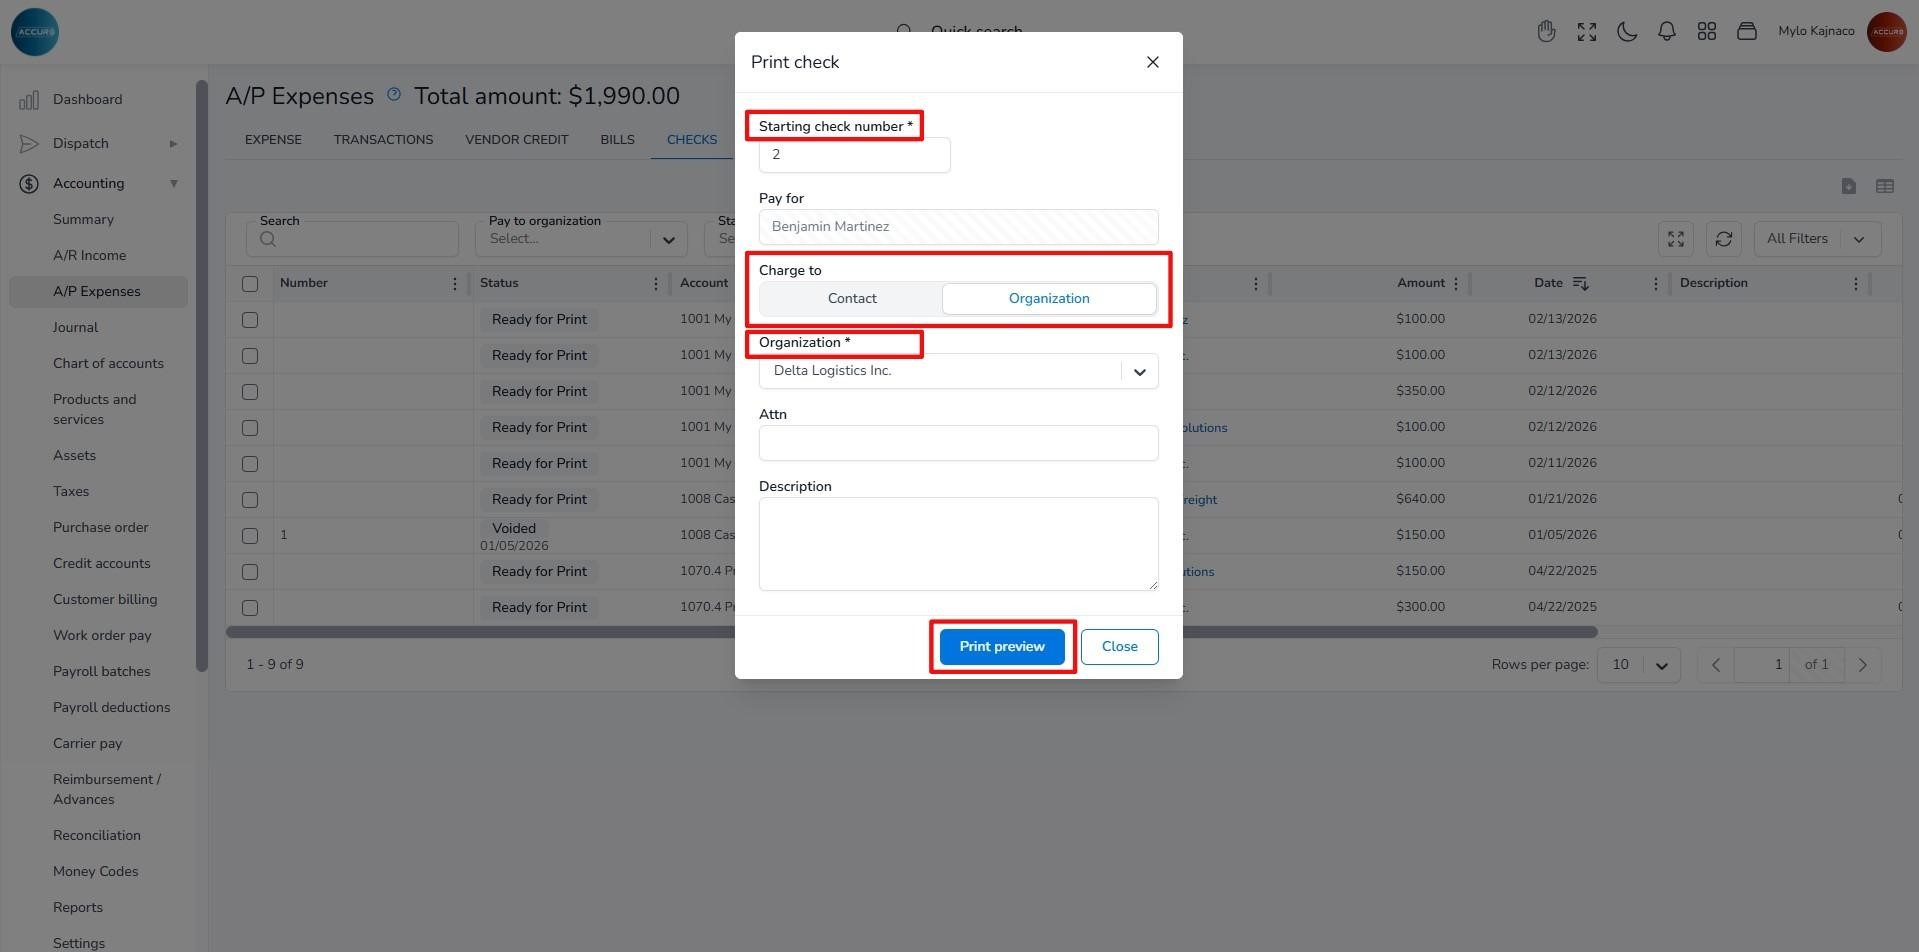
To ensure everything is correct before printing, click the Print Preview button. Once you’ve verified the information, click the Print Check button to complete the process.
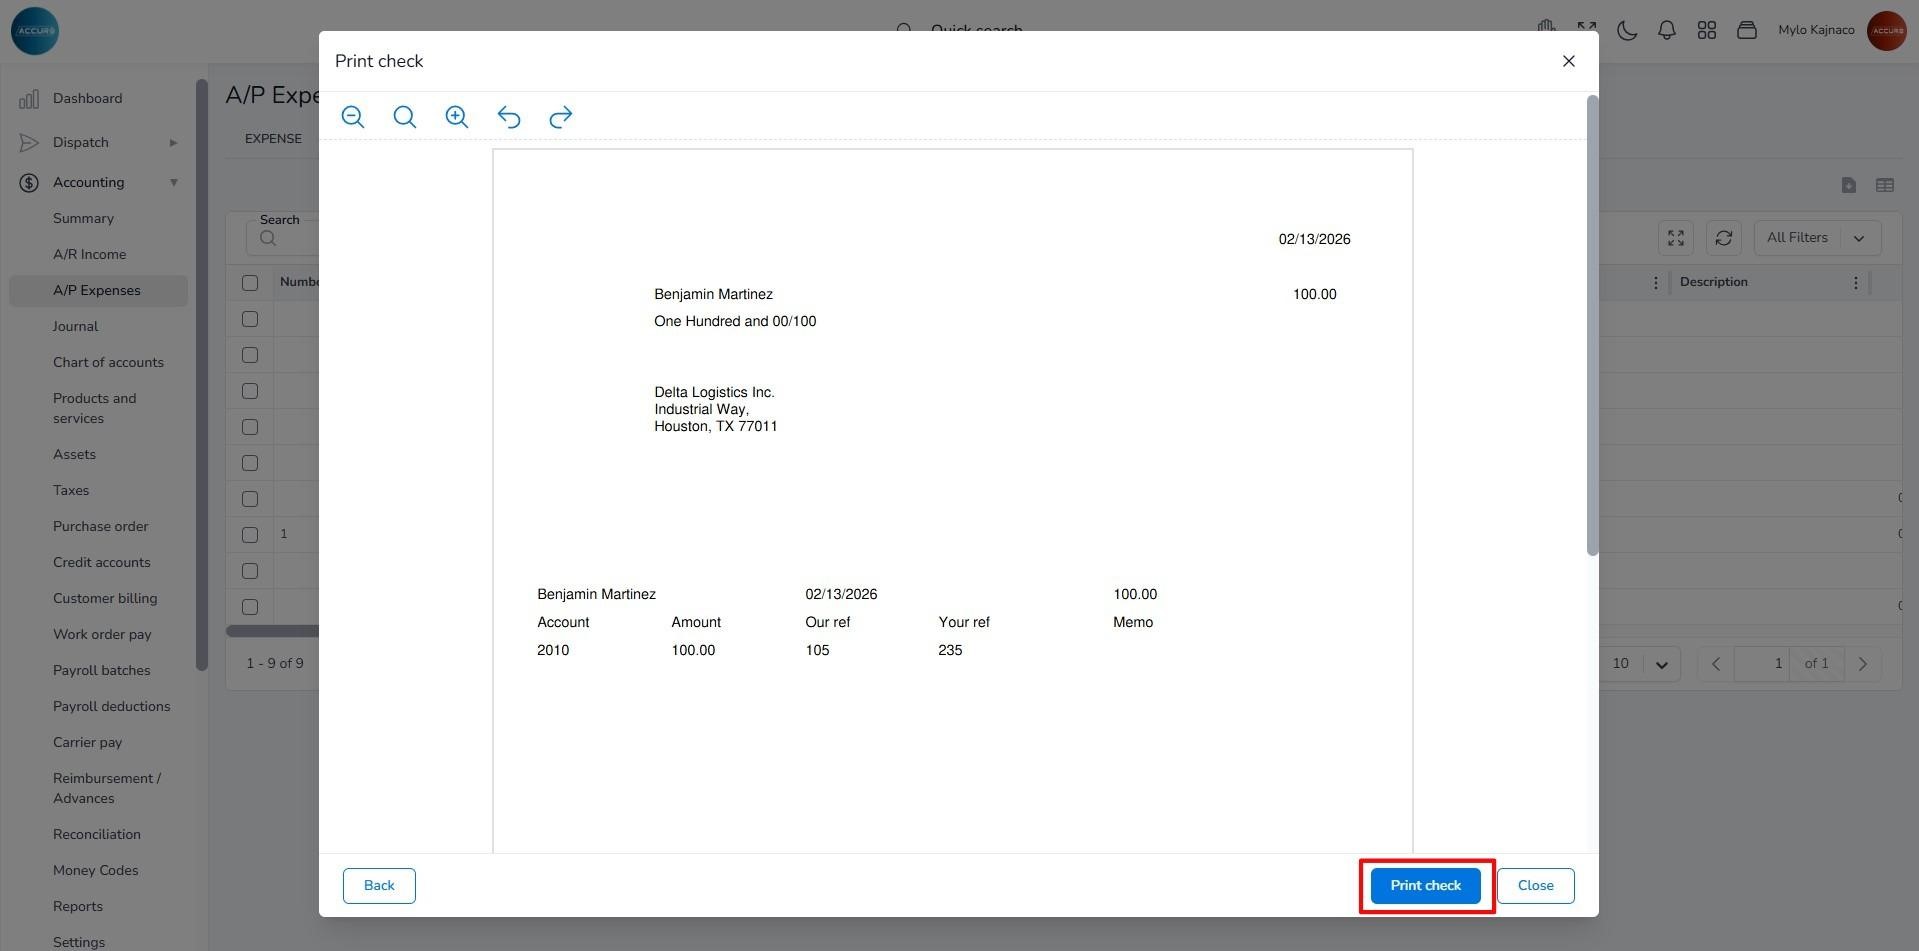
After printing, take a moment to double-check that all details are accurate. If everything is in order, click the Confirm Check Printed OK button at the bottom-right of the pop-up window.
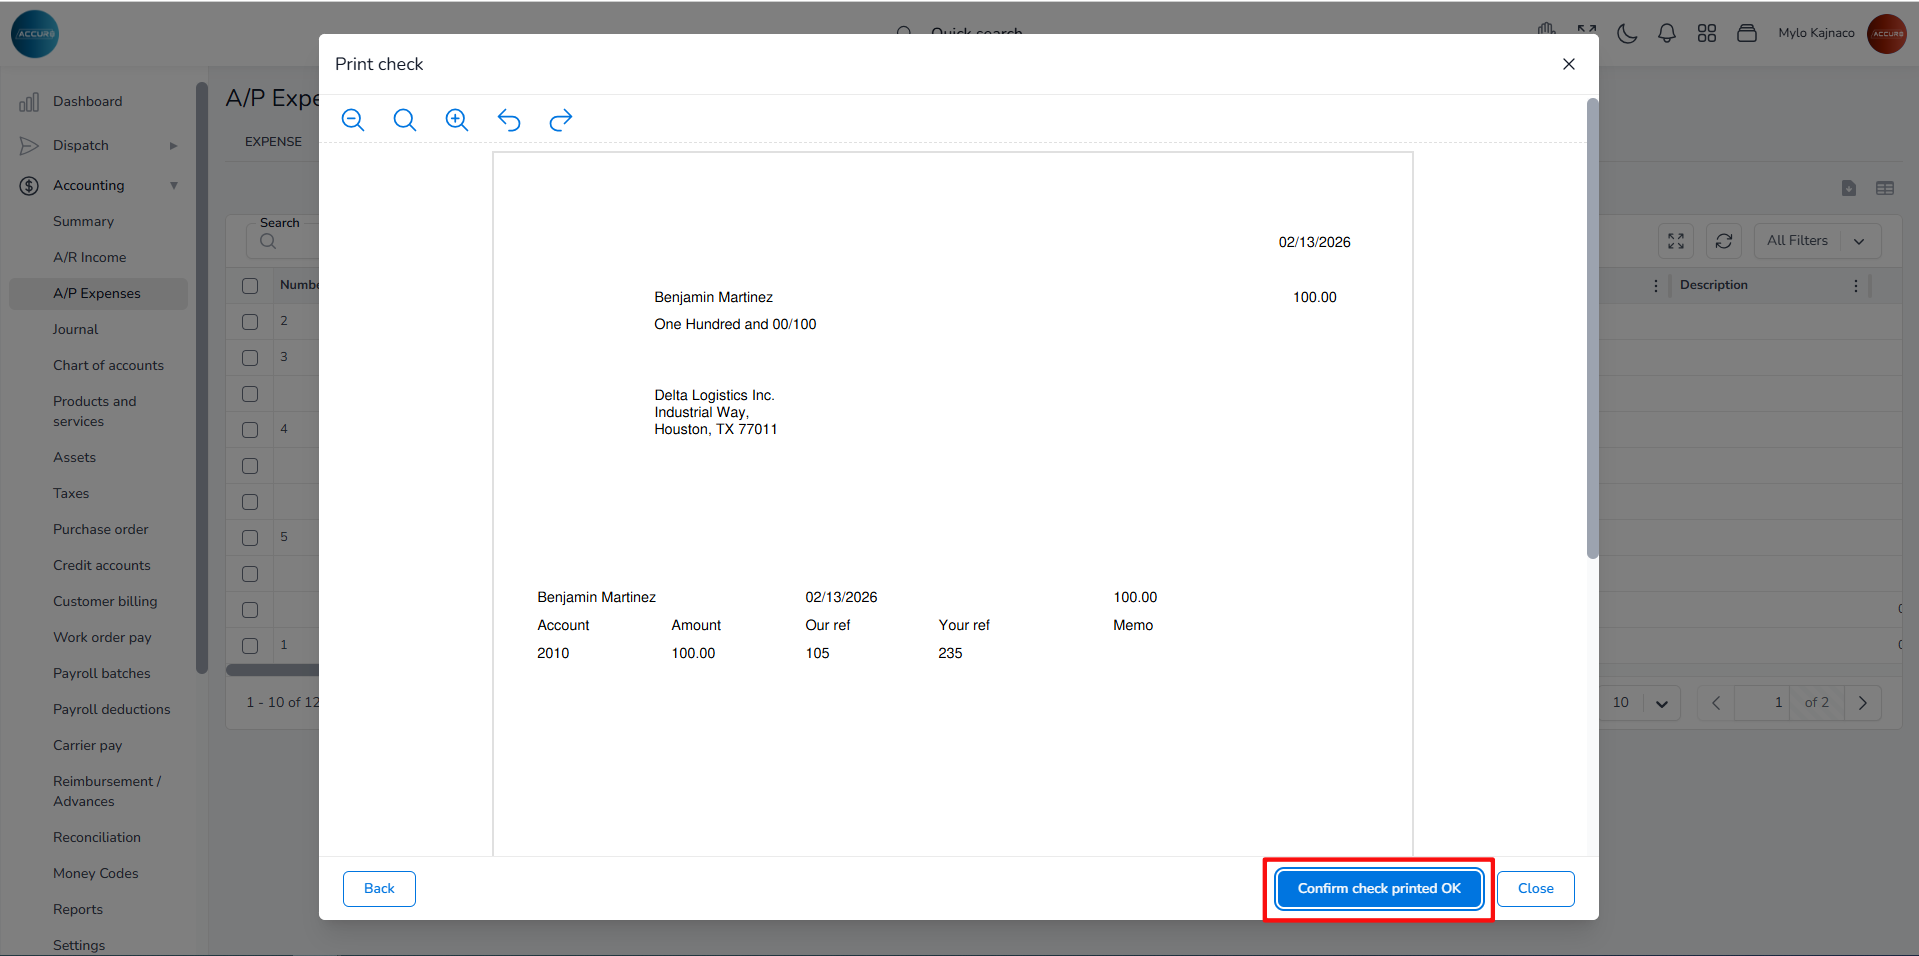
After confirming that action, the check’s status will be updated to Printed.
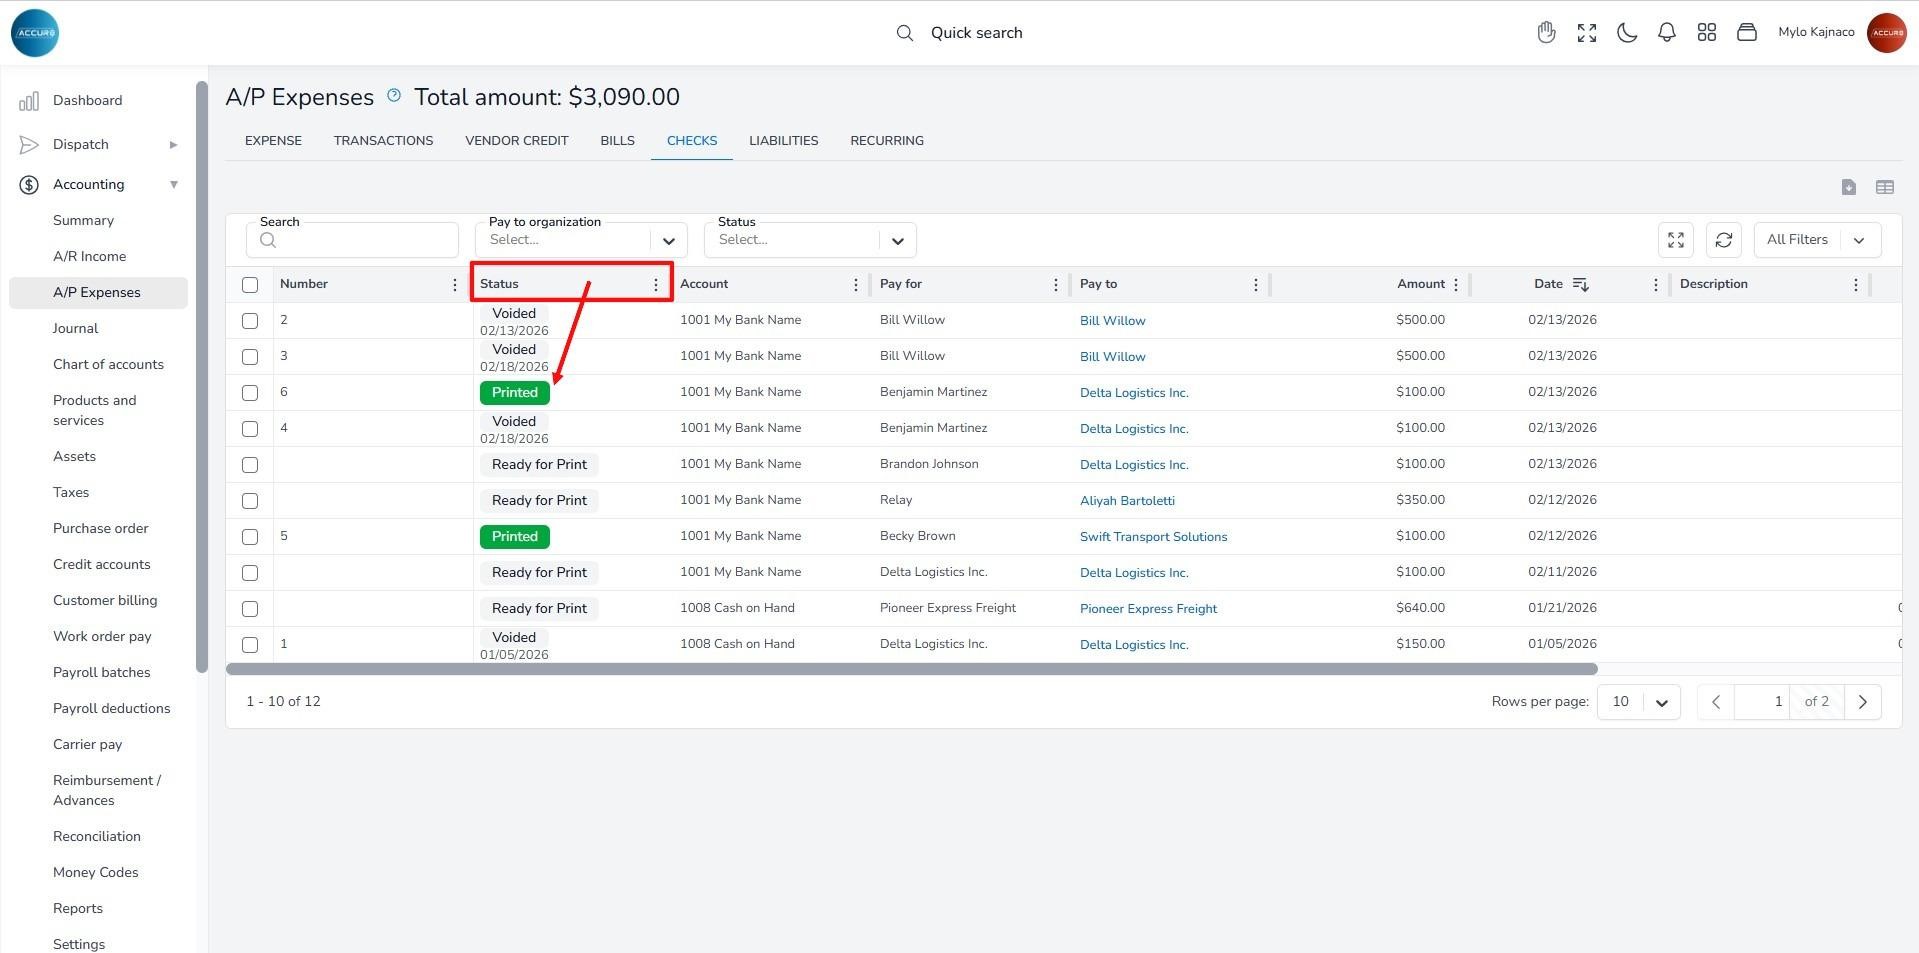
If, for any reason, your check is invalid or lost, you can record this in the system. Simply hover over the check in the list and click the Void button.
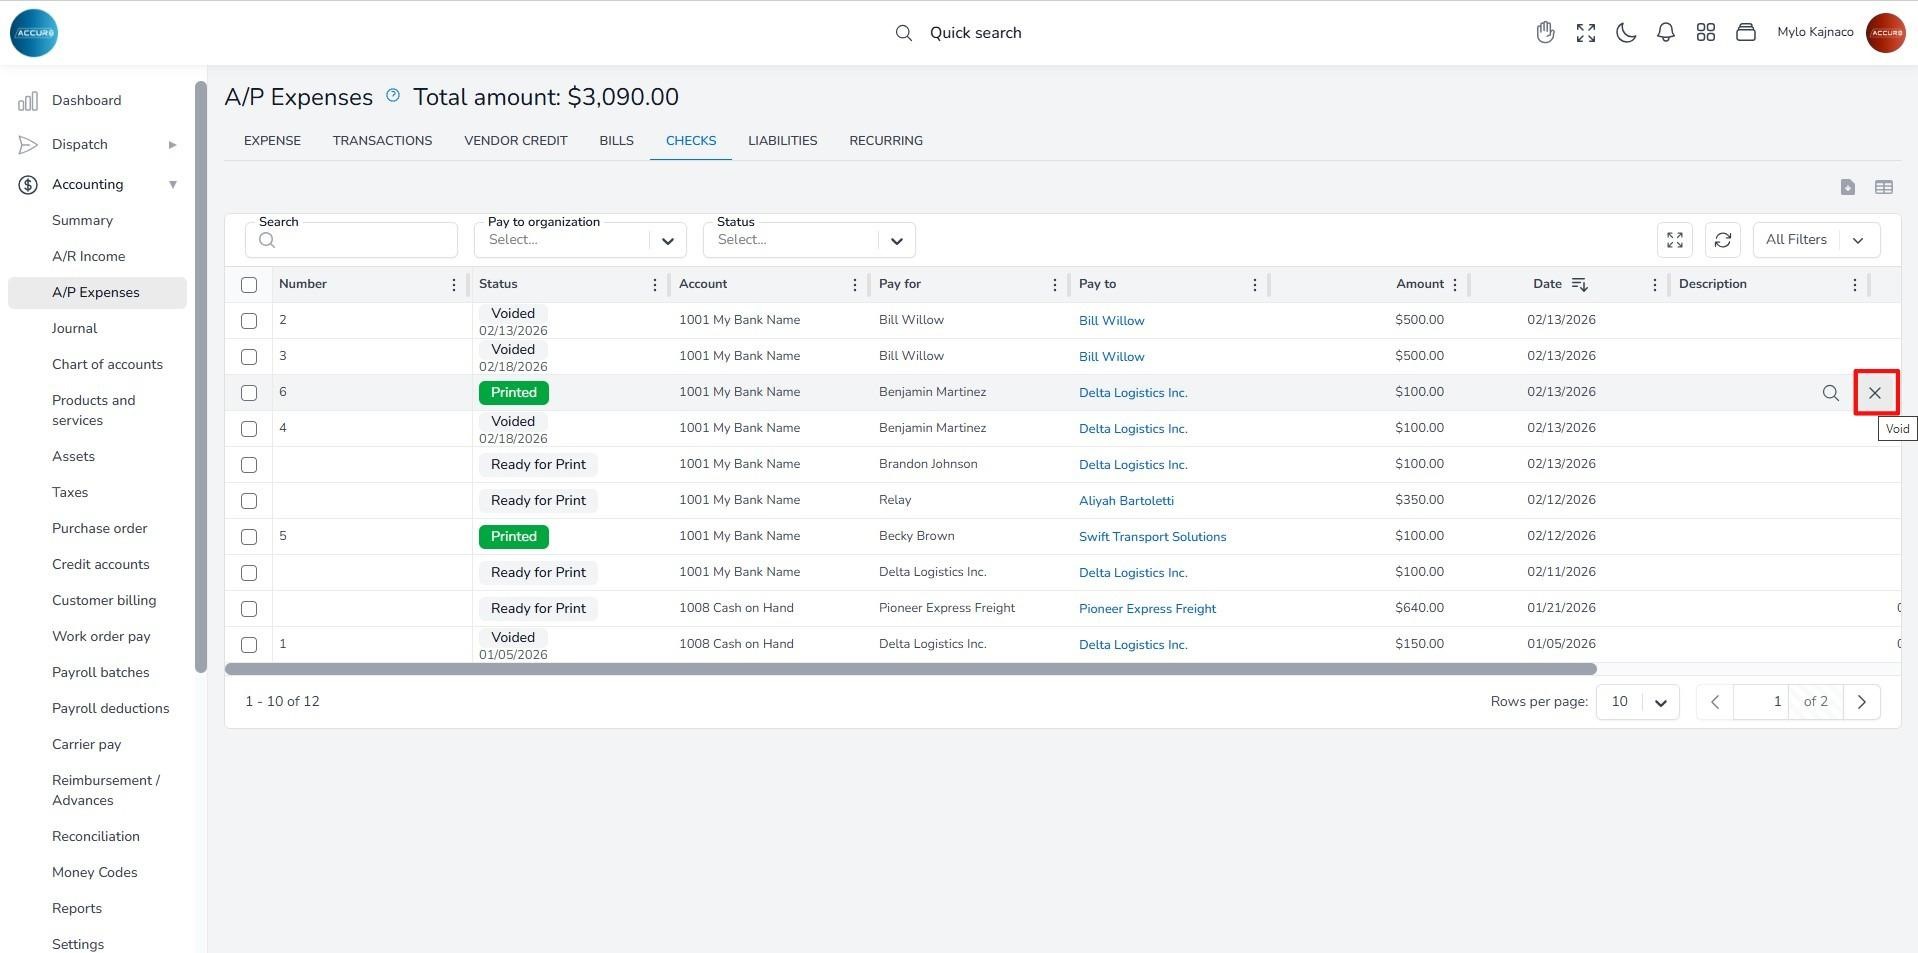
The status of the check will then be changed to Voided. Additionally, the system will create a copy of the check and set it to Ready for Print status, allowing you to issue the same check again if needed.
Was this helpful?
Customer load billing manualCorrecting and Deleting Fuel Bills
Table of Contents
  • Printing a check
ACCUR8 Platform Knowledge Base

AI driven Knowledge Base

All rights reserved