Printing a check #
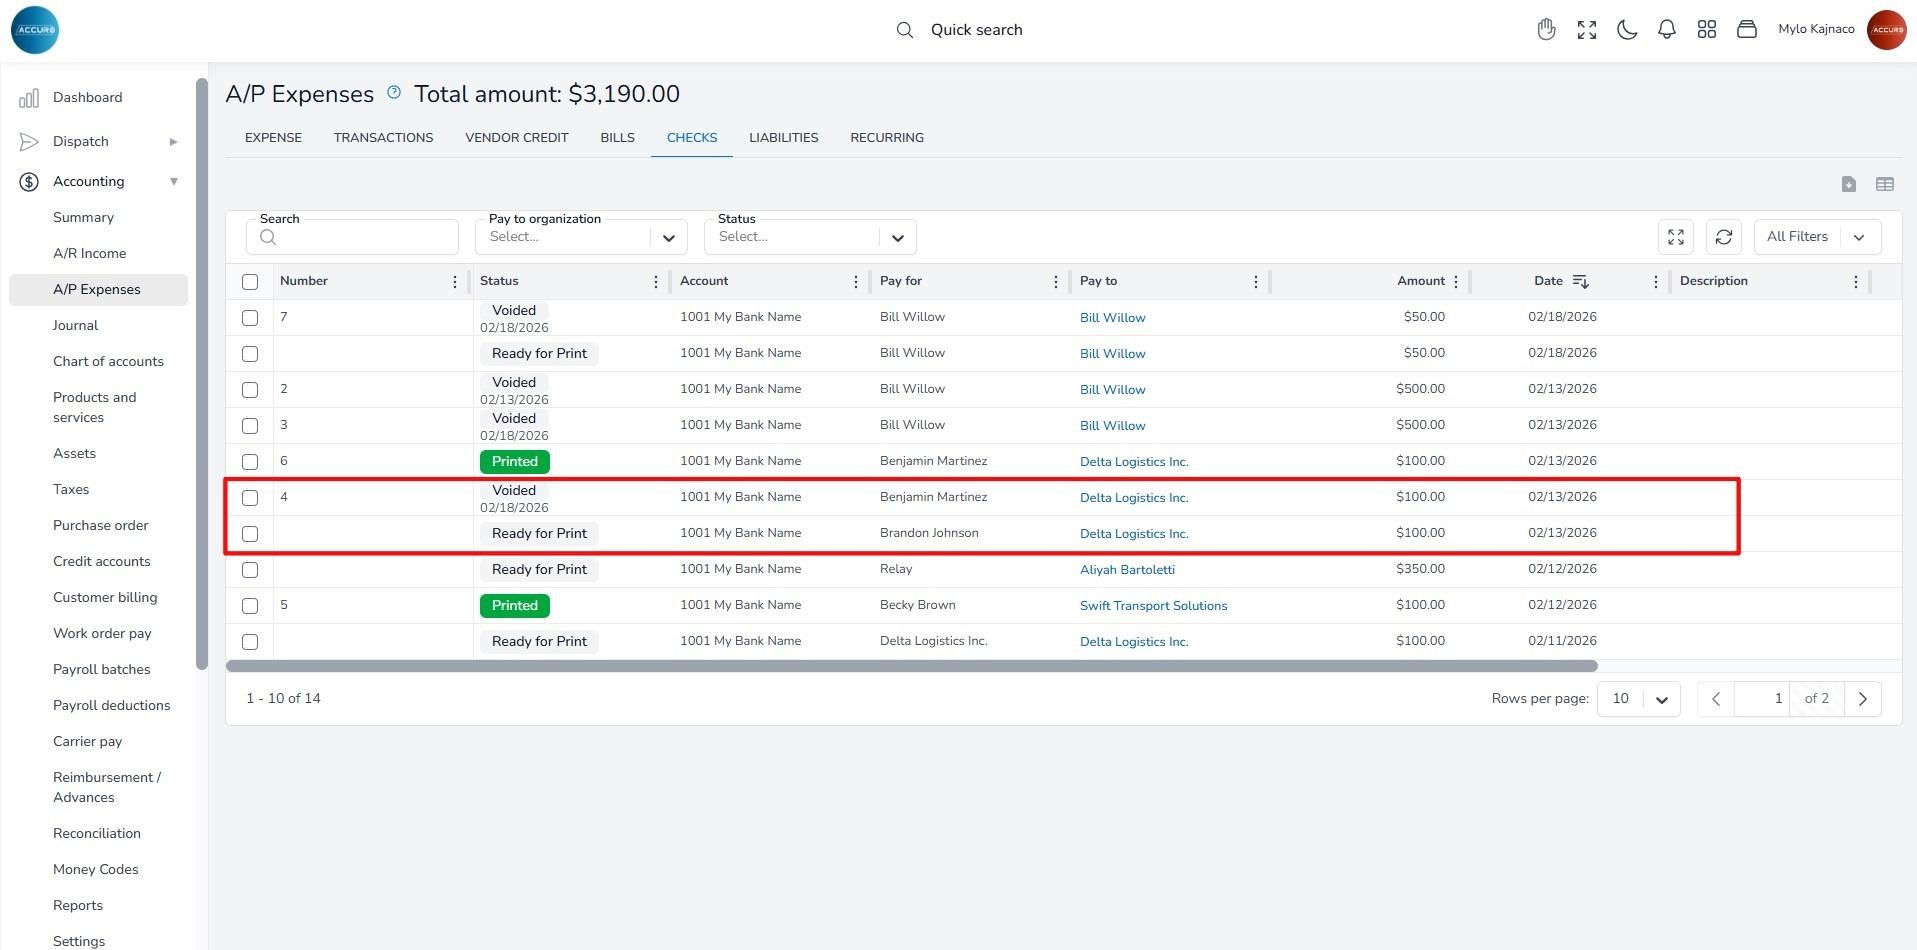
You can find all created checks in the system under the A/P Expenses section, in the Checks tab. For a bill or expense to appear in the Checks list, you must select that option when processing the payment.
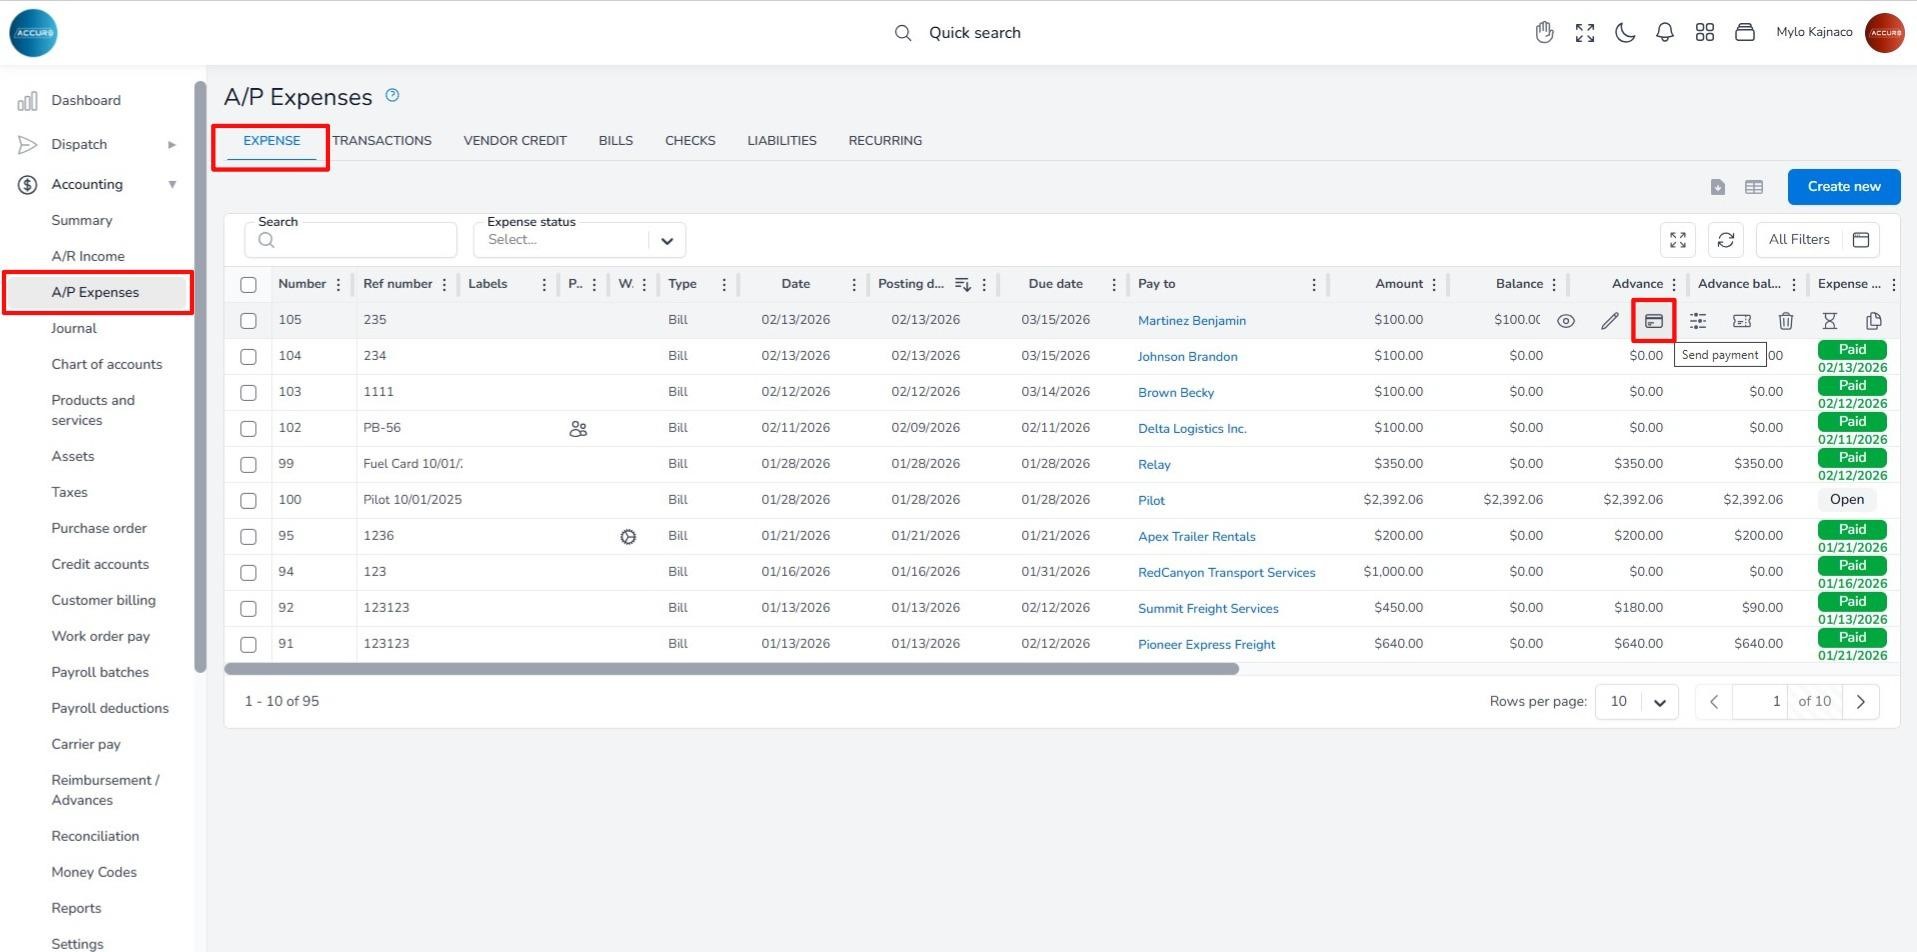
So, after you create a bill or expense, locate it in the Expense list, hover over the entry, and click the Send payment option.
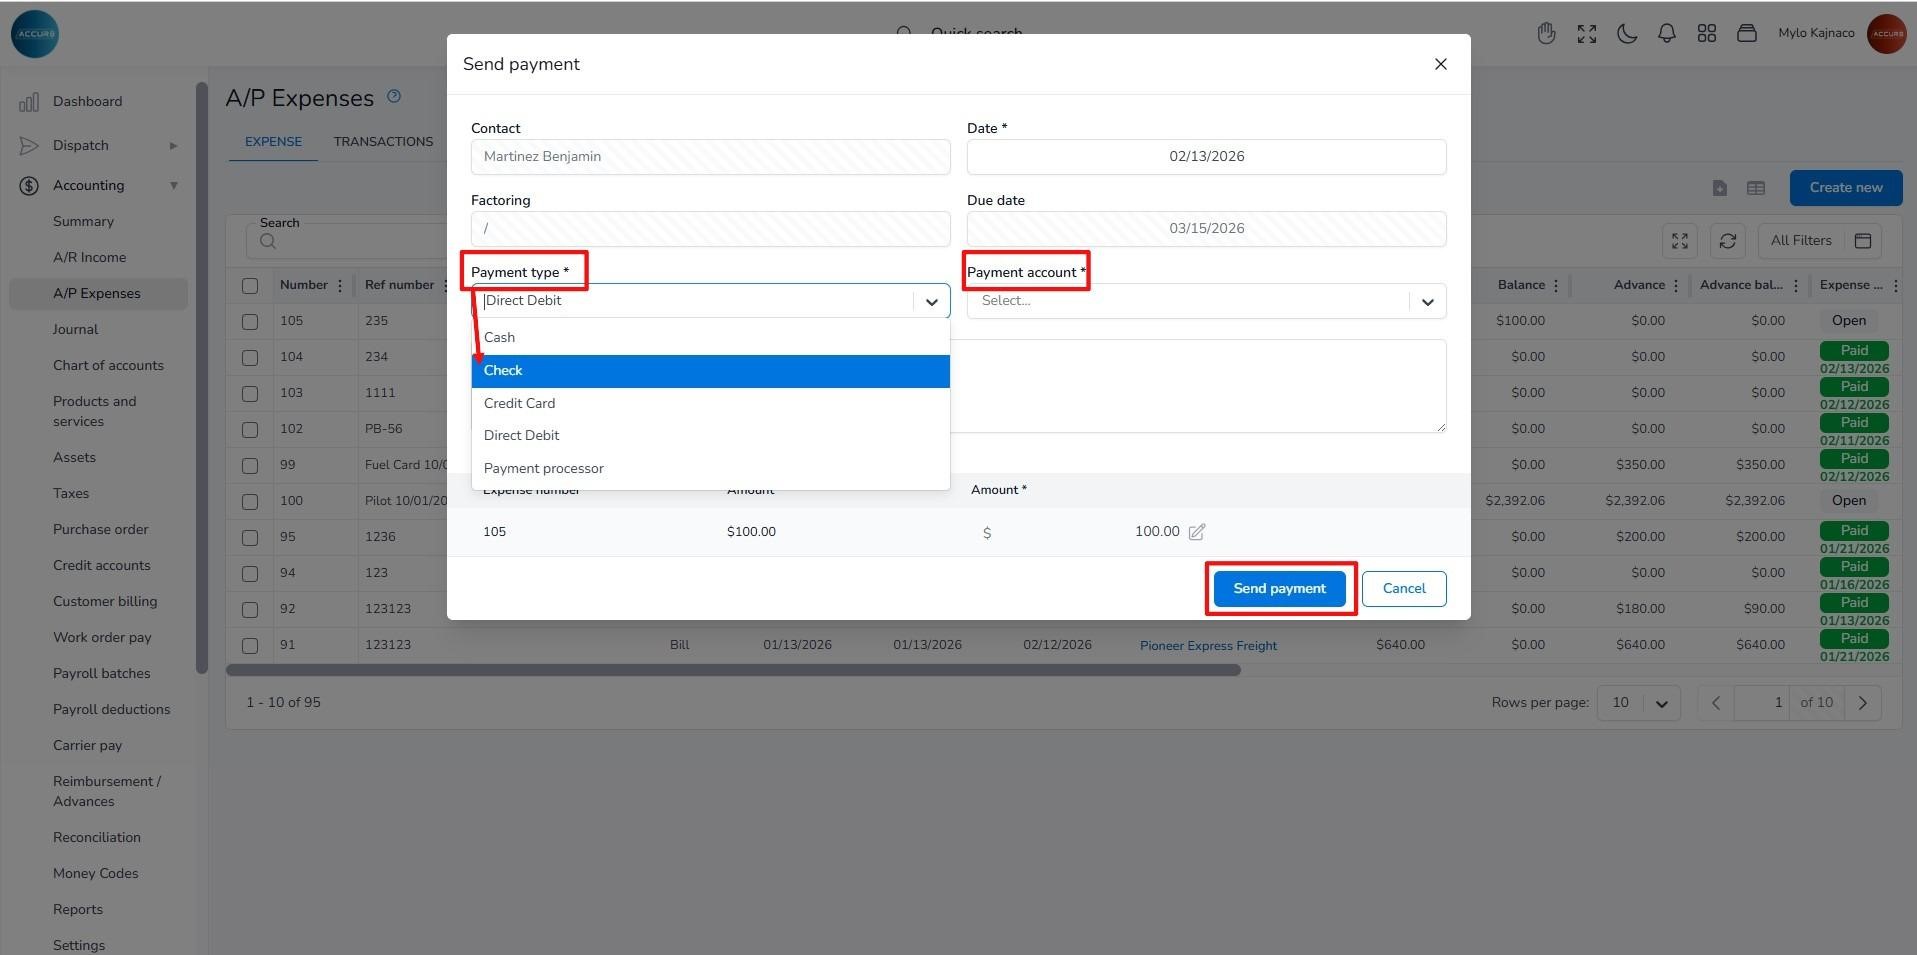
A pop-up window will open where you will select the Check option as the Payment type. Next, you will choose the appropriate Payment account. By clicking the Send payment button, the check will appear on the Checks list.
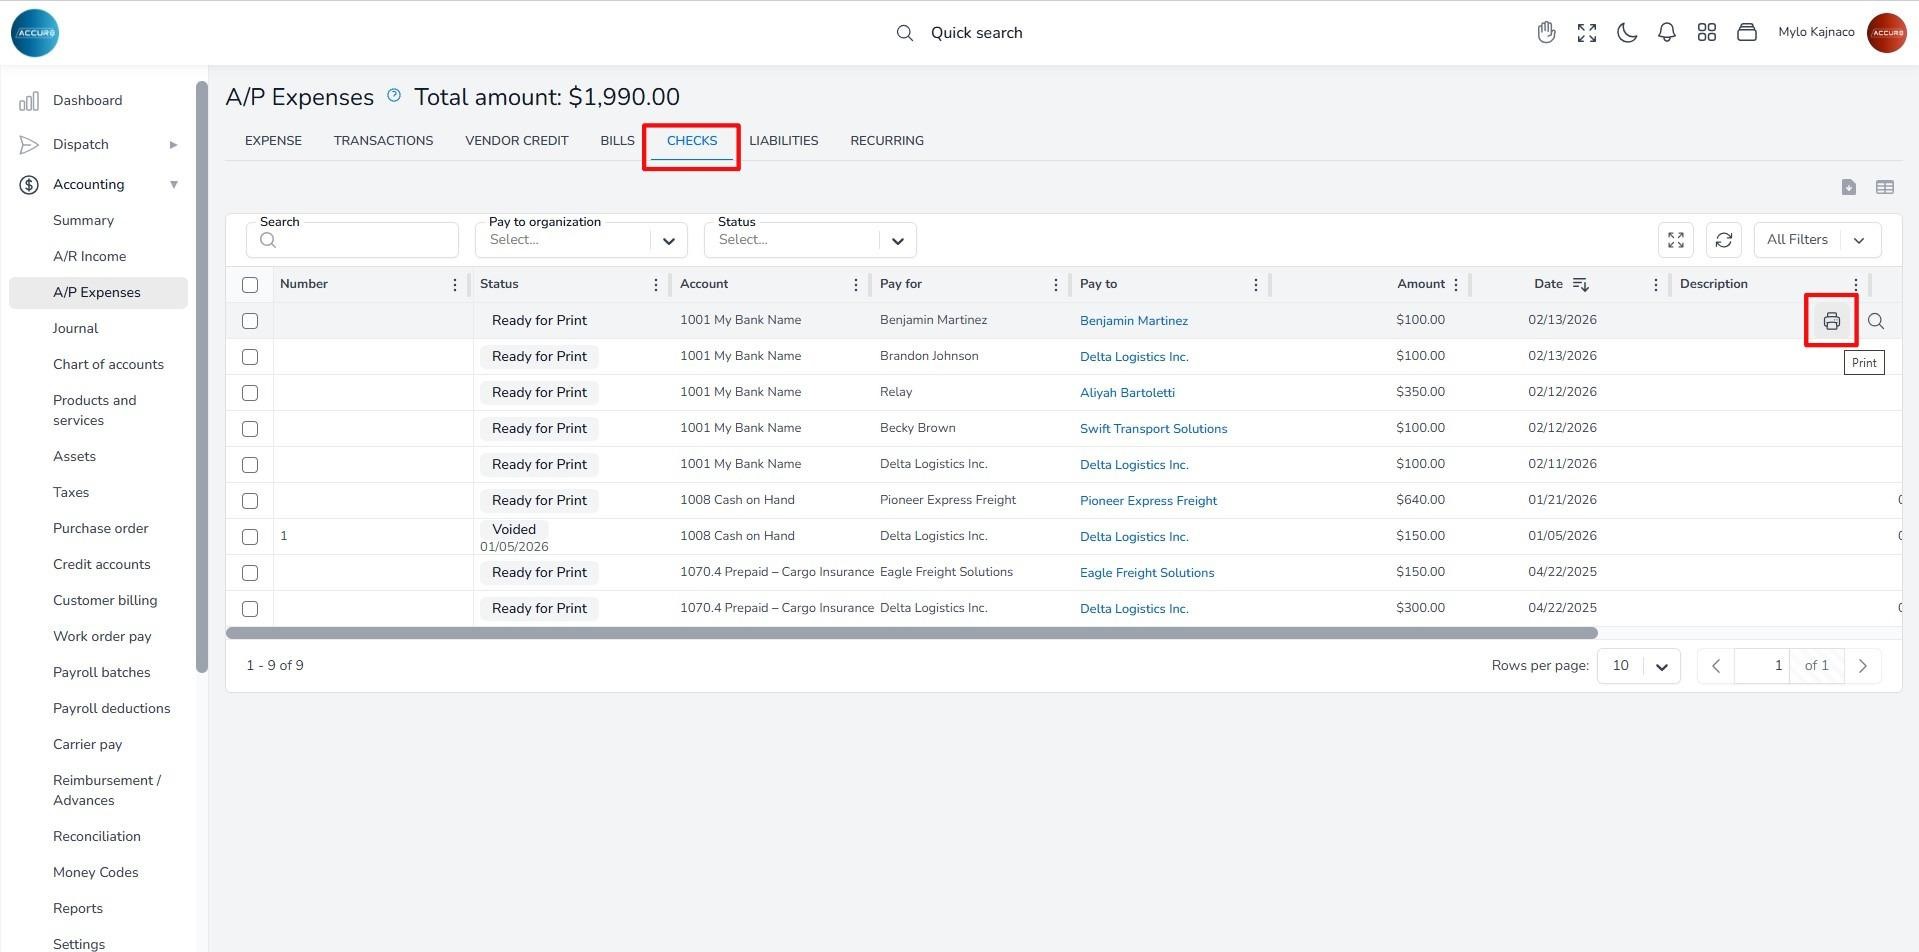
The check status is now Ready for Print. To print a check, hover over the desired entry in the list and click the Print button.
A dialog box will appear, prompting you to complete the required fields, such as the Starting check number, and to select either Contact or Organization under the Charge to option. Based on your selection, choose the corresponding contact or organization from the drop-down menu.
The Attn field is optional, and may be used to specify a particular recipient, if needed.
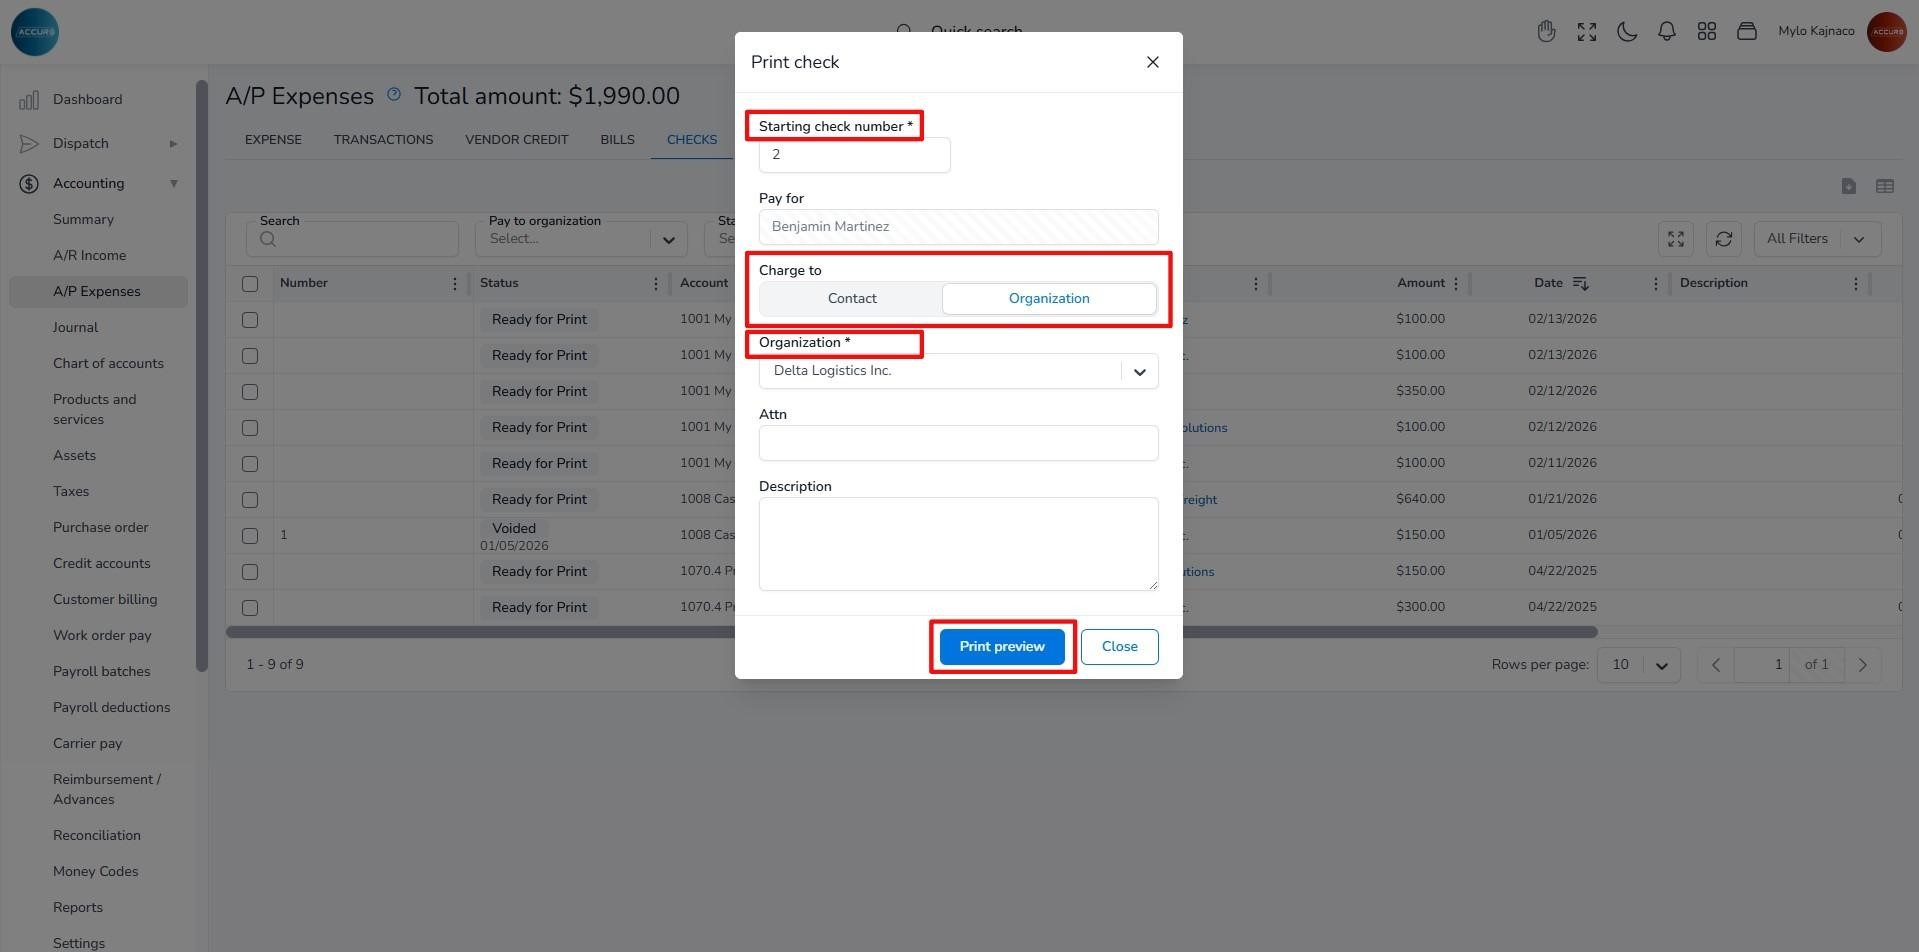
To ensure everything is correct before printing, click the Print Preview button. Once you’ve verified the information, click the Print Check button to complete the process.
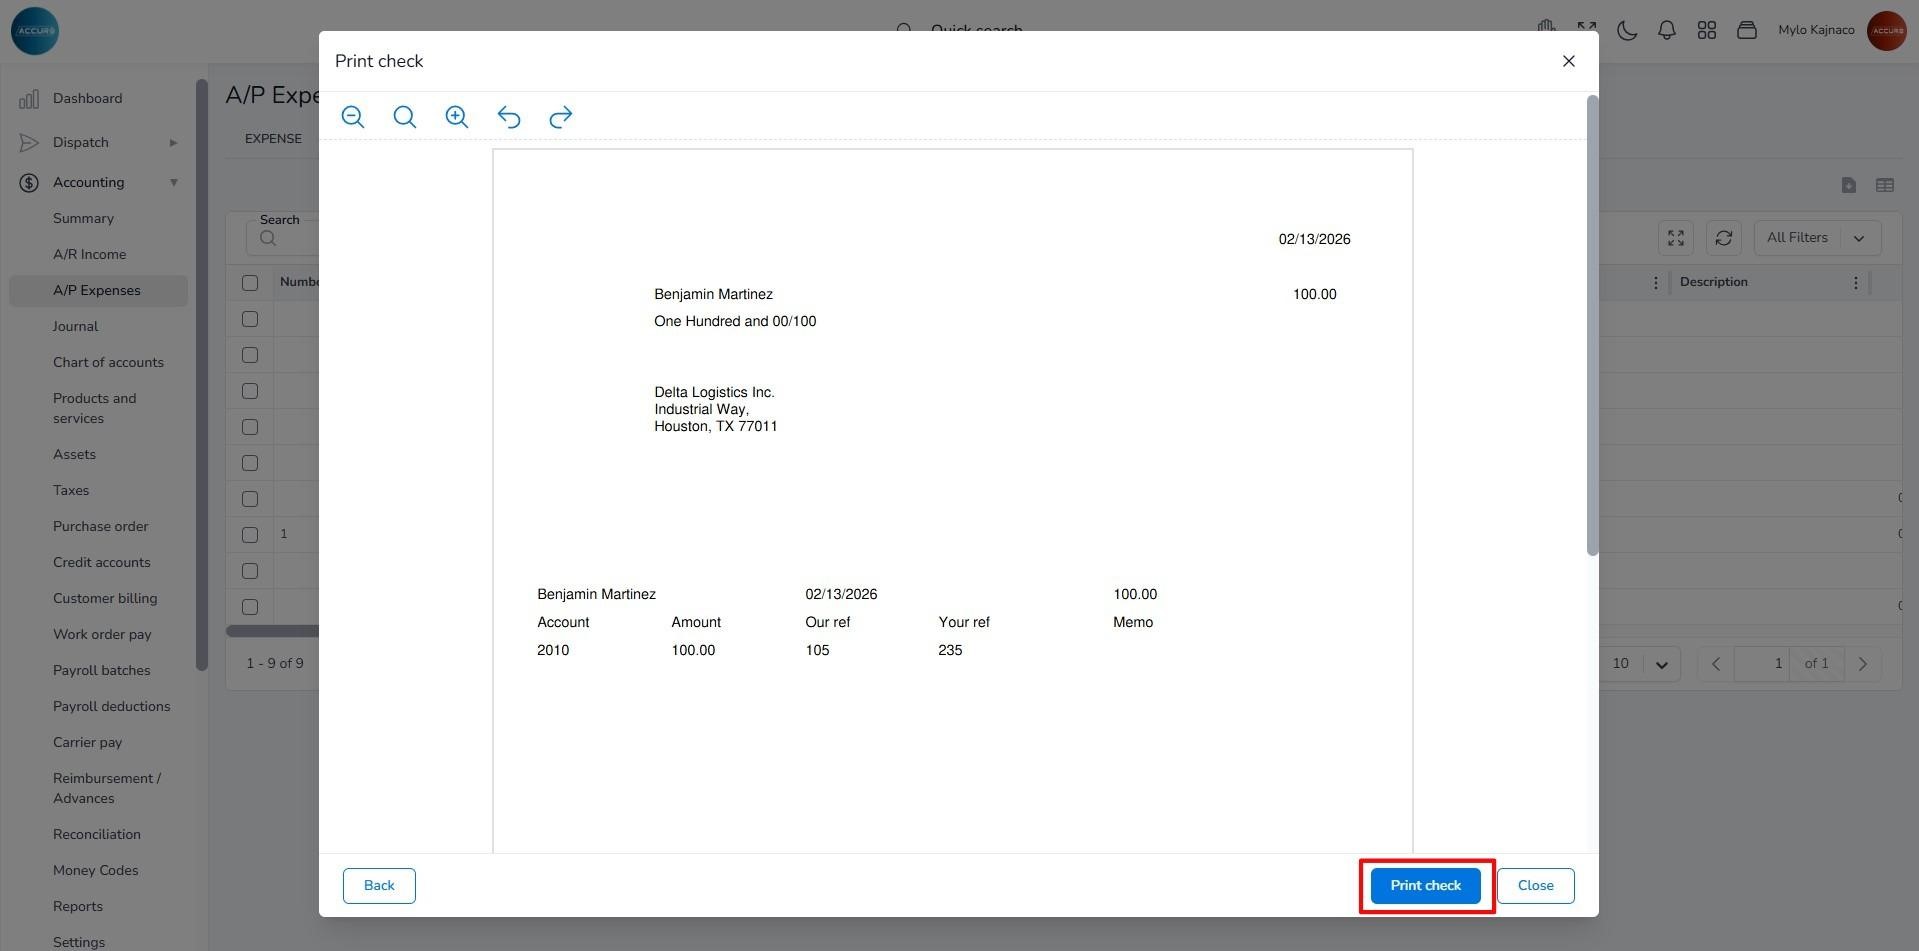
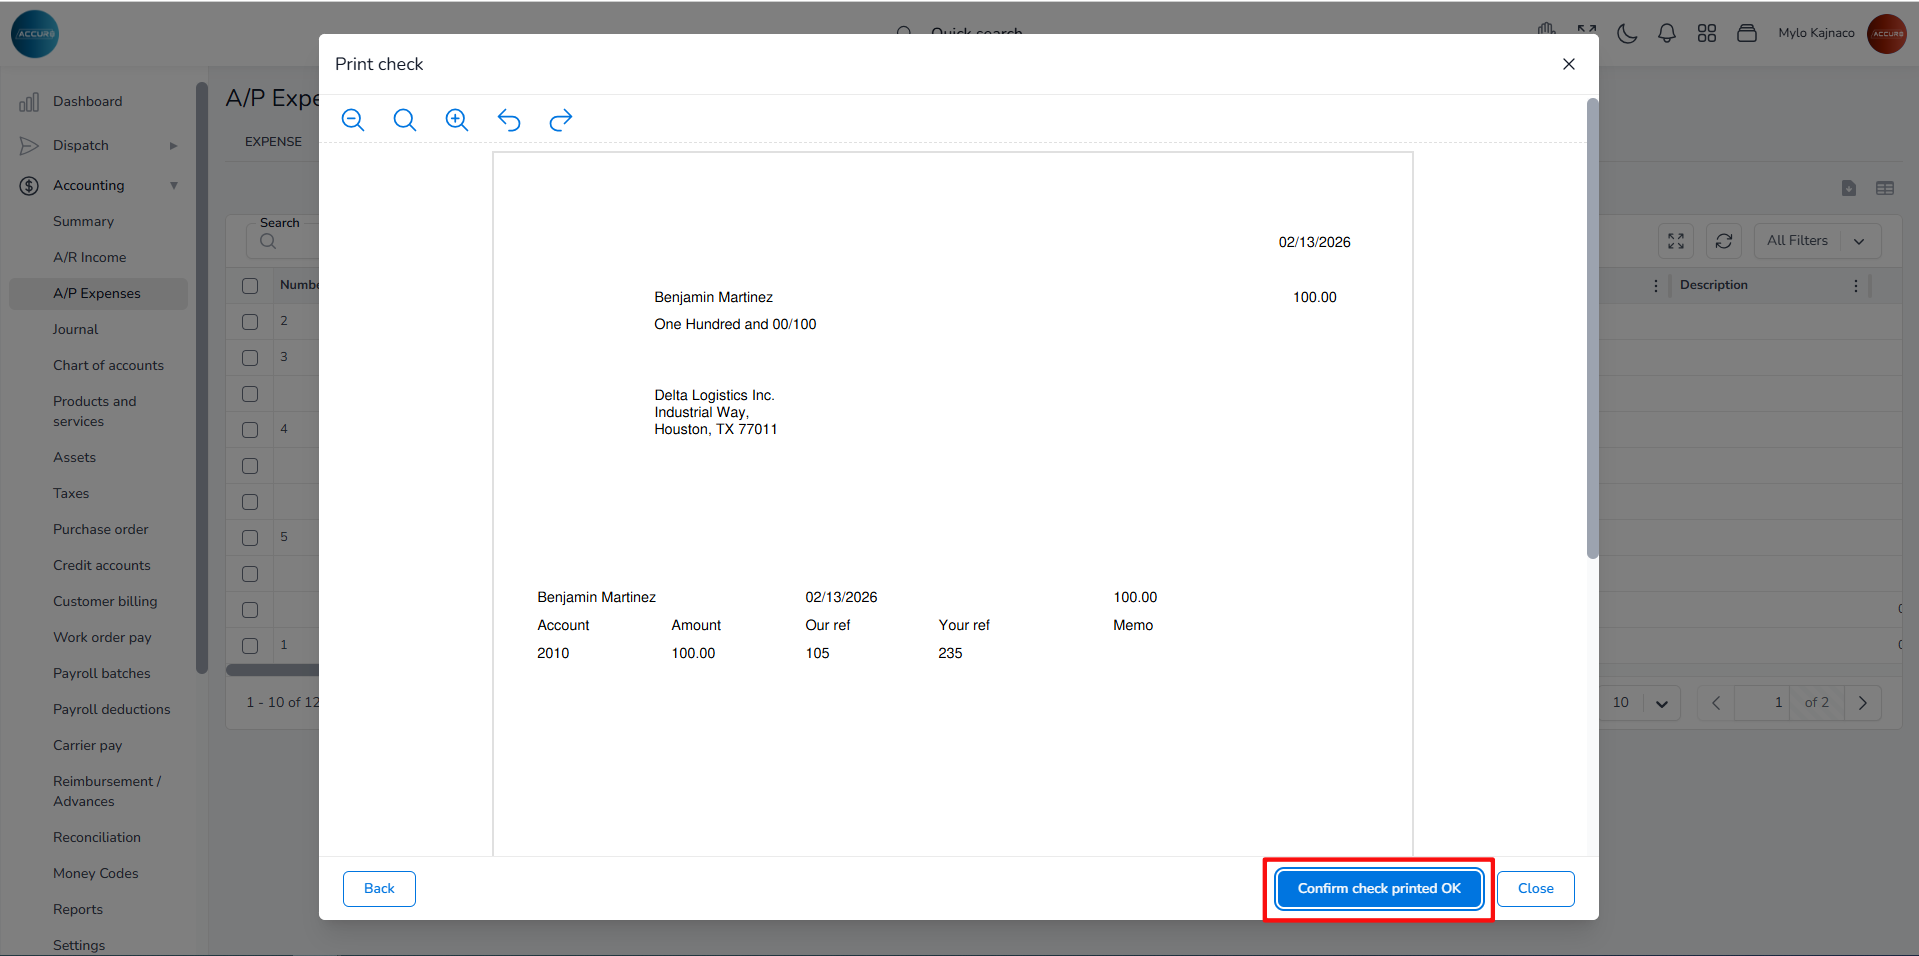
After printing, take a moment to double-check that all details are accurate. If everything is in order, click the Confirm Check Printed OK button at the bottom-right of the pop-up window.
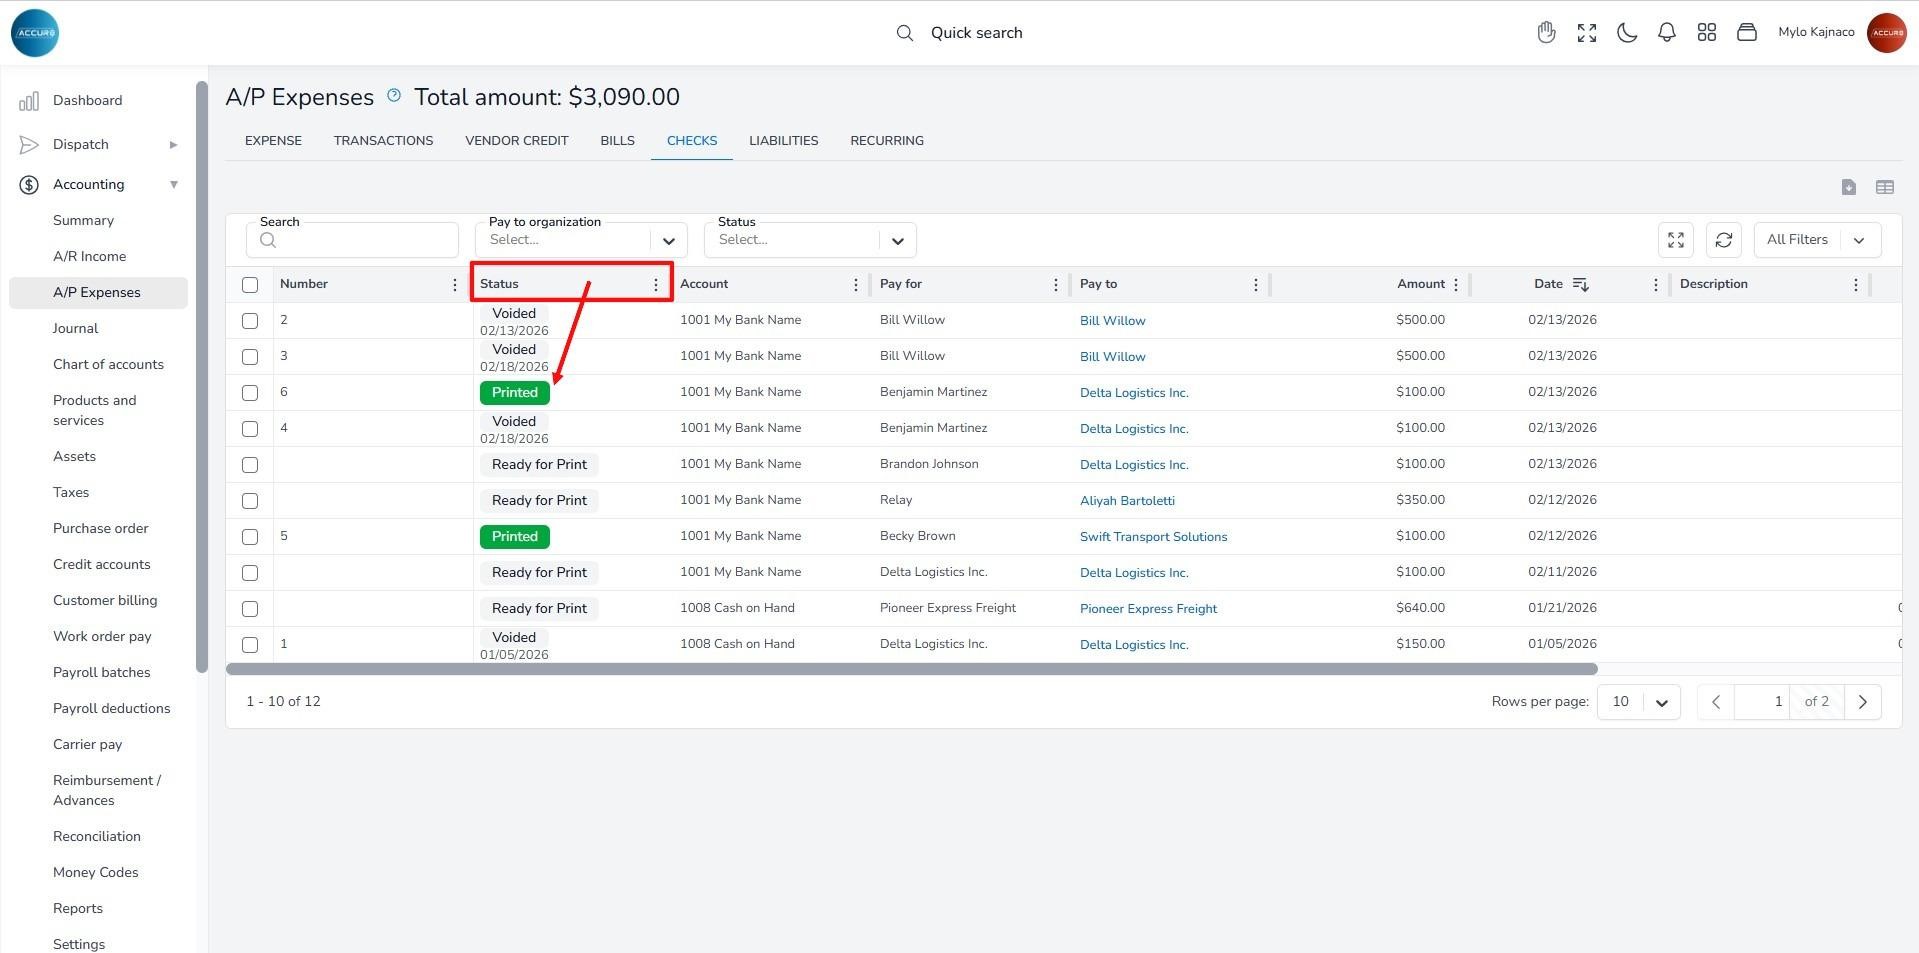
After confirming that action, the check’s status will be updated to Printed.
If, for any reason, your check is invalid or lost, you can record this in the system. Simply hover over the check in the list and click the Void button.
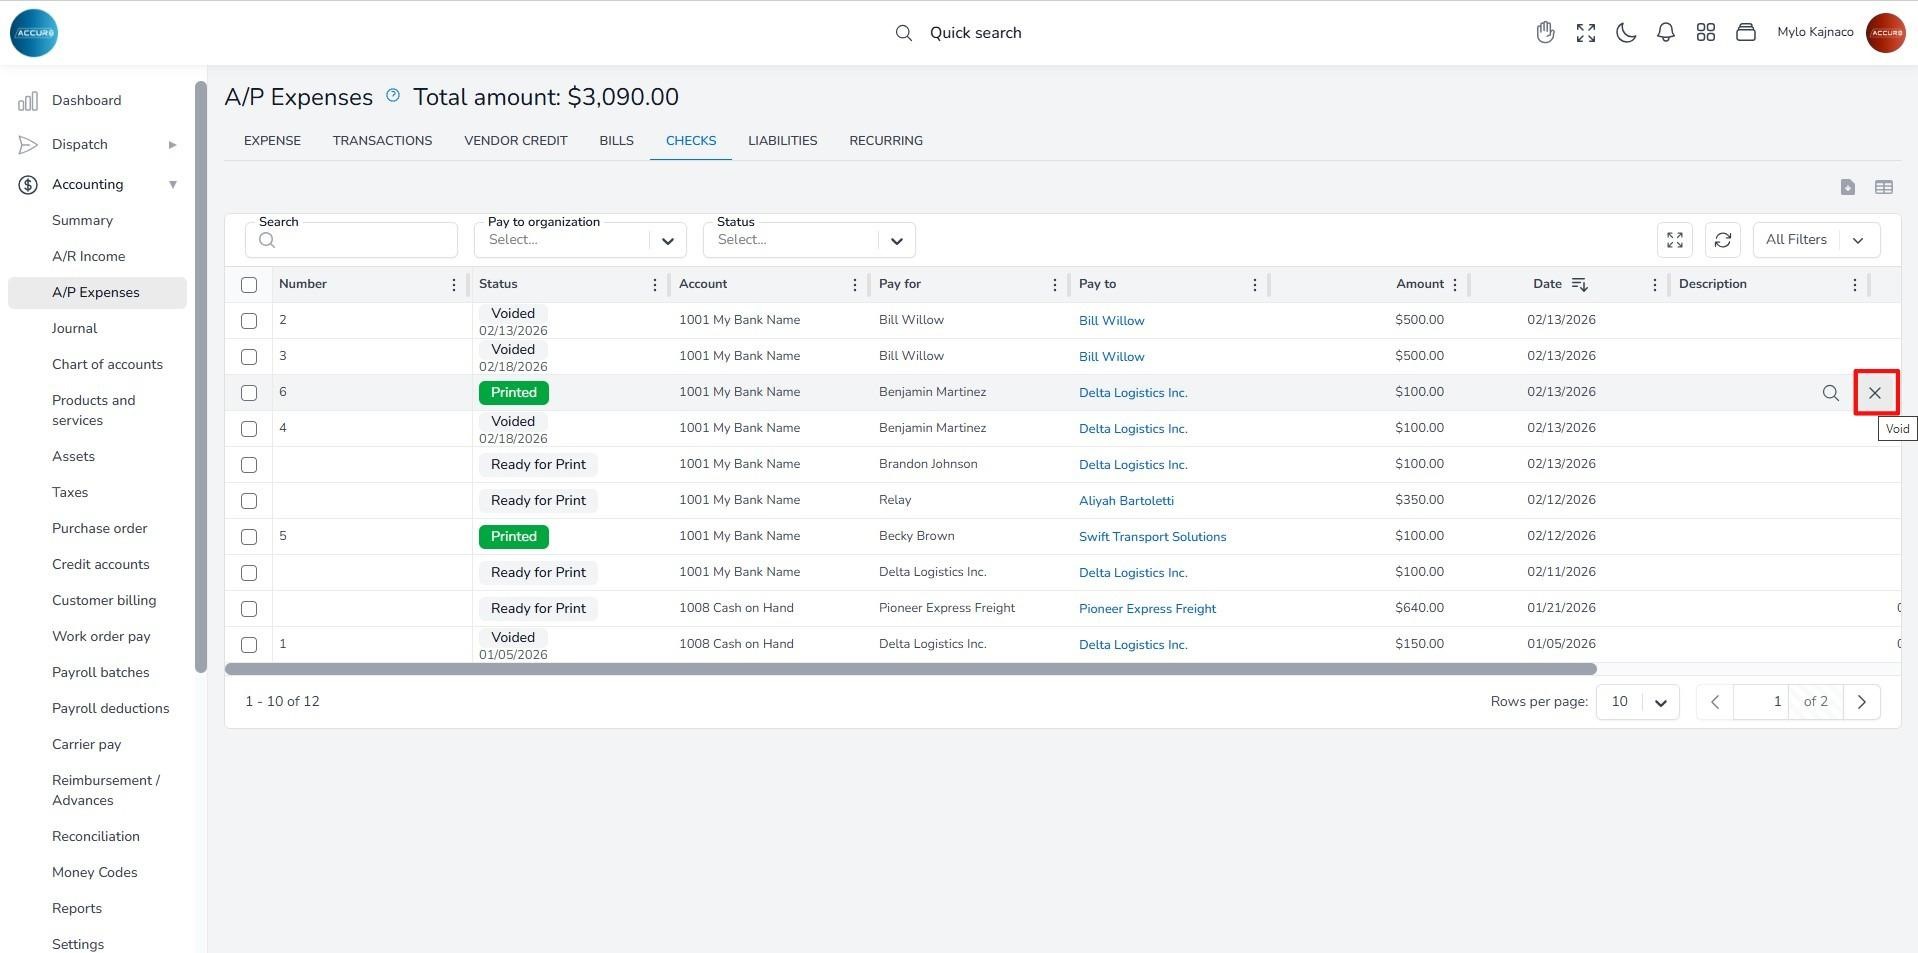
The status of the check will then be changed to Voided. Additionally, the system will create a copy of the check and set it to Ready for Print status, allowing you to issue the same check again if needed.